Advertisement
- 1 INTRODUCTION
- 2 PARTS GUIDE
- 3 DISPLAY INDICATORS
- 4 ACTIVATING/REPLACING THE BATTERY
- 5 BATTERY LEVEL INDICATOR
- 6 BASIC OPERATION
- 7 ADJUSTING THE EYEPIECE
- 8 ACTIVE LASER
- 9 SLOPE SWITCH TECHNOLOGY
- 10 SLOPE SWITCH
- 11 ELEMENTS
- 12 HOW TO USE SLOPE +/-
- 13 THE ADVANTAGE OF SLOPE +/- WITH ELEMENTS
- 14 PINSEEKER WITH VISUAL JOLT
- 15 DISTANCE UNITS: YARDS OR METERS
- 16 DUAL DISPLAY
- 17 HOME ELEVATION
- 18 CONNECTING TO THE BUSHNELL GOLF APP
- 19 UPDATING FIRMWARE
- 20 BITE MAGNETIC MOUNT
- 21 CLEANING AND GENERAL CARE
- 22 TROUBLESHOOTING
- 23 GLOSSARY
- 24 TECHNICAL SPECIFICATIONS
- 25 FDA SAFETY
- 26 Industry Canada Statement
- 27 Disposal of Electric and Electronic Equipment
- 28 Documents / Resources
INTRODUCTION
The Pro X3 is the latest evolution in our illustrious history of providing golfers the most accurate distances in golf. The Pro X3 is packed with all our market-leading innovations and takes getting distances around the course to the next level with our patented Slope with Elements Technology.

AS WITH ANY LASER DEVICE, IT IS NOT RECOMMENDED TO DIRECTLY VIEW THE EMISSIONS FOR LONG PERIODS WITH MAGNIFIED LENSES.
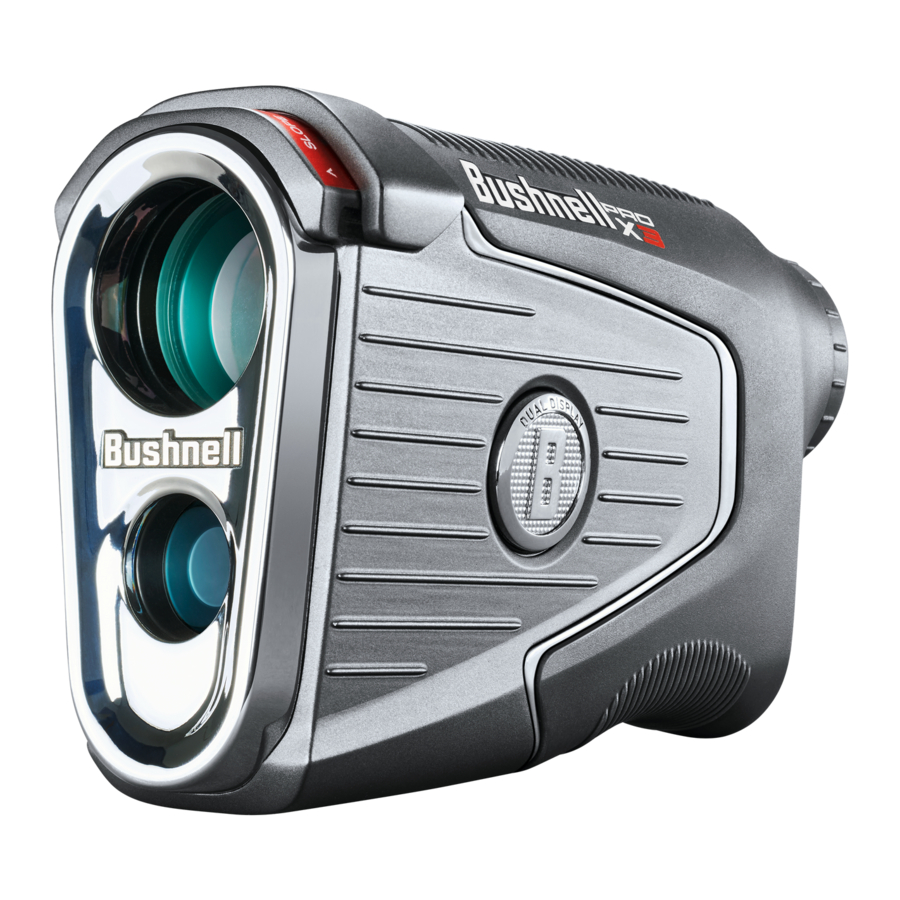
PARTS GUIDE

- Slope Switch
- Mode Button
- Power/Fire Button
- Eyepiece Diopter Dial
- Battery Compartment
- Dual Display Button
- BITE Magnet (see inset photo)
DISPLAY INDICATORS

Your Pro X3 display incorporates the following indicators:
- Aiming Circle (surrounding crosshairs indicate laser transmission)
- Bluetooth Enabled
- Bluetooth Connection to App
- Battery Level
- Elements Mode
- "Play As" Distance (based on Slope/Elements)
- Unit is in "Settings" Mode
- Slope* (% grade)
- Line of Sight Distance
- Visual JOLT Indicator Ring
ACTIVATING/REPLACING THE BATTERY
Remove the battery door by lifting the battery door tab and rotating counterclockwise until it is loose.
Activating the installed battery: A CR2 battery is pre-installed in your new Pro X3. Before using the rangefinder, remove the battery door as described above. Remove the plastic protective disc from the top of the battery, replace the battery door.

Replacing a low battery: Insert a new CR2 3-volt lithium battery into the compartment negative (flat) end first (positive end facing out towards the battery cover), then replace the battery door.
BATTERY LEVEL INDICATOR
The Battery Indicator (4) shows the remaining power level:
- Full charge
![]()
- Approx. 2/3 battery life remaining
![]()
- Approx. 1/3 battery Life remaining
![]()
- Battery Indicator Blinks - The battery needs replacing, and the unit will not be operable.


BASIC OPERATION
While looking through the Bushnell Pro X3, press and release the Power/Fire button to activate the display. If the display icons and numbers are blurry, rotate the eyepiece in either direction until they focus (see "Adjusting the Eyepiece" below). Next, placing the aiming circle (center of the display) over a target at least 5 yards away, press and hold the Power/ Fire button until the "line of sight" distance is displayed near the bottom of the display (see "Display Indicators" below).
Crosshairs surrounding the aiming circle indicate that the laser is transmitted. After a range is acquired and displayed, you can release the Power/Fire button. The crosshairs surrounding the aiming circle will disappear once the Power/Fire button is released (i.e., the laser is no longer transmitted).
Once activated, the display will remain visible and display the last distance measurement for 10 seconds. You can press the Power/Fire button again at any time to range to a new target. The maximum time the laser is transmitted (active) is five seconds. To re-fire, press the button down again.
ADJUSTING THE EYEPIECE
The Pro X3 has an adjustable Fast Focus eyepiece (+/- 3.5 diopter adjustment) that allows you to focus the displayed data and icons relative to the viewed image from the monocular optics. Rotate the eyepiece until the display is in focus.
ACTIVE LASER
Crosshairs surrounding the aiming circle indicate that the laser is transmitted. Once a range is acquired, you can release the Power/Fire button. The crosshairs surrounding the circle will disappear once the Power/Fire button is released (i.e., the laser is no longer transmitted).
SLOPE SWITCH TECHNOLOGY
Slope Switch technology lets the golfer easily turn Bushnell's patented Slope function on and off. This technology allows the golfer to conveniently utilize Slope to get compensated distances around the course when they want it and have a USGA conforming device that is legal for tournament play when they need it.
SLOPE SWITCH
Slope is enabled by sliding the Slope Switch on the top of the Pro X3.
To move the Slope Switch on or off:
- Use the right thumb to pull down the side latch.
![]()
- With the left hand, pull back the switch on both sides to enable Slope On or slide forward to turn Slope off.
![]()
- Release the side latch to keep the switch in place.


The Slope +/- mode will automatically compute an angle compensated range based upon distance and Slope determined by the laser rangefinder and built-in inclinometer, when a target is ranged. This data combines internal algorithmic formulas dealing with average club use and ball trajectories. The angle compensated range provides direction in playing the shot (i.e., add distance if an incline, subtract distance if a decline). For your Pro X3 to conform to USGA Rule 14-3, the Slope compensated ranging feature must be in the Off position.
ELEMENTS
With Slope mode selected, the display will show the percent grade of tilt/incline to the hole or obstacle (with the flag or other target in the aiming circle) and "Play As" compensated distance below the normal "Line of Sight" distance when the laser is fired. You can also activate the Element feature by pressing the Mode button (toggle between Elements on or off). "ON" indicates the Elements Mode icon (  ) in the display.
When the Elements Mode is on, the Slope compensated distance also factors in the air pressure and temperature at your location on the golf course. So, for example, the ball will travel farther through thinner air at higher altitudes (assuming the ball is hit with the same launch conditions). Note: once the device has shut off, the unit will always default to the last mode used.
HOW TO USE SLOPE +/-
Move the slope switch to the "Slope On" position. The second row of information appears in the display, confirming that you are now in slope mode. Next, press the Power/Fire button to obtain the distance to the flag or other objects. Once the range is displayed, release the Power/Fire button. Once you have released the Power/Fire button, the grade percentage and compensated range will be displayed beneath the standard distance in the second row of numbers.

For example, if the true distance is 160 yards, but with a slope of -3%, the Slope compensated ("Play As") range is 156 yards. The display would show this (right):
THE ADVANTAGE OF SLOPE +/- WITH ELEMENTS
- The distance to the black flag in the drawing below is 160 yards. It is also 160 yards to the red flag, although it is on a slope with a 6% grade (uphill incline). However, if a golfer were to play this hole at 160 yards, the ball (X) would fall short of the hole/flag if Slope was not considered. Therefore, due to the Slope, play it as a 168 yard shot.

- In the drawing below, the golfer is hitting up hill, playing at cooler temperature, and at a course elevation lower than their Home Elevation. The Slope and Elements compensated distance for this shot is 171 yards.


PINSEEKER WITH VISUAL JOLT
Ever had trouble getting the distance to the flag? This advanced mode allows easy flag acquisition without inadvertently getting distances to background targets (i.e., trees) with stronger signal strength.
To use PinSeeker™, align the aiming circle reticle onto the flag that you want to measure the distance. Then, press and hold the Power/Fire button and move the laser slowly across an area until the aiming circle at the center of the display is located over the flag or desired object. If the laser beam recognized more than one object (i.e., the flag and a group of trees behind it), only the distance to the closest object (the flag) would be displayed. The JOLT Technology provides two short pulses to confirm that the distance displayed is to the flag. Then, the red ring around the display (Visual JOLT Indicator) is activated, confirming the laser has ranged the correct target via PinSeeker™. Sometimes, the laser beam only sees one object in its path. In this case, the distance is displayed, but no JOLT indication will be provided because more than one object was not acquired.
TIP: While pressing the Power/Fire button, you can move the device slowly from object to object and intentionally force the laser to hit multiple objects to ensure that you only display the closest objects recognized by the laser. Once the device has shut off, the unit will always default to the last mode used.
Settings can also be accessed through the Bushnell Golf App!
*For ease of use, the device will always be in PinSeeker™ Mode.
DISTANCE UNITS: YARDS OR METERS
To set the distance units between Yards or Meters, press Fire/Power to turn the unit on, then press and hold the Mode button until the display is blinking. Press the Mode to switch from Y (yards) or M (meters). Press Fire/Power button to set the distance units.
Note: If the Red Display is being used, the first setting is to adjust the Display Brightness. The second setting is to select the Distance Units. Follow the instructions above to complete.
DUAL DISPLAY

To adjust the Dual Display from Black to Red, press the button on the left side of the rangefinder.

HOME ELEVATION
To customize your Elements compensated distances for your game, you will want to set the home elevation setting to where you play most often. Adjusts for pressure changes wherever you are playing.
We suggest adjusting Home Elevation in the Bushnell Golf app.
To set the Home Elevation in the Pro X3 Set Up menu:
- Press and Hold the Mode button on top of the ProX3 to enter Set Up mode.
- Press the Fire/Power button to move through each setting to the "ELE" blinking screen.
![]()
- Press the Mode button to enter Home Elevation set up. The screen will change to "AdJ" blinking Home Elevation Adjustment Screen (see right).
- Press the Fire/Power button to enter the first number, this will be indicated by the number blinking.
- Press the Mode button to change the number.
- When the correct number is selected, press Fire/Power and the next number to the right will blink and can be changed. Continue until the full number is correct for Home Elevation and press Fire/Power to set.
![]()
- Press Fire/Power to exit Set Up Mode.


CONNECTING TO THE BUSHNELL GOLF APP
Once the Bushnell Golf App is downloaded and installed on your phone, follow the instructions on the App to pair your Pro X3 rangefinder.

*Ensure Bluetooth is enabled on your phone.
The Bushnell Pro X3 does not need to be connected to the Bushnell Golf App to operate. Using the app makes adjusting settings easier and the player can save games, stats and course information. See the screenshots below for some of the features.


UPDATING FIRMWARE
To update the Pro X3 firmware, click on Device Update on the Device Function screen in the Bushnell Golf Mobile app. If there is an update available, it will automatically be downloaded and installed.
BITE MAGNETIC MOUNT
The Pro X3 features a powerful BITE magnet incorporated into the right side of its housing, which allows the device to be securely attached to a golf cart bar or frame.

BITE FEATURE INCLUDED WITH THE DEVICE CONTAINS A NEODYMIUM MAGNET. MAGNETS COULD AFFECT THE FUNCTIONING OF PACEMAKERS AND IMPLANTED HEART DEFIBRILLATORS. IF YOU USE THESE DEVICES, KEEP A SUFFICIENT DISTANCE FROM THE MAGNET. ALSO, WARN OTHERS WHO WEAR THESE DEVICES FROM GETTING TOO CLOSE TO MAGNETS.
- The magnet may permanently lose part of its adhesive force if exposed to temperatures above 175º F (80º C).
- Magnets produce a far-reaching, strong magnetic field. They could damage TVs and laptops, computer hard drives, credit and ATM cards, data storage media, mechanical watches, hearing aids, and speakers. Keep the unit away from devices and objects that strong magnetic fields could damage.
- Magnets have strong magnetic fields which can pinch skin and fingers. Use caution when attaching the unit to a metal bar.
CLEANING AND GENERAL CARE
Your Bushnell Pro X3 laser rangefinder lenses are fully multi-coated for the highest light transmission. However, care must be taken in cleaning the lenses. Follow these tips for proper lens cleaning:
- Blow away any dust or debris on the lens (or use a soft lens brush).
- To remove dirt or fingerprints, clean with the supplied microfiber cloth rubbing in a circular motion. A coarse cloth or unnecessary rubbing may scratch the lens surface and cause permanent damage. The included washable microfiber cleaning cloth is ideal for routine optics cleaning. First, breathe lightly on the lens to provide slight moisture, then gently rub the lens with the microfiber cloth.
- For a more thorough cleaning, photographic lens tissue and photographic-type lens cleaning fluid or isopropyl alcohol may be used. Always apply the fluid to the cleaning cloth – never directly on the lens.
- The rangefinder is water-resistant but should not be exposed to heavy rain or other direct streams of water and will not withstand submersion in water or other liquids.

Use caution to avoid direct sunlight into the eyepiece to prevent damage to the display/internal components. When using the BITE magnet to attach the device to a cart bar or frame, tilt the device so the eyepiece aims towards the ground, not toward the sun. When you are not using the device, please store it in the case for additional protection.
TROUBLESHOOTING
Never disassemble your laser rangefinder. Irreparable damage can result from unauthorized service attempts, voiding the warranty.
If the unit does not turn on, the display does not illuminate:
- Press Power/Fire button.
- Check and, if necessary, replace the battery. If the unit does not respond to button presses, replace the battery with a good quality CR2 3-volt Lithium battery.
If unit powers down (display goes blank when attempting to power the laser):
- The battery is either weak or low quality. Replace the battery with a new 3 -volt lithium battery (CR2).
If the target range cannot be obtained
- Make sure the display is illuminated.
- Make sure that the Power/Fire button is being pressed.
- Ensure that nothing, such as your hand or finger, is blocking the objective lenses (lenses closest to the target) that emit and receive the laser pulses.
- Ensure the unit is held steady while pressing the Power/Fire button.
NOTE: The last range reading does not need to be cleared before ranging another target. Aim at the new target using the display reticle, press the Power/Fire button, and hold until new range reading is displayed.
GLOSSARY
BITE Magnetic Mount: The integrated BITE magnet on the back of your Pro X3 allows you to easily mount your device to the cart bar.
Dual Display Technology: Technology that allows the user to switch between using the Red or the Black display at the user's discretion.
Elements Compensation: Compensated distances are adjusted with Elements Compensation. Temperature and adjusted altitude are added to Slope technology to provide more precise compensated distances.
IPX7: International waterproof rating. Bushnell Golf Pro X3 is IPX7 rated.
JOLT Technology: A vibrating confirmation setting, integrated into Bushnell golf rangefinders. Short bursts of vibrations in the unit are enacted when the rangefinder has successfully acquired and locked onto the flag.
Locking Slope Switch: Bushnell's Locking Slope Switch is on the top of the Pro X3, above the lens. The Locking Slope Switch gives the golfer more assurance that Slope is off while in a tournament when Slope is not allowed.
PinSeeker with JOLT Technology: JOLT has advanced to Visual JOLT. A red ring flashes in the display as JOLT gives the player even greater feedback and confidence to know the rangefinder has locked onto the flag.
Slope Compensation: Slope technology calculates the angle and the compensated range to provide an adjusted distance because of elevation changes. Its purpose is to ensure you are properly informed of the distance ahead so you can select the right club to get the proper trajectory to make it to the hole.
Slope Switch: Slope is enabled by sliding the Slope Switch on the top of the Pro X3. When Slope is enabled, the Slope Switch is pulled back and showing an orange strip.
Straight Line Distance: This is the distance from you, or rather the device, to the target you're seeking a distance from. It's the primary form of distance that's acquired with all tournament legal laser and GPS golf rangefinders.
USGA Rule 14-3: You'll see this term a lot while in the market for golf rangefinders. It stands for United States Golf Association. To be able to legally use rangefinders in tournaments, the device must comply with the USGA's measuring device policy found in Rule 14-3. All Bushnell Golf laser rangerfinders are legal for tournament play when SLOPE mode is disabled
Vivid Display Technology: Bushnell premium rangefinder technology where light transmission, contrast, and clarity are all better than before. The readouts are brighter, and the display can be read in any light condition.
TECHNICAL SPECIFICATIONS
| Dimensions | 4.75 x 1.7 x 3.25 inches |
| Weight | 12 oz. |
| Ranging Accuracy | Accurate to +/- 1 yard |
| Range | 5–1300 Yards / 5–1189 Meters |
| Magnification | 7x |
| Objective Diameter | 28 mm |
| Display | Dual Red & Black LCD w/illuminated JOLT indicator ring |
| Power Source | 3-volt lithium (CR-2) |
| Field Of View | 330 ft. @ 1000 yards / 110 meters @ 1000 meters |
| Extra Long Eye Relief | 15 mm |
| Exit Pupil | 3.7 mm |
| Included Items | Premium Carrying Case and CR2 Battery |
AS WITH ANY LASER DEVICE, IT IS NOT RECCOMENDED TO DIRECTLY VIEW THE EMISSIONS FOR LONG PERIODS OF TIME WITH A MAGNIFIED LENS.
FDA SAFETY
Complies with 21CFR1040.10 and 1040.11 except for conformance with IEC60825-1 Ed.3., as described in Laser Notice 56, dated May 8, 2019.
There are no user controls, adjustments or procedures. Performance of procedures other than those specified herein may result in access to invisible laser light.
- This product contains no user serviceable controls.
- This product must not be opened or modified by the consumer.
- This product must be returned to the manufacturer for service.
Device specifications and design are subject to change without notice or obligation on the part of the manufacturer.
Industry Canada Statement
This device complies with ISED's licence-exempt RSSs. Operation is subject to the following two conditions:
- This device may not cause harmful interference, and
- this device must accept any interference received, including interference that may cause undesired operation.
Disposal of Electric and Electronic Equipment
Applicable in the EU and other European countries with separate collection systems

This equipment contains electric and/or electronic parts and must therefore not be disposed of as normal household waste. Instead, it should be disposed at the respective collection points for recycling provided by the communities. For you, this is free of charge. If the equipment contains exchangeable (rechargeable) batteries, these too must be removed before and, if necessary, in turn be disposed of according to the relevant regulations (see also the respective comments in this unit's instructions). Further information about the subject is available at your community administration, your local waste collection company, or in the store where you purchased this equipment. This device contains license-exempt transmitter(s)/receiver(s) that comply with Innovation, Science and Economic Development Canada's license-exempt RSS(s). Operation is subject to the following two conditions:
- This device may not cause interference.
- This device must accept any interference, including interference that may cause undesired operation of the device.
Changes or modifications not expressly approved by the party responsible for compliance could void the user's authority to operate the equipment.

©2023 Bushnell Outdoor Products
Bushnell, ™, ®, denote trademarks of Bushnell Outdoor Products www.bushnell.com
9200 Cody, Overland Park, KS 66214
Made in China https://vistaoutdoor.com/patents

Documents / Resources
References
![www.bushnell.com]() Performance Binoculars, Riflescopes, Rangefinders, Trail Cameras & Night Vision Equipment
Performance Binoculars, Riflescopes, Rangefinders, Trail Cameras & Night Vision Equipment![vistaoutdoor.com]() Patents – Vista Outdoor
Patents – Vista Outdoor
Download manual
Here you can download full pdf version of manual, it may contain additional safety instructions, warranty information, FCC rules, etc.
Advertisement


Need help?
Do you have a question about the Pro X3 and is the answer not in the manual?
Questions and answers