Table of Contents
Advertisement
Quick Links
www.weslo.com
Model No. WLRW39916.0
Serial No.
Write the serial number in the space
above for reference.
Serial
Number
Decal
ACTIVATE YOUR
WARRANTY
To register your product and
activate your warranty today,
go to www.wesloservice.com/
registration.
CUSTOMER CARE
For service at any time, go to
www.wesloservice.com.
Or call 1-866-699-3756
Mon.–Fri. 6 a.m.–6 p.m. MT
Sat. 8 a.m.–12 p.m. MT
Please do not contact the store.
CAUTION
Read all precautions and
instructions in this manual before
using this equipment. Keep this
manual for future reference.
USER'S MANUAL
Advertisement
Table of Contents

Related Manuals for Weslo FLEX 3.0


Summary of Contents for Weslo FLEX 3.0
- Page 1 Model No. WLRW39916.0 Serial No. USER’S MANUAL Write the serial number in the space above for reference. Serial Number Decal ACTIVATE YOUR WARRANTY To register your product and activate your warranty today, go to www.wesloservice.com/ registration. CUSTOMER CARE For service at any time, go to www.wesloservice.com.
-
Page 2: Table Of Contents
Apply the decal in the location shown. Note: The decal(s) may not be shown at actual size. WESLO is a registered trademark of ICON Health & Fitness, Inc. -
Page 3: Important Precautions
IMPORTANT PRECAUTIONS WARNING: To reduce the risk of serious injury, read all important precautions and instructions in this manual and all warnings on your rower before using your rower. ICON assumes no responsibility for personal injury or property damage sustained by or through the use of this product. - Page 4 STANDARD SERVICE PLANS...
-
Page 5: Before You Begin
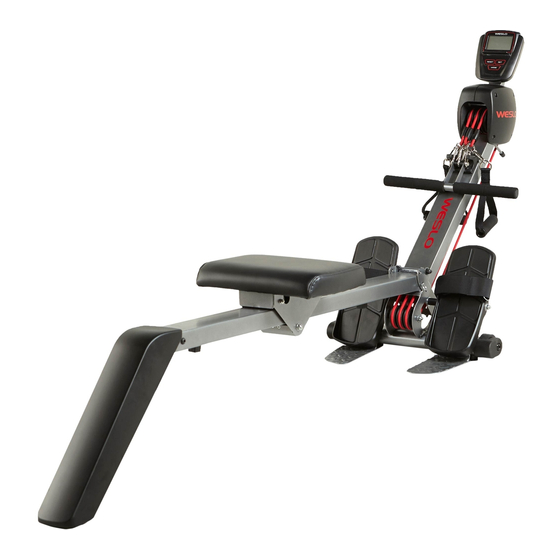
The model the body. The FLEX 3.0 rower is designed to let you number and the location of the serial number decal are enjoy this effective exercise in the convenience and shown on the front cover of this manual. -
Page 6: Part Identification Chart
PART IDENTIFICATION CHART Use the drawings below to identify the small parts needed for assembly. The number in parentheses below each drawing is the key number of the part. The number following the key number is the quantity needed for assembly. Note: If a part is not in the hardware kit, check to see if it has been preassembled. -
Page 7: Assembly
ASSEMBLY • To hire an authorized service technician to • To identify small parts, see page 6. assemble this product, call 1-800-445-2480. • Assembly requires only the included tools. • Assembly requires two persons. Assembly may be easier if you have a set of •... - Page 8 3. See the upper drawing. Orient the Rail (4) and the Seat (5) with the Seat Knob (23) on the side shown. See the middle drawing. Slide the Seat (5) onto the Rail (4). Then, attach the Bumper (6) to the Rail with an M6 x 16mm Screw (7).
- Page 9 5. While a second person holds the Rail (4) near the Frame (2), connect the Rail Wire (10) to the Frame Wire (11). Insert the excess wire into the Rail. Avoid Tip: Avoid pinching the wires. Attach the Rail pinching (4) to the Frame (2) with an M8 Bolt Set (12).
- Page 10 8. The Console (21) can use two AA batteries (not included); alkaline batteries are recommended. Do not use old and new batteries together or alkaline, standard, and rechargeable batter- ies together. IMPORTANT: If the Console has been exposed to cold temperatures, allow it to warm to room temperature before you insert batteries.
-
Page 11: How To Use The Rower
HOW TO USE THE ROWER HOW TO ADJUST THE RESISTANCE 2. The second phase is the DRIVE. Push backward with your legs. Lean back slightly at the hips (not To vary the intensity of your exercise, you can adjust at the waist), keeping your back straight. As you the resistance that you feel when you pull the row bar straighten your legs, pull the row bar toward your or the handles. - Page 12 HOW TO MOVE THE ROWER HOW TO FOLD AND STORE THE ROWER Stand behind the rower and lift the leg until the rower The rower can be stored in a folded position to con- serve space. Store the rower in a location where will roll on the wheels.
- Page 13 FEATURES OF THE CONSOLE HOW TO USE THE CONSOLE Make sure that batteries (not included) are installed in the console (see assembly step 8 on page 10). If there is a sheet of plastic on the console, remove the plastic. IMPORTANT: The console will provide exercise feedback when the seat moves.
-
Page 14: Maintenance And Troubleshooting
4. When you are finished exercising, the console As you exercise, the console will provide instant feedback. If you have set a workout goal, the will turn off automatically. display will show zeros and the console will beep when you reach your goal; if you continue to exer- If the seat does not move for a few seconds, the cise, the display will begin to count upward. -
Page 15: Exercise Guidelines
EXERCISE GUIDELINES Aerobic Exercise—If your goal is to strengthen your WARNING: cardiovascular system, you must perform aerobic Before beginning this exercise, which is activity that requires large amounts or any exercise program, consult your physi- of oxygen for prolonged periods of time. For aerobic cian. -
Page 16: Ordering Replacement Parts
ORDERING REPLACEMENT PARTS For information about available replacement parts, see the front cover of this manual. To help us assist you, be prepared to provide the following information when contacting us: • the model number and serial number of the product (see the front cover of this manual) •...
Need help?
Do you have a question about the FLEX 3.0 and is the answer not in the manual?
Questions and answers