Table of Contents
Advertisement
AIR CONDITIONER
SYSTEM AIR CONDITIONER
SINGLE for North America(R-410A, Heat Pump)
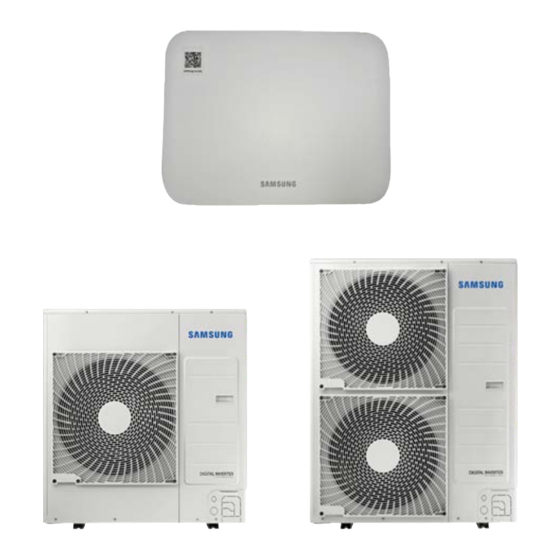
Unitary Outdoor Unit
AC024BXUPCH
AC036BXUDCH
AC036BXUPCH
AC048BXUPCH
AC060BXUPCH
CONTENTS
1. Precautions
2. Product Specifications
3. Disassembly and Reassembly
4. Troubleshooting
5. PCB Diagram and Parts List
6. Wiring Diagram
7. Reference Sheet
AHU Control Unit
MXD-U000XN
Advertisement
Table of Contents
Troubleshooting

Related Manuals for Samsung AC024BXUPCH


Summary of Contents for Samsung AC024BXUPCH
- Page 1 SYSTEM AIR CONDITIONER SINGLE for North America(R-410A, Heat Pump) Unitary Outdoor Unit AHU Control Unit AC024BXUPCH MXD-U000XN AC036BXUDCH AC036BXUPCH AC048BXUPCH AC060BXUPCH AIR CONDITIONER CONTENTS 1. Precautions 2. Product Specifications 3. Disassembly and Reassembly 4. Troubleshooting 5. PCB Diagram and Parts List 6.
-
Page 2: Table Of Contents
Contents 1. Precautions ........................1-1 1-1. Precautions for the Service ..........................1-1 1-2. Precautions for the Static Electricity and PL ....................1-1 1-3. Precautions for the Safety ..........................1-1 1-4. Precautions for Handling Refrigerant for Air Conditioner ................1-2 1-5. Precautions for Welding the Air Conditioner Pipe ..................1-2 1-6. - Page 3 Contents 4-2-23. IPM(IGBT Module) heat sink error - (E474), IPM overheat error - (E500) ........4-29 4-2-24. Input current sensor error (Short/Open) - (E485) ...............4-29 4-2-25. Error due to high pressure switch open or compressor down by high pressure - (E507) ..4-30 4-4-26.
-
Page 4: Precautions
Explain to workers that the battery for the remote control needs to be separated for storage purposes when the product ● will not be used for a long time. – This can cause a problem for the remote control since battery fluid may trickle out. Samsung Electronics... -
Page 5: Precautions For Handling Refrigerant For Air Conditioner
If the compressor is operating while the refrigerant pipe is not correctly connected and the service valve is opened, then air and other substances can enter the pipe. The interior of the refrigerant cycle may then build up excessive high pressure resulting in explosion and damage. Samsung Electronics... -
Page 6: Product Specifications
2-1. Outdoor Unit with AHU Control Unit ■ H ow the system works? Any types of 3rd party indoor unit via SAMSUNG AHU Control Unit can be connected to SAMSUNG New CAC Hybrid Inverter Unitary outdoor unit. AHU Control Unit installed either inside or nearby the indoor unit in the utility room receives the input signal from Thermostat installed in a living space and transmits the signals to both indoor unit and Hybrid Unitary outdoor unit respectively. - Page 7 ■ V ersatile piping installation CAC Single outdoor units offer a selection of pipe directions. The internal pipe connection ports allow four dif- ferent pipe directions, supporting a neater, more organized-looking unit upon installation. Samsung Electronics...
-
Page 8: Product Specifications
ADP® MPAHU + Unitary Outdoor Unit + AHU Control Unit ADP® Indoor Unit AVT240BT AV360CT AV360CT Simple CXH024UPB CXH036UDB CXH036UPB Item US code Outdoor Unit Model AC024BXUPCH AC036BXUDCH AC036BXUPCH Code AHU Control Unit MXD-U000XN Indoor Unit Design Outdoor Unit AHU Control Unit Cooling [Btu/h] 24,000 36,000... - Page 9 19.05(3/4") ~ 22.58(1-1/8") 19.05(3/4") ~ 22.58(1-1/8") Refrigerant Type R-410A R-410A Factory Charging [kg(lbs)] 4.2(9.26) 4.8(10.58) Additional Refrigerant (over 24.6ft(7.5m)) [oz/ft] Basic Piping Length [ft(m)] 24.6(7.5) 24.6(7.5) Max. Piping Length [ft(m)] 164(50) 98(30) Max. Level Difference [ft(m)] 98(30) 49(15) Samsung Electronics...
-
Page 10: Specifications Of Optional Items
DB68-12063ABCDE Outdoor Unit Rubber-Leg DB73-20134A ■ MXD-U000XN Item Description Code No. Q’ty Remark Manual Install DB68-12061A Label Instruction DB68-12062A (Wiring label) U-ring DB60-00444A AHU Control Fan speed control wire DB93-17752A Unit Cable tie DB65-10088B M4x16 screws 6002-000215 Holder lock DB61-00945A Samsung Electronics... -
Page 11: Disassembly And Reassembly
3. Disassembly and Reassembly ■ Necessary Tools Item Remarks +SCREW DRIVER Adjustable Wrench (8mm, 10mm, 13mm) M6, M8 Hex Wrench Samsung Electronics... -
Page 12: Outdoor Unit
Disassembly and Reassembly 3-1. Outdoor unit ■ AC024BXUPCH, AC036BXUDCH Parts Procedure Remark Cabinet Front RH Turn off the power before disassembly necessarily. 1) Remove 3ea of screws from the Cabinet Front RH and separate it. (Use + Screw Driver) Cabinet Upper... - Page 13 Procedure Remark Outdoor Unit Guard 1) Pull out the sensor from the Outdoor Unit Guard and separate it. 2) Remove the 4ea of screws which are fixed to Outdoor Unit Guard and separate it. (Use + Screw Driver) Samsung Electronics...
- Page 14 Cabinet Rear RH 1) Pull out the sensor from the Cabinet Rear RH and separate it. 2) Remove 9ea of screws which are fixed to each side of Cabinet Rear RH and separate it. (Use + Screw Driver) Samsung Electronics...
- Page 15 Cabinet-Installation 1) Remove a screw from the Cabinet- Rear Part Installation Rear Part and separate it. (Use +Screw Driver) Cabinet Front LF 1) Remove 9ea of screws from the Cabinet Front LF and separate it. (Use +Screw Driver) Samsung Electronics...
- Page 16 Disassembly and Reassembly Parts Procedure Remark Cabinet Front LF 1) Remove the 2 hex nuts like the picture on the right side. (Use Hexagon Wrench, Monkey Spanner, Hexagon Socket) Samsung Electronics...
- Page 17 2) Remove 8ea of screws which are fixed to Motor. (Use +Screw Driver) 3) Separate the Motor Wire connector from the Outdoor Unit Control Part. Bracket Motor 1) Remove 2ea of screws from the Bracket Motor and separate it. (Use +Screw Driver) Samsung Electronics...
- Page 18 Disassembly and Reassembly Parts Procedure Remark Base Heater 1) Remove 4ea of screws from the Base heater and separate it. (※ AC024BXADCH (Use +Screw Driver) Only) 2) Separate the Base heater Wire connector from the Outdoor Unit Control Part. Samsung Electronics...
- Page 19 Disassembly and Reassembly Parts Procedure Remark Control Part 1) Separate the 7 connectors from the Outdoor Unit Control part. 2) Remove the 2ea screw which is fixed to Control Part. (Use +Screw Driver) 3) Separate the Control Part. Samsung Electronics...
- Page 20 Service Valve. (Use +Screw Driver) 2) Separate the inlet and outlet pipes by welding torch. If you separate the Compressor, Heat Exchanger or Pipe, please fully discharge refrigerant in the Compressor and then separate the Pipe by welding torch. 3-10 Samsung Electronics...
- Page 21 (Use Hexagon Wrench, Monkey Spanner, Hexagon Socket) 2) Separate the Felt Compressor. 3) Remove the 3 hex nuts from the bottom of Compressor like the picture on the right side. (Use Hexagon Wrench, Monkey Spanner, Hexagon Socket) Samsung Electronics 3-11...
- Page 22 Disassembly and Reassembly Parts Procedure Remark Condenser 1) Remove 3ea of screws which are fixed Connection Part to each side of Condenser Connection Part and separate it. (Use + Screw Driver) 3-12 Samsung Electronics...
- Page 23 1) Remove the 8 screws which is fixed to each side of Cabinet Upper and separate it.(Use + Screw Driver) Cabinet-Installation 1) Remove the 1 screw which is fixed to Front Part Cabinet-Installation Front Part and separate it.(Use + Screw Driver) Samsung Electronics 3-13...
- Page 24 Procedure Remark Outdoor Unit Guard 1) Pull out the sensor from the Outdoor Unit Guard and separate it. 2) Remove the 4 screws which is fixed to Outdoor Unit Guard and separate it. (Use + Screw Driver) 3-14 Samsung Electronics...
- Page 25 Cabinet Rear RH 1) Pull out the sensor from the Cabinet Rear RH and separate it. 2) Remove the 9 screws which is fixed to each side of Cabinet Rear RH and separate it. (Use + Screw Driver) Samsung Electronics 3-15...
- Page 26 Rear Part Cabinet-Installation Rear Part and separate it. (Use +Screw Driver) Cabinet Front LF 1) Remove the screws from the Cabinet Front LF and separate it. (Use +Screw Driver) * AC036/048BXUPCH : 9 screws AC060BXUPCH : 10 screws 3-16 Samsung Electronics...
- Page 27 Disassembly and Reassembly Parts Procedure Remark Cabinet Front LF Samsung Electronics 3-17...
- Page 28 Wrench, Monkey Spanner, Hexagon Socket) Motor 1) Separate the Fan Propeller. 2) Remove the 8 screws which is fixed to Motor. (Use +Screw Driver) 3) Separate the Motor Wire connector <AC024/036BXUPCH, AC036BXUDCH> from the Outdoor Unit Control Part. <AC048/060BXUPCH> 3-18 Samsung Electronics...
- Page 29 Bracket Motor and separate it. (Use +Screw Driver) Base Heater 1) Remove 4ea pf screws from the Base heater and separate it. (Use + Screw Driver) 2) Seperate the Base heater Wire con- nector from the Outdoor Unit Control Part. Samsung Electronics 3-19...
- Page 30 Procedure Remark Control Part 1) Separate the 7 connectors from the Outdoor Unit Control part. <AC024/036BXUPCH, AC036BXUDCH> 2) Remove the 2 screws which is fixed to Control Part. (Use +Screw Driver) <AC048/060BXUPCH> 3) Separate the Control Part. 3-20 Samsung Electronics...
- Page 31 Service Valve. (Use +Screw Driver) 3) Separate the inlet and outlet pipes by welding torch. If you separate the Compressor, Heat Exchanger or Pipe, please fully discharge refrigerant in the Compressor and then separate the Pipe by welding torch. Samsung Electronics 3-21...
- Page 32 Disassembly and Reassembly Parts Procedure Remark EEV Valve 1) Remove the 2 screws which is fixed to Service Valve and separate it. (Use +Screw Driver) 2) Separate the inlet and outlet pipes by welding torch 3-22 Samsung Electronics...
- Page 33 Cover and separate it. (Use Hexagon Wrench, Monkey Spanner, Hexagon Socket) 2) Separate the Felt Compressor. 3) Remove the 3 bolts from the bottom of Compressor like the picture on the right side. (Use Hexagon Wrench, Monkey Spanner, Hexagon Socket) Samsung Electronics 3-23...
- Page 34 Disassembly and Reassembly Parts Procedure Remark Condenser 1) Remove 3ea of screws which are fixed to each side of Condenser Connection Connection Part and seprate it. Part (Use + Screw Driver.) 3-24 Samsung Electronics...
-
Page 35: Ahu Control Unit
1) Push the middle area of the Case top(front cover) and open it upward to separate from the Case bottom(Rear cover). 1) Remove 1ea screw from the PCB(Use +Screw Driver) and push the rib down to separate the PCB from the case. Samsung Electronics 3-25... -
Page 36: Troubleshooting
* If an error occurs during the test operation, the test mode will terminate and display the associated error codes SEG1 SEG2 SEG3 SEG4 Action to take Fault detection is in progress PBA defect: Replace the PBA Check Manual inspection is required Going into fault detection mode failed Try fault detection again Samsung Electronics... - Page 37 ³⁾ When the temperature unit is set to Celsius by using the option switch on the outdoor unit, the value is shown in kW. ⁴⁾ When the temperature unit is set to Celsius by using the option switch on the outdoor unit, the value is shown in kg/cm². Samsung Electronics...
- Page 38 ꞏ Long push K4(Main micom ver.) → short push 1 more (Inv. micom ver.) → short push 1 more (E2P. ver.) → short push 1 more (Automatic address) → short push 1 more (Manual address) → short push 1 more (Main micom ver.) → ..→ Long push K4(veiw mode end) Samsung Electronics...
- Page 39 Example) • After selecting the function for options, press and hold the K2 switch for 2 seconds. Edited value of the option will be saved when entire segments blinks and tracking mode begins. Samsung Electronics...
- Page 40 100% Cooling / Heating operation (default) Dedicated mode for Cooling operation only cooling/ heating Heating operation only Within 98.4 ft (30 m) (Factory default) Long-piping pressure 98.4 ~ 164.0 ft calibration ²⁾ (30 ~ 50 m) (Cooling:-9.96psi, Heating:+4.27psi) Samsung Electronics...
- Page 41 Do NOT use it for performance enhancement purposes. ³⁾ Target low pressure for cooling can be set in a range of 113.79–170.68 psi. ⁴⁾ Target high pressure for heating can be set in a range of 284.47–526.26 psi. Samsung Electronics...
-
Page 42: Troubleshooting By Symptoms
1. Connect the power wire. 1. Is there a fault in the connection of the 2. Turn on the Terminal Box and check whether power supply to Main PCB normal power is supplied to the outdoor unit. and EMI PCB? Continue Samsung Electronics... - Page 43 When detaching and attaching the connector 2. Turn on the Terminal Box and check during power supply, the motor can be damaged.) whether normal power is supplied to → If it is normal, replace the Fan Motor. the outdoor unit. Samsung Electronics...
-
Page 44: Communication Error Between Outdoor Unit Inv ↔ Main Micom (1 Min.) - (E203)
2. If Red - ON, Green - OFF, and Yellow - Blink are displayed in the LED display of outdoor unit Inverter, and there is no indication in 7-segment of outdoor unit Main PCB, replace the Main PCB → The outdoor unit Inverter PCB is normal. Samsung Electronics... -
Page 45: Outdoor Sensor Error - (E221, E231, E251, E320)
Ex) Room temperature : 21℃- Resistance : 205.4KΩ Does same error occur After checking normal operation, end the service. again after power ON? Replace the outdoor unit PCB. → Power ON → After confirming the state is normal, end the service. 4-10 Samsung Electronics... -
Page 46: High Pressure Sensor Error (Open/Short) - (E291)
(Please check by connecting the Manifold gauge to the service valve) High pressure sensor Replace PBA terminal of PBA : Is the voltage between 3 and 4 pins 5V? Replace High Pressure sensor The ▼ mark is the 1st pin on the PBA. Samsung Electronics 4-11... -
Page 47: Suction Temperature Sensor Error (Open/Short) - (E308)
2 terminals. 12.1 18.0 SUCT 27.3 CN404 (7, 8) 43.0 Is the resistor value matching with “NOTE1” table? Replace this part as it is the defective of the Outdoor Suction sensor itself. Restart operation after replace the PBA. 4-12 Samsung Electronics... -
Page 48: Compressor Down Due To Freezing Control - (E403)
4-2-7. System stop due to overload protection control - (E404) Outdoor unit display • Check whether fan or motor operate normally. Judgment Method • Check the operation of EEV. • Check comp. when it starts. Cause of problem Samsung Electronics 4-13... -
Page 49: Comp. Down Due To High Pressure Protection Control - (E407)
Are there any blockage inside Pipe inspection the pipe? (filter etc.) Replace relevant component Indoor fan operating normaly for the heating? (motor or fan) Do Heat-Pump and Furnace operate at Check Thermostat Settings the same time? Check the refrigerant amount 4-14 Samsung Electronics... -
Page 50: Comp. Down Due To Low Pressure Sensor Protection (E410)
Pipe inspection the pipe? (filter etc.) Replace relevant component Indoor fan operating normaly for the cooling? (motor or fan) Is there any obstruction Eliminate suction obstructions to the intake of the indoor unit? Check the refrigerant amount Samsung Electronics 4-15... -
Page 51: Comp. Down Due To Disharge Temperature Protection Control - (E416)
4-2-10. Comp. down due to disharge temperature protection control - (E416) Outdoor unit display • Check for lack of refrigerant. • Check the blockage of the solenoid valve. Judgment Method • Check the malfunction of the exhaust temperature sensor. • Check the EEV. Cause of problem 4-16 Samsung Electronics... -
Page 52: Heating Operation Restricted At Outdoor Temperature Over Theat_High Value
4-2-12. Cooling operation restricted at outdoor temperature over Tcool_low value (default : 32℉(0℃)) - (E441) Outdoor unit display Check the range of temperature limited for cooling operation. Judgment Method Check the outdoor temperature sensor. Cause of problem Samsung Electronics 4-17... -
Page 53: Outdoor Unit Fan Error - (E458, E475)
→ If the error is indicated on 7-segment of the Main PCB of the outdoor unit, the Main PCB of the outdoor unit has no fault. → In case of a control problem, it is possible to solve with S/W update. 4-18 Samsung Electronics... -
Page 54: Compressor Error - (E461, 467)
3. Is there any abnormal noise from compressor 3. Replace the compressor : rotation? When loud abnormal noise generates (metal cutting or grinding noise), or severe vibration. Is there a reading of MegaΩ of resistance Replace the compressor. between compressor body and chassis? Continue Samsung Electronics 4-19... - Page 55 → This error is related to the compressor and Inverter PCB. (Not related to the above PCB) ※ Ensure that the service valve is open! → When the service valve is closed, the defects may be caused by differential pressure when starting the compressor. 4-20 Samsung Electronics...
-
Page 56: Current Error - (E462, 484)
3. Remove obstacle on the outlet of outdoor unit and secure the space. Is service valve fully opened? Open the valve. Is compressor running properly? Replace the compressor. After replacing the Inverter PCB of the outdoor unit, check for normal startup. → End the service. Samsung Electronics 4-21... -
Page 57: Over Load Protection Error (E463)
Troubleshooting 4-2-16. Over Load Protection Error (E463) Outdoor unit display Judgment Method Check the OLP sensor. Cause of problem 4-22 Samsung Electronics... -
Page 58: Ipm (Over Current) Error - (E464)
1. Remove obstacle on the inlet and secure the space. 2. Remove obstacle on the outlet and secure the space. Is indoor and outdoor unit wiring/piping Install again by following the standard specifications. installed properly? ① ② ③ Bad installation Piping Wiring Continue Samsung Electronics 4-23... - Page 59 Is there a reading of MegaΩ of resistance Replace the compressor. between compressor body and chassis? Are the position Turn off the power and change the location and measuring value of the temperature of the temperature sensor or replace it. sensor normal? Continue 4-24 Samsung Electronics...
- Page 60 → E464 is related to Inverter PCB. ※ Ensure that the service valve is open! → When the service valve is closed, the defects may be caused by differential pressure when starting the compressor. PCB connecting connector PCB connecting connector Samsung Electronics 4-25...
-
Page 61: Compressor Over Load Error- (E465)
If the compressor is abnormally run, replace the compressor and then ensure that it works nor- mally. Judgment Method → If the compressor is normally run, check the assembling between the heat sink plate and the Inverter PCB and then If there is no abnormality, replace the Inverter PCB. Cause of problem 4-26 Samsung Electronics... -
Page 62: Ac Input Voltage Sensor Error - (E488)
2. Are the power wire of the Power Terminal Box and the power wire. → Check the normal operation. → End terminal firmly assembled? the service. After replacing the Inverter PCB of the outdoor unit, check for normal startup. → End the service. Samsung Electronics 4-27... -
Page 63: Current Sensor Error - (E468)
Outdoor unit EEPROM Read/Write error (H/W) - (E471) Outdoor unit display • Check EEPROM data Judgment Method • Upload EEPROM data correspoding model name to Main PCB. Cause of problem No or incorrect EEPROM data in the set. 4-28 Samsung Electronics... -
Page 64: Input Current Sensor Error (Short/Open) - (E485)
• Check the input sensor while the set is in stop status. Judgment Method • If error occurs, turn on/off the power several times. The same error occurs while the power is off, replace the inverter PCB. Cause of problem Samsung Electronics 4-29... -
Page 65: Error Due To High Pressure Switch Open Or Compressor Down By High Pressure - (E507)
Are there any blockage inside Pipe inspection the pipe? (filter etc.) Are the Outdoor Fan operating normally for the cooling and Replace relevant component the Indoor Fan operating normally for (motor or fan) the heating? Check the refrigerant amount 4-30 Samsung Electronics... -
Page 66: Gas Leakage Error - (E554)
Check the normal operation. →End the service. (disconnection, wrong connection) 3. Replace the compressor : 3. Is there any abnormal noise from When loud abnormal noise generates (metal cutting or grinding compressor rotation? noise), or severe vibration. Continue Samsung Electronics 4-31... - Page 67 ① ② ③ Bad installation Piping Wiring Is service valve fully opened? Open the valve. Is the indoor EVA Reconnect the sensor connector. sensor correctly connected? Charge the refrigerant. Is refrigerant charged? Replace the inverter PCB. 4-32 Samsung Electronics...
-
Page 68: Blockage Deteced On High Pressure Pipe Duing Heating Operation - (E534)
• Check the troubleshooting of E464, E465 as well. - Condition : A and (B or C) A: Within 10 mins after operating outdoor unit compressor for heating Cause of problem B : E464 occurs C : E465 occurs Samsung Electronics 4-33... -
Page 69: Pcb Diagram And Parts List
5. PCB Diagram and Parts List 5-1. Outdoor Unit Main PBA ■ PF #4: : AC024/036/048/060BXUPCH, AC036BXUDCH 15 11 19 21 13 20 14 This Document can not be used without Samsung’s authorization. - Page 70 #1 : L - RELAY CONTACT OUTPUT #1 : HIGH_PRESSURE #1 : 5V #2 : - #2 : - #2 : GND #3 : N - NEUTRAL POWER OUTPUT #3 : GND #4 : 5V This Document can not be used without Samsung’s authorization. Samsung Electronics...
-
Page 71: Outdoor Unit Inverter Pba
#2 : COMP-V PHASE #N_SKY : AC POWER(N)/SKY #4 : DC 15V #4 : DC 15V #3 : COMP-W PHASE #5 : FAN RPM #5 : FAN RPM #6 : FAN RPM FEEDBACK #6 : FAN RPM FEEDBACK Samsung Electronics... - Page 72 #2 : COMP-V PHASE #N_SKY : AC POWER(N)/SKY #4 : DC 15V #4 : DC 15V #3 : COMP-W PHASE #5 : FAN RPM #5 : FAN RPM #6 : FAN RPM FEEDBACK #6 : FAN RPM FEEDBACK Samsung Electronics...
-
Page 73: Outdoor Unit Emi Pba
■ AC024/036/048/060BXUPCH, AC036BXUDCH N1: AC POWER(N) L1: AC POWER(L) CN01: POWER CN5: AC POWER(N) ① ② ③ ④ #1: AC POWER(N) #1: AC POWER(L) #1: AC POWER(L) #1: AC POWER(N) #3: AC POWER(N) CN4: AC POWER(L) ⑤ #1: AC POWER(L) Samsung Electronics... -
Page 74: Ahu Control Unit Pba
#803_3 : G2 : SIGNAL OUTPUT(AC24V) #801_1 : G : SIGNAL OUTPUT(AC24V) #803_4 : - #801_2 : W1 : SIGNAL OUTPUT(AC24V) #803_5 : G1 : SIGNAL OUTPUT(AC24V) #802_1 : W2 : SIGNAL OUTPUT(AC24V) #802_2 : DHUM : SIGNAL OUTPUT(AC24V) Samsung Electronics... -
Page 75: Wiring Diagram
6. Wiring Diagram 6-1. Outdoor Unit ■ Unitary Inverter : AC024/036/048/060BXUPCH, AC036BXUDCH This Document can not be used without Samsung’s authorization. Samsung Electronics... -
Page 76: Ahu Control Unit
Wiring Diagram 6-2. AHU Control Unit ■ MXD-U000XN DEHUMIDIFICATION DEHUMIDIFICATION This Document can not be used without Samsung’s authorization. Samsung Electronics... -
Page 77: Reference Sheet
DELUXE <- Basic Heat Recovery STANDARD Cooling only DELUXE+Low Temp.<- Basic Heat Pump Cooling only R134A Heat Pump Heat Pump ★ ※ MCD: Dummy mock-up model ※“/” can be removed from the buyer card if there are not enough digits. Samsung Electronics... - Page 78 Inv + Side + Low Temp. Deluxe Unitary Premium (2) Product Type Outdoor Unit (7) Version (3) Mode 2019 Heat Pump 2020 Cooling only 2021 2022 (4) Capacity x1,000 BTU/H ※ Model name for the column/bundle packaging is “~S”. Samsung Electronics...
-
Page 79: Refrigerating Cycle Diagram
You can open the valve by turning the need valve counterclockwise using hex wrench, and it is used for vacuum, gas purging, refrigerant injection, refrigerant purging, and indoor-outdoor unit connection. ■ ACCUMULATOR Accumulator prevents the flow of liquid-state refrigerant into the compressor. (Liquid-state refrigerant flowing into the compressor will overload the compressor.) Samsung Electronics... - Page 80 Latin America https://gspn6.samsungcsportal.com © Samsung Electronics Co., Ltd. October. 2022. This Service Manual is a property of Samsung Electronics Co., Ltd. Printed in Korea. Any unauthorized use of Manual can be punished under Code No. AC-00320E_1 applicable International and/or domestic law.