quadient iX-1 Series User Manual
Hide thumbs
Also See for iX-1 Series:
- User manual (254 pages) ,
- Product manual (18 pages) ,
- Replacement manual (2 pages)
Table of Contents
Advertisement
Quick Links
Advertisement
Chapters
Table of Contents

Related Manuals for quadient iX-1 Series


Summary of Contents for quadient iX-1 Series
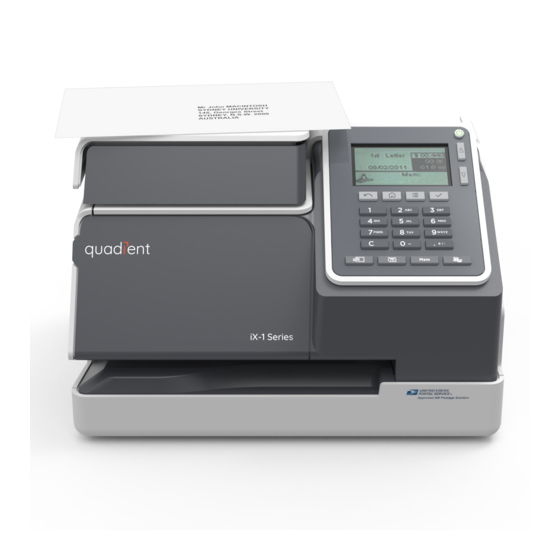
- Page 1 User Guide Mailing Systems iX-1 Series...
-
Page 2: Table Of Contents
Table of Contents Safety Information Safety Requirements .......................3 Symbols ..........................7 Glossary ..........................8 Meet Your Mailing System System Layout .........................11 Accessories ........................13 Control Panel Features ....................15 Connections ........................18 Power Management ......................20 Processing Mail Preparing and Starting your Work Session ............25 Choosing Stamp Type ....................29 Processing Examples ....................32 Mail Corrections ......................57 Settings ..........................63... - Page 3 Managing Accounts ....................119 Account Reports ......................125 Change Current Account ...................129 Rates Selecting a Rate ......................135 Managing Postal Rates ....................233 Reports Generating a Report ....................143 Available Reports ......................145 Online Services Online Services Overview ..................159 OLS Call Types ......................160 OLS Connection Tests ....................165 System Online Services ....................168 eConfirmation Services ....................169 Configuring your Mailing System...
- Page 4 12.1 Ink Cartridge ........................237 12.2 Service Processes ......................246 Troubleshooting 13.1 Machine Issues ......................253 13.2 Diagnostics ........................256 13.3 System Data ........................258 Specifications 14.1 Mail Specifications ....................265 14.2 Package Specifications ...................266 14.3 General Specifications .....................268 14.4 Operating Conditions ....................269 14.5 System Specifications ....................270 14.6 System Changes ......................271...
-
Page 6: Safety Information
Safety Information Safety Requirements ..............3 How to Disconnect your Mailing System ..............6 Symbols ..................7 Glossary ..................8... -
Page 8: Safety Requirements
Safety Requirements Power Connection Before connection, check whether the Mailing System is suitable for the local AC power voltage (110V - 60Hz). THIS SYSTEM MUST BE GROUNDED • Only connect the power plug to an outlet provided with a protective ground contact. •... - Page 9 Environmental Compliance A program is implemented for the recycling of worn mailing systems and systems at the end of their lifetime. Contribute in a responsible way to environmental protection by consulting your retailer's website, or by contacting them directly. CE Compliance CE marking is a certification mark that indicates conformity with health, safety, and environmental protection standards for products sold within the European Economic Area (EEA).
- Page 10 General Safety • Before using your mailing system, thoroughly read the operating instructions. • To reduce the risk of fire, electric shock and injury to persons, follow normal and basic safety precautions for office equipment when using your mailing system. •...
-
Page 11: How To Disconnect Your Mailing System
Network/PC LAN Cable picture above Follow the additional precautions below: • Avoid using your system during an electrical storm; as there may be a risk of electrical shock from lightning. • Do not install LAN connectors in a wet location. •... -
Page 12: Symbols
Symbols This manual uses the symbols listed below. This symbol... Indicates... WARNING: indicates a human safety hazard. ATTENTION: brings to your attention a risk for equipment or mail that could result from an action you may perform. NOTE: remark that explains different scenarios or situations. TIP: advice to help save you time when processing your mail. -
Page 13: Glossary
Glossary This manual uses the acronyms listed below. Acronym Description Ascending Total postage used Descending Postage amount available IDentification Local Area Network: link between computers Personal Computer Personal Identification Number Postal Security Device (Meter) USPS United States Postal Services Weighing Platform... -
Page 14: Meet Your Mailing System
Meet Your Mailing System Get to know your Mailing System in this section. System Layout ................11 Accessories ..................13 Control Panel Features .............15 Connections .................18 Power Management ..............20 How to Switch to 'Sleep' or 'Wake' Mode ............20... -
Page 16: System Layout
System Layout System Components Mail Path Inserting location of envelopes for printing. Weighing Platform Measures weight of mail pieces. Control Panel Controls the mailing system. Cover Allows you to access the ink cartridge. Inside Machine Front view... - Page 17 Bottom view Cover Pull the upper left side corner to open the cover. Prints the postal imprint on envelopes. Ink cartridge See also Changing the Ink Cartridge on page 237. Postal security device Postage meter. (PSD)
-
Page 18: Accessories
Accessories Report Printer (Optional) A USB printer can be directly connected to the mailing system for printing mailing-related reports. For more information about compatible printers that can connect to your mailing system, please contact technical support. - Page 19 Barcode Scanner (Optional) This scanner is used: • to identify accounts through barcodes • to scan e-services tracking numbers on mail items.
-
Page 20: Control Panel Features
Control Panel Features Display Areas Rate and Services Indicates the current rate and services selected. Date Displays the date that will be printed. Postage Indicates the amount to be printed on the envelope. Weight Current weight used to calculate postage amount. - Page 21 Imprint Memory Displays selected imprint memory. Account Displays account currently selected. Weighing type Current weighing method. Indicates that a Slogan will be printed in the left hand Ad Slogan section of the imprint area. Indicates that custom Text will be printed in the left hand Text section of the imprint area.
- Page 22 Short press: Displays the manual weight entry screen. Weight Long press: Access zero weighing platform function. KEYPAD Allows the entry of alpha or numeric values Alphanumeric (accounts or other set up information). Press a key Keys several times to display all possible characters. Clear/Reset Clears keypad entries and existing data in entry Rate...
-
Page 23: Connections
Connections Rear Connectors Your mailing system has Universal Serial Bus (USB) ports that allow you to connect a printer or memory devices. WP Port To Weighing Platform LAN Port To LAN USB ports To peripherals (see detail in next table) Power connector To AC mains adaptor... - Page 24 Right Side USB Connectors • To memory device Flat USB plug • To printer (optional) The Mailing System will detect the connection method on startup. Therefore, please connect the LAN cable before applying power to the system.
-
Page 25: Power Management
Power Management The System can only use the LAN if the LAN cable is connected BEFORE the power chord is plugged in. Energy Star® Compliance Office equipment is generally powered on 24 hours a day, so power management features are important for saving energy and reducing air pollution. Your mailing system is an Energy Star®... - Page 26 To change the period of time after which the mailing system switches to sleep mode, see How to Adjust the Time-outs page 186. Press (at the top right corner of the control panel). - A short press on the sleep/on/soft off mode button sets the machine to sleep mode.
-
Page 28: Processing Mail
Processing Mail This section describes how you can run mail: choosing a type of stamp, selecting a rate and weighing method, activating sealing and so on, depending on the type of process you need to apply to your mail. Preparing and Starting your Work Session .......25 How to Sort Mail ......................25 How to Log in and Start a Work Session .............26 Choosing Stamp Type ..............29... - Page 29 How to Enter the Weight Manually ................71 How to Change the Date ..................83 How to Add (or Cancel) a Text on the Stamp ..........221 How to Add or Cancel a Slogan on the Stamp ..........227...
-
Page 30: Preparing And Starting Your Work Session
Preparing and Starting your Work Session Preparation steps These preparation steps allow to run your mail more efficiently. It involves: • Sorting mail by type and task, to make processing faster (Sorting Mail by Type and Task on page 25). •... -
Page 31: How To Log In And Start A Work Session
Turning On Your System and Starting a Work Session Turning the system on automatically starts a work session on the Mailing System. At start-up, depending on specific settings: • The access to the system may be open. • You may have to enter a PIN code. •... - Page 32 Press to wake-up the system. The system may display one of the following screens: Home Screen [Standard]: Login Screen: Account Screen: If the following screen is displayed: - Home Screen [Standard]: If this screen is displayed, no other step is required to navigate through the system.
- Page 33 How to Find an Account Find your account quicker: type the account number or use a barcode scanner instead of using up and down arrows. To type letters using the keypad, press the corresponding key several times in a row like a cell phone. (Example: To have "N"...
-
Page 34: Choosing Stamp Type
Choosing Stamp Type Type of Process and Type of Stamp The table below indicates the type of stamp to choose, depending on the type of process you want to apply to each set of mail. The column on the right indicates, for each Type of stamp, the options available for each type of stamp. -
Page 35: How To Change The Current Type Of Stamp
Customizing Your Stamp When processing mail you will be required to select the 'Type of stamp' you need. For example, you can select “Standard” to print postage, or “Received” to print the date on incoming mail. For each 'Type of stamp' you select, the Mailing System displays all the specifications - and only those specifications - for the type of process you will use. - Page 36 Select Type and press [OK]. The Type of stamp screen is displayed. Select the type of stamp in the list and press [OK]. The Customize Stamp screen is updated and displays the menu items that allow you to modify the stamp options. Press to return to the home screen.
-
Page 37: Processing Examples
Processing Examples Applying Postage for [Standard] Mail Use the following settings to apply Postage for [Standard] Mail. How to Set Postage for [Standard] Mail The procedure below outlines steps in a recommended sequence to process your mail. • As mail requirements quickly vary, some settings may not be necessary, or their order may vary. - Page 38 Check or change the type of stamp, if you are not in [Standard] mode. Press and select: Customize Stamp. The type of stamp is indicated on line 2 of the screen. To change the type of stamp, select the Type line, press [OK] and then select [Standard] in the Type of stamp screen, and press [OK].
- Page 39 Additionally, you can configure stamp elements from the Customize stamp screen as follows: - One slogan: - One text: To select a Slogan, see How to Add (or Cancel) a Slogan on the Stamp on page 227. To select a Text, see How to Add (or Cancel) a Text on the Stamp on page 221.
-
Page 40: How To Process [Standard] Mail
How to Process [Standard] Mail In Manual weight entry mode Press Select Manual Weight Entry and press [OK]. The following screen is displayed. Enter the weight and press [OK]. The weight of the mail piece is displayed in the Weight area of the home screen and the postage amount is updated. - Page 41 In Standard weighing mode , you can print postage directly on mail pieces from the [Standard] home screen: Put the mail piece on the WP. The weight of the mail piece is displayed in the Weight area of the home screen and the postage amount is updated.
-
Page 42: How To Add Insurance
How to Add Insurance You can add insurance coverage for your mailpieces to protect against loss or damage. Insurance fees are based on the item’s declared value. There are limitations for insuring some products and certain items. Some types of mail classes may include insurance in the price of service. -
Page 43: Dimensional Weighing - Automatic
Enter the dollar amount to insure your shipment for. Press the [OK] button twice to save and exit to the home screen. The total cost is now displayed on the screen. - Not all mail classes may offer insurance. - Be sure to use the correct label for the service you want. Dimensional Weighing - Automatic USPS &... - Page 44 From the home screen (using the Priority mail class), place the item on the scale. The system will prompt for the destination ZIP Code. Using the numeric keys enter the zip code. The display will prompt you to select the basic shape of the item. Select Parcel for a rectangular-shaped parcel and Non-rectangular for all other items.
- Page 45 The display will prompt you to enter the dimensions of the item. Use the numeric keys to enter the dimensions. The prompts may vary depending upon what shape was selected. The display will display the entered dimensions. Select Next. The display will display the rate selection screen. Select Next.
-
Page 46: Dimensional Weighing - Manual Method
The display will show the postage, process as normal. Dimensional Weighing - Manual Method USPS & Dimensional Weighing When processing items using: • Priority Mail • Priority Mail Express • Parcel Select The USPS is adopting DIM weight pricing. Dimensional weight involves factoring the box size into pricing. - Page 47 • If you do decide to calculate dimensional weight manually, you first need to multiply the Length, Width, and Height of what you are sending to determine if it is over 1 cubic foot or 1,728 cubic inches. • If your package is less than 1,728 cubic inches. Your package will be priced off of the actual weight.
-
Page 48: How To Print Meter Tapes
Enter the weight (first lb then oz) and press [OK] to validate. The home screen displays the Manual Weight Entry icon ( ) and the weight entered. How to Print Meter Tapes The mailing system allows you to print adhesive meter tapes for mail pieces that are a too big to fit through the machine. - Page 49 Insert your double meter tape into the system, with the side to be printed facing upwards. Peel the meter tape of its backing and apply it to your mail piece.
-
Page 50: How To Process Certified Mail
How to Process Certified Mail The USPS offers several Confirmation Services to assure postal customers of the delivery of their parcels. To track parcels, the USPS must be able to uniquely identify each one with a label. • Not all mail classes may offer Certified. •... -
Page 51: How To Process E-Certified Mail
How to Process E-Certified Mail The USPS offers several Confirmation Services to assure postal customers of the delivery of their parcels. To track parcels, the USPS must be able to uniquely identify each one with a label. When tracking a parcel using electronic confirmation services, an eConfirmation label is used. - Page 52 Select e-Cert [7]. Enter the destination ZIP Code. Enter an e-Confirmation Sender ID. (Optional) Select [5] for Return Receipt. (Optional)
-
Page 53: How To Process A Large Flat Envelope
How to Process a Large Flat Envelope The process of mailing any item depends on a variety of factors such as weight, length, width and thickness. This example is for a ten inch by thirteen inch envelope ... weighing approximately two ounces and less than a half inch thick. Rates are accessed from the Rate Selection screen. -
Page 54: How To Process International Mail
How to Process International Mail The mailing system allows you to process items for international mailing by selecting the appropriate country when processing. For this example we will be processing an International First Class Letter to Great Britain. One common mistake is to look for England or United Kingdom instead of Great Britain when selecting the country. - Page 55 Select the destination country by entering the country number or by selecting the country from the list. To find the country, start keying in the name in the "Country" box. Select Letter [1] and press the button to select Service. Press the button to display Summary.
-
Page 56: How To Process A Postcard
How to Process a Postcard The mailing system allows you to process Postcards by selecting the appropriate mail class when processing. Place the postcard on the weighing platform and press Select Wizard [8]. Select First Class [1]. Select Domestic [1]. Select Postcard [2] and press the [OK] button select Service. - Page 57 Press the [Finish] button to exit to the home screen. The cost for mailing you postcard is now displayed and you are ready to print. How to Enter the Weight Manually Manual Weight Entry Manual Weighing allows you to enter the weight manually. You may have to enter the weight manually if a mail piece exceeds the weighing capacity of your Scale.
- Page 58 Either: Press Press and select the path: Job Settings Weighing Modes The Manual Weight Entry screen is displayed. Enter the weight (first lb then oz) and press [OK] to validate. If the weight exceeds a threshold, the rate will be chained to another rate.
-
Page 59: How To Set [Received] Mode Printing
How to Set [Received] Mode printing This section describes how to use the [Received] type of stamp, to: • Print the date on incoming mail. • Print 'Received' on incoming mail. You must begin with selecting the Type of stamp to gain access to the corresponding parameters and be able to run mail. - Page 60 Check or change the type of stamp, if you are not in [Received] mode. Press and select: Customize Stamp. The Type of stamp is indicated on line 2 of the screen. To change the type of stamp, select the Type line, press [OK] and then select [Received] from the Type of stamp screen and press [OK].
- Page 61 Insert the envelope into the mail path against the rear-guide wall, with the side to be printed facing upwards. The Mailing System applies the imprint and the mail piece is ejected.
-
Page 62: Mail Corrections
Mail Corrections How to Set [Amount Correction] Mode A postage amount that is too low can be corrected. The sequence is identical to Re-Dating Mail, except that the postage must be set to the desired additional amount. If you have a mail piece that has been stamped with a postage amount that is not the correct, you must correct the postage amount before mailing. - Page 63 Check or change the type of stamp, if you are not in [Amount Correction] mode. Press and select: Customize Stamp. To change the type of stamp, select Stamp type and then select [Amount Correction] in the Type of stamp screen. For more details, see How to Change the Current Type of Stamp on page 57.
- Page 64 Insert the mail piece into the mail path against the rear-guide wall, side to be printed facing upwards. The Mailing System applies the imprint and the mail piece is sent to the catch tray.
-
Page 65: How To Set [Redate] Mode Printing
How to Set [Redate] Mode printing If you have a mail piece that has been stamped with a date that is not the actual date you are mailing the piece, you must “Redate” the mail piece before mailing. Redating is done by applying a “0” value date correction indicia (stamp) to the envelope / item. •... - Page 66 Check or change the type of stamp, if you are not in [Redate] mode. Press and select: Customize stamp. The type of stamp is indicated on line 2 of the screen. To change the type of stamp, select the Type line, press [OK] and then select [Redate] in the Type of stamp screen and press [OK].
- Page 67 Insert the mail piece into the mail path against the rear-guide wall, side to be printed facing upwards. The Mailing System applies the imprint and the mail piece is sent to the catch tray.
-
Page 68: Settings
Settings Changing the Current Account To process a batch of mail pieces using another account (on account-enabled configurations), change the account as follows. How to Change Account You can change the account to charge to any account created. In this example, we will change from "Marketing (account 01)" to "Sales (account 02)". To change accounts: As a user: Press... - Page 69 How to Change Account with a Barcode Scanner • Before using a barcode scanner with the system, it must be setup and configured by a Quadient service technician. • The barcode sheet of accounts that you create should be Free 3 of 9.
- Page 70 If not already done, connect the barccode scanner to the mailing system via a USB port. The list of accounts barcodes that are available is typically placed near the mailing system.
- Page 71 Select the account you want to use and scan. The current account number is displayed. Selecting a Rate Selecting a rate allows the Mailing System to calculate the postage amount when the mail piece weight is available, either from a weighing device or, for big parcels, entered manually (see How to Enter the Weight Manually on page 71).
- Page 72 How to Select a Rate To select a rate: Either: Press Press and select the path: Rate selection The Rate selection screen is displayed. On this screen, you can: - Type a rate number 1 to 7 to select a rate or display rate options. - Press 8 to select the Rate wizard.
- Page 73 How to Use Rate Chaining The rate table can implement the rate chaining function. For a selected rate if the weight exceeds a threshold, the rate shall be chained to another rate. When the printing with the rate chaining is done, the Machine shall return to the selected rate.
- Page 74 Select parcel form and press OK to validate. The display will prompt you to enter the dimensions of the item. Use the numeric keys to enter the dimensions. The prompts may vary depending upon what shape was selected. The entered dimensions are displayed. Select Next to validate.
- Page 75 The Rate Selection screen is displayed. Select OK. The Machine displays the rate chaining on the homepage, process as normal. Choosing a Weighing Type Depending on the options that are installed in your Mailing System, several weighing methods are available. You can also enter the weight manually if you know it: see How to Enter the Weight Manually...
-
Page 76: How To Enter The Weight Manually
From the Manual Weighing Home Screen place an item on the scale. The mailing system switches to Standard Weighing. The default mail class is displayed. You remove the mail piece from the scale and run the mail piece through the mailing system. The display shows "Printing in progress". - Page 77 Either: Press Press and select the path: Job Settings Weighing Modes The Manual Weight Entry screen is displayed. Enter the weight (first lb then oz) and press [OK] to validate. If the weight exceeds a threshold, the rate will be chained to another rate.
- Page 78 Configuring the Stamp Depending on the current Type of stamp, you can modify the elements printed on mail pieces as follows: • Changing printed date • Adding a pre-loaded Slogan to the left of the stamp • Adding a custom text to the left of the stamp (you must first create it, see to Add a New Text Message on page 223) See also...
- Page 79 Select Date and press [OK]. The Date screen is displayed. On the Date screen, you can configure the printed date as follows: To cancel the date, select No date. To cancel the day in the date, select No day. To choose another day, select the corresponding item in the list. icon indicates the current selection.
- Page 80 Adding Text and/or Slogan to the Stamp You can add a text or a slogan to the stamp, as illustrated below. • Imprint with a text • Imprint with a slogan See also: • Managing Custom Text Messages on page 221 •...
- Page 81 From the home screen: Press and select: Customize Stamp Select Text. The Text list screen is displayed. Select the desired text in the list or select None for printing no text. The Text list screen is displayed. icon indicates the current selection. Press [OK] to validate your selection.
- Page 82 How to Add or Cancel a Slogan on the Stamp To add a slogan to the stamp or cancel the slogan: From the home screen: Press and select: Customize Stamp Select Ad slogan. The Slogan list screen is displayed. Select the slogan in the list or select None for printing no slogan. Press [OK] to validate your selection.
- Page 83 How to Use Imprint Test This function allows you printing an imprint which is not intended for delivery but for monitoring printout and being sure that you have a fine printer adjustment. This function is only for the standard stamp. To use imprint test: From the home screen: Press...
- Page 84 Press [OK] to test imprint. Imprint Test as below: A message is displayed: "Check your imprint." - If your setting are not correct, press "OK" to do again. - Else if your imprint quality is bad, press "Cleaning" to clean the cartridge. How to Use an Imprint Memory Imprint Memories allow you to create a preset memory that can include the rate, custom text, slogan and date mode for the Type of stamp you would like to use.
- Page 85 Either: Press Press and select the path: Imprint Memories The imprint memories list is displayed. Select an imprint memory in the list. Press [OK] to validate your selection. The imprint memory zone (Mem) of the home screen displays the current imprint memory number.
-
Page 86: Imprints
Imprints Imprint Configuration ...............83 How to Change the Date ..................83 How to Add (or Cancel) a Text on the Stamp ..........221 How to Add or Cancel a Slogan on the Stamp ..........227 Imprint Memories ..............205 How to Create an Imprint Memory ..............205 How to Edit / Modify an Imprint Memory ............206 How to Use an Imprint Memory ................208 How to Use Imprint Test ....................90... -
Page 88: Imprint Configuration
Imprint Configuration How to Change the Date You can set the Date to change the date at a fixed time. This is useful if you process mail after the last mail pickup for the day. This ensures that the proper date of mailing is printed for the next days mail pickup. - Page 89 Select Date and press [OK]. The Date screen is displayed. On the Date screen, you can configure the printed date as follows: To cancel the date, select No date. To cancel the day in the date, select No day. To choose another day, select the corresponding item in the list. icon indicates the current selection.
- Page 90 How to Add (or Cancel) a Text on the Stamp To add a text to the stamp, or to cancel the text: From the home screen: Press and select: Customize Stamp Select Text. The Text list screen is displayed. Select the desired text in the list or select None for printing no text. The Text list screen is displayed.
- Page 91 How to Add or Cancel a Slogan on the Stamp To add a slogan to the stamp or cancel the slogan: From the home screen: Press and select: Customize Stamp Select Ad slogan. The Slogan list screen is displayed. Select the slogan in the list or select None for printing no slogan. Press [OK] to validate your selection.
- Page 92 Imprint Memories The Imprint Memories are presets for your stamp types. You can quickly recall a saved setting to simplify operation and save time (see Using Imprint Memories on page 208). You can create, edit/modify or delete an Imprint Memory. Each Imprint Memory is identified by a name and a number.
- Page 93 Enter the name of the new imprint memory, then press [OK]. Enter the preferences, press [OK] to validate and display the next list of parameters, if any. Repeat the previous step until the system displays the name of the new imprint memory in the list.
- Page 94 Press to exit. How to Use an Imprint Memory Imprint Memories allow you to create a preset memory that can include the rate, custom text, slogan and date mode for the Type of stamp you would like to use. In account-activated configurations, Imprint Memories allow you assign postage costs to pre-selected accounts.
-
Page 95: How To Use Imprint Test
How to Use Imprint Test This function allows you printing an imprint which is not intended for delivery but for monitoring printout and being sure that you have a fine printer adjustment. This function is only for the standard stamp. To use imprint test: From the home screen: Press... - Page 96 Press [OK] to test imprint. Imprint Test as below: A message is displayed: "Check your imprint." - If your setting are not correct, press "OK" to do again. - Else if your imprint quality is bad, press "Cleaning" to clean the cartridge.
-
Page 98: Money Operations
Money Operations This section describes how you can load and manage money in your Mailing System to allow postage operations. Managing Funds ................95 How to Check the PSD (Meter) Funds ..............95 How to Add Funds to the PSD (Meter) ..............96 Unlocking the PSD (Postal Inspection) ........98 How to Unlock the PSD ....................98 Setting Warnings ..............190... -
Page 100: Managing Funds
Managing Funds The Postal Security Device (PSD) — Postage Meter The PSD, located in the base, handles the funds (or money) in your Mailing System. The PSD performs all necessary operations to comply with the postal standards. To do so, regular connections to the Postal Services are necessary. Check that your Mailing System is connected to a network (see Connections on page 18) and that the connection is properly... -
Page 101: How To Add Funds To The Psd (Meter)
Select the path: Funds Used / Funds Available. The screen displays your postage funds as shown below. (Ascending = funds used. Descending = funds available.) Adding Funds You can add funds to your Mailing System at any time by complete the steps listed below. - Page 102 Select Add Funds. The Add Funds screen is displayed. If the system asks for a PIN code, enter the code using the keypad and press [OK]. Enter the amount of postage to add using the keypad (use C to clear a digit). Press [OK] to start the connection to the Postal Server.
-
Page 103: Unlocking The Psd (Postal Inspection)
Unlocking the PSD (Postal Inspection) A LAN connection must be plugged into the mailing system to perform a Postal Inspection. How to Unlock the PSD • The USPS requires your postage meter (PSD) to connect daily if postage is metered. •... - Page 104 Select Postal Inspection. The system asks for confirmation. Press [OK] to connect to the Postal Server. A message to confirm audit transaction request is displayed. Press [OK] to validate. If the audit is successful, the system displays a successful message. If the audit fails, the system displays a failure message explaining the cause of the error.
- Page 105 Setting Warnings How to Set the High-Value Warning Amount A High Value Warning message warns the user the postage amount that they have entered is higher than a preset value. This high-amount warning prevents the user from accidentally printing high postage amounts. Example: $4.80 instead of $0.48. To set a high-value warning amount: As supervisor (see How to Log in as Supervisor...
- Page 106 How to Set the Low-Funds Threshold A Low Funds Threshold warning warns the user that the funds remaining in the PSD (Meter) are getting low. More funds should be loaded. The Low Funds Value Warning can be set to any dollar amount.
-
Page 107: Funding Pin Code
Funding PIN Code You can create a funding PIN code to control access to only those who are authorized to add postage. How to Set/Cancel a Funding PIN Code A Funds PIN Code can be set to control which users are able to load funds in the mailing system. -
Page 108: Funds Reports
Funds Reports Adding Postage Report This report displays the last postage refill operations performed on the machine in a selected period. • Die Number (on printed report only) • Download date & time (Default period: previous 6 months) • Funding amount •... - Page 109 Funds Summary Report This report displays the information on funds usage since the installation of the system. The content is limited to the history available in the PSD. • Die Number. • Current Date and Time on printed report only. Output Options •...
-
Page 110: Accounts And Access Control
Accounts and Access Control Postage Tracking and Access Control .......107 Access Control .................108 How to Display and Change to 'Account with pin code' Mode ....114 How to Display and Change to 'No account with access control' Mode ..........................112 How to Change a Shared PIN Code ..............110 Account Modes .................111 How to Display and Change to 'No account' Mode ........111 How to Display and Change to 'No account with access control'... -
Page 112: Postage Tracking And Access Control
Postage Tracking and Access Control Postage Tracking and Access Control Your Mailing System allows you to track postage by account/department and to add security to prevent unauthorized use of a variety of functions. • Track postage expenditures: the Accounts function •... -
Page 113: Access Control
Access Control The Access Control Function You can set the Mailing System to ask for a PIN code when a user wakes the machine up to start a session. This allows you to protect the system and restrict the usage of your funds. The different access control policies you can implement are: •... - Page 114 Select 'Account with pin code'. Press [OK] to confirm. If required, enter the PIN code and press [OK]. How to Display and Change to 'No account with access control' Mode No account with access control • Postage usage is not tracked by account. •...
-
Page 115: How To Change A Shared Pin Code
Select 'No account with access control'. Press [OK] to confirm. If required, enter the PIN code and press [OK]. How to Change a Shared PIN Code If you want to prevent unauthorized use of the Mailing System and do not want to use accounts, use the “No Account with Access Control”... -
Page 116: Account Modes
Account Modes The Accounts Function Activating the Accounts Function in the Mailing System is a convenient way to monitor, track and control postage expenses by, for example, associating accounts to departments in your organization (Marketing, Sales, etc.) or to different companies, if the Mailing System is shared. -
Page 117: How To Display And Change To 'No Account With Access Control' Mode
Select 'No Account'. Press [OK] to confirm. If required, enter the PIN code and press [OK]. How to Display and Change to 'No account with access control' Mode No account with access control • Postage usage is not tracked by account. •... - Page 118 Select 'No account with access control'. Press [OK] to confirm. If required, enter the PIN code and press [OK]. Setting up 'Account' In 'Account' Mode, users must select an account before they can process their mail. The user can change accounts at any time during mail processing. If only one account is available, the Mailing System automatically selects it at start up.
-
Page 119: How To Display And Change To 'Account With Pin Code' Mode
'Account' Mode Management Menu In Account Mode, the menu allows you to manage your accounts. See also • To add, modify or delete accounts, see Managing Accounts on page 119. How to Display and Change to 'Account with pin code' Mode Account with pin code •... - Page 120 Select 'Account with pin code'. Press [OK] to confirm. If required, enter the PIN code and press [OK]. How to Display and Change the 'Account Mode' To display and change the 'Account mode': As supervisor (see How to Log in as Supervisor on page 180): From the main menu, select the path: Account Management...
-
Page 121: Creating Accounts
Creating Accounts Account summary • The number of accounts you can create is set to 10 if required. • To upgrade your system, please contact your Customer Service. • Account names must be unique within the system. Account Format Description Item Number 30 Alphanumeric... - Page 122 How to Create an Account To create an account, you have to activate the mode “Accounts”. See How to Display and Change the 'Account Mode' on page 119. From Account Mode Management screen, select Manage Account. The Manage Account screen is displayed. Select Account List.
- Page 123 Press [OK] to validate. The Account creation summary screen displayed. Press [OK] to confirm the creation of the account.
-
Page 124: Managing Accounts
Managing Accounts How to Display and Change the 'Account Mode' To display and change the 'Account mode': As supervisor (see How to Log in as Supervisor on page 180): From the main menu, select the path: Account Management Account Mode Selection The Account Mode Selection screen is displayed with the current 'Account Mode' shown. - Page 125 Select Add Account. Enter Number of account and press [OK]. Enter Name of account and press [OK]. Choose the Status for the account and press [OK]. If you are in 'Account with pin code' mode, set a PIN Code for the account. Press [OK] to validate.
-
Page 126: How To View / Edit Account Information
How to View / Edit Account Information To view or edit an account: As supervisor (see How to Log in as Supervisor on page 180): From the main menu select the path: Account management Manage account Account list The Account list screen is displayed. Select the account (or type the account number) and press [OK]. -
Page 127: How To Activate / Deactivate An Account
Press [OK] to validate. The Account modification summary screen is displayed. Press [OK] to accept the changes. How to Activate / Deactivate an Account This function allows you to create accounts in advance and prevent them being used before your account structure is complete. To activate or deactivate an account: As supervisor (see How to Log in as Supervisor... -
Page 128: How To Delete An Account
Change Status parameter if necessary and press [OK]. Accept the changes by pressing [OK] (on the Account modification summary). If an account is deactivated it is no longer visible to the operator. How to Delete an Account To delete an Account: As supervisor (see How to Log in as Supervisor on page 180):... - Page 129 On the Account management screen, select Delete instead of Edit/Modify. A confirmation of account deletion is displayed. Press [OK] to delete the account. An account number cannot be modified. If you want to modify the account number, first delete the account and then create a new account with a new account number.
-
Page 130: Account Reports
Account Reports How to Generate the Account Report • This report displays the list of accounts in the mailing system. • To generate the report the Account Mode has to be 'Account' or 'Account with pin code'. • Report output is printer or USB memory key. To generate the Account Report: Make sure the current account mode is 'Account' or 'Account with pin code'. - Page 131 Select an Output and then press [OK]. Multi Account Report This report displays postal expenditures for all the accounts over a selected time period, sorted by ascending account number. The report displays all the accounts in 'active' status, and accounts 'inactive' or 'deleted' with a postage value.
- Page 132 Content Single Account Report This report displays postal expenditures for one account over a selected time period. You can select any account from the list. • The current account mode has to be 'Account' or 'Account with pin code'. • You have to select an account in the list of accounts, then the Begin date and the End date of the report.
-
Page 134: Change Current Account
Change Current Account How to Change Account You can change the account to charge to any account created. In this example, we will change from "Marketing (account 01)" to "Sales (account 02)". To change accounts: As a user: Press and select the path: Change Account The list of accounts that are available is displayed. -
Page 135: How To Change Account With A Barcode Scanner
How to Change Account with a Barcode Scanner • Before using a barcode scanner with the system, it must be setup and configured by a Quadient service technician. • The barcode sheet of accounts that you create should be Free 3 of 9. - Page 136 If not already done, connect the barccode scanner to the mailing system via a USB port. The list of accounts barcodes that are available is typically placed near the mailing system.
- Page 137 Select the account you want to use and scan. The current account number is displayed.
-
Page 138: Rates
Rates Selecting a Rate ...............135 How to Select a Rate ....................135 Managing Postal Rates ............233 How to Check your Rate Updates ................233 How to Download New Postal Rates ..............234 How to Use Rate Chaining ..................138... -
Page 140: Selecting A Rate
Selecting a Rate How to Select a Rate To select a rate: Either: Press Press and select the path: Rate selection The Rate selection screen is displayed. On this screen, you can: - Type a rate number 1 to 7 to select a rate or display rate options. - Press 8 to select the Rate wizard. - Page 141 Managing Postal Rates Your Mailing System uses rate tables to calculate postage amounts. You can: • Display the list of rate tables and see which table the system is currently using • Download new postal rate tables New rate tables are automatically downloaded into your Mailing System by connecting the Mailing System to the Online Services server as a user.
- Page 142 How to Download New Postal Rates To download new rates: As supervisor (see How to Log in as Supervisor on page 180): From the main menu, select the path: Options and Updates Rate management The list of rate tables is displayed in the Rate management screen. The tables are identified by the effective date of the rate.
-
Page 143: How To Use Rate Chaining
How to Use Rate Chaining The rate table can implement the rate chaining function. For a selected rate if the weight exceeds a threshold, the rate shall be chained to another rate. When the printing with the rate chaining is done, the Machine shall return to the selected rate. - Page 144 Select parcel form and press OK to validate. The display will prompt you to enter the dimensions of the item. Use the numeric keys to enter the dimensions. The prompts may vary depending upon what shape was selected. The entered dimensions are displayed. Select Next to validate.
- Page 145 The Rate Selection screen is displayed. Select OK. The Machine displays the rate chaining on the homepage, process as normal.
-
Page 146: Reports
Reports This section explains how you can access and print reports for your Mailing System. Generating a Report ...............143 How to Generate a Report ..................143 Available Reports ..............145 How to Generate the Account Report ..............145... -
Page 148: Generating A Report
Generating a Report To generate a report, select the desired report, and choose how you want to display or record the report: • On screen • On an external printer (if any) • On a label • On a USB memory key How to Generate a Report To generate a Report (as a User): As a user:... - Page 149 Depending on the report type, the system may ask for preferences such as: - Period of time targeted (begin date, end date) - Desired account, etc. Select or type the required parameters and press [OK]. The Output selection screen is displayed. Use the [C] key to clear displayed parameter data (from right to left) and then enter the new parameter data you want.
-
Page 150: Available Reports
Available Reports How to Generate the Account Report • This report displays the list of accounts in the mailing system. • To generate the report the Account Mode has to be 'Account' or 'Account with pin code'. • Report output is printer or USB memory key. To generate the Account Report: Make sure the current account mode is 'Account' or 'Account with pin code'. - Page 151 Select an Output and then press [OK]. Adding Postage Report This report displays the last postage refill operations performed on the machine in a selected period. • Die Number (on printed report only) • Download date & time (Default period: previous 6 months) •...
- Page 152 Daily Usage Report This report displays, for each day of the selected period, usage data such as total items and total postage value. • Die Number (on printed report only). • Day number. • Number of items purchased. • Total postage value for this day. Output Options •...
- Page 153 Output Options • On label • Screen • USB printer Content IP Configuration Report The IP Configuration Report displays IP address information. • To generate this report the mailing system must be connected to the network with a LAN. • The report prints to a label. Output Options The IP Configuration Report outputs is: •...
- Page 154 Content Machine Configuration Report This report displays all machine settings. Output Options • USB printer (if installed) • USB memory key...
- Page 155 Content...
- Page 156 Monthly Usage Report This report displays, in a selected period and per month, the total items and total postage used. • You have to specify the Begin date and an the End date of the report. Use the selection of month and year. Default period is previous 12 months, ending current month.
- Page 157 Multi Account Report This report displays postal expenditures for all the accounts over a selected time period, sorted by ascending account number. The report displays all the accounts in 'active' status, and accounts 'inactive' or 'deleted' with a postage value. •...
- Page 158 Proxy Configuration Report The Proxy Configuration Report displays Proxy address information. Output Options The Proxy Configuration report output is: • Label Content Single Account Report This report displays postal expenditures for one account over a selected time period. You can select any account from the list. •...
- Page 159 Output Options • Screen Content Base Events Report This report displays the list of errors encountered on the mailing system and related to the base. Output Options • Screen • USB Printer • USB Key Content...
- Page 160 Meter Events Report This report displays the list of errors encountered on the mailing system and related to the meter. Output Options • Screen • USB Printer • USB Key Content Server Connection History Report Provides a list of the Server Connection History where failed and successful connections appears.
- Page 161 Status Management Report This report displays the information of the current status of the Host. Output Options • Screen Content...
-
Page 162: Online Services
Online Services Online Services for your Mailing System allow you to very easily achieve tasks such as system software or optional features, and using services such as mail follow-up online. Online Services Overview ............159 OLS Call Types .................160 How to Call Online Services Manually ..............160 How to Upload Report Data to the Online Services Server ......162 Synchronize Call ......................163 How to Save Customer Data .................164... -
Page 164: Online Services Overview
Online Services Overview The Online Services simplify the use and the update of your Mailing System. Online Services features and capabilities include: • Online reporting: the usage of your machine is available from your personal, secure web account, simplifying tracking and reporting of your postage expenses. •... -
Page 165: Ols Call Types
OLS Call Types Automatic calls To fully benefit from the convenience and power of Online Services, your Mailing System should permanently be connected to a network connection so that it can link to the Online Server automatically whenever required. For the usage of some services, some automatic calls are scheduled to upload corresponding data. - Page 166 As a user: Press and select the path: Online Services Generic Call The Mailing System connects to the server and downloads the available elements (rates, slogans, etc.). Check your mailbox for messages: see Using the Mailbox on page 216. To trigger a generic call (as Supervisor): As supervisor (see How to Log in as Supervisor on page 180):...
-
Page 167: How To Upload Report Data To The Online Services Server
How to Upload Report Data to the Online Services Server An Upload Statistics call sends report data to the Online Services Server. To upload report data: As a user Press and select the path: Online Services Upload Statistics As supervisor (see How to Log in as Supervisor on page 180): From the main menu, select the path:... -
Page 168: Synchronize Call
Synchronize Call This type of call should only be done on a request from your Customer Service. This call updates the automatic call schedule of the machine and the features/options. To trigger a Synchronize call (as a User): From the home screen: Press and select the path: Online Services... -
Page 169: How To Save Customer Data
How to Save Customer Data The Save Customer Data allows you to backup customer data (accounts, imprint memories, and so on) to the Online Services Server. It should only be performed on a request from by Customer Service. To save customer data: As supervisor (see How to Log in as Supervisor on page 180):... -
Page 170: Ols Connection Tests
OLS Connection Tests Ping Server Diagnostic Test Sends a message to a server (if connected) to check the line. To ping the server (as a User): From the home screen: Press and select the path: Online Services Select Ping Server from the list displayed on the screen. After a successful connection the display shows: Press [OK]. -
Page 171: Test Server Diagnostic Test
Select Ping Server from the list displayed on the screen. After a successful connection the display shows: Press [OK]. Test Server Diagnostic Test Sends a message to a server to test the line. To test the server (as a User): From the home screen: Press and select the path: Online Services... - Page 172 Or, as supervisor (see How to Log in as Supervisor on page 180): From the main menu, select the path: Online Services Select Test Server from the list displayed on the screen. After a successful connection the display shows: Press [OK].
-
Page 173: System Online Services
System Online Services Ink Management Service The Ink Management service sends an electronic message to the Online Services server when the mailing machine’s ink supply is running low. An e-mail message then informs you of that condition so that the ink cartridge can be replaced in time. -
Page 174: Econfirmation Services
eConfirmation Services Service Overview With E-Confirmation Services, your mailing machine can capture and process USPS Delivery Confirmation, Signature Confirmation, and Certified Mail tracking label numbers. After upload to the Online Server, simply log on your Online Services Web account to monitor all of your USPS Confirmation Service delivery tracking records at a glance, or in detail, in one convenient location. - Page 175 eSignature Confirmation You receive an email with the date and time of the delivery and the name of the person who signed for the parcel. You can obtain a copy of the proof-of-delivery signature via FAX or email from the USPS. The dates and times of any unsuccessful deliveries are also noted.
-
Page 176: The Process In Your Mailroom
How e-Confirmation Service Works You can track mail delivery through the Online Services server because the server is in constant communication with the USPS. The diagram below shows how tracking information flows from your mailroom, through the Online Services server and on to the USPS, and then back to you. -
Page 177: How To Process Econfirmation Items Using The Wp
Processing e-Confirmation Items Using your WeighingPlatform If you plan to use the eConfirmation service frequently, the use of a handheld scanner to scan the tracking labels is recommended. The handheld scanner option is compatible with the use of a weighing platform. For information about the optional scanner, please contact your Customer Service representative. -
Page 178: How To Display Econf Record List And Details
Leave the machine ON and connected at night to automatically upload the record to the USPS. You can also upload records manually (see How to Upload Report Data to the Online Services Server on page 162). How to Display eConf Record List and Details List of E-Confirmation records is accessible in the machine. -
Page 179: How To Modify An Econf Record Status
How to Modify an eConf Record Status You can modify an e-Confirmation in case you decide not to send an item processed with an eConfirmation Service. In this case you have to edit the corresponding record and change its status. Record status: •... - Page 180 Press [OK].
-
Page 182: Configuring Your Mailing System
Configuring your Mailing System This section describes the general settings you can apply to your Mailing System. 10.1 Settings Overview ..............179 10.2 Logging in / out as the Supervisor ........180 How to Log in as Supervisor ..................180 How to Exit the Supervisor Mode .................181 10.3 Display Settings ..............182 How to Adjust the Display Contrast ..............182... - Page 183 How to Delete an Imprint Memory ...............207 How to Use an Imprint Memory ................208 10.9 Connection Settings .............209 How to Set the Postal/Online Services Connection ........209 How to Set LAN Parameters ..................210 10.10 Date and Time ...............211 How to Check the Machine Time and Date ............211 How to Set the Automatic Date Advance Time ..........211...
-
Page 184: Settings Overview
10.1 Settings Overview This section describes two types of settings that are available on your system: • User settings, that only last as long as the user who applies them is logged in. • Supervisor settings, sets the default or permanent settings of your Mailing System. Other user settings are described in the corresponding sections: Processing Mail on page 23,... -
Page 185: Logging In / Out As The Supervisor
10.2 Logging in / out as the Supervisor User Settings The user settings described in the sections below are: • Setting the display language. • Adjusting the screen contrast. • Enabling/disabling key beeps and warning/error beeps. How to Log in as Supervisor You need to be logged in as supervisor to configure the Mailing System and perform functions such as managing accounts and access rights, generating certain reports, etc. -
Page 186: How To Exit The Supervisor Mode
Type the supervisor PIN code and press [OK]. The supervisor Main menu is displayed. You can log in as supervisor by directly typing the supervisor PIN code, in place of a regular user PIN code, on Mailing Systems that ask for a PIN code at start-up. How to Exit the Supervisor Mode Follow the step below to exit the supervisor mode. -
Page 187: Display Settings
10.3 Display Settings You can adjust the contrast of the display for bright or dark working environments. How to Adjust the Display Contrast To adjust the display contrast: As a user: Press and select the path: User Preferences Contrast Use the to increase or decrease the contrast. - Page 188 As supervisor (see How to Log in as Supervisor on page 180): From the main menu, select the path: Default User Settings Default User Preferences Contrast Use the button to increase or decrease the contrast. The screen updates to the new setting. Press [OK] to validate.
-
Page 189: How To Change The Display Language
How to Change the Display Language To change the current display language: As a user: Press and select the path: User Preferences Language Select the language you want to use. Press [OK] to validate. This user setting lasts as long as you are logged in. The standby mode will delete this setting. - Page 190 Select the default language. Press [OK] to validate. This setting will not be affected by the standby mode.
-
Page 191: System Time-Outs And Settings
10.4 System Time-outs and Settings System settings include: • Sleep timeout • Soft Off timeout How to Change the 'Sleep timeout' Sleep Timeout: Period of inactivity after which the system automatically switches to 'Sleep' mode (see Power Management on page 20). To change the 'Sleep timeout': As a user: Press... -
Page 192: How To Change The 'Soft Off Timeout
As supervisor (see How to Log in as Supervisor on page 180): From the main menu, select the path: Default User Settings Timeout Settings Sleep Timeout The Sleep Timeout screen is displayed. Enter the value of the 'Sleep timeout'. Use the key [C] to clear the old setting and then enter a new value. - Page 193 As a user: Press and select the path: Job Settings Timeout Settings Soft Off Timeout The Soft Off Timeout screen is displayed. Enter the new value of the 'Soft off time-out'. Use the [C] key to clear old settings then enter a new value. Press [OK] to validate.
- Page 194 Press [OK] to validate.
-
Page 195: Setting Warnings
10.5 Setting Warnings How to Set the High-Value Warning Amount A High Value Warning message warns the user the postage amount that they have entered is higher than a preset value. This high-amount warning prevents the user from accidentally printing high postage amounts. Example: $4.80 instead of $0.48. To set a high-value warning amount: As supervisor (see How to Log in as Supervisor... -
Page 196: How To Set The Low-Funds Threshold
How to Set the Low-Funds Threshold A Low Funds Threshold warning warns the user that the funds remaining in the PSD (Meter) are getting low. More funds should be loaded. The Low Funds Value Warning can be set to any dollar amount. -
Page 197: Weighing Settings
10.6 Weighing Settings The weighing settings include: • Setting a default weighing type used for mailing • Activating / De-activating the WP Automatic Selection functionality • Zeroing the weighing platform • Setting the GEO code that corresponds to the geographical location of the Mailing System •... -
Page 198: How To Activate/De-Active The Automatic Weight Detection On The Wp
How to Activate/De-active the Automatic Weight Detection on the WP This functionality shall be implemented for improving the user productivity and the ease of use of the mailing system. The user is able to change the weighing type to the WP standard weighing by putting a mail piece onto the WP. -
Page 199: How To Zero The Weighing Platform
Log in as the Supervisor (see How to Log in as Supervisor on page 180), then: From the main menu, select the path: Default User Settings System Settings Auto Weight Detection Select No Auto Weight Detection to de-activate the function. Press [OK] to validate. - Page 200 From the home screen: Press and select the path: Job Settings Zero Weighing Platform To zero the Weighing Platform quickly, press and hold the button for approximately two seconds. The display prompts:. Remove all items from the Weighing Platform. Press [OK].
-
Page 201: How To Change The Geo Code
Press [OK]. GEO Code The Weighing Platform provide mail piece weights that have to be corrected according to the geographical location of the mailing system, as weights can change with the altitude and latitude. The correcting Geodesic Code (GEO Code) is done automatically with Online Services or manually. - Page 202 See the map and table on the next pages to get the 5 digit GEO code from your location altitude and latitude, and enter the 5 digit using the keypad. Press [OK] to validate.
- Page 203 Geodesic map...
- Page 204 Geodesic codes...
-
Page 205: How To Activate / De-Activate Epostage Mode
ePostage When the ePostage Mode is activated, the weight value is communicated by the Mailing System to NeoShip. The function ePostage Mode can be activated/de-activated by the supervisor. How to activate / de-activate ePostage Mode To activate/de-activate 'ePostage Mode': As supervisor (see How to Log in as Supervisor on page 180): From the main menu, select the path:... -
Page 206: How To Set The Epostage Connection
How to set the ePostage connection To set the ePostage connection: As supervisor (see How to Log in as Supervisor on page 180): From the main menu, select the path: Maintenance Network Advanced Settings ePostage Link The ePostage Advanced Settings screen is displayed. Enter PC IP address. -
Page 207: Postage Imprint Default Settings
10.7 Postage Imprint Default Settings The settings of the postage imprint 'by default' include: • Stamp default settings: sets the default rate, text and slogan for mailing operations. • Automatic Date Advance: enables early date change to continue printing postage with the new date after post office closing hours. -
Page 208: How To Change The Default Text
Press [OK] to validate. See also • Managing Postal Rates on page 233. How to Change the Default Text To change the default text: As supervisor (see How to Log in as Supervisor on page 180): From the main menu, select the path: Default User Settings Default Imprint Parameters... -
Page 209: How To Change The Default Slogan
How to Change the Default Slogan To change the default Slogan: As supervisor (see How to Log in as Supervisor on page 180): From the main menu, select the path: Default User Settings Default Imprint Parameters Default Slogan Selection Select the default slogan from the list, or None for no slogan. Press [OK] to validate. -
Page 210: Imprint Memories
10.8 Imprint Memories The Imprint Memories are presets for your stamp types. You can quickly recall a saved setting to simplify operation and save time (see Using Imprint Memories on page 208). You can create, edit/modify or delete an Imprint Memory. Each Imprint Memory is identified by a name and a number. -
Page 211: How To Edit / Modify An Imprint Memory
Enter the name of the new imprint memory, then press [OK]. Enter the preferences, press [OK] to validate and display the next list of parameters, if any. Repeat the previous step until the system displays the name of the new imprint memory in the list. -
Page 212: How To Delete An Imprint Memory
Press to exit. How to Delete an Imprint Memory To delete an imprint memory: As supervisor (see How to Log in as Supervisor on page 180): From the main menu, select the path: Predefined Imprint Management Select an imprint memory from the list of saved imprint memories. Press [OK] to validate. -
Page 213: How To Use An Imprint Memory
How to Use an Imprint Memory Imprint Memories allow you to create a preset memory that can include the rate, custom text, slogan and date mode for the Type of stamp you would like to use. In account-activated configurations, Imprint Memories allow you assign postage costs to pre-selected accounts. -
Page 214: Connection Settings
10.9 Connection Settings How to Set the Postal/Online Services Connection To add funds or access Online Services, the Mailing System can access the Internet through a high speed LAN (Local Area Network). LAN settings can only be performed if the machine was actually connected to the LAN at power-up. -
Page 215: How To Set Lan Parameters
Select Internet (LAN) and press [OK]. See also • To physically connect the LAN to the base, see Connection Diagram on page 18. How to Set LAN Parameters LAN settings can only be performed if the machine was actually connected to the LAN at power-up. -
Page 216: Date And Time
10.10 Date and Time How to Check the Machine Time and Date To check the current time and date: As supervisor (see How to Log in as Supervisor on page 180): From the main menu, select the path: System Settings Date and Time Daylight Savings Time Transitions Your Mailing System normally auto-adjusts to Daylight Savings Time. - Page 217 As supervisor (see How to Log in as Supervisor on page 180): From the main menu, select the path: Default User Settings Default Imprint Parameters Automatic Date Advance The Auto date advance screen is displayed. Press [OK]. Select ON and press [OK] to enable the Auto Date Advance function. Select Set Hours, enter the Automatic Date Advance time (00:00 hours is not allowed) and press [OK].
-
Page 218: Options And Updates
Options and Updates This section describes how you can upgrade your system by adding optional functions and elements of stamp such as latest postal rates, additional texts or slogans. 11.1 Overview .................215 How to Access the Options and Updates Menu ..........215 11.2 Using the Mailbox ..............216 How to Read Messages ...................216... -
Page 220: Overview
11.1 Overview You can update your Mailing System by: • Adding new options, such as increasing the maximum number of accounts • Adding enhanced online postal expense management or USPS E-services. • Update postal Rates • Creating additional Texts for the stamp •... -
Page 221: Using The Mailbox
11.2 Using the Mailbox The mailbox allows you to receive messages from the Mailing System or from customer service via the server. On the home screen, an icon indicates that the mailbox contains unread messages. The Mailbox list screen indicates unread messages and allows you to delete read messages. -
Page 222: How To Delete Messages
As supervisor (see How to Log in as Supervisor on page 180): From the main menu, select the path: Mailbox The Mailbox screen is displayed. Select the message to read and press [OK]. Select Delete message to erase the message after you have read it. How to Delete Messages The mailbox allows you to receive messages from the mailing system or from customer service via the server. - Page 223 Select Delete to erase the message. To read Messages (as Supervisor): As supervisor (see How to Log in as Supervisor on page 180): From the main menu, select the path: Mailbox The Mailbox screen is displayed. Select the message to be deleted and press [OK]. Select Delete message to erase the message.
-
Page 224: Managing Options
11.3 Managing Options How to Display the Options The option list includes the options actually loaded into your Mailing System and indicates the options that are activated. You can also display details for each option. For more information about the options you can add to your Mailing System, please contact customer service. -
Page 225: How To Load New Options
How to Load New Options You can activate new options by connecting the Mailing System to Online Services server. New available options are automatically downloaded into your Mailing System and activated. Contact customer service to have new options ready for downloading on the Online Services server. -
Page 226: Managing Text Messages
11.4 Managing Text Messages How to Add (or Cancel) a Text on the Stamp To add a text to the stamp, or to cancel the text:... - Page 227 From the home screen: Press and select: Customize Stamp Select Text. The Text list screen is displayed. Select the desired text in the list or select None for printing no text. The Text list screen is displayed. icon indicates the current selection. Press [OK] to validate your selection.
-
Page 228: How To Display The List Of Text Messages
How to Display the List of Text Messages The list of text displays the messages you have created and indicates with a check mark the default text, if any. To display the list of text: As supervisor (see How to Log in as Supervisor on page 180): From the main menu, select the path: Options and Updates Text Settings... - Page 229 As supervisor (see How to Log in as Supervisor on page 180): From the main menu, select the path: Options and Updates Text Settings The list of text is displayed in the Text management screen. Select Create new text. Enter your text (max. 4 lines, 18 characters per line). For more information on how you can type different characters, Control Panel Features on page 15.
-
Page 230: How To Modify A Text Message
How to Modify a Text Message To modify a text: As supervisor (see How to Log in as Supervisor on page 180): From the main menu, select the path: Options and Updates Text Settings The list of text is displayed in the Text management screen. Select a message and press [OK]. -
Page 231: How To Delete A Text Message
How to Delete a Text Message To delete text: As supervisor (see How to Log in as Supervisor on page 180): From the main menu, select the path: Options and Updates Text Settings The list of text is displayed in the Text management screen. Select a message and press [OK]. -
Page 232: Managing Slogans
11.5 Managing Slogans The Slogans are graphical images you can add on the left hand side of the stamp printed on mail pieces. You can: • Display the list of slogans Rename or delete slogans from the list • Download new slogans. The available slogans are automatically downloaded into your Mailing System by connecting the Mailing System to the Online Services server. - Page 233 From the home screen: Press and select: Customize Stamp Select Ad slogan. The Slogan list screen is displayed. Select the slogan in the list or select None for printing no slogan. Press [OK] to validate your selection. The Customize Stamp screen is displayed with updated parameters (home screen: press See also •...
-
Page 234: How To Display The List Of Slogans
How to Display the List of Slogans The list of slogans includes the slogans that are installed in the Mailing System and indicates with a check mark the active slogan. To display the list of slogans: As supervisor (see How to Log in as Supervisor on page 180): From the main menu, select the path: Option and Updates... - Page 235 As supervisor (see How to Log in as Supervisor on page 180): From the main menu, select the path: Option and Updates Update Ad Slogans The list of Slogans is displayed in the Slogan management screen. Select the slogan and press [OK]. Select Edit.
-
Page 236: How To Delete A Slogan
How to Delete a Slogan To delete a slogan: As supervisor (see How to Log in as Supervisor on page 180): From the main menu, select the path: Option and Updates Update Ad Slogans The list of Slogans is displayed in the Slogan management screen. Select the slogan and press [OK]. -
Page 237: How To Download New Slogans
How to Download New Slogans To download new slogans: From the home screen: From the main menu, select the path: Option and Updates Update Ad Slogans The list of Slogans is displayed in the Slogan management screen. Select Check for updates and press [OK]. The Mailing System connects to the Online Services server and downloads available slogans. -
Page 238: Managing Postal Rates
11.6 Managing Postal Rates Your Mailing System uses rate tables to calculate postage amounts. You can: • Display the list of rate tables and see which table the system is currently using • Download new postal rate tables New rate tables are automatically downloaded into your Mailing System by connecting the Mailing System to the Online Services server as a user. -
Page 239: How To Download New Postal Rates
How to Download New Postal Rates To download new rates: As supervisor (see How to Log in as Supervisor on page 180): From the main menu, select the path: Options and Updates Rate management The list of rate tables is displayed in the Rate management screen. The tables are identified by the effective date of the rate. -
Page 240: Maintenance
Maintenance 12.1 Ink Cartridge ................237 How to Change the Ink Cartridge ................237 How to Display Ink Level and Cartridge Data ..........240 How to Clean the Print Heads Automatically ..........253 How to Clean the Printing Head Manually ............243 How to Align the Print Heads ................244 12.2 Service Processes ..............246 How to Run the Registration Update ..............246... -
Page 242: Ink Cartridge
12.1 Ink Cartridge About the Ink Cartridge The ink cartridge for printing is located in the Mailing System and contains fluorescent red ink that has been tested and approved by the postal service. The ink cartridge uses ink jet technology. It requires the print head nozzles to be cleaned regularly to provide a good printing quality. - Page 243 As a user: Press and select the path: Ink Cartridge Cartridge Replacement To change the Ink cartridge logged as Supervisor: As supervisor (see How to Log in as Supervisor on page 180): From the main menu, select the path: Maintenance Ink Cartridge Cartridge replacement...
- Page 244 Pull on the left side of the blue lever, to unlock the cartridge. Pull the cartridge towards you to disengage it. Remove the protective strips from the new ink cartridge. Insert the new ink cartridge, and then push it forward until it stops. Put the blue lever back into place.
-
Page 245: How To Display Ink Level And Cartridge Data
How to Display Ink Level and Cartridge Data Ink Cartridge Data includes information such as consumption and date installed. To display the ink cartridge data (as a User): As a user: Press and select the path: Ink Cartridge Ink Cartridge information The Ink information screen is displayed. - Page 246 As supervisor (see How to Log in as Supervisor on page 180): From the main menu, select the path: Maintenance Ink Cartridge Cartridge information The Ink information screen is displayed. How to Clean the Print Heads Automatically Each ink cartridge contains two print heads. If after cleaning the print heads, you still observe poor print quality (streaked, too light, blurred, etc.) or the system indicates the ink cartridge is out of ink ...
- Page 247 As a user: Press and select the path: Ink Cartridge Cleaning Process The cleaning starts automatically. To clean the print heads automatically (as Supervisor): As supervisor (see How to Log in as Supervisor on page 180): From the main menu, select the path: Maintenance Ink Cartridge Cleaning Process The cleaning starts automatically.
-
Page 248: How To Clean The Printing Head Manually
How to Clean the Printing Head Manually If automatic cleaning is not sufficient, you can clean the printing head manually. To clean the printing head manually: Open the cover. Remove the ink cartridge (See How to Change the Ink Cartridge on page 237). -
Page 249: How To Align The Print Heads
How to Align the Print Heads After installing a new ink cartridge you should verify that the ink cartridge print heads are aligned. To align the print heads: As supervisor (see How to Log in as Supervisor on page 180): From the main menu, select the path: Maintenance Ink Cartridge... - Page 250 Put a piece of paper in the mail transport. The system prints a test pattern. The Set Cartridge alignment screen is displayed. Check the printed pattern and use the up/down keys to select the letter that corresponds to the straightest and complete vertical line. Press [OK] to validate.
-
Page 251: Service Processes
12.2 Service Processes How to Run the Registration Update The Update Registration process is only to be completed at a request from Customer Service. • This procedure is used if you have changed your address. • Contact your Customer Service to change your information then you will be instructed to perform the update registration procedure. - Page 252 Press [OK] to begin the procedure. Press [OK] to start the update registration transaction. The message "Transaction successful" is displayed. Press [OK]. A message for entering the geodesic code. Please refer to User Guide for allowed values. Press [OK]. Enter the Geocode. Press [OK].
-
Page 253: How To Remove The Base (Meter)
10. Press [Finish] to return to menu. 11. Press the Sleep/Wake button to exit. How to Remove the Base (Meter) Remove the Base: • Removes the PSD from service. • Prepares the base for removal by saving data on USB key. To remove the meter: As supervisor (see How to Log in as Supervisor... -
Page 254: How To Withdraw The Psd (Meter)
Press [OK] when the process is complete. The message "Transaction successful" is displayed. How to Withdraw the PSD (Meter) The Withdraw PSD process is only to be completed at the request of Customer Service. • Removes the PSD from service. •... - Page 255 Open the cover of the base, then the cover of the meter. Pull the meter towards the front of the base to disengage it from the base connector. Remove the meter from the Mailing System base.
-
Page 256: Troubleshooting
Troubleshooting This section helps you solve problems you may encounter while using your Mailing System. 13.1 Machine Issues ...............253 How to Clean the Print Heads Automatically ..........253 13.2 Diagnostics ................256 How to Access Diagnostic Data ................257 13.3 System Data ................258 How to Display Software Data ................258 How to Display Hardware Data ................259 How to Display the Machine Counters ...............259... -
Page 258: Machine Issues
13.1 Machine Issues How to Clean the Print Heads Automatically Each ink cartridge contains two print heads. If after cleaning the print heads, you still observe poor print quality (streaked, too light, blurred, etc.) or the system indicates the ink cartridge is out of ink ... It is time to replace the ink cartridge. To clean the print heads automatically (as a User): As a user: Press... - Page 259 As supervisor (see How to Log in as Supervisor on page 180): From the main menu, select the path: Maintenance Ink Cartridge Cleaning Process The cleaning starts automatically. The Weighing Device does not Weigh Properly If the Base does not display a correct weight, complete the following actions to correct the problem.
- Page 260 Weight of the items on WP Remove the package and if possible, weigh it exceeds the max capacity defined on another scale. in Weighing Platform (you have Use Manual Weight Entry mode to enter the placed a package on the platform weight and determine the postage.
-
Page 261: Diagnostics
13.2 Diagnostics Diagnostics allow you to find the root cause of a an issue or a breakdown that may occur during the life of your Mailing System. The system performs tests automatically to diagnose the problem and generate corresponding reports. The System Data gives data about the status of the system and the events or errors that have occurred. -
Page 262: How To Access Diagnostic Data
How to Access Diagnostic Data To gain access to a diagnostic data: As supervisor (see How to Log in as Supervisor on page 180): From the main menu, select the path: Maintenance Diagnostics The system requires you press [OK] to start the diagnostic tests, then displays the list of the tests. -
Page 263: System Data
13.3 System Data How to Display Software Data The Software Data contains the following information: PSD#, Loader, OS, PACK, XNDF DATA DELTA, language, variant. To display Software Data: As supervisor (see How to Log in as Supervisor on page 180): From the main menu, select the path: Maintenance System Info... -
Page 264: How To Display Hardware Data
How to Display Hardware Data The Hardware Data contains the following information: P/N of the base and the PSD. To display hardware data: As supervisor (see How to Log in as Supervisor on page 180): From the main menu, select the path: Maintenance System Info Hardware... -
Page 265: How To Display The Event Lists
The system displays the data of the machine counters. How to Display the Event Lists The display show the list of the events occurred in the machine (Base errors, PSD events and Server connection history). To display the event lists: As supervisor (see How to Log in as Supervisor on page 180):... - Page 266 Select the Base events list or the PSD events list or Server connection history or Status Management. Press [OK] to validate.
- Page 267 The system displays the selected list in a table with, for each error: The Code of the event The Date where appends the event The Cycles count when the event occurred. Note the Code and refer to your customer service.
-
Page 268: Specifications
Specifications This sections contains the main specifications of your Mailing System. 14.1 Mail Specifications ..............265 14.2 Package Specifications ............266 14.3 General Specifications ............268 14.4 Operating Conditions ............269 14.5 System Specifications ............270 14.6 System Changes ..............271... -
Page 270: Mail Specifications
14.1 Mail Specifications Envelope Dimensions Your Mailing System can handle the envelope & flap sizes as illustrated below (note: the illustration is not to scale). Envelopes: • Minimum Weight: 0.1 oz. • Maximum Weight: 1 lb. 10.4 oz. • Minimum Envelope Thickness: 0.008 inches. •... -
Page 271: Package Specifications
14.2 Package Specifications The mailing systems must upload to USPS the package measurements: • Length: the value of the longest side of the package • Width : the value of the shortest side of the package • Height: the value of the thickness of the package The measurements shall be provided in inches with an accuracy of 3 decimal places (ie NN,NNN). - Page 272 No mail piece may measure more than 108 inches in length and girth combined, except USPS Retail Ground, which may not measure more than 130 inches in length and girth combined. All Parcels except "USPS Retail Ground" "USPS Retail Ground" max Length + Girth (inch) For parcels, the length is the distance of the longest dimension;...
-
Page 273: General Specifications
14.3 General Specifications Dimensions (Width x Length x Height) • Base: 8.85" x 12.75" x 7.85" Weight • Base: 8 lb 5.8 oz Power • Frequency: 60 Hz • Max. current rating (full configuration): 2.5 A • Power supply: 120 V (+6% -10%) 3 wire grounded circuit (Up to standard NFC15-100) -
Page 274: Operating Conditions
14.4 Operating Conditions Temperature and Relative Humidity Your Mailing System should only be operated in the following conditions: Temperature range Ambient temperature: 50°F - 104°F. Relative humidity 80% max. without condensation. Weighing accuracy To obtain the best weighing results, use a solid and steady table: •... -
Page 275: System Specifications
14.5 System Specifications Accounts The number of accounts is set to 10 by default. Weighing accuracy To obtain the best weighing results, use a solid and steady table: • Away from any doors • Away from any fan... -
Page 276: System Changes
14.6 System Changes Major Changes Function Description Link Imprint memory This function is to memorize a • Managing Imprint management specific task used regularly. Memories on page 205 Option 12/60 Option is available when • How to Set LAN DHCP in Lan Configuration is (High-speed Internet) on screen. - Page 277 Index e-Confirmation 169, 170, 173 Energy Star 3, 20 Access Control 107, 108 Account 15, 26, 28, 63, 64, 79, 89, 107, 108, 109, 111, 112, 113, 114, Feeder 5 116, 122, 123, 125, 126, 127, 129, 130, 145, 152, 153, 159, 169, 208, 271 accounts 14, 16, 28, 63, 64, 79, 89, Generate 125, 143, 145, 148, 256 107, 110, 111, 113, 114, 116, 122,...
- Page 278 Normal 5 Weighing platform 8, 11, 18, 26, 70, 172, 192, 194, 196, 254 Weighing type 15, 192, 193 OFF 6, 41, 170, 186, 187 Online Services 136, 137, 157, 159, 162, 168, 171, 172, 209, 215, 220, 233 zero 16, 194 Option List 219 PIN code 26, 102, 107, 108, 109, 112 Platform 41, 254...
- Page 279 A0146499/A - 30/01/2023...
- Page 280 A0146499/A - 30/01/2023...
Need help?
Do you have a question about the iX-1 Series and is the answer not in the manual?
Questions and answers
"Name resolution failed" How do I correct this?
To fix the "Name resolution failed" error on the Quadient iX-1 Series, try the following steps:
1. Check the network connection and correct any issues.
2. Press the retry button to attempt the connection again.
3. If the error persists, unplug the system, wait 10 seconds, then power it back on and try again.
4. If the issue continues after restarting, contact Quadient support through Myquadient or call 1.800.636.7678 for assistance.
This answer is automatically generated
Is it possible to remove the american flag from the postage on an IX-1 permanently?
I have a small box that is 4 x 4 x 5 , but I can't figure out how to stamp it because it's asking for the zip code and size of the box
To stamp a 4 x 4 x 5 box using the Quadient iX-1 Series, follow these steps:
1. Weigh the Package – Place the box on the weighing platform to determine its weight.
2. Measure the Package – Confirm the dimensions (4 x 4 x 5).
3. Select Mail Class – Use the numeric keys to select the appropriate mail class.
4. Confirm and Print – Press the confirmation button to print the postage.
5. Apply the Stamp – Place the printed postage on the box.
For additional guidance, visit the iX-1 user guide or how-to video hub.
This answer is automatically generated
how to calculate postage to foreign country
To calculate postage for the Quadient iX-1 Series to a foreign country:
1. Place the item on the weighing platform and press the button to weigh.
2. Select Wizard [8].
3. Select International First Class [11].
4. Select the destination country by typing the country name in the "Country" box or entering the country number. Use "Great Britain" instead of "England" or "United Kingdom" if mailing there.
5. Select Letter [1] and press the button to select the service.
6. Press the button to display the summary.
7. Press [OK] to save and return to the home screen. The postage cost will be displayed.
This answer is automatically generated