
Related Manuals for Bodylastics Curl Bar

Summary of Contents for Bodylastics Curl Bar
- Page 2 CAUTION Your Bodylastics system is not a toy. It is a serious piece of exercise equipment. In fact, what you have in your possession is the most powerful slingshot on the planet. Use it with caution and care! When using the door anchor, be sure to place it on the hinge side of the door and lock your door! When standing on the bands make sure to always wear athletic shoes, and position the bands securely under the arches of your feet.
- Page 3 Scan the QR Code to go to the website and watch an unboxing video of the set that you have purchased. Get to know your Bodylastics set inside and out and make sure there is nothing missing. Watch the instruction and setup videos to learn how to use your Bodylastics Bands...
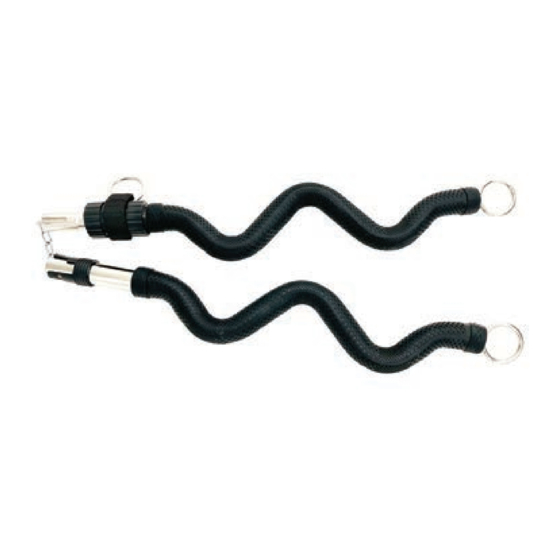
- Page 4 Curl Bar Assembly Instructions Take the collapsed bar out of the travel bag and lay both halves down on a flat surface. CONNECTOR CHAIN HOLLOW END Hold a half in each hand and feed the connector chain into the half that has the hollow end.
- Page 5 Curl Bar Assembly Instructions (cont.) PUSH BAR Push the solid end into the hollow end until TOGETHER it stops. Then twist the two halves of the bar until the notched out section from the solid end aligns with the stopper of the hollow end.
- Page 6 Door Anchor Position Diagram Refer to this diagram for the door anchor position found in the exercise descriptions. Top of the door - Chest height - Waist height - Knee height - Close the anchor in the door so the anchor loop is on the side of Bottom of the door - the door facing you.
- Page 7 Door Anchor Setup Locate the hinge side Open the loop of the of the door. The hinge door anchor. side is the the vertical side of the door that the door hinges are attached to. Push the loop of the Thread your band(s) anchor between the through the loop of...
- Page 8 Ankle Strap Setup Place the strap Pull the end of the around your ankle strap back and with the soft stick the rough side cushioned side securely to the soft against your ankle. side. Thread the rough side Check to make sure of velcro through the that the strap is rectangular ring.
- Page 9 Anywhere Anchor Setup Wrap the Pull the strap tight. Anywhere Anchor around a stationary object. Pull one loop Thread a band through the other through the padded loop. loop to double over your band, or clip a band directly onto the D-Ring to use a single length of elastic.
- Page 10 Attaching The Clip Bands Attaching The Bands: To attach your Clip Resistance Bands to the handles and ankle straps simply clip them on to the metal rings. Increasing Resistance: Decreasing Resistance: To increase resistance, To decrease simply substitute the resistance, simply elastic for a thicker change out the one (thicker = more...
- Page 11 Maintaining Your Bands Do not wrap your bands Never thread your band through Never clip your band around stationary objects. to an anchor loop. the ring of an ankle strap. Do not pull your bands side to side Do not stretch the bands Do not store your bands like a pulley.
-
Page 12: Lifetime Warranty
CA: CAD 8.95 per item All other countries: Market price for shipping To place a warranty order go to https://bodylastics.com/warranty To contact us regarding your warranty please email support@bodylastics.com * Free Replacement Not Applicable For Products Used In Commercial Settings... - Page 13 Also make sure that you carefully inspect all equipment for any signs of damage prior to performing any exercise. Do not use any equipment that displays signs of damage or wear and instead contact support@bodylastics.com to arrange a replacement in accordance with the warranty.
-
Page 14: Chest Press
Chest Press MUSCLE GROUP CHEST... - Page 15 Area Targeted: Middle Chest Set up: Anchor Position: #1 - Top of the door. Bands: Thread the band(s) through the anchor and attach each end of the band(s) to an outer ring of the bar. Body Positioning: Stand close to the door with your back to the anchor. Position your head and shoulders in between the bar and the anchor.
- Page 16 Standing Chest Fly MUSCLE GROUP CHEST...
- Page 17 Area Targeted: Middle Chest Set up: Anchor Position: #2 - Chest height. Bands: Thread the band(s) through the anchor and attach each end of the band(s) to an outer ring of the bar. Body Positioning: Grip the center collar of the bar with one hand (palm facing forward) and stand 3 to 4 feet away from the door with your active side facing the door.
- Page 18 Biceps Curls MUSCLE GROUP BICEPS...
- Page 19 Area Targeted: Biceps Set up: Anchor Position: Not required. Bands: Attach each end of the band(s) to an outer ring of the bar. Body Positioning: Stand on the band(s), hips-width apart. Now grip the bar with each hand with palms facing up (choose the width that feels the most comfortable) and stand up straight.
- Page 20 Reverse Biceps Curls MUSCLE GROUP BICEPS...
- Page 21 Area Targeted: Biceps Set up: Anchor Position: Not required. Bands: Attach each end of the band(s) to an outer ring of the bar. Body Positioning: Stand on the band(s), hips-width apart. Now grip the bar with each hand with palms facing down (choose the width that feels the most comfortable) and stand up straight.
- Page 22 Preacher Curls MUSCLE GROUP BICEPS...
- Page 23 Area Targeted: Biceps Set up: Anchor Position: #4 - Knee height. Bands: Thread the band(s) through the anchor and attach both ends of the band(s) to the center ring. Body Positioning: Grip the bar with each hand, shoulders width apart, palms facing up. Sit down 3 to 4 feet from the door while facing the door.
- Page 24 Forward Triceps Extension MUSCLE GROUP TRICEPS...
- Page 25 Area Targeted: Triceps Set up: Anchor Position: #2 - Chest height. Bands: Thread the band(s) through the anchor and attach each end of the band(s) to an outer ring of the bar. Body Positioning: Stand close to the door/anchor point with your back to the anchor. Position your head and shoulders in between the bar and the anchor point.
- Page 26 Kneeling Triceps Extension MUSCLE GROUP TRICEPS...
- Page 27 Area Targeted: Triceps Set up: Anchor Position: #1 - Top of the door. Bands: Thread the band(s) through the anchor and attach both ends of the band(s) to the center ring of the bar. Body Positioning: Grip the bar with both hands close to the center with palms facing down. Kneel down, facing the door about one foot away from the door.
-
Page 28: Overhead Triceps Extension
Overhead Triceps Extension MUSCLE GROUP TRICEPS... - Page 29 Area Targeted: Triceps Set up: Anchor Position: #1 - Top of the door. Bands: Thread the band(s) through the anchor and attach each end of the band(s) to an outer ring of the bar. Body Positioning: Grip the bar with both hands in a close grip, and stand about 3 feet from the door, with your back to the door.
- Page 30 Squats MUSCLE GROUP LEGS...
- Page 31 Area Targeted: Thighs & Butt Set up: Anchor Position: Not required. Bar: Attach an ankle strap to each end ring of the bar. Bands: Attach each end of the band(s) to an ankle strap. Body Positioning: Stand on the band(s) with both feet and hips-width apart. Squat down, press the bar over your head and rest it on your shoulders, right below your neck (not on your neck).
- Page 32 Lunge MUSCLE GROUP LEGS...
- Page 33 Area Targeted: Thighs & Butt Set up: Anchor Position: Not required. Bands: Attach each end of the band(s) to an outer ring of the bar. Body Positioning: Stand on the band(s) with one foot in front. Take a big step backward with the other leg.
- Page 34 Front Squats MUSCLE GROUP LEGS...
- Page 35 Area Targeted: Thighs & Butt Set up: Anchor Position: Not required. Bar: Attach an ankle strap to each end ring of the bar. Bands: Attach each end of the band(s) to an ankle strap. Body Positioning: Stand on the band(s) with both feet hip-width apart. Squat down and rest the bar on the front of your shoulders with your arms interlocked (making a box) and elbows up at shoulder height.
- Page 36 Standing Abs Twist MUSCLE GROUP...
- Page 37 Area Targeted: Side Abs Set up: Anchor Position: #2 - Chest height. Bands: Attach each end of the band(s) to an outer ring of the bar. Body Positioning: Stand about 3 to 4 feet away from the door, with your side facing the door.
- Page 38 High Low Chops MUSCLE GROUP...
- Page 39 Area Targeted: Side and Middle Abs Set up: Anchor Position: #1 - Top of the door. Bands: Thread the band(s) through the anchor and attach both ends of the band(s) to one outer ring on the bar. Body Positioning: Grip the bar with both hands, one on each side of the center collar. Turn your body so that your side is facing the door.
- Page 40 Low-High Abs Chops MUSCLE GROUP...
- Page 41 Area Targeted: Side Abs Set up: Anchor Position: #5 - Bottom of the door. Bands: Thread the band(s) through the anchor and attach both ends of the band(s) to one outer ring on the bar. Body Positioning: Grip the bar with both hands, one on each side of the center collar. Turn your body so that your side is facing the door.
- Page 42 Kneeling Abs Crunch MUSCLE GROUP...
- Page 43 Area Targeted: Middle Abs Set up: Anchor Position: #1 - Top of the door. Bands: Thread the band(s) through the anchor and attach both ends of the band(s) to one center ring on the bar. Body Positioning: Grip the bar with a close grip, palms down, and kneel down about 2 feet away from the door, facing the door.
- Page 44 Standing Front Shoulder Raise MUSCLE GROUP SHOULDERS...
- Page 45 Area Targeted: Front Shoulder Set up: Anchor Position: Not required. Bands: Attach each end of the band(s) to an outer ring of the bar. Body Positioning: Stand on the band(s), hips-width apart. Now grip the bar with each hand (shoulders width apart) and stand up straight with your back straight, head straight, chest up, and stomach tight.
-
Page 46: Standing Lateral Raise
Standing Lateral Raise MUSCLE GROUP SHOULDERS... - Page 47 Area Targeted: Side Shoulder Set up: Anchor Position: Not required. Bands: Attach each end of the band(s) to an outer ring of the bar. Body Positioning: Stand on the middle of the band(s) with the foot on the same side of the shoulder that you are going to work.
-
Page 48: Shoulder Press
Shoulder Press MUSCLE GROUP SHOULDERS... - Page 49 Area Targeted: Front/Side Shoulder Set up: Anchor Position: Not required. Bands: Thread the band(s) through the anchor & attach each end of the band(s) to an outer ring of the bar. Body Positioning: Stand on the middle of the band with one foot slightly forward. Bend down and grip the bar and raise it so that your hands are right above your shoulders and your elbows are down.
- Page 50 Shrugs MUSCLE GROUP SHOULDERS...
- Page 51 Area Targeted: Top of Shoulders Set up: Anchor Position: Not required. Bands: Attach each end of the band(s) to an outer ring of the bar. Body Positioning: Stand on the band(s) hips-width apart. Now bend down and grip the bar, slightly wider than shoulders width with both hands (palms facing behind you), and stand up straight with your back straight, head straight, chest up, and stomach tight.
- Page 52 High Row MUSCLE GROUP SHOULDERS...
- Page 53 Area Targeted: Rear Shoulder Set up: Anchor Position: #1 - Top of the door. Bands: Thread the band(s) through the anchor and attach each end of the band(s) to an outer ring of the bar. Body Positioning: Grip the bar with each hand, shoulders width apart, palms facing down. Stand 3 to 4 feet from the door while facing the door.
-
Page 54: Upright Row
Upright Row MUSCLE GROUP SHOULDERS... - Page 55 Area Targeted: Front and Side Shoulder Set up: Anchor Position: Not required. Bands: Attach each end of the band(s) to an outer ring of the bar. Body Positioning: Stand on the band(s) hips-width apart. Now grip the bar towards the center of the bar with both hands (palms facing behind you) and stand up straight with your back straight, head straight, chest up, and stomach tight.
- Page 56 Standing One Arm Back Row MUSCLE GROUP BACK...
- Page 57 Area Targeted: Outer Back Set up: Anchor Position: Not required. Bands: Attach each end of the band(s) to an outer ring of the bar. Body Positioning: Using a staggered stance (one foot slightly back) and step on the middle of the band with the back leg. Bend down and grip the bar from the center collar with the arm that is on the same side as the back leg.
- Page 58 Straight Arm Lat Extension MUSCLE GROUP BACK...
- Page 59 Area Targeted: Outer Back Set up: Anchor Position: #1 - Top of the door. Bands: Thread the band(s) through the anchor and attach each end of the band(s) to an outer ring of the bar. Body Positioning: Grip the bar with each hand towards the outer ring with palms facing down.
- Page 60 Seated Wide Grip Lat Pull MUSCLE GROUP BACK...
- Page 61 Area Targeted: Outer Back Set up: Anchor Position: #1 - Top of the door. Bands: Thread the band(s) through the anchor and attach each end of the band(s) to an outer ring of the bar. Body Positioning: Grip the bar with each hand towards the outside of the bar. Sit close to the door, facing the door, with your knees bent.
- Page 62 Standing Back Row MUSCLE GROUP BACK...
- Page 63 Area Targeted: Outer Back Set up: Anchor Position: #2 - Chest height. Bands: Thread the band(s) through the anchor and attach each end of the band(s) to an outer ring of the bar. Body Positioning: Grip the bar with each hand, shoulders width apart, palms facing up. Stand 3 to 4 feet from the door while facing the door.
- Page 64 Seated Back Extension MUSCLE GROUP BACK...
- Page 65 Area Targeted: Middle Back (along Spine) Set up: Anchor Position: #4 - Knee height. Bands: Thread the band(s) through the anchor and attach each end of the band(s) to an outer ring of the bar. Body Positioning: Grip the bar with each hand, shoulders width apart, palms facing down. Sit down 3 to 4 feet from the door while facing the door.
- Page 66 Dead Lift MUSCLE GROUP BACK...
- Page 67 Area Targeted: Entire Posterior Set up: Anchor Position: #5 - Bottom of the door. Bands: Thread the band(s) through the anchor and attach each end of the band(s) to an outer ring of the bar. Body Positioning: Grip the bar with each hand, shoulders width apart, palms facing down. Stand 3 to 4 feet from the door while facing the door.
- Page 69 Also make sure that you carefully inspect all equipment for any signs of damage prior to performing any exercise. Do not use any equipment that displays signs of damage or wear and instead contact support@bodylastics.com to arrange a replacement in accordance with the warranty.
- Page 70 Chest Press MUSCLE GROUP CHEST...
- Page 71 Area Targeted: Middle, Upper Chest Set up: Anchor Position: #4 - Knee height. Bands: Attach each end of the band(s) to a handle. Body Positioning: Grip a handle in each hand, and stand 3 to 4 feet away from the door with your back to the door.
- Page 72 Double Point Chest Press MUSCLE GROUP CHEST...
- Page 73 Area Targeted: Middle, Upper Chest Set up: Anchor Position: #4 - Knee height. Bands: Attach each end of the first band to a handle, and each end of a second band to an ankle strap. Body Positioning: Secure an ankle strap on each arm, above the elbow, and grip a handle from the first band in each hand.
- Page 74 Resisted Standard Push Up MUSCLE GROUP CHEST...
- Page 75 Area Targeted: Middle Chest Set up: Anchor Position: Not required. Bands: Wrap the band(s) around your body so that the band(s) are around your back. Body Positioning: Lay on the floor and place your palms over the band(s), on each side, so that there is no slack.
- Page 76 Standing One Arm Chest Fly (Mid) MUSCLE GROUP CHEST...
- Page 77 Area Targeted: Middle Chest Set up: Anchor Position: #2 - Chest height. Bands: Attach both ends of the band(s) to one handle, and grip the handle with one hand. Body Positioning: Stand 3 to 4 feet away from the door with your active side facing the door.
- Page 78 Kneeling One Arm Chest Fly MUSCLE GROUP CHEST...
- Page 79 Area Targeted: Middle Chest Set up: Anchor Position: #1 - Top of the door. Bands: Attach both ends of the band(s) to one handle, and grip the handle with one hand. Body Positioning: Kneel 3 to 4 feet away from the door, with your active side facing the door.
- Page 80 Standing Curl MUSCLE GROUP BICEPS...
- Page 81 Area Targeted: Biceps Set up: Anchor Position: Not required. Bands: Attach a handle to each end of the band(s). Body Positioning: Stand on the band(s) hips width apart. Now take a handle in each hand and stand up straight. Keep your back straight, head straight, chest up and stomach tight. Start with your arms straight down with palms facing forward, and elbows tight to your sides.
- Page 82 Standing Hammer Curl MUSCLE GROUP BICEPS...
- Page 83 Area Targeted: Biceps Set up: Anchor Position: Not required. Bands: Attach a closed ankle strap to each end of the band(s) and grip the loop of a strap with each hand. Your fingers should be inside the loop, and thumb on the outside. Body Positioning: Stand on the band(s) hips width apart and stand up straight.
- Page 84 Standing One Arm Preacher Curl MUSCLE GROUP BICEPS...
- Page 85 Area Targeted: Biceps Set up: Anchor Position: Not required. Bands: Wrap the band(s) once around the foot on the same side of your active arm, and then attach both ends of the band(s) to one handle. Grip the handle with the hand of your active arm. Body Positioning: Keep your back flat, head straight and chest up.
- Page 86 Seated Preacher Curl MUSCLE GROUP BICEPS...
- Page 87 Area Targeted: Biceps Set up: Anchor Position: #5 - Bottom of the door. Bands: Attach each end of the band(s) to a handle. Body Positioning: Grip a handle in each hand and sit facing the door with your toes 2 to 3 feet from the door.
- Page 88 Lying Curl (Low) MUSCLE GROUP BICEPS...
- Page 89 Area Targeted: Biceps Set up: Anchor Position: #5 - Bottom of the door. Bands: Attach each end of the band(s) to a handle. Body Positioning: Grip a handle in each hand and lay on your back with your toes 1 to 2 feet away from the door.
- Page 90 Kneeling Extension MUSCLE GROUP TRICEPS...
- Page 91 Area Targeted: Triceps Set up: Anchor Position: #1 - Top of the door. Bands: Grip an end of the band(s) in each hand, right above the clip. Body Positioning: Kneel down, facing the door about one foot away from the door. Keep your back straight, head straight, chest up and stomach tight.
- Page 92 Two Arm Kickback MUSCLE GROUP TRICEPS...
- Page 93 Area Targeted: Triceps Set up: Anchor Position: #3 - Waist height. Bands: Attach a closed ankle strap to each end of the band(s) and grip the loop of a strap with each hand. Your fingers should be inside the loop, and thumb on the outside. Body Positioning: Stand 3 to 4 feet from the door while facing the door.
- Page 94 Forward Extension MUSCLE GROUP TRICEPS...
- Page 95 Area Targeted: Triceps Set up: Anchor Position: #2 - Chest height. Bands: Attach each end of the band(s) to a handle. Body Positioning: Grip a handle with each hand and stand about 3 feet from the door, with your back to the door. Stagger your legs, with one leg in front. Start with your upper arms up at parallel with the floor, hands close to your head (at eye level), and palms facing forward.
- Page 96 Cross Body Extension MUSCLE GROUP TRICEPS...
- Page 97 Area Targeted: Triceps Set up: Anchor Position: #1 - Top of the door. Bands: Attach a closed ankle strap to both ends of the band(s) and grip the loop of the strap with the hand of your active arm. Your fingers should be inside the loop, and thumb on the outside. Body Positioning: Stand about 3 feet away from the door with your inactive side facing the door.
- Page 98 Lying Extension MUSCLE GROUP TRICEPS...
- Page 99 Area Targeted: Triceps Set up: Anchor Position: #5 - Bottom of the door. Bands: Attach a closed ankle strap to each end of the band(s) and grip the loop of a strap with each hand. Your fingers should be inside the loop, and thumb on the outside. Body Positioning: Grip an ankle strap, or handle in each hand and lay on the floor with your body facing away from the door, and your head about 2 to 3 feet away from the door.
- Page 100 Calf Raise (Arms Up) MUSCLE GROUP LEGS...
- Page 101 Area Targeted: Calves Set up: Anchor Position: #5 - Bottom of the door. Bands: Attach each end of the band(s) to a handle. Body Positioning: Grip a handle in each hand and stand 1 to 2 feet away from the door with your back to the door.
- Page 102 Lunges MUSCLE GROUP LEGS...
- Page 103 Area Targeted: Thighs & Butt Set up: Anchor Position: Not required. Bands: Attach each end of the band(s) to a handle. Body Positioning: Stagger your feet with one foot in front. Now stand on the band(s) with your front foot. Grip a handle in each hand and raise your hands up to shoulder height. With your back straight, head straight, elbows back, and chest up, lower your hips straight down until your front thigh is almost parallel with the floor.
- Page 104 Lying Hamstrings Curl MUSCLE GROUP LEGS...
- Page 105 Area Targeted: Hamstrings Set up: Anchor Position: #5 - Bottom of the door. Bands: Attach each end of the band to an ankle strap. Body Positioning: Wrap the ankle straps around your ankles and lay on the floor 3 to 4 feet away from the door.
- Page 106 Hip Extension MUSCLE GROUP LEGS...
- Page 107 Area Targeted: Butt (Gluteus Maximus) Set up: Anchor Position: #5 - Bottom of the door. Bands: Attach both ends of the band to one ankle strap. Body Positioning: Now secure the ankle strap around the ankle of your active leg, with the ring in the front.
- Page 108 Squats MUSCLE GROUP LEGS...
- Page 109 Area Targeted: Thighs & Butt Set up: Anchor Position: Not required. Bands: Attach each end of the band(s) to a handle. Body Positioning: Stand on the band(s) with both feet, hips width apart. Squat down and grip a handle in each hand. Raise the handles up to shoulder height, with the bands behind your arms, palms facing forward.
- Page 110 Kneeling Crunch MUSCLE GROUP...
- Page 111 Area Targeted: Middle Abs Set up: Anchor Position: #1 - Top of the door. Bands: Grip each side of the band, right above the clips or handles. Body Positioning: Kneel down about 2 feet away from the door, facing the door. Hold your hands close to your forehead and position your arms so that your elbows are about 6 inches apart and facing down.
- Page 112 Standing Twist MUSCLE GROUP...
- Page 113 Area Targeted: Side Abs Set up: Anchor Position: #2 - Chest height. Bands: Attach both ends of the band(s) to one handle, and grip the handle with both hands. Body Positioning: Stand about 3 to 4 feet away from the door, with your side facing the door.
- Page 114 Resisted Crunch MUSCLE GROUP...
- Page 115 Area Targeted: Middle Abs Set up: Anchor Position: #5 - Bottom of the door. Bands: Attach each end of the band(s) to an ankle strap. Body Positioning: Grip an ankle strap, or handle in each hand and lay on the floor facing away from the door with your knees bent, and feet flat on the floor.
- Page 116 High/Low Chop MUSCLE GROUP...
- Page 117 Area Targeted: Side and Middle Abs Set up: Anchor Position: #1 - Top of the door. Bands: Attach both ends of the band(s) to one handle, and grip the handle with both hands. Body Positioning: Stand about 2 feet away from the door. Turn your body so that your side is facing the door.
- Page 118 Press MUSCLE GROUP SHOULDERS...
- Page 119 Area Targeted: Front/Side Shoulder Set up: Anchor Position: Not required. Bands: Attach each end of the band(s) to a handle. Body Positioning: Stagger your feet with one foot in front. Now stand on the band(s) with your front foot. Grip a handle in each hand and stand up straight. With the bands in front of your arms and palms facing forward, bring your arms up to goal post position (upper arms parallel, and forearms perpendicular with the floor).
- Page 120 Reverse Fly MUSCLE GROUP SHOULDERS...
- Page 121 Area Targeted: Rear Shoulder Set up: Anchor Position: #2 - Chest height. Bands: Attach a handle to each end of the band(s). Body Positioning: Grip a handle in each hand and stand 3 to 4 feet away from the door while facing the door.
- Page 122 Standing Front Raise MUSCLE GROUP SHOULDERS...
- Page 123 Area Targeted: Front Shoulder Set up: Anchor Position: Not required. Bands: Attach each end of the band(s) to a handle. Body Positioning: Stand on the band(s) hips width apart. Now grip a handle in each hand and stand up straight with your back straight, head straight, chest up, and stomach tight. Your arms should be straight and down with palms facing your thighs, on top of your thighs.
- Page 124 Standing Lateral Raise MUSCLE GROUP SHOULDERS...
- Page 125 Area Targeted: Side Shoulder Set up: Anchor Position: Not required. Bands: Attach a closed ankle strap to each end of the band(s) and position a strap over each wrist with the ring on the bottom. Body Positioning: Stand on the band(s) hips width apart and stand up straight with your back straight, head straight, chest up, and stomach tight.
- Page 126 Wide Grip Pull Down MUSCLE GROUP BACK...
- Page 127 Area Targeted: Outer Back Set up: Anchor Position: #1 - Top of the door. Bands: Attach a handle to each end of the band(s). Body Positioning: Grip a handle with each hand and kneel down on one knee, 3 to 4 feet from the door while facing the door.
- Page 128 Reverse Grip Pull Down MUSCLE GROUP BACK...
- Page 129 Area Targeted: Outer Back Set up: Anchor Position: #1 - Top of the door. Bands: Attach a handle to each end of the band(s). Body Positioning: Grip a handle with each hand and kneel down on one knee, 3 to 4 feet from the door while facing the door.
- Page 130 Squatted Row MUSCLE GROUP BACK...
- Page 131 Area Targeted: Outer Back Set up: Anchor Position: #4 - Knee height. Bands: Attach a handle to each end of the band(s). Body Positioning: Grip a handle in each hand and squat 3 to 4 feet from the door while facing the door.
- Page 132 Bent Over Row (Heavy Pants) MUSCLE GROUP BACK...
- Page 133 Area Targeted: Outer Back Set up: Anchor Position: Not required. Bands: No adjustment required. Body Positioning: Lay the band(s) on the floor and stand on the band(s) with your feet hips width apart. The length of the band on each side from the outside of your foot to the clip or handle should be about 6 inches.
- Page 134 Standing Extension (Band) MUSCLE GROUP BACK...
- Page 135 Area Targeted: Middle Back (along Spine) Set up: Anchor Position: #5 - Bottom of the door. Bands: No adjustment required. Body Positioning: While facing the door bend forward and grip a side of the band with each hand, so that the band is just starting to stretch. Position your lower body far enough away from the door so that when you bend forward, your head is close to the door, but does not touch it.
Need help?
Do you have a question about the Curl Bar and is the answer not in the manual?
Questions and answers