Table of Contents
Advertisement
Quick Links
Advertisement
Table of Contents

Related Manuals for Sharp SSR3065JS


Summary of Contents for Sharp SSR3065JS
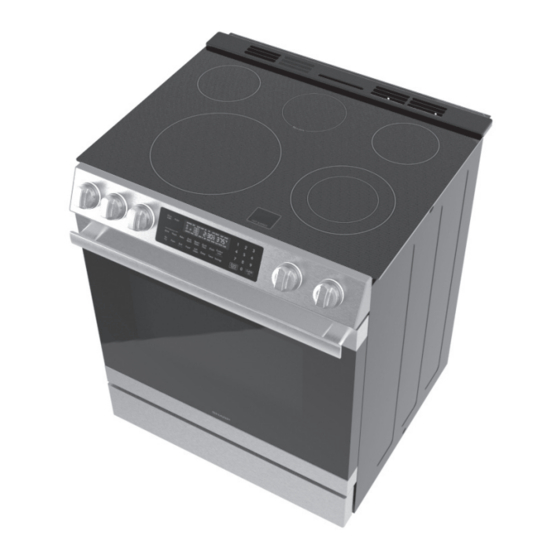
- Page 1 OPERATION MANUAL 30" SLIDE-IN ELECTRIC RANGE MODEL : SSR3065JS...
-
Page 2: Table Of Contents
CONTENTS CUSTOMER ASSISTANCE ..........3 OVEN USE ............17-22 USING THE OVEN ..............17 US CONSUMER LIMITED WARRANTY ......4 OVEN RACKS ................ 17 SAFETY PRECAUTIONS ..........5 OVEN DOOR ................18 GROUNDING THE APPLIANCE ..........5 OVEN VENTS ................. 18 ANTI-TIP BRACKET .............. -
Page 3: Customer Assistance
Æ Downloads including the Installation Guide, Spec Sheet, and Owner’s Manual CONTACT US If at any time you have questions or comments concerning your SHARP product, please contact the SHARP Customer Assistance Center. We are available to assist you through multiple contact methods for your convenience:... -
Page 4: Us Consumer Limited Warranty
(“Productˮ), when shipped in its original container and sold or distributed in the United States by Sharp or an authorized Sharp dealer or reseller, will be free from defective workmanship and materials, and agrees that it will, at its option, either repair the defect or replace the defective Product or part thereof with a new or remanufactured equivalent at no charge to the Purchaser for parts or labor for the period(s) set forth below. -
Page 5: Safety Precautions
SAFETY PRECAUTIONS IMPORTANT Read all instructions carefully before installa- ANTI-TIP BRACKET tion and operation. Keep this Operation Manual for future use. Sharp Slide-in Electric Range is manufactured in compliance WARNING TIP-OVER HAZARD with the relevant safety standard. • If the Anti-Tip Bracket is not installed, there is risk of the... -
Page 6: Important Safety Instructions
IMPORTANT SAFETY INSTRUCTIONS To reduce the risk of fire, electrical shock, injury to persons GENERAL SAFETY PRECAUTIONS or damage when using the product, follow basic precautions, 1 Read all instructions before using the appliance. including the following. 2 To prevent accidents and achieve optimal ventilation, ensure sufficient space around the cooking area. -
Page 7: Cooktop Safety
14 Avoid scratching the glass-ceramic cooktop. The cooktop precautions to reduce the risk of burns, electric shock, fire, can be scratched by items such as sharp instruments, rings injury to persons or property damage, including the following: or other jewelry and rivets on clothing. Large scratches 1 Use proper pan size. -
Page 8: Self Clean Hazards
IMPORTANT SAFETY INSTRUCTIONS USDA RECOMMENDED TEMPERATURE SELF CLEAN HAZARDS 1 Before starting Self Clean, ensure the oven is empty. Remove FOOD MINIMUM INTERNAL broiler pan, racks, cookware and any other materials. TEMPERATURE 2 Before starting Self Clean, to avoid ignition, remove excess beef, pork, veal and lamb steaks, 145 °F and allow to rest grease or food from inside the oven. -
Page 9: Parts And Features
PARTS AND FEATURES TOP VIEW Lower Warming Lower Power Zone Power Higher Higher Power Power FRONT VIEW 1 Cooling Vents 7 Door Lock 13 Control Panel 19 Door Hinge 2 Oven Vent 8 Broil Burner 14 Door Switch 20 Storage Drawer 3 Cooktop Burners 9 Rack Positions 15 Oven Lights... - Page 10 PARTS AND FEATURES GLASS-CERAMIC COOKTOP SURFACE RIGHT-REAR LEFT-REAR HEATER HEATER WARMING ZONE RIGHT-FRONT LEFT-FRONT HEATER HEATER LEFT-FRONT WARMING HOT SURFACE RIGHT-REAR RIGHT-FRONT HEATER ZONE INDICATOR HEATER HEATER CONTROL CONTROL CONTROL CONTROL LEFT-REAR HEATER CONTROL CONTROL KEYPAD AND DISPLAY 1 Display: communicates information, including time-of-day, oven temperature and cooking mode 2 Oven Light pad: controls interior oven light 3 Oven Operations: available operating modes 4 Auxiliary Features: useful features not associated with oven operation, such as Timer, Control Lock and Settings...
-
Page 11: Settings
PARTS AND FEATURES SETTINGS Navigate through the Settings menu to customize the appliance. 3 Touch START/ENTER pad to select a menu item. Settings can only be adjusted when no other oven operation is 4 Touch 7+ and 9- pads to toggle through the setting options. in progress. -
Page 12: Sabbath Mode
PARTS AND FEATURES SABBATH MODE When in Sabbath mode, the oven operation may be controlled TO EXIT SABBATH MODE as described below, however audible signals will not sound, the 1 Quickly touch Settings pad three times to reopen the Settings clock is disabled, oven lights are disabled and changes to the menu. -
Page 13: Before Operating
SERVICE AND REPAIR WARNING lation Manual. Do not repair or replace any part of the Sharp Slide-In Electric 3 Wipe all surfaces, including inside oven and drawer, with a Range. If the display, heaters or touch controls fail, consult a damp, soft cloth to remove any dust that may have settled Sharp Authorized Servicer. -
Page 14: Cooktop Use
COOKTOP USE ABOUT THE RANGETOP ABOUT COOKTOP UTENSILS GLASS-CERAMIC SURFACE BOTTOM OF PAN Ensure the cooktop surface and the pan bottom are clean before Use pans with flat bottoms that make good contact with the entire heating. Do not use the cooktop if the surface is broken or if surface of the burner. -
Page 15: Acceptable Cooktop Utensils
COOKTOP USE ACCEPTABLE COOKTOP UTENSILS SINGLE HEATER BURNERS The quality and material of the cookware affects how rapidly The left-rear, right-rear and left-front burners are all Single and evenly heat is distributed, which affects cooking results. Heater Burners with heat settings of Hi, Med or Low. Rear burners: 6"... -
Page 16: Double Heater Burner
COOKTOP USE WARMING ZONE DOUBLE HEATER BURNER The center-rear Warming Zone can be used to keep cooked food The right-front burner is a Double Heater Burner and is adjust- warm. The Warming Zone does not have variable heat settings. able for either small cookware and lower power heating or larger cookware and higher power heating. -
Page 17: Oven Use
OVEN RACKS The SSR3065JS model of the Sharp Slide-In Electric Range comes with one wire flat rack and one gliding extension rack, both of which can be placed in any of the seven rack positions in the oven. -
Page 18: Oven Door
OVEN USE OVEN VENTS RACK POSITIONS For best performance, adjust racks so food is positioned at the Blocking or covering the oven vents will cause poor air circula- center of the oven. For most foods, the best rack position is the tion, affecting cooking, cleaning and cooling results. -
Page 19: Advantages Of Convection Cooking
OVEN USE ADVANTAGES OF CONVECTION PREHEAT COOKING For most oven cooking, preheating the oven is recommended and desirable. Some foods, such as large pieces of meat where • Baking on multiple racks saves time and provides even the total cooking time is much longer than preheating time, do cooking results in food not technically require preheating time. -
Page 20: Pizza
OVEN USE PIZZA TO CONVECTION BAKE 1 Touch Convection Bake pad. The Pizza mode uses a customized heating algorithm to bake fresh pizza. Fresh pizza can be homemade or purchased from 2 The default temperature for Convection Bake mode is a store or specialty shop. -
Page 21: Steam Clean
OVEN USE STEAM CLEAN TO SELF CLEAN 1 Start with a cool oven and remove all items from inside, including oven racks. Wipe out any large spills or excess CAUTION BURN HAZARD debris. • Use caution to avoid contact with hot surfaces. Oven surfaces, especially the oven bottom, may be hot. -
Page 22: Cook Time
OVEN USE COOK TIME TO USE PROBE FEATURE 1 Place meat in an appropriate dish or pan and insert probe The Cook Time function is used to set oven operation for a into meat. Position the probe so the tip is in the approximate specific duration, after which time oven operation will stop. -
Page 23: Cleaning And Maintenance
BROKEN COOKTOP. or other residue is heavily burned-on during heating, clean the Call 1-800-BE-SHARP for an authorized servicer. glass surface at once. These spills and residue can cause pitting of the surface of your cooktop unless the spill is removed while the cooktop is hot. -
Page 24: Maintaining Stainless-Steel
CLEANING AND MAINTENANCE MAINTAINING STAINLESS-STEEL OVEN INTERIOR CLEANING The stainless-steel drawer exterior and rangetop control panel CAUTION BURN HAZARD should be wiped often with a damp, soft cloth and polished to • Oven surfaces may be hot, and hot surfaces may create hot maintain its beauty. -
Page 25: Drawer And Door
CLEANING AND MAINTENANCE DRAWER AND DOOR TO REPLACE OVEN DOOR 1 Holding the door firmly from both sides, align the door to IMPORTANT: Do not allow excess water or cleaner to enter the oven so the hinges slip back into the openings. any holes or slots in the door. -
Page 26: Troubleshooting
TROUBLESHOOTING BEFORE YOU CALL COOKTOP PROBLEM SOLUTION Part of all of the appliance does not The appliance may be disconnected from the power source. If the Control Panel Display is operate not illuminated or does not respond to manual commands, check the following: •... - Page 27 Æ Downloads including the Installation Guide, Spec Sheet, and Owner’s Manual CONTACT US If at any time you have questions or comments concerning your SHARP product, please contact the SHARP Customer Assistance Center. We are available to assist you through multiple contact methods for your convenience:...
- Page 28 SHARP ELECTRONICS CORPORATION • 100 Paragon Drive • Montvale, New Jersey 07645 • USA 1-800-BE-SHARP (1-800-237-4277) TINSEB 616MR R1 APR 4, 2023...