Advertisement
Quick Links
QUICK START GUIDE
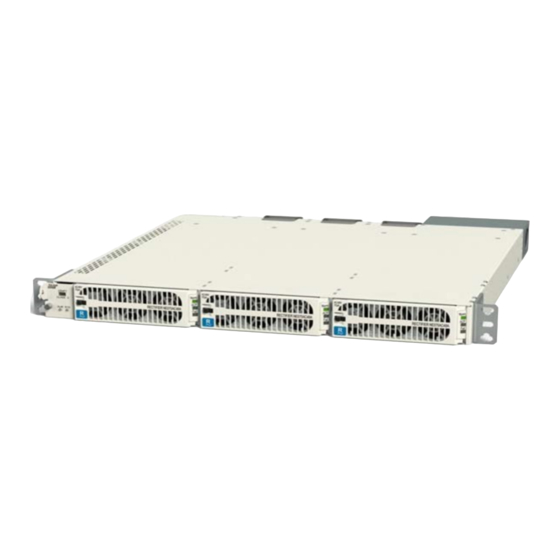
Infinity S 19" Universal Power Shelf
Models: J5964803 L209-L216
Universal Power Shelves accept +24V and –48V rectifiers and converters.
Primary shelf (L209, L211, L213, & L215) includes controller slot. Install shelf immediately below distribution, if used.
Expansion shelf (L210, L212, L214, & L216) includes cables and hardware to connect to an adjacent shelf.
No vertical spacing is required. Provide 2 inch minimum clearance at back of shelf for rectifier airflow.
Refer to Infinity S Flex Power System Brochure for details and accessories.
Tools required
•
Wire cutters and strippers
•
Cable crimpers
•
Torque wrench - 0-65 in-lb (0-10Nm)
Step 1 - Mount Shelf
1.
Reposition mounting ears as required - 4 screws
each.
Torque
to
screwdriver.
2.
Install Inter-Shelf brackets between adjacent
shelves (optional). Torque to 25 in-lb (2.8Nm) - Philli
screwdriver
3.
Attach shelf to the frame using a minimum of four
screws (two on each side) - 12-24 (provided). Torque
to 35 in-lb (4Nm) - 5/16" socket.
Step 2 - Connect Chassis Ground
Lug Landings: #10 double-hole on 5/8-inch center
(lugs not provided)
Some applications may rely on frame mounting
screws for shelf ground omitting the chassis ground
cable.
Minimum 10 AWG wire is recommended.
Torque 10-32 screws to 30 in-lb (3.4Nm) - 5/16"
socket.
Page 1
© 2021 ABB. All rights reserved.
25
in-lb (2.8Nm)
-
Phillips
•
Sockets - 5/16", 7/16", etc.
•
Screwdrivers - Philips #1 and #2, Flat small
2 Adjacent Shelves
Chassis Ground
Mounting Ears
Inter-Shelf Bracket
AC Wiring Box
Knockout
Advertisement

Related Manuals for ABB Infinity S J5964803 L209


Summary of Contents for ABB Infinity S J5964803 L209
- Page 1 Some applications may rely on frame mounting AC Wiring Box screws for shelf ground omitting the chassis ground cable. Chassis Ground Minimum 10 AWG wire is recommended. Torque 10-32 screws to 30 in-lb (3.4Nm) - 5/16” socket. Knockout Page 1 © 2021 ABB. All rights reserved.
- Page 2 Cable Connection - to stand-alone shelf Lug Landings - 2 x 1/4” on 5/8” center, 0.7” (18mm) max. tongue width. Connect cables with suitable lugs to +24V, -48V, and RETURN. Torque to 65 in-lb (7.3 Nm) Page 2 © 2021 ABB. All rights reserved.
- Page 3 Step 9 - Install 1-Wire Battery Temp and Voltage Monitor per Galaxy Pulsar Edge Controller Quick Start Guide - Optional 1. Connect 1-Wire Battery Temp and Voltage Monitor to upper J3/J4 connector on Rectifier Shelf with controller. Page 3 © 2021 ABB. All rights reserved.
-
Page 4: Step 11 - Initial Start Up
Voltage Current Voltage Current NE030DC48A 81A max 108A max NE040DC48A NE075DC24A 54A max 100A +24V Orange 3. Maximum current at full load and end of discharge voltage ( 21Vdc or 42Vdc ) Page 4 © 2021 ABB. All rights reserved. - Page 5 Relays 1 - 4 are user configurable. Customer specific factory defaults - see the Quick Start Guide Supplement. Positive Temperature Coefficient resistor protected battery voltage provides up to 0.5A for external alarm circuits. Page 5 © 2021 ABB. All rights reserved.
-
Page 6: Reference Documents
DC Returns - Isolated DC return (DC-I) or Common DC return (DC-C). Reference Documents abbpowerconversion.com These documents are available at 850035894 Galaxy Pulsar Edge Quick Start Guide CC848815341 Pulsar Edge Controller Family Product Manual Infinity S Flex Power System Brochure Page 6 © 2021 ABB. All rights reserved. - Page 7 – in whole or in parts – is to purchase orders, the agreed particulars shall prevail. forbidden without prior written consent of ABB. ABB does not accept any responsibility whatsoever for potential errors or possible lack of information in this Copyright©...