Table of Contents
Advertisement
Quick Links
Advertisement
Table of Contents

Related Manuals for Philips WelcomeEye Connect Pro 531022


Summary of Contents for Philips WelcomeEye Connect Pro 531022
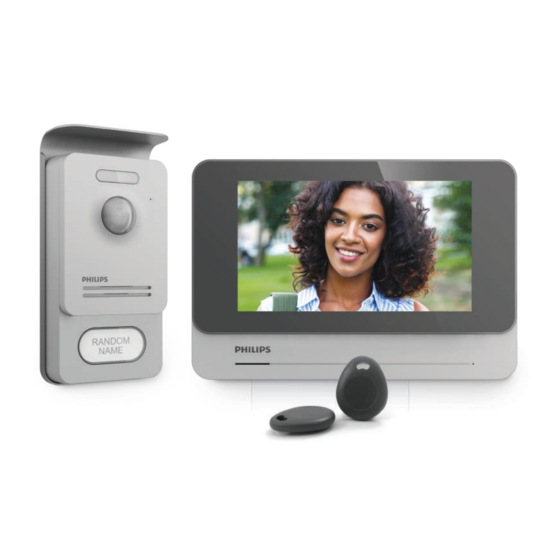
- Page 1 WelcomeEye Connect Pro Video Doorphone 531022 User manual...
- Page 2 Fig. 1 (Master) DES 9900 VDP Wifi 2.4GHz 550mA SMARTHOME FRANCE 19 avenue Marcel Dassault 37200 TOURS FRANCE 120 m max 24 V 230 V 1 2 3 4 SMARTHOME FRANCE 19 avenue Marcel Dassault 37200 TOURS FRANCE 110mA RFID 125kHz IP44 WelcomeEye Connect Pro / V5...
- Page 3 Fig. 2 Made in P.R.C Made in P.R.C Made in P.R.C Made in P.R.C Made in P.R.C WelcomeEye Connect Pro / V5...
- Page 4 Fig. 3 Made in P.R.C Made in P.R.C Made in P.R.C Made in P.R.C Made in P.R.C Made in P.R.C Made in P.R.C Made in P.R.C WelcomeEye Connect Pro / V5...
-
Page 5: Table Of Contents
CONTENTS SAFETY INSTRUCTIONS ..............p.2 CONTENT OF THE KIT ..............p.2 GENERAL INFORMATION ...............p.3 NOMENCLATURE ................p.3 PRODUCT INSTALLATION ...............p.5 1. Wiring 2. Configuring the intercom 3. Installing the main or additional monitor 4. Installing the main or additional intercom panel 5. Installing a camera (optional) MONITOR INTERFACE..............p.9 A. -
Page 6: Safety Instructions
1. SAFETY INSTRUCTIONS Important! • Please carefully read the user manual before installing or using this product. • If you are installing this product for someone else, remember to leave the manual or a copy of it with the end user. Warning: •... -
Page 7: Nomenclature
3. GENERAL This videophone consists of an indoor answering unit with a touch screen and an outdoor panel with an intercom and camera, allowing you to see and communicate with the visitor who has pressed the bell. It is easy to install as only two wires are needed for all functions: bell, video image, intercom and strike plate and automatic opener controls. - Page 8 Intercom panel: Twilight sensor White LED (night vision) Microphone Camera lens Loudspeaker Name holder lighting Call button, name holder and RFID scan area Tamper-resistant retaining screw 1 2 3 4 Programming switch RFID reset button Loudspeaker volume settings 1 2 3 4 1 2 3 4 Terminal block SMARTHOME FRANCE...
-
Page 9: Product Installation
5. PRODUCT INSTALLATION Important notes and advice: - To make the most of your intercom panel, we recommend configuring it (RFID, for 1 or 2 families, 1 or 2 intercoms, loudspeaker volume) before final installation. To do this, you will need to connect it on a table, to ensure that the settings have been configured correctly. -
Page 10: Configuring The Intercom
- The dry contact function can only be used if the respective intercom panel video is displayed. 2. Configuring the intercom (see fig. 1, fig. 2 or fig. 3) a. Configuring the intercom number: Place switch 2 on the left on intercom no. 1 and on the right on intercom no. 2. b. -
Page 11: Installing The Main Or Additional Monitor
To open the gate motor, hold the badge in front of the RFID scan area for 3 seconds. Two short beeps indicate that the gate is opening. 6) Replacing a badge RFID badges do not have predefined functions. It is the programming step that sets the badge’s function. - Page 12 Warning: during this step, do not connect the power supply to the 230V AC. 4. Installation of the main or additional intercom panel Warning: The product must not be connected to the power supply before the wiring has been completed. 1m60 1 2 3 4 SMARTHOME FRANCE...
-
Page 13: Installing A Camera (Optional)
Run silicone sealant around the entire contour of the intercom panel, on a dry wall to prevent moisture staying on the wall. 8 – Insert the screws and refit the two caps concealing the retaining screws. Note: screw through the black covers on the back of the intercom panel without removing them. -
Page 14: Monitoring Function
: indicates that the automatic answering function is activated : indicates that silent mode is activated (when this mode is activated, no ringtone will sound on the monitor when there is a call) Go to settings then to turn it ON or OFF. : indicates that the memory is full. - Page 15 1. Visit memory function a: Photo record of a visitor. b: Video recording of a visitor (there must be a formatted micro SD card in the monitor). c: Deactivation of the visit memory function. 2. Video recording configuration (valid if video mode has been selected) Choose the video recording time (10, 20 or 30 sec) during a missed call or in monitoring mode (note:...
- Page 16 a: To activate or deactivate voice message function. b: To play back the recorded voice message. c: Allows you to start and stop recording a voice message (maximum message length: 15s.). 6: Configuring WelcomeEye system options a: Activation of a second intercom panel (choose On if a second intercom panel is used). b: Activation of the camera option (choose On if a camera is used).
-
Page 17: Photo Album
a: Activation (On) or deactivation (Off) of WiFi network. b: configuration of the time between the visitor ringing the bell and when the notification is sent to the smartphone. c: Accessing network information and resetting the WiFi network. 10: Time and date settings a: time and date settings The date and time can be set from the app. -
Page 18: Video Album
: time and date photo was taken. Click on it to view the photo. : To delete one or several photos. Click on the waste bin then select the photos to be deleted and click on the waste bin again to delete them. E. -
Page 19: Smartphone Application
2.4 GHz WiFi Connecting a monitor to the WiFi network 1. Download the Philips app onto your smartphone from the Apple store or Play store (you must accept all permissions requested by the smartphone). 2. From the monitor, go to... - Page 20 4. From the WelcomeEye application, click on + to add a device. 5. Android: Click on new device and then next The UID of your monitor should appear. Click on it. GB16 WelcomeEye Connect Pro / V5...
- Page 21 “suivant” (next). Exit the app and go into the smartphone WiFi settings. Connect to the WiFi signal named “UIDcg…”. If a password is requested, enter the password shown in the Philips monitor interface: cg..GB17 WelcomeEye Connect Pro / V5...
- Page 22 Your videophone is now connected to the WiFi network and your smartphone can receive calls. Add a smartphone to a connected videophone 1. Download the Philips WelcomeEye application to your smartphone from the Apple store or Play store 2. From the WelcomeEye application, click on + to add a device.
- Page 23 3. Click on device connected to the network, then conn. dev. Make sure that the smartphone is connected to the same WiFi network as the monitor. 4. The UID of your monitor should appear. Click on it. 5. Enter the name you wish to give your device, the username, the password (it must match the password entered during initial setup) and the door number (= channel number) you wish to control.
- Page 24 Interface function Contains the different devices and enables switching to monitoring mode. Enables you to add a device Click the image to enter monitoring mode. Enables you to manage the camera settings: name, password, WiFi network, Channel number and alarm. Start/stop live video feed.
- Page 25 Used to delete recordings Groups recordings Allows you to edit photos (delete, sort and group) Contains the saved photos. Notifications on iOS and a call on Android. Info on the application. Exit the application. Manage settings. GB21 WelcomeEye Connect Pro / V5...
-
Page 26: Technical Characteristics
9. TECHNICAL CHARACTERISTICS Monitor: ref.: 531022 (WelcomeEye Connect Pro) - 2 wires - 7" touch screen - Resolution: 800 x 480 - Class 10 micro SD card up to 32GB (not supplied) - 2.4 GHz IEEE 8111 b/g/n WiFi - Radio power emitted: 18 dB maximum - Current consumption: 550mA - Power consumption: 13.2W - 6 ringtones (85dB) -
Page 27: Accessories
WelcomeEye Cam: (additional camera) ref.: 531007 - C-MOS colour sensor 900TVL - Viewing angle: 95°H, 75°V - Operating temperature: -20°C/+50°C - Protection rating: IP66 10. ACCESSORIES WelcomeEye AddComfort Pro (ref.: 531024)* WelcomeEye Cam - DES 9900 CVC (ref.: 531007) WelcomeEye Outdoor Pro (ref.: 531023)** WelcomeEye Lock - DES 1000 EDL (ref.: 531008) WelcomeEye Lock - DES 1100 EDL (ref.: 531009) WelcomeEye Power - DES 1000 DPS (ref.: 531010)**... - Page 28 • The intercom panel • Switch • Verify that the intercom panel is not is on but the monitor configuration of programmed in dual-family mode. does not ring the intercom panel Reminder: single-family =switch 1 set to ON, dual-family = switch 1 set to “ne pas déranger”...
- Page 29 • The Dual-family • Configuration • Verify that the intercom panel is not mode is not working programmed in dual-family mode. Reminder: single-family =switch 1 set to ON, dual-family =switch 1 set to OFF. Don’t forget to turn the power off for five seconds to activate the new settings (page 6) •...
- Page 30 • No video recording • Absence of micro • Videos can only be recorded when SD card there is a micro SD card in the monitor • Card format • Type of micro SD card or SDHC mic, unsuitable no SDXC mic •...
-
Page 31: Safety Precautions
The warranty does not cover: consumables (batteries, etc.) and damage caused by misuse, improper use, improper installation, external intervention, damage due to physical or electrical shocks, dropping or atmospheric phenomena. • Do not open the device, as this will void the warranty. •... -
Page 32: Fcc/Ce Warning
: This symbol indicates a risk of electrical shock or short-circuiting. - Only use this product with electrical current in the following ranges: 100-240 volts and 50-60 hertz. Never attempt to use this device at a different voltage. - Ensure that all the system’s electrical connections conform to the instructions for use. - In commercial establishments, ensure that you adhere to the electrical installation accident prevention regulations. - Page 34 FR - Ne jetez pas les NL - De lege batterijen en ES - No tire las pilas ni los piles et les appareils oude apparaten niet met het aparatos inservibles hors d’usage avec les huisvuil meegeven: deze kunnen residuos domésticos, ya que ordures ménagères.
- Page 35 Courant alternatif Znaki handlowe Philips są zarejestrowanymi znakami GB - Alternating Current handlowymi Koninklijke Philips N.V. Wechselstrom I marchi Philips sono marchi registrati di proprietà di NL - Gelijkstroom Koninklijke Philips N.V. PL - Prąd zmienny Las marcas registradas de Philips son marcas...
- Page 36 The Philips trademark and the Philips Shield Emblem are registered trademarks of Koninklijke Philips N.V. used under license. This product was manufactured and is sold by Avidsen and Avidsen is the sole guarantor of the product. - Non-contractual photos and illustrations - Reproduction in whole or in part prohibited - The technical characteristics...