Advertisement
- 1 SPECIFICATIONS
- 2 DESIGNATIONS AND PROPERTIES
- 3 CONDITIONS OF SAFE USAGE
- 4 ASSEMBLY AND START-UP
- 5 ADJUSTMENT AND UNCOUPLING OF FILTER HOSES
- 6 CLEANING OF THE PRE-FILTER AND FILTER MEDIA
- 7 CLEANING OF THE ROTOR CHAMBER AND MAINTENANCE OF THE FILTER COVER GASKET
- 8 DISASSEMBLY AND DISPOSAL
- 9 WARRANTY CONDITIONS
- 10 Documents / Resources
SPECIFICATIONS
| ULTRAMAX | 1000 | 1500 | 2000 | |
| Voltage | V | 220-240 | ||
| Frequency | Hz | 50 | ||
| Maximum water lift | cm | 160 | 180 | 250 |
| Wattage | W | 10 | 15 | 24 |
| Maximum performance | l/h | 1000 | 1500 | 2000 |
| Number of 1.9-litre baskets | pcs. | 3 | 4 | 5 |
| Recommended tank capacity | l | 100-300 | 250-400 | 400-700 |
| Hose diameters | mm | 16/22 | ||
DESIGNATIONS AND PROPERTIES
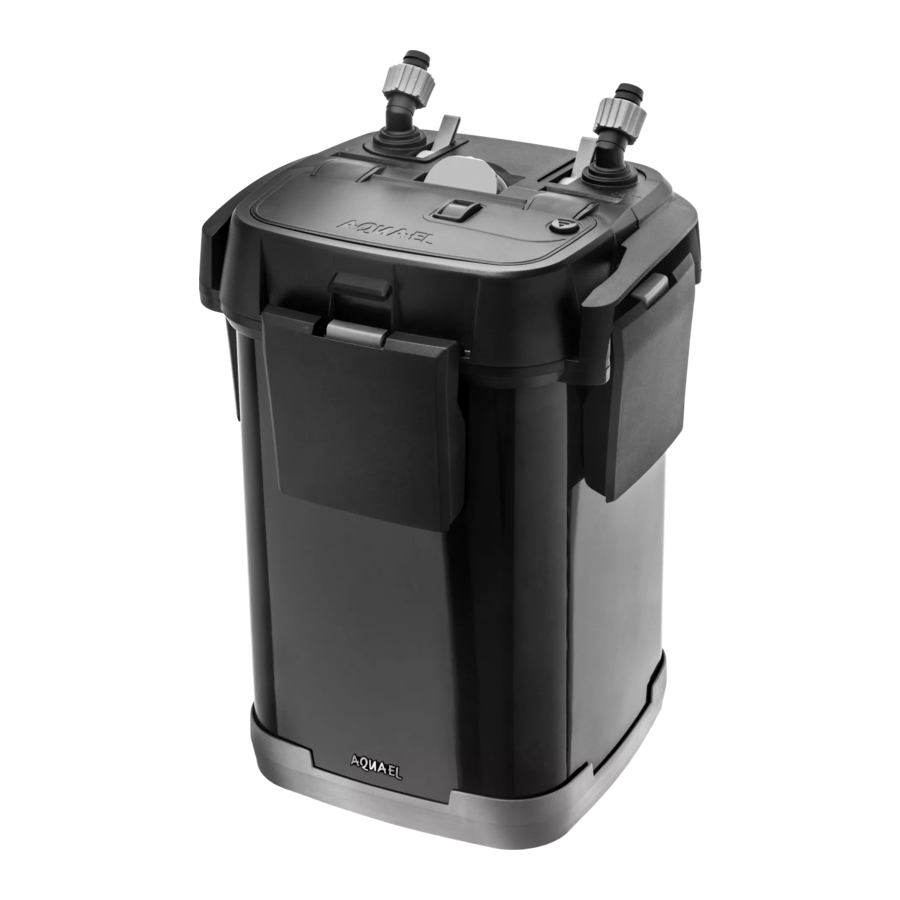
The ULTRAMAX filters are technologically advanced canister filters based on patented solutions. They are designed for the filtration and aeration of water in freshwater aquariums. The filters will keep the water perfectly clean while maintaining proper water parameters in any tank. In addition, they are exceptionally user-friendly. The pre-filter built into the cover reduces the required frequency of filter media maintenance. Moreover, it can be taken out without the need to disassemble the entire device or even to take it out of the aquarium cabinet. The double valves guarantee absolute water-tightness of the filter. The hoses can be easily detached, which ensures quick and easy maintenance. Another feature of the device is its exceptionally low energy consumption. The ULTRAMAX line of filters includes three models (ULTRAMAX 1000, 1500, and 2000) with a maximum performance from 1000 to 2000 l/h.
CONDITIONS OF SAFE USAGE
The devide you purchased was manufactured in conformity with all safety standards currently in force on the area of European Union. For long lasting and safe usage please read the safety conditions below:
- Before the installation and every starting of the device, carefully read this installation and maintenance manual.
![]()
- The device is designed for usage only indoors and accordingly to its destination.
![]()
- The device can be powered from a power grid of voltage stated on the device.
- The power cord is non-detachable and cannot be replaced. If the cord is damaged, the device must be discarded.
![]()
![]()
Before performing any maintenance works, unplug or turn off all the devices in the tank.

- This device can be operated by children who are at least eight years of age, by persons with reduced physical or mental capabilities or persons with no prior experience with the device only under supervision or following aninstruction on the safe operation of the device to ensure that the person is aware of any associated risks. The device is not a child's toy! Do not let children to clean or perform maintenance on the device without supervision.
![]()


ASSEMBLY AND START-UP

The ULTRAMAX filter must ALWAYS be positioned below the water level in the tank. To improve the appearance of your aquarium installation, you should place the filter inside a specially designed aquarium cabinet under the tank. Earlier insert the filter valves into the holes in the cover. The valves in the new filter are in the box with the hoses.
To prepare the device for operation, assemble the parts b-i from Fig. 1. The bottom ends of the hoses should be pressed until refusal onto the inlet stubs of the filter, and secured with clamp nuts (y). In order to ensure tightness, the ends of the hoses need to be pressed until refusal onto the stubs.
Before putting the filter into operation, remove the filter cover by unfastening the four clasps (i) securing the pre-filter and the four clasps (k) securing the filter cover (l). Next, lift up the filter cover (l). Take the filter baskets (m) and media out of the filter. The sponges and cotton wool should be soaked in water before use. The ceramic filter media should be poured from the plastic bags directly into the filter baskets. After that, they should be thoroughly rinsed to remove any residual dust. Otherwise, the dust may cause temporary cloudiness of water in the tank. In order to speed up the initiation of biological filtration, the sponge and ceramic media should be sprinkled with a biostarter containing live cultures of nitrifying bacteria (e.g. AQUAEL ACTIBACTOL). Next, put the filter baskets with filter media inside the filter in the following order (starting from the bottom): black sponge (thin), blue sponge (thick), cotton wool, ceramic media, container sieve (n) and assemble the filter cover (l) by closing the four clasps (k) holding the filter cover and the four pre-filter clasps (i). NOTE: in a newly-purchased filter, the filter media may be arranged in a different order. For optimum performance, arrange the filter media as described above. After the filter has been assembled, it can be primed with water. Make sure that the device is disconnected from the mains and that the hose valves are open. Pull the priming lever (o) located in the cover all the way out and then push it back in place. The resulting negative pressure inside the filter will cause it to automatically fill up with water from the aquarium tank. You will have to add water to the tank to compensate for the resulting drop of water level. Directly after the filter has been filled with water, it can be connected to the mains. NOTE: initially, the device may operate slightly louder, discharging large amounts of air bubbles through the outlet hose. This is normal, and is caused by the automatic venting of the inside of the filter. NOTE: In the event that the lever used for filling the filter (o) is blocked, insert a screwdriver in the opening in the front part of the lever and pull it out.
ADJUSTMENT AND UNCOUPLING OF FILTER HOSES
The ULTRAMAX filter is equipped with two independent double valves that are used for regulating the flow of water and for uncoupling the hoses that serve to feed water into the filter and return it back into the tank. Use the valves to adjust the device performance (the rate of water flow through the filter). In order to reduce or increase filter performance, move the valve lever. The valves are also used for cutting off water supply and for uncoupling the hoses. To do this, move the valve lever to the SERVICE position – at this moment, the valve body will slightly rise in the filter cover. Next, pull the valve up to detach it from the filter cover. To reattach the valve to the cover, perform the above steps in reverse order.
CLEANING OF THE PRE-FILTER AND FILTER MEDIA
The sponge pre-filter in the cover is designed to trap coarse mechanical impurities preventing them from getting inside the device. This can significantly reduce the required frequency of maintenance involving the disassembly of the entire filter and cleaning of the filter media inside it. The pre-filter must be cleaned if a visible decrease in performance is observed. To do this, close the "IN" filter hose, wait 2-3 seconds, close the "OUT" valve of the filter hose, disconnect the device from the mains, open the three pre-filter clamps (i) holding the pre-filter cover and lift the pre-filter cover up. Next, remove the prefilter basket (p) along with the sponge media (r) inside it, take the sponge media out of the basket and thoroughly rinse it under running water to remove any mechanical impurities. Then mount the prefilter in the filter cover in reverse order, open the filter valves and connect the device to the mains. When cleaning the pre-filter container, pay attention to the spillage protection flap. If the flap is displaced, put it back into its place.
Pre-filter maintenance only takes a few minutes and does not require removing the entire device from the aquarium cabinet. The pre-filter will require cleaning just once in 1 to 4 weeks, depending on the conditions prevailing in a particular aquarium.
The filter media installed in the filter should be rinsed only in water drained from the tank (do not use tap water for this purpose!). The first cleaning of the filter media should be performed if a visible decrease in performance is observed even after the pre-filter has been cleaned as described above. For optimum operation of the filter, the filter media should be cleaned or replaced at least every 12 months. In order to clean the filter media installed in the filter, close the hose valves (attention! it is recommended to close the IN valve first, wait 2-3 seconds, and then close the OUT valve – it will allow to pump most of the water out of the filter), disconnect the appliance from the mains, uncouple the hose valves, and take the device out of the aquarium cabinet. Some dirty water may spill out during the removal of the filter cover. For this reason, it is recommended that the device should be placed in a bathtub or shower tray before removing the cover. In order to remove the filter cover, unfasten the four main clasps (i) securing the pre-filter cover, unfasten the four smaller clasps (k) securing the filter cover, then lift up the filter cover (l).
Next, remove the filter baskets (m) from the filter, take out the filter media from the baskets and perform their replacement or maintenance in accordance with the above guidelines. Next, reassemble the device by placing the filter baskets (m) inside the filter, put the filter cover (l) on the container (j), fasten the four smaller clasps (k) to the secure the filter cover, fasten the four main clasps (i), attach the hose valves, open the hose valves, and connect the device to the mains. If needed, the hoses, tubes, and filter casing can be cleaned from algae, limestone or dust using a soft cloth or sponge.
CLEANING OF THE ROTOR CHAMBER AND MAINTENANCE OF THE FILTER COVER GASKET
In order to ensure trouble-free operation of the filter, every time filter cartridges are cleaned, one should also clean the rotor and the rotor chamber. To do so, turn the filter cover (l) upside down, remove the clasping cover (s) of the rotor chamber by rotating it anti-clockwise, pull out the rotor cover (t), take out the rotor (u) and thoroughly wash it under running water. Use a soft brush to clean the inside of the rotor chamber (w). Next, reassemble the device by performing all the operations described above in reverse order. Note! When cleaning the filter, carefully remove the gasket (x) located under the filter cover, thoroughly wash it in warm water, next dry it with a paper towel and carefully lubricate it with the silicone grease. One should also thoroughly clean the gasket groove using a soft sponge or cloth to remove limescale and other mechanical impurities. Next, carefully replace the gasket into the groove under the filter cover. If maintained in this way, the gasket will have a long service life: 4-5 years without replacement. If the gasket gets ruptured or otherwise damaged, it must be replaced.
DISASSEMBLY AND DISPOSAL
It is forbidden to dispose of used electric and electrical equipment in a trash bin. Segregating and proper utilization of this kind of waste leads to conserving the resources of natural environment. The user is responsible for delivering the used product to a specialized collection point where it will be accepted free of charge. You can obtain information about such a facility at the local authorities at the product seller.
WARRANTY CONDITIONS
The manufacturer grants a 24 month guarantee beginning on the date of purchase. The guarantee covers defects arising from manufacturer fault i.e. defective materials or assembly errors. It does not cover damage due to user's fault caused by improper handling of the device or using the device for purposes discordant its destination. Attention: any modification or disassembly attempt exceeding normal usage and maintenance cause the guarantee void. In case of noticing improper operation of the device send it with filled out warranty card to the distributor address. The conformity of the production date stamped on the product and written in the guarantee card is a prerequisite for accepting the guarantee. The following warranty conditions do not exclude, limit or suspend user's rights derived from discrepancy of the merchandise with the agreement.

Documents / ResourcesDownload manual
Here you can download full pdf version of manual, it may contain additional safety instructions, warranty information, FCC rules, etc.
Download Aquael ULTRAMAX 1000, ULTRAMAX 1500, ULTRAMAX 2000 - Filter Manual
Advertisement


Need help?
Do you have a question about the ULTRAMAX 1000 and is the answer not in the manual?
Questions and answers