Table of Contents
Advertisement
Quick Links
Advertisement
Table of Contents

Related Manuals for Shining 3D Freescan Combo


Summary of Contents for Shining 3D Freescan Combo
-
Page 2: Symbol Conventions
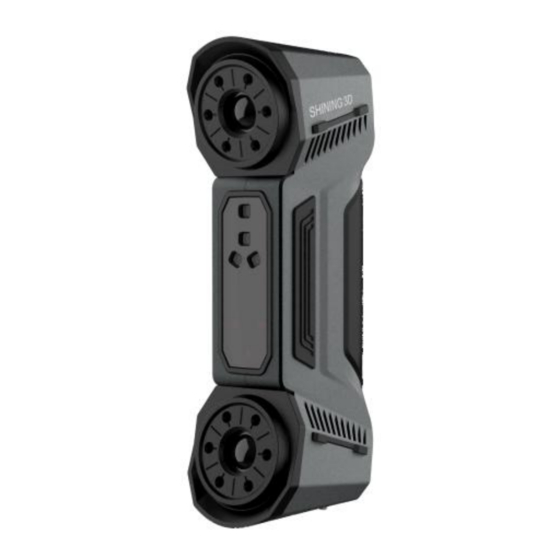
This document is related to your safety, lawful rights, and responsibilities. Read it carefully before installing and using the product. SHINING 3D Tech Co., Ltd. (hereinafter referred to as “the Company”) owns complete intellectual property rights for the contents of this document and, without the written consent of the Company, it is not allowed to copy, transmit, publish, reedit, compile or translate any contents of this document for any purpose or in any form. - Page 3 In the event of any ambiguity and/or any advice on the contents of the document, contact us by the contact. FreeScan Combo is a handheld laser 3D scanner independently developed by SHINING 3D. The scannner supports the laser mode and the IR mode. The laser mode is mainly used in industry scanning;...
- Page 4 Name Description Scanning distance Only after the power indicator lights on, the indicator/Power scanner can be operated. indicator Scanning distance indicator: ●Red: too close ●Yellow: relatively close ●Green: suitable distance ●Greenish-blue: relatively far ●Blue: too far Scanning Button Click: Preview/Start Scan/Pause Scan. Double-click: call out the menu, and at this time the scanning button becomes the confirmation button.
-
Page 5: Connect Cables
Connect Cables Caution Make sure you are using the correct power adapter (12V/5A). Step 1.Connect the aviation cable (4) to the power port (1) and the USB port (2) 2.Connect the power cord (6) to the power adapter (7). 3.Connect the power adapter (5) into the aviation cable (4). 4.Connect the USB port (3) on the aviation cable to the PC USB 3.0 port. -
Page 6: Operating Environment
Operating Environment Module Recommendation Intel® Core™ i7-8700 or above 6 gigabyte(GB) or above Storage 32GB or above Graphics Card NVIDIA GTX 3060 or above Operation System Win 10,Win11 Pro and Win 11 Home(all 64 bit) Software Installation Step 1.Insert the flash drive. 2.Copy the installation file to the PC and run it. - Page 7 Registration Register an account to log in or directly through a verification code when accessing the software for the first time. Click Register and fill in the account information in the registration pop-up. Note ●Enter valid email or phone number to get verify code for registration. ●Fill in correct user information for better service.
-
Page 8: Online Activation
Activation Online Activation The activation will be completed automatically after logging in successfully on the networked computer. Offline Activation If the PC cannot be networked, activate the scanner offline. -
Page 9: Firmware Upgrade
1. Export C2SN3D file. ⑴Prepare a USB flash drive or portable hard disk. ⑵)Insert the dongle to your PC. ⑶Enter the device serial number. ⑷Click Export. And save the C2SN3D file to a USB flash drive. 2. Upload C2SN3D file. ⑴Enter https://passport.shining3d.com/login on the networked computer. -
Page 10: Software Upgrade
Warning ● Make sure that the device is powered on during the upgrade; avoid interruption of the upgrade due to power cuts. ● Do not use mismatched software, firmware and scanners, because this may affect the scanning effect. If in doubt, please contact your supplier or technical support Software Upgrade Update the software for better performance, new functions or bug fixing. - Page 11 window automatically pops up for users to decide whether the new version shall be installed immediately. Click Yes to start installing. Warning The software will be closed during upgrading. Please save your projects properly before upgrading. Laser Mode Interface Function Description cription tion...
- Page 12 ●Reverse Engineering Service Feedback ●Link - Official Website: Open the official website Shining 3D to learn about the company’s products and information. -Facebook: Enter Shining 3D’s Facebook to view product introduction and other operations. - Support Platform: Enter Shining 3D’s support platform to view product introduction and other operations.
- Page 13 - Teamviewer: The quick access to remote assistance. Please send the ID and password in the pop-up window to the technical supporters for remote assistance. Scanning Settings ●Camera Window: To preview the actual scene during scanning. Parameters can be adjusted accurately through the camera window.
- Page 14 ●Reverse Engineering Service Feedback ●Link - Official Website: Open the official website Shining 3D to learn about the company’s products and information. -Facebook: Enter Shining 3D’s Facebook to view product introduction and other operations. - Support Platform: Enter Shining 3D’s support platform to view product introduction and other operations.
- Page 15 ●Settings - Advanced Mode: Check the box to select a smaller dot pitch when creating a new project - User Experience: To help us improve the user experience. We hope to be allowed to collect usage experience information and we will . - Factory Default: All settings can be restored to the initial settings, and the software will restart automatically.
-
Page 16: Quick Calibration
Edit Toolbar For more, see Data Edit. Shortcuts Quickly move the model or adjust the angle through shortcut keys. Scan & Generate For more, see scanning。 Point Cloud Side Toolbar For more, see functions。 Other Information To show information about FPS, Frames in Total, Points in Total, etc. - Page 17 Caution Start to calibrate when the temperature of the device get high enough(35℃). The calibration board is matched to the device. Calibrating with an mismatched calibration board will lead to inaccuracy or fail to get good scanned data. Always make sure that both sides of the calibration board are clean and free of scratches.
- Page 18 5. Move the device slowly and adjust the distance between the scanner and the calibration board according to the height indicating box. 6. Keep moving until all height boxes turn green. 7. Check the calibration result. Note ●If the calibration fails, please try it again. ●If the calibration still fails after several attempts, please contact the supplier or technical support.
- Page 19 Basic Scanning Workflow Laser scan Select scan mode IR scan Create new project group Laser scan Resolution IR scan Project settings Scan portrait / object Alignment Resolution Preview Scan Pause & Edit New project Generate point cloud Align(for multi- projects) Mesh Post process Mesurement...
- Page 20 Global Markers Scanning Workflow Laser Scan Scan Mode Invisible Light Scan Create a Project Group Laser Scan Resolution Invisible Light Scan Project Settings Scan Portrait/Object Alignment Mode Resolution Open a Global Marker File Scan Global Markers Generate Global Preview Markers Scanning Pause &...
- Page 21 Alignment( for multiple projects) 后处理 测量 保存 Mesh Post-process Measurement Save Preparation Make some preparations when scanning different objects. Marker Markers shall be attached to models. If the device fails to catch markers, it will not emit laser lines in the laser scan mode. ●...
-
Page 22: Laser Mode
Wrong Correct Spraying Spray the washable or specified imaging agent on the transparent, shiny or reflective model before scanning. Note Objects are not recommend to scan: ● Moving or vibrating objects. Frequent changes in the coordinates of such objects will result in poor scanning quality. - Page 23 IR Mode IR Mode is a scanning mode that scans with infrared light of a scanner, which is usually used to scan portraits and objects. Project and project group Create or open a project group before scanning. Project group Project group is the standard file structure of the software.It contains one project or more.
- Page 24 Scenario Project Group Description One object in the scene One project in One project can scan and save all with only one alignment the group data of the object. mode Multiple objects in the One project in only need one project to finish the scene with only one the group scan...
- Page 25 Method One: Click Open project group after selecting the scan mode. Method Two: Click and select Open project group on the scanning page. In the prompt window, select the project group file and then click open. Note ● The current project group will be saved automatically when opening a project group.
- Page 26 the project: Cannot open the project 1. All projects of group with different this group will be resolution or texture setting loaded to the at the same time. software after opening the project group. 2. Click open the project group. Remove Note Click...
- Page 27 Level Resolution High Detail 0.2mm Medium Detail 0.5mm Low Detail 1.0mm IR Mode Two kinds of scanning models are supported in the IR mode: Portrait and Object. Alignment Different alignment methods and resolutions can be chosen in different scanning modes.
-
Page 28: Scan Mode
Scan Alignment Resolution Note Mode Portrait Feature 0.2mm~3.0mm- Feature Alignment: Align the data Scan 1.0mm by automatically during scanning by default object geometric features. Rich features on the object are required for this mode. Object ●Feature Normal: Hybrid Alignment: Align the data Scan ●Hybrid 0.2mm~3.0mm-... - Page 29 Scan Description Mode Scan Point Acquire the data as point cloud. It could be switched to scan point cloud Cloud mode after scanning markers. It is also feasible to import the generated global marker file and then scan the point cloud. Partial HD Partial HD Scanning means selecting the area to be rescanned when the Scanning...
- Page 30 When the function is enabled, the scanning interface only displays the local perspective of the scanned object, which can be used for supplementary scanning of small holes. It is recommended to enable under 0.2mm point distance. View Lock The object view will be locked during scanning and not follow the scanning path, when the function is enabled.
- Page 31 Too Bright Proper Too Dark IR mode Working Distance Adjustment The effective area of the scanned data. It can be adjusted according to the size of the object and the alignment mode. The larger the value, the easier it is to scan data with far distance, but some data details will be lost.
- Page 32 Hair Mode When the function is enabled, it is easier to capture hair but the data noise will increase. Note Only available in portrait scan mode. Turn off Turn on Local Enlarged View When the function is enabled, the scanning interface only displays the local perspective of the scanned object, which can be used for supplementary scanning of small holes.
- Page 33 The object view will be locked during scanning and will not follow the scanning path, when the function is enabled. Preview / Start Scan / Pause Scan You can switch in these 3 status with the trigger on the scanner, or click the button in the software.
- Page 34 Preview Generate point cloud When finishing the scan, point at to choose Generate Point Cloud or Optimize and Generate Point Cloud , and then to edit the data later. Note The time it takes to generate point cloud depends on the data size of your project and the hardware configuration of your PC.
- Page 35 Edit scanned data Icon Function Instruction Multi View 6 different view angles to choose. Cutting Create a plane to do quick cut. For more, see Scan Plane Data Edit. Icon Function Instruction Point Cloud Edit the selected data area in the point cloud edit mode. Edit Markers Click Point cloud Edit again to switch to Markers Edit.
- Page 36 and a red circle will appear. At this time, roll the mouse wheel will zoom in and out of the circle. Move the red circle to select/deselect the area to be edited. Select All Select all of the data. Unselect Cancel All Selected Areas.
- Page 37 Shortcut Shortcut Function Press and hold the Left mouse button and move the cursor Rotate the data Press and hold the middle mouse button and move the Translate the data cursor Hold down Shift + Left mouse button Select the area of data Hold downCtrl + Left mouse button Deselect the area of data Scroll Wheel...
- Page 38 Method Instruction Fitting Press Shift + LMB to select data, and then click Generate Plane. The Point Cloud direction of the plane will be calculated by the software according to the direction of point cloud. Creating Press Shift + LMB to draw a line, and generate the cutting plane Straight according to the line.
- Page 39 Illusration Instruction ●Delete selected point cloud/markers:Data/Makers in the reverse direction will be shown in red afetr checking the box. The red data will be deleted after clicking Apply. ●Invert:Inverse the normal direction of the cutting plane. ●Delete Plane:Delete the created cutting plane. ●Reset:Reset all operations after creating the cutting plane.
- Page 40 Icon Function Instruction Project Create / Open a project group. Group About project group, please refer to Project Group. Delete Your Delete the current point cloud data to Scan rescan. Align Align the data as you need. For more, see Align. Save Your Save the scanned data.
- Page 41 Mode Instruction Note By Feature 1.Choose By Feature. Regular shaped objects (circular 2.Select the project which objects and square objects included) needs alignment in the fixed or small sized objects are not window and the floated suitable for this mode. window.
- Page 42 Icon Name Description Unwatertight For models with unclosed holes, use this mesh type to keep the original state with less meshing time. Semi- To fill the holes automatically. watertight Model Watertight To fill all holes automatically. The data can be 3D printed directly.
-
Page 43: Left Panel
●Max triangles: Set max plate number to get mesh model’s triangle plate number is within configured plate number. - Please enter this value reasonably to avoid over-simplification resulting in poor data quality. - Avoid entering extremely small numbers. ●Fill Small Hole:Automatically fill the small holes with a smaller perimeter than the number input. - Page 44 Function Instruction Note Simplifiction After simplification, the polygon numbers, The result will not be file size and detail of data will be reduced added by multiple universally. operations on Set the ratio from 0 to 99 and the default is Simplification.
-
Page 45: Right Panel
Buttom Panel Icon Function Description Select Visible To select data on the front view only. Select Through To select the front and back sides of the data. Note The other editing functions are the same as point cloud editing. Right Panel Icon Function Description... - Page 46 Click to display the menu of creating features. To close the menu, please click the icon again, or click Close. Point Creation Description Note Method Selected ● Click on the data to select a point. Points ● Click Create to create a point. Line-Plane ●...
- Page 47 redo it. ● The line generated is define as point from to point to point. Plane- ● Click on the plane previously created, or 2 planes should be Plane select it on the dropdown, repeat for the created in advanced. Intersection second plane.
- Page 48 ● Click on the data to select one point or click on a can't be on the previous created feature point. same line. ● In the Choice list select one of the points to reselect it. Feature creation failed! Error code 6: the points selected are co-linear.
- Page 49 Exact Movement Click "Move to" to align the model center with the input coordinates, and the axis direction is adjusted to match the input rotation angle. The coordinate system displayed on the interface is the global coordinate system, in which the direction of the red line is the positive direction of X-axis, green is the positive direction of Y-axis and blue is the positive direction of Z-axis.
- Page 50 Select a feature surface in the plane drop down menu, and select an axis in the corresponding constraint drop-down menu of the plane. The arrow on the plane corner indicates the positive direction of the plane, and the selected axis direction will be consistent with the plane direction.
- Page 51 Measurement Description Steps Distance Calculate the distance Click on the surface of the model to between two points on the pick two points, the calculation will be surface of the model. done automatically. ● Total is the 3D distance. ● X, Y and Z are the projection of the segment to the respective planes.
-
Page 52: Third Party Software
Format Data Type Saved as Application ASC (whole Optimized cloud scan.asc 1. Check the data; piece) points 2. Quick export and no need for post-operation. 3. Use other software to post- possess the data. Mesh Data scan.stl 1. 3D printing; 2. - Page 53 Geomagic Essentials and Solid Edge SHINING 3D Edition. Icon Name Description Export data Mainly used for 3D test. If the GeomagicControl X software has been installed, clicking this button will Geomagic open the GeomagicControl X software and import the Control X mesh data.
- Page 54 Add: No. 1398, Xiangbin Road, Wenyan, Xiaoshan, Hangzhou, Zhejiang, China, 311258 EMEA Region SHINING 3D Technology GmbH. Stuttgart, Germany Phone: +49 711 28444089 Add: Breitwiesenstraße 28, 70565, Stuttgart, Germany Americas Region SHINING 3D Technology Inc. San Francisco, United States Phone: +1 415 259 4787 Add: 1740 Cesar Chavez St.
Need help?
Do you have a question about the Freescan Combo and is the answer not in the manual?
Questions and answers