
Related Manuals for Shining 3D EinScan HX


Summary of Contents for Shining 3D EinScan HX
- Page 1 EinScan HX User Manual V1.2.0.4 Shining 3D EinScan HX_User Manual_V1.2.0.4_June 2021 User Manual...
- Page 2 ⚫ EinScan HX uses a class I laser when using laser scan mode, which is eye and skin safe under all conditions of normal use, but long time staring at the laser beam directly is not suggested. Please avoid direct eye contact with the laser beam. Keep the laser beam away from children.
-
Page 3: Table Of Contents
New Project Group ......................22 6.2. Open Project Group ......................22 6.3. Pre-setting ........................22 6.3.1. Select Texture ......................22 6.3.2. Alignments ....................... 23 6.3.3. Resolution ........................ 24 6.3.4. Global Marker File ....................24 6.4. Scan Setting........................25 Shining 3D EinScan HX_User Manual_V1.2.0.4_June 2021... - Page 4 10.3.1. Create Feature ......................45 10.3.2. Movement ........................ 46 10.3.3. Measuring......................... 48 Export Data .......................... 51 11.1. Data Formats........................51 11.2. Scale Data ........................52 Share Data ........................... 52 Third-party Software ......................53 Model Preview ........................54 Shining 3D EinScan HX_User Manual_V1.2.0.4_June 2021...
- Page 5 Device Button ........................55 Support and Contact ......................56 16.1. Submit a Ticket......................... 56 16.2. Contact Us ........................57 Shining 3D EinScan HX_User Manual_V1.2.0.4_June 2021...
-
Page 6: Specification And System Requirements
GTX1060, 16G RAM 7RF stealth pro RAM 32G MSI – GS63VR Alien — ALW15M-R2726R ASUS ROG STRIX — 1.2. Scanner Set Up Unpack and set up your scanner and software before getting started with scanning. Shining 3D EinScan HX_User Manual_V1.2.0.4_June 2021... -
Page 7: Unpack The Box
Please check carefully when opening the package. Note: Each scanner has its own serial number, label is placed at the bottom of the scanner. It will be required for maintenance. Do not remove it. Serial number Shining 3D EinScan HX_User Manual_V1.2.0.4_June 2021... -
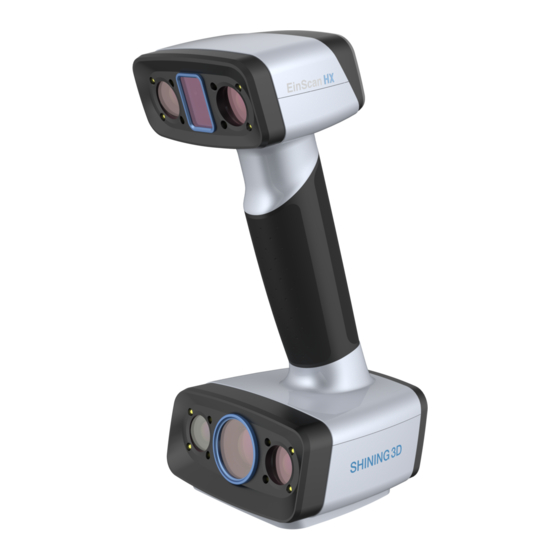
Page 8: Scanner Body
1.2.2. Scanner Body 1.2.3. Connection Hardware set-up Step 1: Take out the connection cable. Step 2: Insert the pin plug into the scanner’s circular connector port. Shining 3D EinScan HX_User Manual_V1.2.0.4_June 2021... - Page 9 Step 4: Plug the power adaptor into the connection cable DC in port. Step 5: Plug the power cable another end into a power outlet. Step 6: Connect the other end of the connection cable to a USB 3.0 port on your computer. Shining 3D EinScan HX_User Manual_V1.2.0.4_June 2021...
-
Page 10: Software Set Up
Click Upgrade and follow the instruction to update the device firmware. ⚫ Firmware updating will take around 6 mins. ⚫ Power off the device after upgrading successfully. ⚫ Reconnect the device, and open the software again, the device is running under the latest firmware. Shining 3D EinScan HX_User Manual_V1.2.0.4_June 2021... -
Page 11: Device Activation
(.ple file can be found in the USB drive.) Note: If the activation fails, send a request for activation file to einscan_support@shining3d.com with your serial number. Shining 3D EinScan HX_User Manual_V1.2.0.4_June 2021... -
Page 12: Software Update
When a new version is available, a pop-up will show when you start the software to remind you update your software to the latest version. You are recommended to click Yes for new feature experience. Update reminder Shining 3D EinScan HX_User Manual_V1.2.0.4_June 2021... -
Page 13: Interface And Parameters
When the device is offline, meaning the scanner is not connected to PC, please check the connection and click on the refresh connection button to reconnect. Device offline or connection loose Refresh the connection on the status bar Shining 3D EinScan HX_User Manual_V1.2.0.4_June 2021... -
Page 14: Settings
If you close the User Experience Enhancement Program, you might not be informed with software updates automatically. Factory Default All settings modifications will go back to the original settings. Shining 3D EinScan HX_User Manual_V1.2.0.4_June 2021... -
Page 15: Einscan Community
2.6.5. Help Mode Open Help Mode Click the question mark in the upper right bar, and open the help mode from the drop-down menu. Drop down menu Display the help tool related to the current interface. Shining 3D EinScan HX_User Manual_V1.2.0.4_June 2021... -
Page 16: Alerts
Fail to Activate For activation failure, make sure the scanner is well connected. Redo the activation. Device fails to activate Incorrect Configuration Try another USB port and update your graphics card drivers and restart the software. Shining 3D EinScan HX_User Manual_V1.2.0.4_June 2021... - Page 17 In Manage 3D Settings > Program Settings, Add EXScan software. Then change the preferred graphic processor for this program. Select NVIDIA processor. Click Apply to save the settings. Multiple graphic cards detected Change graphic card preferences for EinScan HX Shining 3D EinScan HX_User Manual_V1.2.0.4_June 2021...
-
Page 18: Software Scan Workflow
NEW PROJECT GROUP GROUP SELECT TEXTURE, SELECT RESOLUTION, SCAN SELECT RESOLUTION ALIGNMENT ADJUST BRIGHTNESS AND PREVIEW DISTANCE CONTINUE SCAN START SCAN CLOUDS EDITING COMPLETE SCAN NEW/OPEN PROJECT ALIGN PROJECTS SAVE DATA MESH MESH EDITING MEASUREMENT Shining 3D EinScan HX_User Manual_V1.2.0.4_June 2021... -
Page 19: Calibration
Clean with clear water only, do not use alcohol or chemical liquid to clean the calibration board. 4.2. Preparation for Calibration Take out the calibration board, and the position paper. Calibration board Position paper Shining 3D EinScan HX_User Manual_V1.2.0.4_June 2021... -
Page 20: How To Calibrate
Standard Calibration Position 1 Position 2 Position 3 — Position 4 Position 5 — Standard calibration (Point the scanner at the center of the board) Shining 3D EinScan HX_User Manual_V1.2.0.4_June 2021... - Page 21 Move the scanner up and down till a photo taken at a right distance. A pop-up of white balance calibration succeeded will appear. Click Next on the pop-up, you will enter to scan mode. Shining 3D EinScan HX_User Manual_V1.2.0.4_June 2021...
- Page 22 Customer calibration is recommended to do twice a week for daily use. ⚫ Move the scanner at a steady and slow speed. ⚫ Make sure to protect the calibration board and keep it clean, no scratches or stains on the black surface with white circles. Shining 3D EinScan HX_User Manual_V1.2.0.4_June 2021...
- Page 23 If there are any reflective object or strong light nearby, recalibrate to avoid the reflective and strong light. ⚫ If the positions were followed as suggested, recalibrate according to the suggested steps. ⚫ If the board is clear and clean without scratches or stains. Shining 3D EinScan HX_User Manual_V1.2.0.4_June 2021...
-
Page 24: Before Scanning
5.1. Scanner Buttons 5.2. Scan Modes Now you can start to scan. Use EinScan HX, you can use Rapid Scan by structure light scanning for a fast scan, or use Laser scan by laser triangulation to scan some difficult. Scan modes... -
Page 25: Preparation
Use the markers provided with the device only. Other markers can result in bad accuracy or not to be seen. ⚫ Spraying powder is not necessary for scanning black, transparent or shiny surface. Note: Laser line will not be projected when markers are not recognized. Shining 3D EinScan HX_User Manual_V1.2.0.4_June 2021... - Page 26 Object with markers Warning: EinScan HX uses a class I laser when using laser scan mode, which is eye and skin safe under all conditions of normal use, but long time staring at the laser beam directly is not suggested.
-
Page 27: Project
It is only available in Rapid Scan mode. NON-TEXTURE SCAN: The scan will be without color. Note: Texture scan requires the objects to have colorful texture surface, and it takes longer time for data processing when meshing. Shining 3D EinScan HX_User Manual_V1.2.0.4_June 2021... -
Page 28: Alignments
Use the markers coming with your device. Other markers can result bad accuracy or not be able to be detected for scanning. While scanning, make sure at least 4 markers in each frame can be taken. Example of use of hybrid alignment Shining 3D EinScan HX_User Manual_V1.2.0.4_June 2021... -
Page 29: Resolution
(Step 1—Step 6). When selecting marker alignment in Rapid Scan, you will find an option of “open global markers file”. It allows you to import .asc, .p3 marker files by using a combination of marker Shining 3D EinScan HX_User Manual_V1.2.0.4_June 2021... -
Page 30: Scan Setting
” or “ ” on the scanner, or drag the cursor under the camera preview to left (-) or right (+). Rapid scan Too bright (X) Good (√) Too dark (X) Camera window Preview display Shining 3D EinScan HX_User Manual_V1.2.0.4_June 2021... -
Page 31: Optimal Distance Range
When there is less geometry, software will remind “not enough features to align”. If you do not choose the plane detection, you could still scan flat surface, but the misalignment will happen. Plane detection on when not enough features to align Shining 3D EinScan HX_User Manual_V1.2.0.4_June 2021... -
Page 32: Other Settings In Laser Scan
Turn the data setting cursor from left to right . It will help scanning, but with noise. Global markers scan. After creating a new project, select Scan Point Cloud or Scan Markers. See "5.3.2 Laser Scan." Shining 3D EinScan HX_User Manual_V1.2.0.4_June 2021... - Page 33 Scan other settings Shining 3D EinScan HX_User Manual_V1.2.0.4_June 2021...
-
Page 34: Scan
(when texture alignment is selected), it will stop data capturing. The software will remind tracking lost on the interface with sound. You can point the scanner at any scanned regions, and the scanning will be resumed. Shining 3D EinScan HX_User Manual_V1.2.0.4_June 2021... -
Page 35: Generate Point Clouds
3d point clouds will be generated. The optimization includes a realignment of the data. Then you can select, delete data to use the edit tools. Before generating point cloud Shining 3D EinScan HX_User Manual_V1.2.0.4_June 2021... -
Page 36: Clouds Editing
Click the button or space bar to apply the edition, and exit edit mode. Cancel edit Undo all editors, and exit edit mode. Note: Don’t support markers editing. 7.6. Right-click Context Menu Right click, and there will be the context menu as below. Shining 3D EinScan HX_User Manual_V1.2.0.4_June 2021... -
Page 37: Cutting Plane
Fitting Point cloud: Press Shift + left-click to select data, then click the button “Generate plane”. The cut plane will be created by point cloud fitting. The direction of the plane will be calculated by the software according to the direction of point cloud. Shining 3D EinScan HX_User Manual_V1.2.0.4_June 2021... - Page 38 Cutting plane operation is only workable under the current project. ⚫ Scan with Cutting plane: Only one side from the cutting plane can be scanned. Cutting plane is very useful when a base need to be removed during scanning. Shining 3D EinScan HX_User Manual_V1.2.0.4_June 2021...
-
Page 39: Project Group
It can be imported when it is needed. Click Delete or right click and delete to delete the selected project(s) from the project tree and the local folder. Shining 3D EinScan HX_User Manual_V1.2.0.4_June 2021... -
Page 40: Align Projects
Click “Apply” to align. Click “Next”, the aligned projects will merge to a group, you could continue further alignment. Click “Cancel” to recall the alignment. Click “Exit” to exit project alignment interface. Shining 3D EinScan HX_User Manual_V1.2.0.4_June 2021... -
Page 41: Meshing
The texture capture is separate from the 3d data capture. If the texture has been captured, it will still be displayed on areas where holes are filled in the mesh processing. If the texture is missing, the corresponding mesh data will be in black. Shining 3D EinScan HX_User Manual_V1.2.0.4_June 2021... -
Page 42: Mesh Optimization
For objects with holes (smaller than 10 mm), you are not recommended to use the function or you can set the function parameter value to a smaller one. Shining 3D EinScan HX_User Manual_V1.2.0.4_June 2021... -
Page 43: Mesh Editing
SHIFT + Left mouse: Select unwanted data, the selected section will be displayed in red, as shown below. CTRL+ Left mouse: Deselect a selected region. Edit buttons: ①Multi view ②Select Visible ③Select Through ④Rectangular ⑤Polygon ⑥Circle ⑦Paint Brush ⑧Select all Shining 3D EinScan HX_User Manual_V1.2.0.4_June 2021... -
Page 44: Texture Adjustment
: Click Reset to return to 0. Modify texture This modification is not saved in the project file. Export the data to save the texture editing. Shining 3D EinScan HX_User Manual_V1.2.0.4_June 2021... -
Page 45: Simplification
After simplification 9.5. Mesh Optimization Mesh optimization can optimize the quality of the data. There are 3 ratio options of mesh optimization. Processing time will be different. Below shows the result of 3 different ratios. Shining 3D EinScan HX_User Manual_V1.2.0.4_June 2021... -
Page 46: Smooth
It might remove some small details or smooth some sharp edges at the same time. The example of before and after smoothing is shown below. Run 2 times, data will be smoothed twice. Original Shining 3D EinScan HX_User Manual_V1.2.0.4_June 2021... -
Page 47: Remove Small Floating Parts
9.8. Auto Hole Filling Input the perimeter of the biggest hole to be filled. Less than 100mm is recommended. This function will fill every hole with a smaller perimeter than the number input. Shining 3D EinScan HX_User Manual_V1.2.0.4_June 2021... -
Page 48: Manual Hole Filling
The hole edges are displayed green, and get red after picking. The number of the holes and the number of holes filled will be displayed on the interface. Choose Curvature, Tangent or Flat before picking a hole. Manual hole filling Click the edge of the hole to fill it. Shining 3D EinScan HX_User Manual_V1.2.0.4_June 2021... -
Page 49: Texture Remapping
No Texture layout optimization Texture layout optimization Note: ⚫ TLO requires a longer time to compute. ⚫ TLO is used only with OBJ output. ⚫ TLO result is more convenient for texture manual editing. Shining 3D EinScan HX_User Manual_V1.2.0.4_June 2021... -
Page 50: Measurement
Click on the data to select a point. — Selected Points Point ⚫ Click create to create a point. ⚫ Line-Plane Line Click on the created line, or select it on the Interface Plane should dropdown. Shining 3D EinScan HX_User Manual_V1.2.0.4_June 2021... -
Page 51: Movement
Movement Use this mode to modify the alignment of the data to the global coordinate. This action is useful for post processing or reverse engineering. The transformations do not affect the shape and size. Shining 3D EinScan HX_User Manual_V1.2.0.4_June 2021... - Page 52 Prior to 3-2-1 movement, the creation of a plane, line not normal to the plane and point are required. 3-2-1 movement (plane-line-point alignment) aligns the data by deletion of the Degrees of Freedom. The arrows represent the global coordinate system, Red=X+, Green=Y+, Blue=Z+. Shining 3D EinScan HX_User Manual_V1.2.0.4_June 2021...
-
Page 53: Measuring
This tool calculates the distance between two points belonging to the surface of the data. Click on the data to pick the first and second point, select one of the two points to redo it. Shining 3D EinScan HX_User Manual_V1.2.0.4_June 2021... - Page 54 This tool calculates the volume contains in a watertight mesh. It returns the volume in mm^3 and the coordinates of the smallest box, parallel to the global coordinates, containing all the data. Volume menu Shining 3D EinScan HX_User Manual_V1.2.0.4_June 2021...
- Page 55 Prior to the calculation make sure the file is watertight (no holes). File not watertight alert Shining 3D EinScan HX_User Manual_V1.2.0.4_June 2021...
-
Page 56: Export Data
◆ Low storage Mesh scan.ply ◆ Easy texture editing ◆ Low storage Mesh scan.3mf ◆ Compatibility with Microsoft paint3d ◆ Global Marker File in EinScan Marker software scan.p3 position ◆ Measurement of the marker Shining 3D EinScan HX_User Manual_V1.2.0.4_June 2021... -
Page 57: Scale Data
Note: ⚫ Sketchfab basic plan accounts can only upload data less than 50M, while Pro plan account can share with a maximum of 200M. ⚫ Data is saved as .STL does NOT contain texture. Shining 3D EinScan HX_User Manual_V1.2.0.4_June 2021... -
Page 58: Third-Party Software
Install a third-party software ( Geomagic ControlX , Verisurf , Einsense Q , Geomagic Design X , Geomagic Essentials and Solid Edge ) first. Then after meshing data, click to export data to the third-party software. Shining 3D EinScan HX_User Manual_V1.2.0.4_June 2021... -
Page 59: Model Preview
In this case we recommend Meshlab, a free mesh software editor, or upload to sketchfab. Note: To load a OBJ textured file make sure to have the MTL and JPG files with the same name and in the same folder than the OBJ. Shining 3D EinScan HX_User Manual_V1.2.0.4_June 2021... -
Page 60: Device Button
Device Button Long press the scan button on the device to pop up menu. You could then enter calibration, delete data, and full screen operation directly. Device button menu Shining 3D EinScan HX_User Manual_V1.2.0.4_June 2021... -
Page 61: Support And Contact
Support and Contact 16.1. Submit a Ticket Sign up in Shining 3D Support Platform support.shining3d.com. Or send email directly to einscan_support@shining3d.com. Log in with your account. Click New Ticket on the tab bar to submit a ticket and check the status. -
Page 62: Contact Us
Phone: +49 711 28444089 Add: Breitwiesenstraße 28, 70565, Stuttgart, Germany Americas Region SHINING 3D Technology Inc. San Francisco, United States Phone: +1 415 259 4787 Add: 1740 Cesar Chavez St. Unit D. San Francisco, CA 94124 Shining 3D EinScan HX_User Manual_V1.2.0.4_June 2021...
Need help?
Do you have a question about the EinScan HX and is the answer not in the manual?
Questions and answers