Advertisement
Quick Links
Advertisement

Related Manuals for ESKUTE Spark Y


Summary of Contents for ESKUTE Spark Y
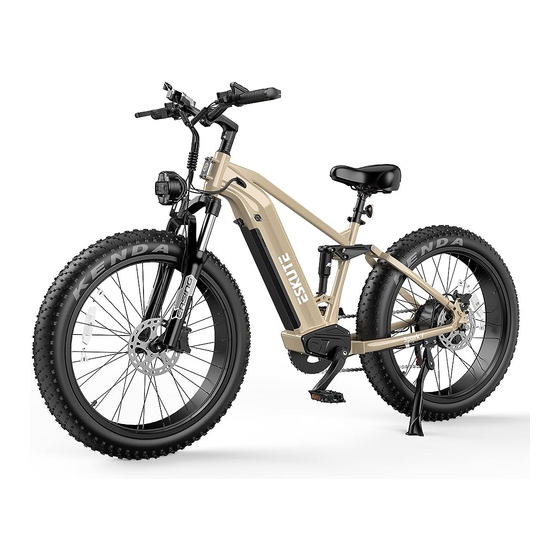
- Page 1 User Manual Fat Tire E-Bike Model: Spark Y www.eskute.com...
- Page 2 WELCOME! Congratulations on the purchase of your new Spark Y and welcome to the Eskute Team! About this User Manual It is important for you to understand your new electric bike. Even if you have ridden an e-bike before, it is important for every person to read this manual before riding - you’ll know how to get better performance, comfort, and enjoyment from...
-
Page 3: Table Of Contents
TABLE OF CONTENTS SECTION 1. Geometry 4. Charging the Battery 2. Specification 5. Maintenance Instructions 3. Assembling Your Bike Tires Brakes Handlebars Battery Care Front Wheel Seat / Saddle Pedals 6. More Tips 7. Warranty... -
Page 4: Geometry
Geometry Full Suspension Handlebar Saddle Frame On/Off Switch Headlight Fender Display Battery Shifter Throttle Rear Derailleur Front Brake Fat Tire Brake Rear Brake Front Fork... -
Page 5: Specification
Specification Model Spark Y Capacity 48V,20Ah (960Wh) Range 40-70 Miles Average (estimate) Battery Charger 54.6V, 3A Charging Time 4-5 Hour Charging Motor Power 48V, 750W Sutto (Bafang) Hub Motor Display Display LED Display with APP Suspension Fork Hydraulic lockout, Coil spring adjust for preload... -
Page 6: Assembling Your Bike
Before assembling, check that all parts are complete and in good condition. If you have any NOTE: questions or cannot find the information you need in the manual, please contact at support@eskute.com. STEP 1. Install the Handlebars 1.Using the Allen wrench, unscrew the 4 bolts and remove the stem plate. - Page 7 Note: DO NOT depress the brake levers before installing the front wheel. Figure 1. Stem plate bolt removal. Figure 2. Tightening stem plate bolts.
- Page 8 STEP 2. Install the Front Wheel 1.Take off the plastic protective gaps on each side, throw these away. 2.Loosen up both bolts untill you are able to slide the wheel into place, making sure the brake caliper slides onto the rotor and both of the forks are properly hooked onto the wheel, fasten and screw the bolts.
- Page 9 STEP 3. Install the Seat Post 1.Loosen the seat post clamp and insert saddle post. 2.Adjust saddle to the preferred height then tighten clamp. Tip: DO NOT raise the saddle higher than the safety line. Figure 5. Dropping seat into bike. Figure 6.
- Page 10 STEP 4. Install the Rear Light / Reflector 1.Wrap the bracket for the rear reflector around the seat post. 2.Secure with the included Phillips head screw. 3.Position the reflector facing rearward. Figure 7. Fix the screws. Figure 8. Tighten the screws.
- Page 11 STEP 5. Attach the Pedals 1.Check the end cap on both pedals in order to identify the left and right pedal. Tip: Imagine that you are sitting on the bike to correctly determine left vs. right side. 2.Grab the wrench, and screw the pedal tightly into the correct crank. The pedals should thread smoothly and easily if properly aligned.
-
Page 12: Charging The Battery
Charging the Battery Tip: The battery can be charged on/off your bike. Make sure that your motor system and battery is turned completely off before beginning any charging procedures. 1.Use your key to unclock the battery pin, then pull the battery up from the bottom and slide it downward to remove it from the frame. - Page 13 Figure 11. Removing the battery Figure 12. Charging your battery 3.Plug your charge into an outlet. The indicator light will turn green. Green Light: Not charging / Fully charged Red Light: Charging / Not fully charged Figure 13. Checking the charger indicator...
- Page 14 4.You can also check the battery life by pressing on the button toward the bottom of the battery pack. The light will indicate how much juice is left in your battery. Green Fully charged Signal Figure 14. Checking battery life 5.After allowing your bike to fully charge, test to make sure the LCD display is working.
-
Page 15: Maintenance Instructions
Figure 16. Checking the LCD display Cheers! Your Spark Y is now fully assembled in all its glory. Give yourself a pat on the back and admire your work. Take some pictures, call a friend, and take a well-deserved break while charging. - Page 16 BRAKES It’s important that your learn, and remember, which brake lever controls each brake (front/rear) in order to ensure your safety. Traditionally, the right brake lever will control the rear brake, while the left brake lever will control the front brake. However, this may vary depending on what country you are in, and can always be adjusted to suit your own preference.
- Page 17 Tip: Twist clockwise to decrease tension, and counterclockwise to increase tension. WARNING! Riding with worn brake pads, improperly installed brakes, or wheels where you can visibly see the wear from the brake pads, is dangerous and can result in serious injury or death. Applying the brakes suddenly or with too much pressure can result in your wheel locking up.
-
Page 18: Tires
TIRES Your Spark Y will come standard with 26” X 4.8” CST fat tires. It’s important that you understand appropriate conditions and terrain these tires can handle, in order to ensure safe riding Tire Pressure Size, pressure rating and other information can often be found on the sidewall of the tire. Tire pres... -
Page 19: Battery Care
If the battery becomes physically damaged, non-functional, has been dropped, or involved in a crash, or you notice it performing abnormally, please discontinue use and contact ESKUTE BIKE immediately. Charging Your Battery TThe charger is rated for 100-240V. Be sure to check the charger, charging cables, and battery for damage before beginning each charge. - Page 20 Only charge the battery with the supplied ESKUTE charger, as others may cause damage to the battery or increase the possibility of fire or explosion. While the charger is designed to automatically stop charging once the battery is full, do not leave it plugged in for periods of time greater than 12 hours.
- Page 21 1.For the first initial charge upon receiving your bike (or after long storage time), be sure to charge the battery for at least 8 hours before riding. Note: We recommend that you let the battery charge for at least 8 hours for the first 3 charges to make sure the cells balance properly 2.After the first 3 rides, you may begin normal charging procedures Storing Your Battery...
- Page 22 More Tips Proper maintenance is essential for your safety and to ensure that you get optimal performance from your eBike. If you are unable to perform the general maintenance yourself, please reach out to a qualified mechanic. Be sure to frequently inspect and tighten your crank bolts as needed. Crank bolts can loosen on any bike, especially after strenuous use.
- Page 23 This Limited Warranty is only in accordance with the following terms: This limited warranty applies only to the original owner of an ebike purchased from ESKUTE’s online store or an authorized ESKUTE retailer.
- Page 24 Damages resulting from improper charging of the battery pack or use of any charger not sup plied by Eskute Bike WARRANTY CLAIMS PROCESS: ESKUTE WILL NOT REPLACE ANY COMPONENT UNDER THIS LIMITED WARRANTY WITHOUT FIRST SEEING PHOTOS OR VIDEO OF THE DAMAGED COMPONENT.
- Page 25 You will be responsible for shipping costs associated with returning a component, unless ESKUTE agrees in writing to pay for such shipping costs. Replacement components under this Limited Warranty shall only be shipped to the address of the original purchaser.
- Page 26 Welcome to the family Company: Shenzhen Huitong Global Trade Co., Ltd. E-Mail: support@eskute.com Add: Saixi Technology Building No.2402, Yuehai Street Binhai Website: www.eskute.com Community, Binhai Boulevard No.3398, Shenzhen Made in China...
Need help?
Do you have a question about the Spark Y and is the answer not in the manual?
Questions and answers