Table of Contents
Advertisement
Available languages
Available languages
Advertisement
Chapters
Table of Contents

Related Manuals for Philips Lumea IPL 8000 Series


Summary of Contents for Philips Lumea IPL 8000 Series
- Page 1 Lumea BRI947...
- Page 3 Suitable skin tones / Tonos adecuados de piel Suitable body hair colors / Colores de vello corporal adecuados...
- Page 4 English 6 Español 30...
-
Page 5: Table Of Contents
Philips Lumea Prestige is gentle and offers convenient and effective treatment at a light intensity that you find comfortable. -
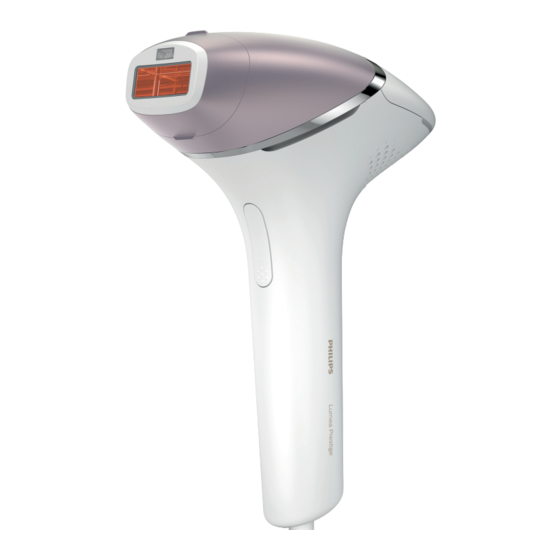
Page 6: Device Overview
English Device overview Light exit window with integrated UV filter 2 Attachments a Body attachment b Underarm attachment c Bikini attachment d Facial attachment 3 SmartSkin sensor 4 Integrated safety system 5 Reflector inside the attachment 6 Electronic contacts 7 Opening for electronic contacts 8 Flash button 9 On/off button... - Page 7 English - If you are taking photosensitizing agents or medications, check the package insert of your medicine and never use the device if it is stated that it can cause photo-allergic reactions, photo-toxic reactions or if you have to avoid sun when taking this medicine. - If you take anticoagulation medications, including heavy use of aspirin, in a manner which does not allow for a minimum 1-week washout period prior to each treatment.
-
Page 8: Important Safety Instructions
- Do not attempt to open or repair your device. Opening Philips Lumea Prestige may expose you to dangerous electrical components and to pulsed light energy, either of which may cause bodily and/or eye injury. - Page 9 English - No modification of this equipment is allowed. Do not modify, override or cut off any part of the device (e.g. adapter or the cord), as this causes a hazardous situation. - Do not look at the flash while using the device. Use the device in a well-lit room so that the light is less glaring to your eyes.
-
Page 10: How Ipl Works
English - The adapter, light exit window and the filter of the attachments can become very hot ( >210 °C/>410 °F ) during usage. Always let the adapter, the light exit window as well as the filter and inner parts of the attachments cool down before you touch them. -
Page 11: Recommended Treatment Schedule
English Recommended treatment schedule Initial phase To achieve effective hair reduction, follow the initial treatment schedule. Initial treatment schedule For the first 4 treatments, use Lumea Prestige once every two weeks to ensure that all hairs are treated. - Treat yourself within 3 days before or after the planned treatment date. - If you have not treated yourself within 3 days before or after the planned treatment date, restart the initial phase. -
Page 12: How To Use Your Lumea Prestige
English - After 2-3 treatments, you should see a noticeable reduction in hair growth. However, to effectively treat all hairs, it is important to keep on treating according to the recommended treatment schedule. - After 4 treatments, you should see a significant reduction of hair growth in the areas that you treated with Lumea Prestige. - Page 13 English 2 Select the correct attachment to test your skin (see 'Attachments'). to turn on the device. 3 Press the on/off button 4 Choose an area for your skin test. 5 Press the device firmly onto your skin and hold it in place. The integrated safety system prevents unintentional flashing without full skin contact.
- Page 14 English 7 Try each setting on your skin if comfortable: - When the 'READY to flash' light is white, press the flash button on the handle once, to treat one spot with setting ➀ The device makes a soft popping sound. The flash gives you a warm sensation.
- Page 15 English C Treatment IMPORTANT: First finish section A (Remove hair & clean your skin) and B (Test skin 24 hrs before treatment). 1 Connect the power adapter to the device and plug into a power outlet. to turn on the device. 2 Press the on/off button 3 Choose the setting you selected after the skin test (section B, step 9).
- Page 16 English 6 Move to an adjacent spot and press the flash button again. The surface of the attachment that is in contact with your skin is slightly larger than the light exit window. The surface of the attachment should overlap the previous spot to make sure you flash the complete skin area.
-
Page 17: Learning More About Your Lumea Prestige
English 5 Clean the light exit window of the device (A). 6 Clean all surfaces of the attachment, including the metal reflector and window of the attachment (parts B, C, D, E). 7 Let all parts dry thoroughly. 8 Store in a dust-free place at room temperature. Learning more about your Lumea Prestige Attachments For optimal results, it is important to use the correct attachment intended... -
Page 18: Smartskin Sensor
English Body attachment The body attachment has the largest treatment window and a curved-in design to effectively cover and treat areas below the neckline, especially large areas such as legs, arms and stomach. Facial attachment The facial attachment has a precise flat design with extra integrated filter for safe and precise treatment on the sensitive skin above the upper lip, chin and sideburns. -
Page 19: Selecting The Light Intensity
English 1 The SmartSkin sensor prevents you to treat areas of your skin that are too dark: if it detects a skin tone that is too dark for treatment with Lumea Prestige, the 'READY to flash' light starts blinking orange. It does not flash when you press the flash button. -
Page 20: Two Treatment Modes: Stamp & Flash And Slide & Flash
Two treatment modes: Stamp & Flash and Slide & Flash Your Philips Lumea Prestige has two treatment modes for more convenient use on different body areas: - The Stamp & Flash mode is ideal to treat small or curvy areas like knees and underarms. -
Page 21: Treatment Time Per Area
English Treatment time per area 1.5 min. 1.5 min. 2 min. 4.2 min. 6.5 min. -
Page 22: Using Your Lumea Prestige Before And After Tanning
English Using your Lumea Prestige before and after tanning Tanning with natural or artificial sunlight Intentionally exposing your skin to natural or artificial sunlight with the aim of developing a tan influences the sensitivity and color of your skin. Therefore the following is important: - After each treatment, wait at least 48 hours before tanning. - Page 23 English cloth. If dryness persists, you can apply a non-scented moisturizer on the treated area. Rare side effects - Burns, excessive redness (e.g. around hair follicles) and swelling: these reactions occur rarely. They are the result of using a light intensity that is too high for your skin tone.
-
Page 24: Troubleshooting
In case the attachment is well connected and it is possible to produce flashes with the device, contact the Consumer Care Center in your country, your Philips dealer or a Philips service center. The cooling airflow of the Make sure the cooling airflow of the fan is fan is blocked by hands or unblocked. - Page 25 If the UV filter is broken, do not use the device exit window is broken. anymore. Contact the Consumer Care Center in your country, your Philips dealer or a Philips service center. The skin feels more You treated an area for...
-
Page 26: Warranty And Support
Warranty and support If you need information or support, please visit www.philips.com/support or read the international warranty leaflet. Recycling - Do not throw away the product with the normal household waste at the end of its life, but hand it in at an official collection point for recycling. -
Page 27: Electromagnetic Compatibility - Compliance Information
Below you find the meaning of the warning signs and symbols on the label and in the user manual. This symbol identifies the manufacturer of the product: Philips Consumer Lifestyle B.V. Tussendiepen 4, 9206 AD Drachten. The Netherlands This symbol means that you have to read the user manual carefully before you use the device. - Page 28 English This symbol indicates that the equipment is suitable for direct current only. Symbol indicates that the device should not be used around the eyes and near the eyebrows. This symbol means: 'Do not use this device in a bathtub, shower or water-filled reservoir. This symbol means that the transformer is designed to be short-circuit proof.
-
Page 29: Bienvenida
Lumea Prestige de Philips es delicada y ofrece un tratamiento eficiente y conveniente a una intensidad de luz que le resulte cómoda. Por fin el vello no deseado es cosa del pasado. -
Page 30: Descripción General Del Dispositivo
Español Descripción general del dispositivo Ventanilla de salida de luz con filtro UV integrado 2 Accesorios a Accesorio corporal b Accesorio para las axilas c Accesorio para la zona del bikini d Accesorio facial 3 Sensor SmartSkin 4 Sistema de seguridad integrado 5 Reflector dentro del accesorio 6 Contactos electrónicos 7 Apertura para contactos electrónicos... - Page 31 Español - Si está tomando sustancias o medicamentos fotosensibilizadores, lea el folleto en el paquete de su medicamento y nunca use el dispositivo si se afirma que puede producir reacciones fotoalergénicas, fototóxicas o si tiene que evitar el sol cuando toma dicha medicina. - Si toma medicamentos anticoagulantes, incluso el uso intensivo de aspirina cuyo curso no se puede interrumpir por un periodo de limpieza de una semana previo a cada tratamiento.
-
Page 32: Instrucciones Importantes De Seguridad
- No trate de abrir ni de reparar el dispositivo. Abrir el dispositivo Lumea Prestige de Philips puede exponerlo a componentes eléctricos peligrosos y a la energía de la luz pulsada, los cuales pueden causar lesiones oculares o corporales. - Page 33 Español - Siempre lleve el dispositivo a un centro de servicio autorizado por Philips para examinación o reparación. Una reparación realizada por una persona no calificada podría causar situaciones extremadamente peligrosas para el usuario. - No está permitido modificar este equipo. No modifique, anule ni corte ninguna parte del dispositivo (p. ej., el adaptador o el cable), ya que esto...
-
Page 34: Cómo Funciona Ipl
Español - Después de cada tratamiento, espere al menos 48 horas antes de broncearse para garantizar que se haya disipado cualquier reacción de la piel. - Si nota un cambio en el tono de piel desde el último tratamiento, le recomendamos que se realice una prueba en la piel y que espere 24 horas antes de hacerse el siguiente tratamiento. -
Page 35: Programa De Tratamiento Recomendado
Español El ciclo de crecimiento del vello consiste en varias fases. La tecnología IPL solo es eficaz cuando el vello está en su fase de crecimiento. No todos los vellos están en la fase de crecimiento al mismo tiempo. Por eso recomendamos seguir la fase de tratamiento inicial (cuatro tratamientos, cada uno con dos semanas de diferencia) y, luego,‑continuar con la fase de tratamiento (Touch-Up‑cada cuatro semanas) a fin de garantizar que se... -
Page 36: Qué Esperar
Español Programa de tratamiento de retoque Trátese cada 4 semanas. Repita el procedimiento 8 veces para lograr una reducción eficaz del vello. Esto es para mantener los resultados y disfrutar una piel suave durante meses. - Le recomendamos tratarse dentro de los 4 días anteriores o posteriores a la fecha planeada para el tratamiento. -
Page 37: Cómo Utilizar La Depiladora Lumea Prestige
Español Cómo utilizar la depiladora Lumea Prestige A Elimine el vello y limpie la piel 1 Elimine todo el vello visible antes de aplicar cada tratamiento. Puede afeitar, depilar o usar cera. Asegúrese de empezar el tratamiento antes de que el vello nuevo comience a ser visible en su piel. Si decide depilarse con cera, espere 24 horas antes de usar Lumea Prestige. - Page 38 Español para encender el 3 Presione el botón de encendido/apagado dispositivo. 4 Elija un área de su piel para hacer la prueba. 5 Presione el dispositivo firmemente sobre su piel y manténgalo en su lugar. El sistema de seguridad integrado previene la emisión de pulsos de luz involuntarios sin tener contacto total con la piel.
- Page 39 Español • Verá un haz luminoso • Nota: Para alternar entre los distintos niveles de intensidad de la luz, presione el botón para alternar. - Pase a la siguiente área. Trate una parte con la configuración ➁ - Pase a la siguiente área. Trate una parte con la configuración ➂ - Pase a la siguiente área.
- Page 40 Español 1 Conecte el adaptador de corriente al dispositivo y enchúfelo. para encender el 2 Presione el botón de encendido/apagado dispositivo. 3 Elija la configuración que seleccionó después de la prueba en la piel (sección B, paso 9). 4 Presione el dispositivo firmemente sobre su piel y manténgalo en su lugar.
- Page 41 Español 6 Mueva el dispositivo a un lugar adyacente y vuelva a presionar el botón de pulso de luz. La superficie del accesorio que está en contacto con la piel es un poco más grande que la ventanilla de salida de luz. La superficie del accesorio debe superponerse con el punto anterior para asegurarse de tratar el área completa de la piel.
-
Page 42: Más Información Sobre Su Depiladora Lumea Prestige
Español 5 Limpie la ventanilla de salida de luz del dispositivo (A). 6 Limpie todas las superficies del accesorio, incluido el reflector de metal y la ventanilla del accesorio (piezas B, C, D. E). 7 Deje que las piezas se sequen totalmente. 8 Guarde el dispositivo en un lugar sin polvo a temperatura ambiente. - Page 43 Español Para quitar el accesorio, simplemente sáquelo de la ventanilla de salida de luz. Accesorio corporal El accesorio para áreas corporales grandes tiene la ventana de tratamiento más amplia y un diseño curvo para cubrir y tratar áreas debajo de la línea del cuello de manera eficaz, en especial áreas grandes como las piernas, los brazos y el abdomen.
-
Page 44: Sensor Smartskin
Español Accesorio para la zona del bikini El accesorio para la zona del bikini tiene un diseño especializado para tratar eficazmente esa área. Tiene un diseño curvo y una mayor intensidad de luz en comparación con el accesorio para áreas corporales grandes. El vello de esta área tiende a ser más grueso y resistente que el vello de las piernas. -
Page 45: Dos Modos De Tratamiento: Sello Y Pulso De Luz, Y Deslizamiento Y Pulso De Luz
Dos modos de tratamiento: Sello y pulso de luz, y Deslizamiento y pulso de luz Su depiladora Lumea Prestige de Philips tiene dos modos de tratamiento para un uso más conveniente en diferentes áreas del cuerpo: - El sello y pulso de luz es ideal para tratar zonas pequeñas o curveadas como las rodillas y las axilas. -
Page 46: Tiempo De Tratamiento Por Área
Español Tiempo de tratamiento por área 1.5 min. 1.5 min. 2 min. 4.2 min. 6.5 min. -
Page 47: Use La Depiladora Lumea Prestige Antes Y Después De Broncearse
Español Use la depiladora Lumea Prestige antes y después de broncearse Bronceado con luz solar natural o artificial La exposición deliberada de la piel a la luz solar natural o artificial con la intensión de broncearse influye en la sensibilidad y el color de la piel. Por lo tanto lo siguiente es importante: - Después de cada tratamiento, espere al menos 48 horas antes de broncearse. - Page 48 Español Reacciones comunes de la piel Su piel puede presentar un ligero enrojecimiento y comezón, hormigueo o sensación de calor. Esta reacción desaparece rápidamente. Puede presentarse piel reseca y comezón como resultado de afeitarse o una combinación de afeitarse y un tratamiento ligero. Puede enfriar la zona con un paquete de hielo o con una toallita mojada.
-
Page 49: Solución De Problemas
Centro de atención al consumidor de su país, su distribuidor de Philips o un centro de servicio de Philips. El flujo de enfriamiento Asegúrese de que nada bloquee el flujo de del ventilador queda enfriamiento del ventilador. - Page 50 Si el filtro UV está roto, no use más el de salida de luz está roto. dispositivo. Comuníquese con el Centro de atención al consumidor de Philips en su país, su distribuidor de Philips o un centro de servicio de Philips.
-
Page 51: Garantía Y Asistencia
Garantía y asistencia Si necesita asistencia o información, visite www.philips.com/support o lea el folleto de garantía internacional. Reciclar - No deseche el producto con la basura normal de la casa al final de su vida útil, sino que llévelo a un punto de recolección oficial para su... -
Page 52: Especificaciones Técnicas
Español Especificaciones técnicas Condiciones de Lumea Prestige seguirá funcionando mientras se le dé un USO NORMAL transporte y de acuerdo con las especificaciones luego del transporte y almacenamiento almacenamiento en lugares con las siguientes características: Entre -25 °C y +70 °C con una humedad relativa de hasta el 90 %, sin‑condensación, entre 700 hPa y 1060 hPa Condiciones de Lumea Prestige cumplirá... - Page 53 Español Este símbolo identifica al fabricante del producto: Philips Consumer Lifestyle B.V. Tussendiepen 4, 9206 AD Drachten. Países Bajos Este símbolo significa que usted tiene que leer detenidamente el manual del usuario antes de usar el dispositivo. Conserve este manual para futura referencia. Este símbolo indica que el usuario debe consultar las instrucciones de uso para conocer información importante de seguridad como precauciones que, por diversos motivos, no se...
- Page 54 Español Este símbolo indica la eficiencia energética del adaptador. La eficiencia energética cumple con la norma oficial mexicana NOM-029-ENER-2017. Marca de certificación para México que muestra que se evaluó este producto y se determinó que cumple con los requisitos de seguridad pertinentes.
- Page 55 © 2021 Koninklijke Philips N.V. All rights reserved. Speci cations are www.philips.com subject to change without notice. Trademarks are the property of 3000.068.3720.1 Koninklijke Philips N.V. (Royal Philips) or their respective owners. (2021-3)