Table of Contents
Advertisement
Quick Links
Compact Bread Maker
INSTRUCTION MANUAL
Model: MRBRD9WT
Read these instructions carefully before
using this appliance for the first time.
STORE THESE INSTRUCTIONS CAREFULLY
For product hints and tips plus more join us at
www.morphyrichards.com.au
facebook.com/MorphyRichardsAUS
instagram.com/morphyrichardsau
Advertisement
Table of Contents

Related Manuals for Morphy Richards MRBRD9WT


Summary of Contents for Morphy Richards MRBRD9WT
- Page 1 Compact Bread Maker INSTRUCTION MANUAL Model: MRBRD9WT Read these instructions carefully before using this appliance for the first time. STORE THESE INSTRUCTIONS CAREFULLY For product hints and tips plus more join us at www.morphyrichards.com.au facebook.com/MorphyRichardsAUS instagram.com/morphyrichardsau...
-
Page 2: Specifications
INTRODUCTION Thank you for purchasing a Morphy Richards Bread Maker. As you will soon find out there is nothing like the aroma of fresh homemade bread throughout your home. Please take some time to familiarise yourself with your new Bread Maker. This manual explains what you need to do before first use as well as explaining some hints and tips to create perfect breads and cakes every time. -
Page 3: Product Overview
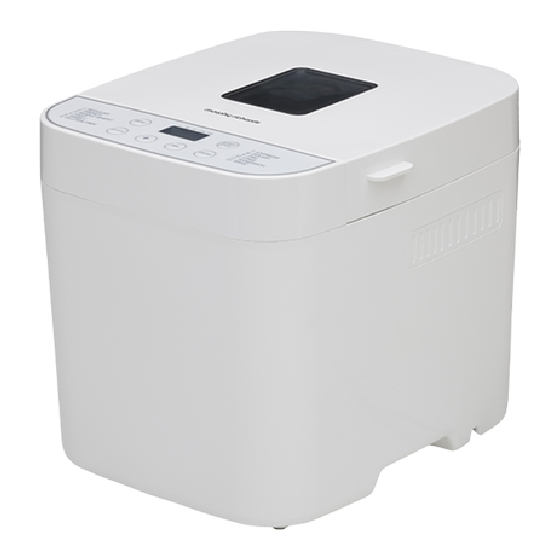
PRODUCT OVERVIEW 1. Lid 5. Main unit 2. Viewing window 6. Dough hook 3. Baking pan 7. Measuring cup 4. Control panel 8. Measuring spoon... -
Page 4: Important Safety Instructions
IMPORTANT SAFETY INSTRUCTIONS WARNING: To reduce the risk of fire, electric shock, injury to persons or damage to property, follow basic precautions including the following: If the power cord is damaged, it must be replaced by the • manufacturer or its service agent or a similarly qualified person in order to avoid a hazard. - Page 5 This appliance is intended to be used in household and similar • applications such as: - staff kitchen areas in shops, offices and other working environments; - farm houses; - by clients in hotels, motels and other residential type environments; - bed and breakfast type environments.
- Page 6 Other safety considerations WARNING: To protect against fire, electric shock and personal • injury, do not immerse cord, plugs, or appliance in water or other liquid. WARNING: Extreme caution must be used when moving • the appliance when containing hot food, water, or other hot liquids.
-
Page 7: Read Carefully And Keep For Future Reference
Proper use Only use your bread maker for baking bread in a household • environment. Do not use the appliance for drying foodstuffs or other objects. Do not use the bread machine outdoors. Use accessories • recommended by the manufacturer only. Accessories not recommended may cause damage to the appliance. -
Page 8: Control Panel
CONTROL PANEL MENU - Select the desired baking program. The program number and corresponding baking time will appear on the display. When pressing any button a beep will be heard, unless the appliance is operating. In this case, no beep will sound. COLOUR - Select the degree of browning: Light >... -
Page 9: Before First Use
BEFORE FIRST USE Before first use, please take a few minutes to read this instruction book and find a place to keep it handy for future reference. Please pay particular attention to the safety instructions. 1. Wash the Baking pan (3) and all accessories in hot soapy water and dry thoroughly. -
Page 10: Using Your Bread Maker
USING YOUR BREAD MAKER The Bread Maker has two loaf size settings to make either 700g or 900g loaves (approximate weight, dependent upon recipe). Rotate the Baking pan (3) anti-clockwise and pull upwards out of the appliance to remove from the Main unit (5). Push the Kneading blade onto the drive shaft in the baking pan. - Page 11 USING YOUR BREAD MAKER Starting a Program Hold down the Start/Stop Button for a few seconds to start the machine, the Bread Maker will beep and two dots in the LCD will begin to flash, the working light illuminates and the program starts.. Occasionally, condensation may occur in the viewing window (2) during baking.
-
Page 12: Program Descriptions
PROGRAM DESCRIPTIONS Select the desired baking program by pressing the menu button. The corresponding program number is shown on the display and detailed below. The baking time depends on the selected program combinations. 1. REGULAR This program is suitable for baking white or brown breads, which largely consist of wheat or rye flour. - Page 13 PROGRAM DESCRIPTIONS 7. EXPRESS The times for kneading and baking as well as the rise time are greatly reduced in the Express program. This program is only suitable for recipes that do not require any strong flour types or other heavy ingredients. The bread will be smaller and less airy than breads made with other programs.
-
Page 14: Using The Timer
USING THE TIMER The timer function enables you to delay when you wish to start baking. Use the ‘+’ & ‘-’ buttons to set the desired end time which should include the program baking time. Select a program and the desired crust colour and loaf size. The display indicates the required baking time. -
Page 15: Hints And Tips
HINTS AND TIPS • After a power supply failure the ingredients will have to be discarded and you must start again with fresh ingredients. • Place all recipe ingredients into the Baking pan so that the yeast is not touching any liquid. •... -
Page 16: Measuring Ingredients
MEASURING INGREDIENTS The most important step when using your Bread maker is measuring your ingredients precisely and accurately. It is extremely important to measure liquid and dry ingredients properly or it could result in a poor baking result. Do not use standard kitchen teaspoons (tsp) or tablespoons (tbsp). The ingredients must also be added into the Baking Pan in the order in which they are given in each recipe. -
Page 17: Using The Right Ingredients
USING THE RIGHT INGREDIENTS Flours, while visibly similar, can be very different by virtue of how they were grown, milled and stored. You may find that you will have to experiment with different brands of flour to help you make that perfect loaf. Storage is also very important, as all flours should be kept in an airtight container. -
Page 18: Other Ingredients
OTHER INGREDIENTS Yeasts (Active Dry Yeast) Yeast through a fermentation process produces gas (carbon dioxide) necessary to make the bread rise. Yeast must be able to feed on sugar and flour carbohydrates in order to produce this gas. There are three different types of yeast available: fresh, traditional dry active, and fast action. - Page 19 OTHER INGREDIENTS Sunflower Oil ‘Shortens’ or tenderises the texture of yeast breads. Butter or margarine can be used as a substitute. If butter or margarine is used directly from the refrigerator it should be softened first for easier blending during the mixing cycle.
- Page 20 OTHER INGREDIENTS Milk Powder (tbsp) Milk Equiv. (ml) • • • 1 1/2 • • • • 2 1/12 • • • • 3 1/12 • • • Give your baked bread a professional ‘bakery’ finish. Select one of the following special glazes to enhance your bread.
- Page 21 RECIPES With a Bread Maker, even the most inexperienced baker can achieve the satisfying experience of baking a loaf of bread. Inside the Bread Maker, the dough is mixed, kneaded proved and baked without you being present. The Bread Maker can also just prepare dough, and when it’s ready, you shape, allow to rise and bake in a conventional oven.
- Page 22 REGULAR BREAD (PROG 1) Ingredients Loaf Size 700g 900g • Water • 280ml • 340ml • • 2 tbsp • 3 tbsp • Salt • 1 tsp • 1.5 tsp • White Bread Flour • 420g • 490g • Sugar •...
- Page 23 FAST (PROG 4) Ingredients Loaf Size 900g • Water • 340ml • • 2 tbsp • Salt • 1.5 tsp • Flour • 490g • Sugar • 2 tbsp • Yeast • 2 tsp SWEET BREAD (PROG 5) Ingredients Loaf Size 700g 900g •...
- Page 24 EXPRESS (PROG 7) Ingredients Loaf Size 700g 900g • Water (40-50°C) • 270ml • 340ml • • 2 tbsp • 3 tbsp • Salt • 1 tsp • 2 tsp • White Bread Flour • 420g • 490g • Sugar •...
- Page 25 CAKE (PROG 10) Ingredients • Vanilla Essence • 1 tsp • • 2 tbsp • Lemon Juice • • Self Raising Flour • 250g • Sugar • 8 tbsp • Yeast • 1 tsp • Eggs • SANDWICH (PROG 11) Ingredients Loaf Size 700g...
- Page 26 RECIPE BAKING TIMES Program Crust Loaf Total Knead 1 Rise 1 Knead 2 Rise 2 Rise 3 Bake Keep Size Time Warm 700g 2:53 Light 1. Regular Medium 900g 3:00 Dark 700g 3:40 Light 2. French Medium 900g 3:50 Dark 700g 3:32 Light...
-
Page 27: Troubleshooting
TROUBLESHOOTING Bread Sinks in the centre Too much liquid or liquid too Measure ingredients accurately. Use liquids warm. at temperatures between 21°C and 28°C. Salt was not added, causing Measure ingredients accurately. bread to over rise and collapse. Too much yeast was added. Measure ingredients accurately, if problem persists, reduce yeast by 1⁄4 teaspoon. - Page 28 Bread rises too much High humidity and hot Bake during the coolest part of the day. Try ambient temperatures can reducing the yeast by 1⁄4 teaspoon or use cause bread to over rise. liquids directly from the refrigerator. Do not use the Timer function.
-
Page 29: Error Codes
ERROR CODES WARNING: If the below error codes are shown on the display, please follow the steps below. If “HHH” is displayed after the program has started, it means that the temperature inside of bread pan is too high. You should stop the program and unplug from the power outlet immediately. -
Page 30: Maintenance
NON-STICK FINISH Avoid damaging the coating. Do not use metal utensils such as spatulas, knives or forks. The coating may change colour in time, this is only caused by moisture and steam and will not affect the performance of the unit or quality of your bread. If the retainer in the kneading blades are clogged, you can clean them carefully with a wooden skewer. - Page 31 NOTES...
- Page 32 Recycling: Do not dispose of electrical appliances as unsorted municipal waste. Use separate collection facilities. Contact your local government for information regarding the collection systems available. If electrical appliances are disposed of in landfills or dumps, hazardous substances can leak into the ground water, polluting the food chain and damaging health and wellbeing.
Need help?
Do you have a question about the MRBRD9WT and is the answer not in the manual?
Questions and answers