
Related Manuals for Beko BBIE12300XD


Summary of Contents for Beko BBIE12300XD
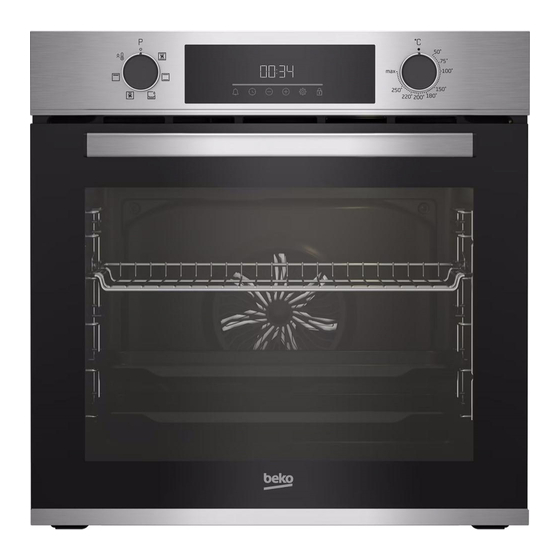
- Page 1 Built-in Oven User Manual 881 E12300XD 385.4400.44/R.A8/28.08.2020/4-1 7768288334...
- Page 2 Dear Customer, Please read this manual before using the product. Beko thank you for choosing the product. We want your product, manufactured with high quality and technology, to offer you the best efficiency. To do this, carefully read this manual and any other documentation provided before using the product and keep it as a reference.
-
Page 3: Table Of Contents
� First use Safety instructions First time setting ......19 Purpose of usage ......4 First cleaning ........19 Child, vulnerable person and pet safety4 Electrical safety ........5 How to operate the oven 21 Transportation safety ......7 lnstallation safety ....... 7 General information on oven usage ... -
Page 4: I] Safety Instructions
• This section contains safety • ADo not perform technica! instructions that will help modificiations on the product. prevent any risks of personal À Purpose of usage injuries or material damage. • This product is designed for • lf the product is transferred to home use. -
Page 5: Electrical Safety
older, and people who are product are hot. Keep underdeveloped in physical, children away trom the sensory or mental skills, or product. lack of experience and • Keep the packaging materials knowledge, as long as they out of the reach of children. are supervised or trained There is a hazard of injury and suffocation. - Page 6 of the stove). lf this is not The power cord should not possible, there should be a be bent, crushed, and come mechanism (fuse, switch, into contact with any heat switch, etc.) on the electrical source. installation to which the •...
-
Page 7: Transportation Safety
À À Transportation safety lnstallation safety • Disconnect the product trom • Before the product is the mains before transporting installed, check the product for any damage. lf the the product. product is damaged, do not • The product is heavy, carry the product with at least two install it. -
Page 8: Temperature Warnings
• Do not climb on the product product, as the edges will be to reach anything or for any hot while it is operating. other reason. • As steam may be exhaled, • Do not use the product in keep away while opening the situations that may affect oven door. -
Page 9: Maintenance And Cleaning Safety
fire when exposed to hot on the bottom of the oven. surfaces, causing a fire. The accumulated heat can • Food waste, oil, etc. in the damage the base of the oven. cooking area may catch fire. • Close the oven door during Before cooking, remove such grilling. -
Page 10: Waste Regulation
Waste regulation Package information Compliance with the WEEE • Packaging materials of the product Directive and Disposing of the are manufactured from recyclable Waste Product materials in accordance with our National Environment Regulations. Do This product complies with not dispose of the packaging materials EU WEEE Directive together with the domestic or other (2012/19/EU). -
Page 11: Your Product
Product introduction 1 Control panel 10 Ventilation holes 2 Lamp* * lt depends on the model. Your product may not have a lamp, or 3 Wire shelves** the type and location of the lamp 4 Fan motor (behind steel plate) may differ from the illustration. -
Page 12: Product Control Panel Introduction And Usage
Product control panel introduction and usage In this section, you can find the overview and basic uses of the product's control panel. There may be differences in images and some features depending on the type of product. Oven control 1 Function selection knob temperature, the temperature symbol 2 Timer reappears. -
Page 13: Oven Operating Functions
Oven operating functions On the function table; the operating functions you can use in your oven and the highest and lowest temperatures that can be set for these functions are shown. The order of the operating modes shown here may differ from the arrangement on your product. -
Page 14: Product Accessories
Product accessories There are various accessories in your product. In this section, the description of the accessories and the descriptions of the correct usage are available. Depending on the product model, the supplied accessory varies. All accessories described in the user guide may not be available in your product. -
Page 15: Use Of Product Accessories
Use of product accessories Cooking shelves There are 5 levels of shelf position in the cooking area. You can also see the order of the shelves in the numbers on the front frame of the oven. Models with wire shelves Models without wire shelves: lt is crucial to place the wire grill on the side shelves properly. - Page 16 Models without wire shelves: lt is also crucial to p lace the tra y s on the side shelves p ro p erl y . The tra y has one direction when p lacin g it on the shelf. While p lacin g the tra y on the desired shelf , its side desi g ned for holdin g must be on the front.
- Page 17 Proper placement of the wire grill and tray on the telescopic rails Models with wire shelves and telescopic rails Thanks to telescopic rails, trays or the wire grill can be easily installed and removed. When using trays and wire grills with the telescopic rail, care should be taken that the pins, on the front and back of the telescopic rails, rest against the edges of the grill and the tray (shown...
-
Page 18: Technica! Specifications
Technical specifications Product external dimensions 595 mm/594 mm/567 mm (heighVwidth/depth) Oven installation dimensions 590 or 600 mm/560 mm/min. 550 mm (heighVwidth/depth) Voltage / freguency 220-240 V - 50 Hz Cable type and cross section used / min. H05W-FG/3 x 1,5 mm suitable for use in the product Total power consumption 2.4 kW... -
Page 19: First Use
Before you start using your product, it is lf the first time is not set, "12:00" recommended to do the following in the and 0 symbols continue to flash following sections. and your oven will not start. For your oven to work, you must First time setting confirm the time of the day by Always set the time of day before... - Page 20 NOTICE The surface might get damaged by some detergents or cleaning materials. Do not use aggressive detergents, cleaning powders/creams or any sharp objects during cleaning. NOTICE Smoke and smell may emit for a couple of hours during the initial operation. This is quite normal.
-
Page 21: General Information On Oven Usage
General information on oven Operation of the oven usage control unit General warnings for the oven control Cooling fan unit Your product has a cooling fan. The cooling fan is activated automatically Maximum time that can be set for when necessary and cools bath the end of cooking is 5 hours 59 front of the product and the furniture. - Page 22 2.Set the temperature you want to cook Display symbols using the temperature knob. : Cooking time symbol » Your oven will start operating : Cooking end time symbol immediately at the selected function and : Alarm symbol û temperature and fil will appear on the Brightness symbol screen.
- Page 23 0 1-11-1.1-11-1 uu·uu The cooking time increases by 1 After setting the operation minute in the first 15 minutes, function and temperature, you after 15 minutes it increases by 5 can set the cooking time for 30 minutes. minutes by touching the 0 key directly for quick setting of the 4.
-
Page 24: Settings
Settings _1 · uu 11=-1-11-1 Aetivating key loek You can prevent control unit from being intervened with by activating the key loek function. 1.Touch ÓJ until the ÓJ symbol appears » After the cooking end time is set, the on the dis la . 0 symbol and the() symbol with the time period symbol will appear constantly on the display. - Page 25 can use the alarm clock when you want Changing the volume level to turn the food in the oven at a certain 1.Touch the© key until i:(J,) symbol time. As soon as the time you set has appears on the display. expired, the clock gives you an audible warning.
- Page 26 1.Touch © until the 0 symbol appears on the display. 2.Set the time of da b touchin 0/8. , @: ..1 =i-1-11-1 ·uu /11_ 5.Confirm the setting by touching the 0 or© key. » The time of day is set and the 0 3.Touch 0 or©...
-
Page 27: General Information About
This section describes tips on preparing • Cut the greaseproof paper you will use and cooking your food. in your cooking in suitable sizes to the In addition, you can also find some of container you will cook. Greaseproof the foods tested as producers and the papers that are overflowing from the most appropriate settings for these container can create a risk of burns... - Page 28 Tips for baking cakes sheets with a sauce consistin g of milk, • lf the cake is too dry, increase the oil, e gg and yo g hurt mixture. temperature by 10 ° C and shorten • lf the pastry is g ettin g cooked slowly, the bakin g time.
-
Page 29: Meat, Fish And Poultry
Top and Whole bread Single tray Standard tray' bottom 20 0 30 ... 40 heatin Glass / metal Top and rectangular Lasagna Single tray bottom 2 or3 20 0 30 ... 40 container on healing wire rill" Round black Top and metal mold, 20 Apple pie Single tray... -
Page 30: Grill
The key points of the grill Grill • Prepare foods of similar thickness and Red meat, fish and poultry meat will weight as much as possible for the quickly turn brown when grilled, hold a grill. beautiful crust and do not dry out. Fillet •... -
Page 31: Test Foods
Test foods Foods in this cooking table are prepared according to the EN 60350-1 standard to facilitate testin of the roduct for control institutes. Shortbread Top and (sweet Single tray Standard tray' bottom 20 ... 30 cookie heatin Top and Single tray Standard tray' bottom... -
Page 32: Maintenance And Care
• Remove lime, oil, starch and protein General cleaning stains on the surfaces immediately information without waiting. Stains may rust under General warnings long periods of time. • Wait for the product to cool before Enameled surfaces cleaning the product. Hot surfaces •... -
Page 33: Cleaning The Accessories
cleaning materials. They can damage to clean the panel. The control panel the glass surface. and buttons may be damaged. • Clean the touch control panels with a • Clean with dishwashing detergent, warm water and a soft cloth or damp soft cloth and dry with a dry spon ge and dry it with a dry cloth. -
Page 34: Easy Steam Cleaning
3.To reattach the shelves, the A During the easy steam cleaning V mode, water that is placed in the procedures applied when removing them must be repeated trom the end tray to soften lightly formed to the beginning, respectively. residues/dirt within the oven cavity Easy Steam Cleaning will evaporate and condense in the oven cavity and inner glass of... -
Page 35: Removing The Inner Glass Of The Oven Door
2.Pull the plastic component, attached on the upper section of the front door, Hinge loek - open position towards yourself by simultaneously 3.Get the oven door to a half-open pressing on the pressure points on p()§itign i : . · ····················· :: :: : r ·······························... -
Page 36: Cleaning The Oven Lamp
slot. (lf your product has an inner 2.Remove the glass cover by turning it glass). Inner glass (2) must be counterclockwise. attached to the plastic slot closest to the innermost glass (1). 6.While reassembling the innermost (1), glass pay attention to place the printed side of the glass on the inner glass. - Page 37 as shown in the figure and replace it with a new one. lf type (B) is a model, pull it out as shown in the figure and re lace it with a new one. 5. Refit the glass cover and wire shelves. 37/EN...
-
Page 38: Troubleshooting
Consult the Authorised Service Agent or technician with license or the dealer where you have purchased the product if you cannot remedy the trouble although you have implemented the instructions in this section. Never attempt to repair a defective roduct ourself. •...