Table of Contents
Advertisement
Available languages
Available languages
Quick Links
VIDEOGRABADOR
VIDEO CASSETTE RECORDER
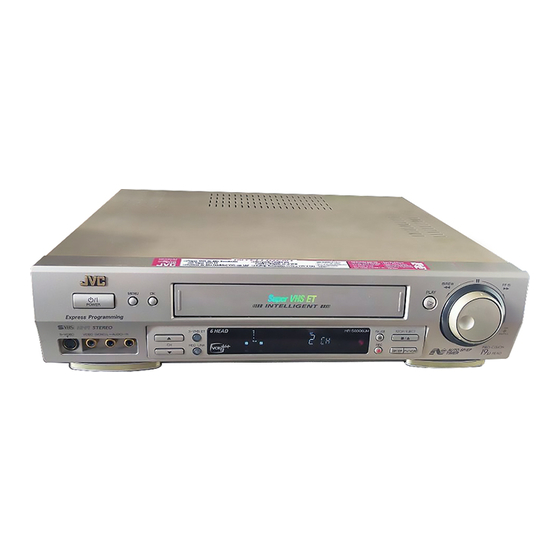
HR-S8006UM
m
ULTI
m
ARQUE
CABLE
VCR
TV
/SAT
TV/VCR
AUDIO
ENTER/ENTREE
1
2
3
2
4
5
6
VPS/PDC
DAILY/QTDN.
WEEKLY/HEBDO
7
8
9
0000
AUX
0
4
START
STOP
TV
DATE
DEBUT
FIN
PROG
EXPRESS
1
PROG
30 SEC
S-VIDEO
PQ000000
Downloaded from:
https://www.usersmanualguide.com/
MENU
OK
POWER
VIDEO (MONO)L—AUDIO—R
S-VHS ET
+8
4
CH
0
REC LINK
6
15dB
NORM
MANUAL DE
INSTRUCCIONES
INSTRUCTIONS
REW
PLAY
PAUSE
STOP/EJECT
SP
REC
VCR
SP/EP TV/VCR
FF
JOG
SHUTTLE
LPT0265-001B
Advertisement
Chapters
Table of Contents

Related Manuals for JVC HR-S8006UM


Summary of Contents for JVC HR-S8006UM
- Page 1 VIDEOGRABADOR VIDEO CASSETTE RECORDER HR-S8006UM ULTI ARQUE CABLE /SAT TV/VCR AUDIO ENTER/ENTREE VPS/PDC DAILY/QTDN. WEEKLY/HEBDO 0000 START STOP DATE DEBUT PROG EXPRESS PROG 30 SEC PLAY MENU POWER S-VIDEO VIDEO (MONO)L—AUDIO—R S-VHS ET PAUSE STOP/EJECT SHUTTLE REC LINK 15dB SP/EP TV/VCR...
- Page 2 Estimado cliente: Le agradecemos la adquisición del videograbador VHS de JVC. Antes de utilizarlo, lea la información y las precauciones de seguridad contenidas en este página para utilizar su nuevo videograbador con seguridad. PRECAUCIONES Advertencia sobre la pila de litio La pila utilizada en este aparato podría ocasionar...
-
Page 3: Table Of Contents
Control remoto multimarca para Cámara lenta/cámara lenta hacia atrás .... 14 receptor DBS ..........43 Búsqueda de alta velocidad ......15 Control de dos VCRs de JVC ......44 Búsqueda con omisión ........15 OCALIZACION Y REPARACION Búsqueda de índice ........15 DE AVERIAS Revisión instantánea ........ -
Page 4: Nstalacion De Su Nuevo Vcr
INSTALACION DE SU NUEVO VCR Conexiones básicas Conexiones INSPECCION DEL CONTE- NIDO Antena o cable ANT. IN (Entrada de antena Asegúrese de que el paquete contiene todos los accesorios listados en "ESPECIFICACIONES" ( p. 51). o cable) Cable coaxial UBICACION DEL VCR Alimentador plano Coloque el VCR sobre una superficie estable y Tomacorriente de CA... -
Page 5: Conexión S-Video
Antena o cable Conecte el enchufe de alimenta- Alimentador plano ción a un tomacorriente de CA antes de instalar la pila de litio. (véa abajo) Cable coaxial A ANT. IN Parte trasera del VCR Cordón de CA Transformador de adaptación (no suministrado) ANT. -
Page 6: Justes Iniciales
AJUSTES INICIALES La función Instalación Fácil simplifica la instalación guiándolo a Plug & Play través de los procedimientos de ajuste de lenguaje, reloj y canales del sintonizador, simplemente siga los menúes en pantalla que aparecen cuando se presiona por primera vez el botón para conectar la alimentación del VCR después de conectar el enchufe (Instalación Fácil) - Page 7 AJUSTE AUTOMATICO DE CANALES Presione MENU. AJUSTE AUTOMATICO DE CANAL ● Los canales que se pueden recibir en su área EXPLORANDO... serán asignados automáticamente a los SHATTLE botones CH5∞ o TV PROG y los canales que PRESIONE (MENU) P/TERMINAR no pueden ser recibidos son omitidos.
-
Page 8: Idioma
AJUSTES INICIALES (cont.) Este VCR le ofrece la opción de ver los mensajes en pantalla en, Idioma español o inglés (no se incluyen los mensajes superpuestos en la imagen del TV). Seleccione el idioma deseado empleando este procedimiento. El ajuste por falta es "ESPAÑOL". CONEXION DE LA ALI- Conecte la alimentación de TV y seleccione el canal 3 ó... -
Page 9: Reloj
CONEXION DE LA ALIMENTA- Reloj CION DEL VCR Presione Conecte la alimentación de TV y seleccione el canal 3 ó 4 del VCR (o el modo AV). ACCESO A LA PANTALLA DEL MENU PRINCIPAL Presione MENU. ACCESO A LA PANTALLA DE AJUSTE INICIAL En la pantalla de menú... -
Page 10: Sintonizador
AJUSTES INICIALES (cont.) Ajuste de los canales para Sintonizador recepción CONEXION DE LA ALI- Conecte la alimentación de TV y seleccione el canal 3 ó 4 MENTACION DEL VCR del VCR (o el modo AV). Presione ACCESO A LA PANTALLA DEL MENU PRINCIPAL Presione MENU. -
Page 11: Adición U Omisión De Un Canal
Adición u omisión de un canal ACCESO A LA PANTALLA DEL MENU PRINCIPAL Presione MENU. SHATTLE ACCESO A LA PANTALLA DE AJUSTE DEL SINTONIZADOR Mueva la barra iluminada (flecha) a "AJUSTE DE SINTONIZADOR" presionando CH 5 ∞ o % fi, y después presione OK o . -
Page 12: Sencillas
REPRODUCCION Y GRABACION SENCILLAS COLOCACION DE UN CASSETTE Reproducción Asegúrese de que el lado con la ventanilla esté hacia arriba y el lado con la etiqueta trasera esté hacia usted, mientras que la flecha en el frente del cassette esté sencilla apuntando hacia el VCR. -
Page 13: Grabación Sencilla
COLOCACION DE UN CASSETTE Grabación Asegúrese de que la lengüeta de protección de grabación esté intacta. Si no lo está, cubra el orificio con cinta adhesiva antes de colocar el cassette. sencilla SELECCION DEL CANAL QUE DESEA GRABAR Conecte la alimentación de TV y seleccione el canal 3 ó 4 Presione TV PROG o CH5∞. -
Page 14: Unciones De Reproducciony Grabacion
FUNCIONES DE REPRODUCCION Y GRABACION Reproducción de imagen fija/ Funciones de cuadro por cuadro PAUSA DURANTE LA REPRODUC- reproducción CION Presione PAUSE. Si hay fluctuación vertical de imagen, emplee el botón CH 5 (+) y ∞ (–) o TV PROG para corregir la imagen. -
Page 15: Búsqueda De Alta Velocidad
Revisión instantánea Búsqueda de alta velocidad Pulsando un botón, podrá conectar la alimentación de su ACTIVACION DE LA BUSQUEDA videograbador, rebobinar la cinta y comenzar a ver el último programa grabado con el temporizador. DE ALTA VELOCIDAD Durante la reproducción o la imagen fija, gire comple- ACTIVACION DE LA REVISION AL tamente el anillo SHUTTLE hacia la derecha para la INSTANTE... -
Page 16: Memoria De Próxima Función
FUNCIONES DE REPRODUCCION Y GRABACION (cont.) Repetición de reproducción INICIO DE LA REPETICION Mantenga presionado PLAY (hasta que la indicación " " parpadee en el panel frontal de indicación), durante la reproducción y después suéltelo. ● Toda la cinta es reproducida 50 veces. PARADA DE REPETICION SHATTLE PAUSE... -
Page 17: Control De Imagen
Control de imagen Esta característica le permite ajustar la calidad de la imagen de reproducción según sus preferencias. *El ajuste por omisión es "AUTOM.". ACCESO A LA PANTALLA DE MENU PRINCIPAL SHATTLE Presione MENU. ACCESO A LA PANTALLA DE AJUSTE DE FUNCION Mueva la barra iluminada (flecha) a "AJUSTE DE FUNCION"... -
Page 18: Estabilizador De Video
FUNCIONES DE REPRODUCCION Y GRABACION (cont.) Estabilizador de video Activando el estabilizador de video usted puede corregir las fluctuaciones verticales de la imagen cuando reproduce una grabación inestable que fue efectuada en otro VCR. Cuando coloca esta función en "SI", la fluctuación vertical será automáticamente corregida. -
Page 19: Superposición
Superposición Esta función puede ser conmutada entre SI y NO determinando que los indicadores de operación aparezcan o no en la pantalla. ACCESO A LA PANTALLA DEL MENU PRINCIPAL Presione MENU. SHATTLE ACCESO A LA PANTALLA DE AJUSTE DE FUNCION Mueva la barra iluminada (flecha) a "AJUSTE DE –... -
Page 20: Selección De La Banda De Sonido
FUNCIONES DE REPRODUCCION Y GRABACION (cont.) Selección de la banda de sonido Su VCR puede grabar dos bandas de sonido simultáneamente (normal y Hi-Fi), y reproducir la seleccionada o ambas conjuntamente. O cuando se mira una cinta grabada que contiene dos programas de audio Hi-Fi independientes, usted puede escoger escuchar uno de ellos seleccionado "HI-FI L"... -
Page 21: Reproducción Av Compu Link
Reproducción AV COMPU LINK Su VCR es compatible con los componentes AV COMPU LINK de JVC, incluyendo amplificadores (o receptores) y televisores. El AV COMPU LINK le brinda control al toque de los componentes de audio y vídeo enlazados a través de los conectores AV COMPU LINK. -
Page 22: Sistema De Imagen B.e.s.t
FUNCIONES DE REPRODUCCION Y GRABACION (cont.) La función B.E.S.T. (Biconditional Equalized Signal Tracking= Sistema de Seguimiento Bicondicional Ecualizado de Señal) verifica la condición de la cinta durante la reproducción y grabación y compensa la reproducción inadecuada suministrando la mejor calidad de grabación y reproducción. *El ajuste por falta es "SI". imagen B.E.S.T. -
Page 23: Reproducción
Grabación Efectúe los pasos de 1 a 3 en la página 13 ("Grabación sencilla"), antes de continuar. INICIO DE LA GRABACION Mantenga presionado REC DURANTE EL B.E.S.T. y presione PLAY en el control remoto, o presione SHATTLE REC en el panel frontal del PAUSE VCR. -
Page 24: Funciones De Grabación
FUNCIONES DE REPRODUCCION Y GRABACION (cont.) Funciones de grabación SHATTLE – –:– – TV/VCR Grabación de un programa mientras mira otro 0000 ACTIVACION DEL MODO TV Visualización del tiempo Durante la grabación..remanente de la cinta ● Presione TV/VCR. El indicador VCR del VCR se apaga. (Si está... -
Page 25: Estereofónico Y Sap (Segundo Programa De Audio)
Estereofónico y SAP (Segundo Programa de Audio) El descodificador incorporado MTS de su VCR permite la recepción de programas de TV con sonido multicanal. Cuando cambia el canal... ● El indicador "STEREO" aparece en pantalla durante 5 segundos aprox. si el programa es estereofónico. ●... -
Page 26: S-Vhs (Super Vhs), S-Vhs Et Y Vhs
FUNCIONES DE REPRODUCCION Y GRABACION (cont.) ACCESO A LA PANTALLA DEL MENU PRINCIPAL Presione MENU. ACCESO A LA PANTALLA SHATTLE DE AJUSTE DE FUNCIONES Pulse CH5∞ or %fi para mover la barra iluminada (flecha) a "AJUSTE DE FUNCION" y luego presione OK SELECCION DEL MODO S- FUNCIONES =B.E.S.T. -
Page 27: Super Vhs Et
Super VHS ET Su VCR se encuentra equipado con Super VHS ET, para poder grabar imagen de calidad S-VHS en los cassettes VHS. SELECCION DEL MODO DE AJUSTE S-VHS ET Presione S-VHS ET. El botón se enciende. ● El indicador “S-VHS” se enciende en el panel SHATTLE indicador delantero. -
Page 28: Temporizador
GRABACION POR TEMPORIZADOR La grabación por temporizador le permite programar el VCR para que grabe automáticamente un programa cuando éste sea transmitido. Programación La función de grabación por temporizador le permite programar hasta 8 programas a trasmitirse durante el año en curso utilizando VCR Plus+ o el temporizador expreso. - Page 29 VERIFICACION DE LOS DATOS DE PROGRAMA PROGRAMA 1 (VCR PLUS+ 12345678) El número PlusCode DESDE HASTA 8:00PM = 10:00PM ingresado por usted y la CANAL información de grabación 12/24/99 12 SP por temporizador se EL (8=LU-VI O 9=SEMANAL, visualizan en la pantalla STOP+/–...
-
Page 30: Configuración De Vcr Plus
GRABACION POR TEMPORIZADOR (cont.) IMPORTANTE Configuración Si usted se traslada a otra área diferente o el número de canal de la emisora de transmisión cambia, se visualizará un número CANAL GRABADOR incorrecto en la pantalla de VCR Plus+ de programación VCR Plus+ ( paso 5 en la página 29). - Page 31 ACCESS GUIDE CHANNEL SET SCREEN AJUSTE INICIAL Presione CH5∞ o %fi AJUSTE DE RELOJ para mover la barra IDIOMA ESPAÑOL = AJUSTE DE CANAL GUIA iluminada a "AJUSTE DE CANAL GUIA", y después presione OK o #. ELEGIR CON (5,∞), Y (OK) PRESIONE (MENU) P/TERMINAR SHATTLE ENTRADA DEL NUMERO...
-
Page 32: Programación Del Temporizador Expreso
GRABACION POR TEMPORIZADOR (cont.) Usted puede programar directamente el temporizador del VCR Programación para grabar un máximo de 8 programas hasta un año por adelantado. Recuerde que el reloj debe ser ajustado antes de programar el temporizador ( p. 6 o 9). COLOCACION DE UN CASSETTE temporizador... - Page 33 AJUSTE DEL NUMERO DE CANAL Presione TV PROG +/–. ● El mantener presionadoTV PROG +/– busca rápidamente entre los canales. ● Si usted está usando una caja de cable, ingrese el canal de la caja de cable, no el canal a ser grabado. El canal a ser grabado debe ser seleccionado en la caja de cable.
-
Page 34: Verificación, Cancelación Y Revisión De Programas
GRABACION POR TEMPORIZADOR (cont.) Verificación, cancelación y revisión de programas DESACTIVACION DEL TEMPORIZADOR Presione ‰ ‰ ‰ ‰ ‰ y después presione SHATTLE ACCESO A LA PANTALLA DE AJUSTE DE PROGRAMA Presione PR DESDE HASTA CANAL DIA 8:00P 10:00 12/24 2 10:00A 10:45 12/25... -
Page 35: Temporizador Sp→Ep Automático
Temporizador SP → EP automático Temporizador automático Si cuando graba en el modo SP no hay suficiente cinta para Cuando el temporizador automático está ajustado en grabar todo el programa, el VCR conmuta automáticamente al "AUTOMATICO", se activa automáticamente cuando se modo EP para permitirle la grabación del programa completo. -
Page 36: Grabación Instantánea Por Temporizador (Itr)
GRABACION POR TEMPORIZADOR (cont.) Este es un método fácil que le permite grabar desde 30 minutos Grabación a 6 horas (seleccionable en incrementos de 30 minutos), y que desconecta su VCR después de que la grabación haya terminado. instantánea INICIO DE LA GRABACION Presione REC en el panel frontal. -
Page 37: Grabación Automática De Programas Vía Satélite
Esta función le permite grabar automáticamente un programa vía Grabación satélite programado por temporizador en su receptor de satélite exterior. Conecte un receptor de satélite a los conectores AUDIO/ VIDEO IN o S VIDEO IN* (L-1) de la parte posterior del VCR y programe el temporizador en el receptor de satélite. -
Page 38: Dicion
AUDIO IN Grabador Su VCR ● Si está utilizando una videocámara de JVC equipada con control maestro de edición, la videocámara es capaz de controlar su VCR. El cable de miniclavija es una miniclavija monofónica de 3,5 mm para conector con miniclavija monofónica de 3,5 mm. - Page 39 GRABADOR Si usted está usando una videocámara equipada Coloque su VCR en el modo de grabación. con control maestro de edición de JVC – vaya al ● Si está utilizando una videocámara de JVC equipada paso 8. Si usted no está usando una videocámara con control maestro de edición, la misma podrá...
-
Page 40: Edición Hacia O Desde Otro Vcr
EDICION (cont.) Usted podrá usar su VCR como reproductor o como grabador. Edición hacia CONEXIONES Conecte un cable de AV entre los conectores VIDEO o desde otro OUT y AUDIO OUT del reproductor y los conectores VIDEO IN y AUDIO IN del grabador. ●... -
Page 41: Control Remoto Multimarca Para Tv
TV El control remoto del VCR puede controlar diversas funciones de los televisores con control remoto de JVC y de los televisores con control remoto de otras marcas indicadas más abajo. *El ajuste de fábrica es código 01 de JVC. -
Page 42: Control Remoto Multimarca Para Caja De Cable
CARACTERISTICAS ESPECIALES (cont.) Control remoto multimarca para caja de cable El control remoto del VCR puede controlar las funciones de las cajas de cable de las marcas indicadas abajo. Algunas marcas de caja de cable tienen más de un código. Si su caja de cable no funciona con un código específico, pruebe con otros códigos. -
Page 43: Control Remoto Multimarca Para Receptor Dbs
Sólo podrá ajustar el control remoto para operar una sola unidad a la vez. ● Usted deberá suscribirse a un servicio DBS para poder recibir canales DBS. (P.ej.) Para ajustar el control remoto a JVC 51: CABLE /SAT Suéltelo Manténgalo... -
Page 44: Control De Dos Vcrs De Jvc
CARACTERISTICAS ESPECIALES (cont.) Control de dos VCRs de JVC TEl control remoto es capaz de controlar dos VCRs de JVC independientemente: uno para responder a las señales de control de código A de su control remoto y el otro para las señales de control de código B. -
Page 45: Ocalizacion Y Reparacion De Averias
● Las cabezas de video pueden estar Es necesario limpiar las cabezas. o se interrumpe aunque los sucias. Consulte con su agente JVC. programas de TV sean claros. 5. No se escucha la banda de sonido ● La opción ESCUCHO AUDIO fue Coloque "ESCUCHO AUDIO"... -
Page 46: Grabación Por Temporizador
LOCALIZACION Y REPARACION DE AVERIAS (cont.) GRABACION POR TEMPORIZADOR SINTOMA CAUSA PROBABLE ACCION CORRECTIVA 1. La grabación por temporizador no ● El reloj y/o el temporizador han sido Ajuste el reloj y/o el temporizador funciona. incorrectamente ajustados. correctamente. Presione ‰ ‰ ‰ ‰ ‰ y asegúrese de que ‰ ●... -
Page 47: Reguntas Y Respuestas
PREGUNTAS Y RESPUESTAS REPRODUCCION P. Algunas veces durante la búsqueda de índice el VCR no encuentra el programa que quiero mirar. ¿Por P. ¿Qué sucede si la cinta llega al fin durante la qué? reproducción o búsqueda? R. Pueden haber códigos de índice demasiado juntos. R. -
Page 48: Ndice
INDICE VISTA FRONTAL PLAY MENU POWER VIDEO (MONO)L—AUDIO—R S-VHS ET PAUSE S-VIDEO SHATTLE REC LINK 15dB NORM SP/EP TV/VCR & 1 Botón de alimentación [POWER p. 6) 0 Botón REC LINK ( p. 37) 2 Botón de menú [MENU] ( p. -
Page 49: Vista Trasera
VISTA TRASERA ANT. IN AUDIO S VIDEO (MONO) RF OUT VIDEO REMOTE PAUSE/ AV COMPU LINK 1 Cordón de alimentación ( p. 4, 5) 7 Conectores de salida de S VIDEO ( p. 40) 2 Conectores de entrada de VIDEO/AUDIO ( 8 Conector REMOTE PAUSE/AV COMPU LINK ( p. -
Page 50: Control Remoto
INDICE (cont.) CONTROL REMOTO 1 Botón TV p. 41) 2 Botón VCR ( p. 44) 3 Botón TV/VCR ( p. 13, 24, 41) 4 Botón REVIEW ( p. 15) 5 Teclas números [NUMBER] ( p. 11, 13, 31) & ULTI ARQUE CABLE 6 Botón... -
Page 51: Specificaciones
En caso de que ocurra este problema, 5. EVITE golpear violentamente el VCR cuando lo asegúrese de ponerse en contacto con su agente JVC más transporta. cercano. Downloaded from:... - Page 52 Dear Customer, Thank you for purchasing the JVC VHS video cassette recorder. Before use, please read the safety information and precautions contained on this page to ensure safe use of your new VCR. CAUTIONS Warning on lithium battery The battery used in this device may present a fire or chemical burn hazard if mistreated.
- Page 53 Cable Box Multi-Brand Remote Control ....42 LAYBACK AND RECORDING DBS Receiver Multi-Brand Remote Control ....43 FEATURES Control Two JVC VCRs ..........44 Playback Features ........14 Variable-Speed Search/Reverse Motion Playback ..14 ROUBLESHOOTING Still Picture/Frame-By-Frame Playback ..... 14 Power ............
-
Page 54: Connections
INSTALLING YOUR NEW VCR Basic Connections Connections CHECK CONTENTS Make sure the package contains all of the accessories Antenna or Cable listed in “SPECIFICATIONS” ( pg. 51). ANT. IN (Antenna or Cable input) SITUATE VCR Coaxial Cable Place the VCR on a stable, horizontal surface. Flat Feeder Matching AC Outlet... -
Page 55: S-Video Connection
Connect the power plug to an Antenna or Cable AC outlet before installing the Flat Feeder lithium battery. (See below) Coaxial Cable Back of VCR To ANT. IN AC Power Cord Matching Transformer (not supplied) ANT. IN AUDIO S VIDEO (MONO) RF OUT VIDEO... -
Page 56: Plug & Play
INITIAL SETTINGS The Plug & Play function simplifies installation by guiding you through the procedures of setting the language, clock and tuner Plug & Play channels — simply follow the on-screen menus that appear when the button is first pressed to power on the VCR after you connect the power plug to an AC outlet. - Page 57 START AUTO CHANNEL Press MENU. AUTO CHANNEL SET ● Receivable channels in your area are automati- SCANNING... cally assigned to the CH5∞ or TV PROG buttons, and non- SHATTLE receivable channels are PRESS (MENU) TO END skipped. ● If the tuner channels have been set properly "SCAN COMPLETED"...
-
Page 58: Language
INITIAL SETTINGS (cont.) This VCR offers you the choice to view on-screen messages in Language Spanish or English (not including messages superimposed on the TV picture). Select the desired language using this procedure. The default setting is "SPANISH". TURN ON THE VCR Turn on the TV and select the VCR channel 3 or 4 (or AV mode). -
Page 59: Clock
TURN ON THE VCR Clock Press ACCESS MAIN MENU SCREEN Turn on the TV and select the VCR channel 3 or 4 (or AV mode). Press MENU. ACCESS INITIAL SET SCREEN At the Main Menu screen, MAIN MENU move the highlight bar FUNCTION SET (arrow) to "INITIAL SET"... -
Page 60: Tuner
INITIAL SETTINGS (cont.) Set Receivable Channels Tuner TURN ON THE VCR Press Turn on the TV and select the VCR channel 3 or 4 (or AV mode). ACCESS MAIN MENU SCREEN Press MENU. ACCESS TUNER SET SCREEN SHATTLE Move the highlight bar MAIN MENU (arrow) to "TUNER SET"... -
Page 61: Add Or Delete A Channel
Add Or Delete A Channel ACCESS MAIN MENU SCREEN Press MENU. ACCESS TUNER SET SHATTLE SCREEN Move the highlight bar (arrow) to "TUNER SET" by pressing CH5∞ or % fi, then press OK or ACCESS MANUAL CHANNEL SET SCREEN Move the highlight bar TUNER SET (arrow) to "MANUAL CHANNEL SET"... -
Page 62: Imple Playback And Recording
SIMPLE PLAYBACK AND RECORDING LOAD A CASSETTE Simple Make sure the window side is up, the rear label side is facing you and the arrow on the front of the cassette is pointing towards the VCR. Don’t apply too much Playback pressure when inserting. -
Page 63: Simple Recording
LOAD A CASSETTE Simple Make sure the record safety tab is intact. If not, cover the hole with adhesive tape before inserting the cassette. Recording SELECT RECORDING CHANNEL Turn on the TV and select the VCR channel 3 or 4 (or AV Press TV PROG or CH5∞. -
Page 64: Features
PLAYBACK AND RECORDING FEATURES Still Picture/Frame-By- Playback Frame Playback PAUSE DURING PLAYBACK Features Press PAUSE. If there is vertical jitter, use the CH 5 and ∞ or TV PROG + and – button to correct the picture. ACTIVATE FRAME-BY- FRAME PLAYBACK Turn the JOG dial to the right for forward frame-by- PLAY frame playback, or to the left for reverse frame-by-frame... -
Page 65: High-Speed Search
High-Speed Search Instant ReView At the press of a button, you can power up your VCR, rewind ACTIVATE HIGH-SPEED the tape and begin viewing the most recent timer-recorded program. SEARCH ACTIVATE INSTANT During playback or still picture, turn the SHUTTLE ring to the right for forward high-speed search, or to the left REVIEW for reverse high-speed search. -
Page 66: Repeat Playback
PLAYBACK AND RECORDING FEATURES (cont.) Repeat Playback START REPEAT Press and hold PLAY (until " " blinks on the front display panel) during playback, then release. ● The entire tape is played back 50 times. STOP REPEAT SHATTLE PAUSE To stop, press STOP or STOP/EJECT at any time. NOTE: Pressing PLAY , REW , FF , PAUSE or also stops... -
Page 67: Picture Control
Picture Control This feature helps you to adjust the playback picture quality according to your preference. *The default setting is "AUTO." ACCESS MAIN MENU SCREEN Press MENU. SHATTLE ACCESS FUNCTION SET SCREEN Move the highlight bar (arrow) to "FUNCTION SET" by pressing CH5∞... -
Page 68: Video Stabilizer
PLAYBACK AND RECORDING FEATURES (cont.) Video Stabilizer By activating the Video Stabilizer you can correct vertical vibrations in the picture when playing back unstable recordings that were made on another VCR. When this function is set to "ON", vertical vibration will be automatically corrected. *The default setting is "OFF". -
Page 69: Superimpose
Superimpose This function, switchable between ON and OFF, determines whether or not operational indicators will appear on screen. ACCESS MAIN MENU SCREEN Press MENU. SHATTLE ACCESS FUNCTION SET SCREEN Move the highlight bar (arrow) to "FUNCTION SET" by pressing CH5∞ or % fi, then press OK or –... -
Page 70: Select The Soundtrack
PLAYBACK AND RECORDING FEATURES (cont.) Select The Soundtrack Your VCR can record two soundtracks simultaneously (Normal and Hi-Fi) and play back the selected one, or both together. Or, when viewing a pre-recorded tape that contains two separate Hi-Fi audio programs, you can choose to listen to either one by selecting either "Hi-Fi L"... -
Page 71: Av Compu Link Playback
(not supplied) AUDIO VIDEO the TV sets to its AV mode, automatically! NOTE: Connection varies depending on the type of JVC TV you have. Please refer to the TV’s instruction manual when making this AV COMPU LINK II connection. (VCR ONLY) -
Page 72: Picture System
PLAYBACK AND RECORDING FEATURES (cont.) The B.E.S.T. (Biconditional Equalized Signal Tracking) checks the condition of the tape during recording and playback, and B.E.S.T. compensates for poor reproduction to provide the best quality recording and playback pictures. *The default setting is "ON". Picture System Preparation TURN ON THE VCR... -
Page 73: Playback
Recording Perform steps 1 – 3 on page 13 ("Simple Recording") before continuing. START RECORDING DURING B.E.S.T. Press and hold REC and press PLAY on the remote control, or press REC on SHATTLE PAUSE the VCR's front panel. ● The VCR takes about 7 seconds to assess the START quality of the tape in... -
Page 74: Recording
PLAYBACK AND RECORDING FEATURES (cont.) Display Elapsed Recording Time Recording RESET COUNTER TO ZERO Features Before recording starts, press 0000. The counter resets to zero and displays the exact elapsed time as the tape runs. DISPLAY ELAPSED TIME ON SCREEN During recording, press –... -
Page 75: Stereo And Sap (Second Audio Program)
Stereo And SAP (Second Audio Program) Your VCR’s built-in MTS decoder enables reception of Multi- channel TV Sound broadcasts. When the channel is changed... ● The "STEREO" indication appears on the screen for about 5 seconds if the program is a stereo broadcast. ●... -
Page 76: S-Vhs (Super Vhs), S-Vhs Et And Vhs
PLAYBACK AND RECORDING FEATURES (cont.) ACCESS MAIN MENU SCREEN Press MENU. ACCESS FUNCTION SET SHATTLE SCREEN Move the highlight bar (arrow) to "FUNCTION SET" by pressing CH5∞ or %fi, then press OK or SELECT S-VHS MODE Move the highlight bar FUNCTION (arrow) to "S-VHS MODE"... -
Page 77: Super Vhs Et
Super VHS ET Your VCR is equipped with Super VHS ET that makes it possible to record with S-VHS picture quality on VHS cassettes. SELECT S-VHS ET SET MODE Press S-VHS ET. The button lights up. ● The "S-VHS" indicator lights on the front display SHATTLE panel. -
Page 78: Imer Recording
TIMER RECORDING Timer recording allows you to program the VCR to automatically record a program that will be broadcast at some future time. VCR Plus+ The timer record function can be programmed using VCR Plus+ or Express Timer programming up to 8 shows as far as a year in advance. - Page 79 CHECK PROGRAM DATA The PlusCode number you PROGRAM 1 entered and the matching (VCR PLUS+ 12345678) START STOP Timer-Recording informa- 8:00PM = 10:00PM tion is displayed on the DATE Program screen. Check to 12/24/99 12 SP make sure it’s accurate. PRESS (8=DAILY, 9=WEEKLY STOP+/–...
- Page 80 TIMER RECORDING (cont.) IMPORTANT VCR Plus+ If you have moved to a different area or if a broadcasting station's channel number has been changed, the wrong VCR CH number will be displayed on the VCR Plus+ program Setup screen ( step 5 on page 29).
- Page 81 ACCESS GUIDE CHANNEL SET SCREEN INITIAL SET Press CH5∞ or %fi to CLOCK SET move the highlight bar LANGUAGE ENGLISH (arrow) to “GUIDE =GUIDE CHANNEL SET CHANNEL SET”, then press OK or #. SELECT WITH (5,∞) AND (OK) PRESS (MENU) TO END SHATTLE INPUT GUIDE CHANNEL NUMBER...
-
Page 82: Express Timer Programming
TIMER RECORDING (cont.) You can directly program the VCR’s timer to record up to 8 shows, as far as a year in advance. Remember, the clock must be Express Timer set before you can program the timer ( pg. 6 or 9). LOAD A CASSETTE Programming Make sure the record safety tab is intact. - Page 83 SET TAPE SPEED Press SP/EP ( ) to set the tape speed. RETURN TO NORMAL SCREEN Press PROG or OK. "PROGRAM COMPLETED" appears on the screen for about 5 seconds, then normal screen appears. NUMBER "9" ENGAGE TIMER MODE Press ‰ ‰ ‰ ‰ ‰ . The VCR turns off automatically and "‰" is displayed on the display panel.
-
Page 84: Check, Cancel And Revise Programs
TIMER RECORDING (cont.) Check, Cancel And Revise Programs DISENGAGE TIMER Press ‰ ‰ ‰ ‰ ‰ , then press ACCESS PROGRAM SHATTLE CHECK SCREEN Press PR START STOP DATE 8:00P 10:00 12 12/24 2 10:00A 10:45 40 12/25 3 11:30P 01:00 125 12/25 PRESS (CHECK) TO NEXT ACCESS PROGRAM... -
Page 85: Auto Sp→Ep Timer
Auto SP → EP Timer Auto Timer If, when recording in SP mode, there is not enough tape to record When the Auto Timer is set to ON the timer is automatically the entire program, the VCR automatically switches to EP mode engaged when the VCR's power is turned off. -
Page 86: Instant Timer Recording (Itr)
TIMER RECORDING (cont.) This easy method lets you record from 30 minutes to 6 hours (selectable in 30-min. increments) and shuts the VCR off after Instant Timer recording is finished. START RECORDING Recording Press REC on the front panel. (ITR) ENGAGE ITR MODE Press REC again. -
Page 87: Automatic Satellite Program Recording
This facility allows you to automatically record a satellite program which is timer-programmed on your external satellite Automatic Sat- receiver. Connect a satellite receiver to the VCR's rear AUDIO/ VIDEO IN or S VIDEO IN* (L-1) connectors and program the timer on the satellite receiver;... -
Page 88: Diting
Recorder Your VCR ● When a Master Edit Control-equipped JVC camcorder is used, the camcorder is capable of controlling your VCR. The mini-plug cable is a mono 3.5 mm mini-plug to mono 3.5 mm mini-plug connector. - Page 89 "EDIT." If you are using a JVC Master Edit Control-equipped camcorder — go to step 8. If you are not using a JVC Master Edit Control- equipped camcorder — go to step 9. NOTE: When you select “EDIT” to dub tapes, be sure to select “AUTO”...
-
Page 90: Edit To Or From Another Vcr
EDITING (cont.) You can use your VCR as the player or the recorder. Edit To Or MAKE CONNECTIONS Connect an AV cable between the player’s VIDEO OUT From Another and AUDIO OUT connectors and the recorder’s VIDEO IN and AUDIO IN connectors. ●... -
Page 91: Tv Multi-Brand Remote Control
SPECIAL FEATURES TV Multi-Brand Remote Control The VCR's remote control can control several functions on JVC remote control TVs and on the brands of remote control TVs listed below. *The default setting is JVC code 01. ENTER TURN ON THE TV TV/VCR Turn the power on using the TV's remote control. -
Page 92: Cable Box Multi-Brand Remote Control
SPECIAL FEATURES (cont.) Cable Box Multi-Brand Remote Control The VCR's remote control can control functions on the brands of cable boxes listed below. Some cable box brands have more than one code. If your cable box does not function with a specified code, try other codes. -
Page 93: Dbs Receiver Multi-Brand Remote Control
● You have to subscribe to a DBS service to receive DBS channels. DBS RECEIVER BRAND NAME BRAND CODE JVC (DISH Network) (Ex.) To set remote control to JVC 51: ECHOSTAR (DISH Network) CABLE /SAT PRIMESTAR Release... -
Page 94: Control Two Jvc Vcrs
SPECIAL FEATURES (cont.) Control Two JVC VCRs The remote control is capable of controlling two JVC VCRs independently; one set to respond to your remote control's A code control signals and another set to respond to B code control signals. The remote control is preset to send A code signals because your VCR is initially set to respond to A code signals. -
Page 95: Roubleshooting
4. The playback picture is blurred or ● The video heads may be dirty. The heads must be cleaned. Consult interrupted, even though TV your JVC dealer. broadcasts are clear. 5. The Hi-Fi soundtrack cannot be Set "AUDIO MONITOR" to "HI-FI"... -
Page 96: Timer Recording
TROUBLESHOOTING (cont.) TIMER RECORDING SYMPTOM POSSIBLE CAUSE CORRECTIVE ACTION ● The clock and/or the timer have Set the clock and/or timer correctly. 1. Timer recording won’t work. been set incorrectly. Press ‰ ‰ ‰ ‰ ‰ and check to make sure that ●... -
Page 97: Playback
QUESTIONS AND ANSWERS PLAYBACK RECORDING Q. What happens if the end of the tape is reached Q. When I pause and then resume a recording, the end during playback or search? of the recording before the pause is overlapped by A. -
Page 98: Front View
INDEX FRONT VIEW PLAY MENU POWER S-VHS ET PAUSE S-VIDEO VIDEO (MONO)L—AUDIO—R SHATTLE REC LINK 15dB SP/EP NORM TV/VCR & 1 POWER Button ( pg. 6) 0 REC LINK Button ( pg. 37) 2 MENU Button ( pg. 7) ! S-VHS ET Button ( pg. -
Page 99: Rear View
REAR VIEW ANT. IN AUDIO S VIDEO (MONO) RF OUT VIDEO REMOTE PAUSE/ AV COMPU LINK 1 Power Cord ( pg. 4, 5) 7 S VIDEO Output Connector ( pg. 40) 2 VIDEO/AUDIO Input Connectors ( pg. 40) 8 REMOTE PAUSE/AV COMPU LINK Connector 3 VIDEO/AUDIO Output Connectors ( pg. -
Page 100: Remote Control
INDEX (cont.) REMOTE CONTROL 1 TV Button ( pg. 41) 2 VCR Button ( pg. 44) 3 TV/VCR Button ( pg. 13, 24, 41) 4 REVIEW Button ( pg. 15) & ULTI ARQUE 5 NUMBER Keys ( pg. 11, 13, 31) CABLE /SAT Button (... -
Page 101: Pecifications
3. DO NOT place heavy objects on the VCR or remote may cause the playback picture to become blurred or control. interrupted. Be sure to contact your nearest JVC dealer if such 4. DO NOT place anything which might spill on top of the troubles occur. - Page 102 MEMO Downloaded from: https://www.usersmanualguide.com/...
- Page 103 MEMO Downloaded from: https://www.usersmanualguide.com/...
- Page 104 VICTOR COMPANY OF JAPAN, LIMITED Printed in Malaysia COPYRIGHT © 1999 VICTOR COMPANY OF JAPAN, LTD. 0799IYV Downloaded from: https://www.usersmanualguide.com/...
- Page 105 This file has been downloaded from: www.UsersManualGuide.com User Manual and User Guide for many equipments like mobile phones, photo cameras, monther board, monitors, software, tv, dvd, and othes.. Manual users, user manuals, user guide manual, owners manual, instruction manual, manual owner, manual owner's, manual guide, manual operation, operating manual, user's manual, operating instructions, manual operators, manual operator, manual product, documentation manual, user maintenance, brochure, user reference, pdf manual Downloaded from:...