Table of Contents
Advertisement
Quick Links
Advertisement
Table of Contents
Troubleshooting

Related Manuals for Prusa Research Original Prusa XL


Summary of Contents for Prusa Research Original Prusa XL
- Page 1 3D PRINTING HANDBOOK FOR THE ORIGINAL PRUSA XL 3D PRINTER...
- Page 2 Development a.s. | JOSEF PRUSA, ORIGINAL PRUSA, and PRUSAMENT are registered trademarks (or trademark applications) of Prusa Development a.s. and are used by Prusa Research a.s. under license from Prusa Development a.s. in the following countries: Australia, New Zealand, Israel, Mexico, South Korea, Turkey, Ukraine, Russia, Kazakhstan, Switzerland, China, Colombia, Uzbekistan, Philippines and Norway.
- Page 3 About the Author Josef Průša (*23. 2. 1990) developed an interest in 3D printing when he began studying at the University of Economics in 2009 - it started off as a hobby, a new technology open to modifications and improvements. The hobby quickly became his passion, and Josef became one of the main developers of the international open-source (all works are freely available for any use) RepRap project by Adrian Bowyer.
-
Page 4: Table Of Contents
Table of contents 1. Introduction ................................2. Original Prusa XL Overview and Glossary ..................... 2.1. Contents of the Package and Accessories ..................2.2. How to Move the Printer ........................2.3. Disconnecting the Power Source ...................... 2.4. Error Screens .............................. 3. Your First Print ............................... - Page 5 6.1.1. Double-Sided TEXTURED Print Sheet ................6.1.2. Double-Sided SMOOTH Print Sheet ................. 6.1.3. Double-Sided SATIN Print Sheet ..................6.1.4. Improving the Adhesion ......................6.2. Keeping the Printer Clean ........................6.3. Linear Rails ..............................6.4. Fans ................................. 6.5. Extruder Feeding Gear ...........................
- Page 6 Safety symbols and their meaning Careful: strong magnetic fields Careful: mechanical parts. Take care to avoid injury to hands when in close proximity to the device with mechanical parts. Further information regarding function and service can be found in this user (service) manual or online at help.prusa3d.com.
- Page 7 Product Information Name: Original Prusa XL Prusa Research a.s., Partyzánská 188/7a, Holešovice, 170 00 Manufacturer: Prague 7, Czech Republic Contacts: Phone: +420 222 263 718, e-mail: info@prusa3d.com 3 (IT / Telecommunications Equipment), device usage: indoor use EEE category: only Power supply: 100-240 VAC, 10 A max., 50-60 Hz...
- Page 8 The full text of the Declaration of Conformity is available at: prusa.io/xl-documents. Warranty The Original Prusa XL 3D printer is covered by a 24-month warranty for end customers in the EU, and a 12-month warranty for business customers and end customers in the rest of the world.
- Page 9 As we cannot control the conditions under which the Original Prusa XL printer is assembled, we do not assume any responsibility and expressly disclaim any liability for losses, injuries, damages or expenses arising out of or in connection with the assembly, handling, storage, use or disposal of the product.
- Page 10 Electrical Safety The printer should only be powered through a standard 230 VAC, 50 Hz or 110 VAC, 60 Hz outlet. Never use alternative power sources as they can cause problems or damage the printer. Do not use the printer if the power cord is damaged in any way – damaged cords can lead to electric shock.
- Page 11 Proper Use of Double-Sided Print Sheets Each type of print sheet requires slightly different maintenance. Improper handling and use can lead to damage to the print sheet, heatbed or other parts of the printer. Print sheets are consumable and subject to wear. The surface of the textured and satin print sheet must not be cleaned with acetone! Please refer to the Flexible Print Sheets chapter for maintenance instructions.
-
Page 12: Introduction
Thank you for purchasing the Original Prusa XL 3D printer from Prusa Research! Your support allows us to invest in further development of 3D printers and other 3D printing products. The Original Prusa XL is a great option for beginners, hobbyists, companies, and even for setting up a 3D printing farm. -
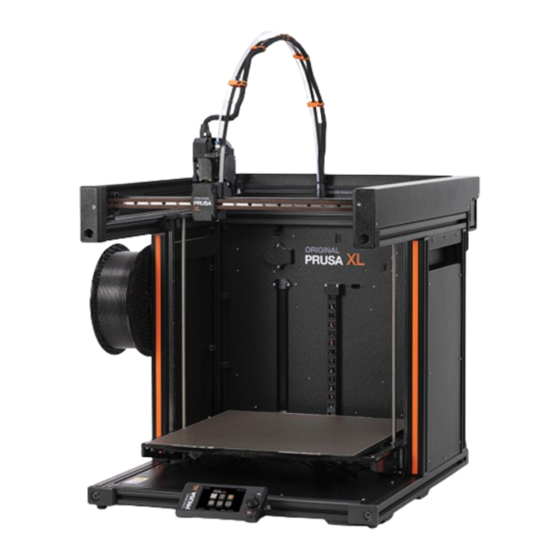
Page 13: Original Prusa Xl Overview And Glossary
2. Original Prusa XL Overview and Glossary Extruder (Nextruder) Filament sensor / Filament insertion point (on the side) Spoolholder (with a spool installed) Print sheet Control Knob and Reset Button USB port Heatbed (moves along the Z-Axis) PTFE tube / Extruder cables... -
Page 14: Contents Of The Package And Accessories
(for removing plastic from the print sheet). Not the standard 0.4mm nozzle! The Original Prusa XL comes with a 0.6mm nozzle preinstalled. The larger nozzle diameter offers a great detail-to-print speed ratio. If you need to print more detailed objects, you can easily replace the nozzle with a smaller diameter model, or use an adapter and choose any V6- compatible nozzle (available in our e-shop at prusa3d.com) -
Page 15: How To Move The Printer
2.2. How to Move the Printer If you want to move the Original Prusa XL printer, use the recommended method - pick up the printer using the integrated holders on the sides. Due to the weight of the printer, we recommend moving it with the help of a second person. -
Page 16: Error Screens
2.4. Error Screens If the printer encounters a critical error, an error screen will be displayed with a description of the error. The information on the screen is intended to facilitate easy identification, diagnosis and resolution of the error. Pay special attention to the text on the screen. Most error messages are supplemented with a QR code - scanning them (e.g. -
Page 17: Your First Print
3. Your First Print To get your printer up and running, please pay attention to the information in the following chapters. We will go through the basics together - you’ll be printing in no time! In this chapter you will learn how to: Control the printer Prepare the print sheet for the first print Perform initial calibration... -
Page 18: Selftest Calibration (Wizard)
3.2. Selftest Calibration (Wizard) When you first power on the Original Prusa XL, the Selftest calibration wizard will start. The wizard will walk you through the initial calibration and all necessary tests to start printing. Completing the entire checklist is mandatory. But don't worry, it's gonna be super easy, barely an inconvenience! The purpose of the calibration is to check whether your printer is in a good shape. - Page 19 Attach the sheet by first aligning the rear cutout with the locking pins on the back of the heated bed. (marked in orange in the picture above). Hold the sheet by the front two cutouts and slowly lay it down onto the heated bed - watch your fingers! Important: It is absolutely essential that the print sheet is properly attached to and aligned with the heatbed - the cutout must match with the two pins on the rear and the bed must not be skewed, otherwise the risk of hitting the end stops of the Z-axis arises.
-
Page 20: Running The Selftest
3.4. Running the Selftest During the Printer Selftest, do not manipulate or touch the printer. If the printer is placed on an unstable surface or if there is another running 3D printer next to it, it may affect the accuracy of the calibration negatively. -
Page 21: Inserting Filament
3.5. Inserting filament Cut the end of the filament into a sharp point. Insert the filament into the PTFE tube on the side. If the filament sensor is on, the filament will be automatically fed. If the filament sensor is off, proceed to step 2. -
Page 22: Removing Filament
For the next step (Start the First Print), leave the filament inserted in the printer. If for any reason you need to change the filament, the procedure is as follows: 3.6. Removing Filament Select LCD Menu - Filament - Unload Filament The printer will preheat automatically. -
Page 23: Starting The First Print
Subsequently, the printing of the object or objects will take place. Carefully observe the quality of the first layer. The Original Prusa XL is equipped with very accurate LoadCell technology, which measures the distance between the nozzle and the bed with perfect accuracy. -
Page 24: Removing A Printed Object From The Print Sheet
3.8. Removing a Printed Object from the Print Sheet Once the printing is finished, wait until the print sheet cools down. The print plate and heated bed may exceed 100 °C, depending on the settings - contact with unprotected skin can cause burns. -
Page 25: First Print Troubleshooting
3.9. First Print Troubleshooting The calibration and pre-print setup of the Original Prusa XL are fully automated - the filament is automatically inserted, axes checked and the first layer precisely measured. If a printing issue does occur, it usually falls into one of the following scenarios: 3.9.1. -
Page 26: Updating The Firmware
3.10. Updating the Firmware The Original Prusa XL is ready to print once assembled and powered on. To make sure you have the most up-to-date version of the firmware with the latest features and settings, we recommend checking prusa3d.com/drivers. You can perform the firmware update after you perform the initial Selftest. -
Page 27: Sample Models
3.11. Sample Models The USB drive that came with your Original Prusa XL 3D printer contains a number of sample files (G-codes). We recommend keeping them on the flash drive. These files have been prepared (sliced) and thoroughly tested by us. If you encounter issues with print quality at any time, try loading and printing one of the sample files - especially the Prusa Logo and the First Layer Test. -
Page 28: Advanced User Guide
4. Advanced User Guide This part of the handbook covers everything you need to know once you manage to successfully print your first sample object. Network connection, printing your own models, slicing - all this (and more) is covered on the following pages. 4.1. -
Page 29: Network Connection
Original Prusa XL can be connected to a local network (LAN/Wi-Fi), which allows you to have an overview of various functions of the printer through the web interface called PrusaConnect. The printer has DHCP enabled by default. -
Page 30: Obtaining Printable Models
One of the best places for free 3D models is Printables.com, a large online library full of high- quality 3D models managed by Prusa Research. Its main goal is to bring together a large community of designers, creators, and 3D printing enthusiasts - regardless of the brand of 3D printer they prefer. -
Page 31: Create Your Own Model
Models are usually available to download either for free under the Creative Commons - Attribution - Non-Commercial License (models cannot be used commercially and must always include the author's name), or for a small fee. We have selected the most interesting websites for you: www.printables.com www.thingiverse.com www.myminifactory.com... -
Page 32: Prusaslicer
Color painting Various print settings Thanks to the strong community and a dedicated team of developers in Prusa Research, PrusaSlicer is constantly evolving with new features and improvements based on community feedback. From print quality improvements to reducing print time and minimizing filament usage, even small updates can have a significant impact on your 3D printing experience. -
Page 33: Prusaslicer Interface Explained
4.7. PrusaSlicer Interface Explained Opens detailed Print, Filament and Printer settings Add button to import a 3D model into the scene The Delete and Delete All buttons remove the model(s) from PrusaSlicer Switching between Simple, Advanced and Expert modes Settings for printing speed and quality Material selection Printer selection Quick settings for Infill density, Supports and Brim... -
Page 34: Initial Setup And General Workflow
(no. 6 in the illustration above) If you don't see the Original Prusa XL it in the list, you need to add it either by using Add Printer- Add Presets menu item (in the same menu), or by using Configuration - Configuration Wizard from the top menu bar. -
Page 35: Using Supports
4.7.2. Using Supports Supports are printed structures resembling scaffolding. They are used for printing complex objects. After printing, they can be easily separated from the output. You can find a large number of objects that can be printed without supports - just place them in the right orientation on the bed, slice them and you can print. -
Page 36: Speed Vs Print Quality
The default support pattern usually works correctly, but if you need to modify the places where the supports will be generated, just go to the Print Settings tab and select Support Material. Check the Generate Support Material box. The Overhang Threshold allows you to set the minimum angle for printing the support material. -
Page 37: Infill
4.7.4. Infill Another parameter that affects the properties of the printed object is Infill. It affects the printing speed, strength and appearance of the object. Objects printed with the FFF/FDM method usually do not have 100% density. Instead, they contain a certain geometric structure inside. It can take various forms, from simple square grids or hexagons to more complex patterns. -
Page 38: Printing Objects Larger Than The Print Volume
4.7.6. Printing Objects Larger than the Print Volume The Original Prusa XL printer has a huge print volume of 360 x 360 x 360 mm. If even this is not enough, you can play around with settings to be able to print truly gigantic models. Don’t let the size of the print bed be a limitation –... -
Page 39: Printing Multicolored Objects (Single-Tool Xl)
4.7.7. Printing Multicolored Objects (Single-Tool XL) If you want to have a print with layers in different colors, it can be easily set up directly in PrusaSlicer - follow the instructions below. Switch to the layer view (Preview) using the button in the left bottom corner Use the slider on the right to select the layer in which you want to change the color Click on the orange icon with the plus sign An immediate preview will appear. -
Page 40: Slicing And Exporting
However, for some projects, a nozzle of a diameter might be more suitable. The Original Prusa XL uses special nozzles with a metal filament guide, making them easy to swap and highly reliable. -
Page 41: Material Guide
The Original Prusa XL 3D printer is compatible with almost all filaments available. Individual materials may differ not only in color but also in mechanical and optical properties, or even in printing difficulty. If you have no experience with 3D printing, we recommend starting with PLA. -
Page 42: Petg
5.2. PETG PETG is one of the most popular materials for 3D printing. It is a great choice for parts that will be subject to mechanical stress. Compared to PLA, it has a higher temperature resistance, it is more flexible and less brittle. Thanks to its low thermal expansion, it holds well to the bed and does not warp. -
Page 43: Asa (Abs)
5.3. ASA (ABS) ASA and ABS are very similar materials. In some respects, ASA is better than ABS. ASA is UV- stable compared to ABS and shrinks slightly less during printing. When it comes to post- processing, ABS and ASA can be similar, but the latter is currently more popular, so we will focus mainly on it. -
Page 44: Pc (Polycarbonate) And Pc Blend
5.4. PC (polycarbonate) and PC Blend Polycarbonate (PC) is a technical material boasting excellent strength, tensile strength, and resistance to high temperatures. It is however quite demanding to print, thus making it suitable mainly for advanced users. This of course does not apply to our Prusament PC Blend, which is much easier to print compared to other polycarbonates. -
Page 45: Pvb
5.5. PVB Polyvinyl butyral (PVB) is a material that can be easily smoothed with isopropyl alcohol (IPA). Prints, when properly set up, are clear and transparent, thus making PVB a suitable material for printing vases, lamp shades, and other decorative models. The printing settings are similar to those for PLA, but the mechanical properties of PVB are slightly better. -
Page 46: Flexible Materials
5.6. Flexible Materials Flexible filaments are typically very strong and elastic materials. In many cases, the classic hard plastic (PLA, PETG) may not be ideal or even completely unsuitable for certain models. Whether you are printing a phone case, a housing for an action camera or even wheels for an RC car, it is better to use a flexible material. -
Page 47: Pa (Polyamide) / Pa11Cf
5.7. PA (Polyamide) / PA11CF Polyamide (also known as Nylon) is a versatile material known for its durability and is commonly used for 3D printing special models due to its high difficulty in printing (not applicable to PA11CF) and higher costs. There are several types of polyamide, which differ in properties such as temperature resistance, water absorption and adhesion to different types of surfaces. -
Page 48: Regular Maintenance
6. Regular Maintenance The Original Prusa XL was designed from the beginning as a true print "workhorse". Despite its high reliability, it is still a device with mechanical components that require more or less regular maintenance. Follow the instructions below to keep your printer in perfect condition for as long as possible. - Page 49 Consumable materials such as print sheets are not covered by our warranty unless they arrive damaged or incorrectly manufactured. Print sheets are consumables and the warranty only applies to defects that appear immediately after unpacking. All original print sheets made in Prusa Research are double-sided.
-
Page 50: Double-Sided Textured Print Sheet
6.1.1. Double-Sided TEXTURED Print Sheet Surface resistant to damage and scratches Texture on the surface of the sheet is transferred to the bottom side of the printed object Simpler Z-axis calibration FLEX does not require glue (Kores) application to the print bed After the print sheet cools down, the print usually detaches itself PLA prints with small contact area may require a brim Large PLA prints may warp... -
Page 51: Double-Sided Satin Print Sheet
6.1.3. Double-Sided SATIN Print Sheet Suitable for PLA and PETG Soft texture on the bottom part of the print Only use quality isopropyl alcohol (90+ %) to clean FLEX requires the use of a glue separation layer (Kores) on the print sheet Wide range of supported materials, including advanced materials such as PC Blend and more Easy maintenance and good adhesion Do not use acetone! Acetone will damage the surface of the print sheet! -
Page 52: Extruder Feeding Gear
stuck in it. In such a case, check and remove any dirt from the relevant fan. Do not try to bypass the RPM check - this could damage the printer! Both fans should be checked and cleaned after a few hundred hours of printing. Dust can be removed with compressed air in a spray can, small plastic threads can be removed with tweezers. -
Page 53: Cleaning The Nozzle
6.9. Filament Sensors Original Prusa XL is equipped with two filament sensors: the first one is located on the side, close to the input of the PTFE tube where you feed the filament. The second one is located in the extruder. -
Page 54: Flashing An Unofficial (Unsigned) Firmware
6.10. Flashing an Unofficial (Unsigned) Firmware: We take security seriously. Before each firmware update, we rigorously test it to ensure that all of its security features are working correctly. If any of the sensors detect an unexpected reading, the heater will be immediately disconnected to prevent any damage to the printer or its surroundings. -
Page 55: Faq - Frequently Asked Questions And Basic Troubleshooting
7. FAQ - Frequently Asked Questions and Basic Troubleshooting In case of a critical failure, the Original Prusa XL may display an error screen with short instructions on how to proceed. This screen contains a link to a detailed article on our Knowledge Base at help.prusa3d.com... -
Page 56: Loose Belts
Crash detection sensitivity in the Settings menu. If you assembled the Original Prusa XL as a kit, make sure that the cables running from the electronics to the extruder are not blocked by anything. -
Page 57: Advanced Hardware Troubleshooting
Due to the length of the articles, it is not possible to include detailed troubleshooting guides in this handbook. However, the Original Prusa XL will display an error screen with a short recommendation on how to proceed further if it runs into a problem. This screen will also contain a link to a detailed article in our Knowledge Base at help.prusa3d.com. - Page 58 PRINT AND SHARE! JOIN OUR COMMUNITY! Download 3D models for free at printables.com and participate in design contests! Follow us for tips, guides, inspiring videos and amazing 3D prints! HAPPY PRINTING!
Need help?
Do you have a question about the Original Prusa XL and is the answer not in the manual?
Questions and answers