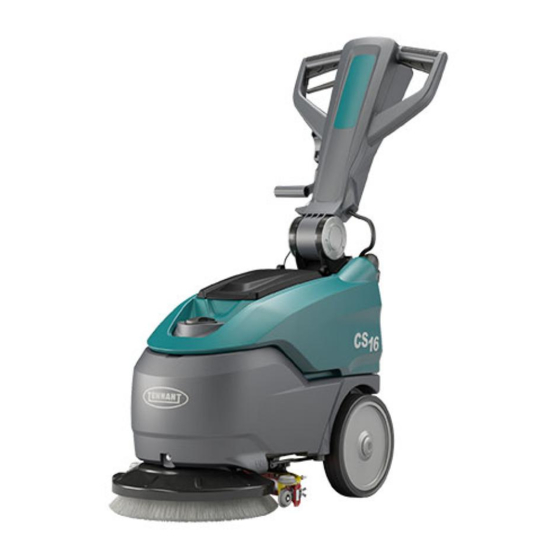
Tennant CS16 Technical & Service Manual
Hide thumbs
Also See for CS16:
- Operator's manual (380 pages) ,
- Quick manual (2 pages) ,
- Operator's manual (35 pages)

Related Manuals for Tennant CS16


Summary of Contents for Tennant CS16
- Page 1 PLDC04626 REVISION DATE March 11, 2022 DATE March 11, 2022 TECHNICAL OFFICE Stavale CS16 ECHNICAL ERVICE ANUAL...
- Page 3 PLDC04626 REVISION 00 March 11, 2022 TECHNICAL OFFICE Stavale ALARM CODES DISPLAYED WARNING: Triggering of the brush motor thermal, interruption of the brush motor and vacuum motor fuses, malfunction (interrupted cable) of the brush motor and vacuum motor power cables are not displayed on the dashboard. Error: BRUSH SHUTDOWN On display: 2 quick flashes of brush LED ref.
- Page 4 Error: MAXIMUM TEMPERATURE On display: fast, continuous flashing of brush LED ref. 3 and suction LED ref. 4 simultaneously. Power board overheating error. To restore the functions switch the machine off and wait around 15 minutes until the power board cools down.
- Page 5 Information - SHUTDOWN ERROR: If activated due to "short circuit" or "excessive peak current" detected by the power board, the problem may involve the brush and/or suction motor wiring or motor power supply or the actual power board itself. In the shutdown error involves the motors or the motor wiring, the electronic control board stops the function and signals the error via the LED on the instrument panel.
- Page 6 A2.1 Removing the brush motor from the CS16 Battery A2,2 Removing the brush motor from the CS16 Cord A2.3 Removing the brush head from the CS16 B and CS16 Cord A2.4 Replacing the brush motor’s thermal protector SUCTION UNIT - TANKS SUCTION MOTOR B1.1 Measuring suction motor current draw on the CS16 Battery...
- Page 7 WARNINGS ! DANGER Indicates the need for attention in order to avoid a series of consequences which could cause death or damage to the health of the operator. WARNING Indicates the need for attention in order to avoid a series of consequences which could cause damage to the machine or work environment or financial loss.
-
Page 8: Brush Head
In this Service Manual, the machine version CS16 B = battery, CS16 C = corded may appear between brackets “( )”. This indicates that the instruction in question refers only to the version specified. - Page 9 Stavale A1 MEASURING BRUSH MOTOR CURRENT DRAW On the scrubber CS16, the brush motors of type battery versions and cord type versions are very similar. Apart from the power source (24 V DC for battery versions and 230V AC for “C” versions), the differences lie in the motors’ maximum current draw and in the type of connections.
- Page 10 TECHNICAL DEPT. Stavale A1.1 Measuring brush motor current draw on the CS16 Battery Make sure that the batteries on the machine are fully charged (24V ± 1V). Use a clamp-on ammeter with a full scale reading of at least 200 A (amperes) as shown below.
- Page 11 TECHNICAL DEPT. Stavale On the CS16 Battery, the brush motor is powered by the power control card. This imposes a current ramp, so you are unlikely to see in-rush current peaks. For this reason, always wait a few seconds for current draw to stabilise before taking the reading.
- Page 12 March 11, 2022 TECHNICAL DEPT. Stavale A1.2 Replacing the brush motor’s carbon brushes on the CS16 B Disassembly Move the machine to the tank draining area, and empty the solution tank and the collection tank. Move the machine to a flat, dry floor. For convenience, use a fork lift if one is available.
- Page 13 PLDC04626 REVISION March 11, 2022 TECHNICAL DEPT. Stavale Lift from its seat the two fuse holders. Detach the cable from the squeegee mounting by unscrewing the screw E. Lift the solution tank up to the brush motor. PHOTO 9 Pull the machine frame and brush motor mounting away from the solution tank. Remove the screw G holding the metal strap H in place, to protection of carbon motor brushes I.
- Page 14 PLDC04626 REVISION March 11, 2022 TECHNICAL DEPT. Stavale Use a suitable hook to pull away the spring clip L while lifting the carbon brush out by its cable. PHOTO 12 Check that the dimensions of the carbon brush I lie within the tolerances given in the figure below. The brush must have a minimum length of 8.0 mm / 0,31 in.
- Page 15 PLDC04626 REVISION March 11, 2022 TECHNICAL DEPT. Stavale Blow the inside of the motor clean with a jet of compressed air, paying particular attention to the area around the carbon brushes and to the part of the rotor M with which the carbon brushes come into sliding contact. Check the rotor M for wear, paying particular attention to the area of contact with the carbon brushes.
- Page 16 March 11, 2022 TECHNICAL DEPT. Stavale A1.3 Replacing the brush motor’s carbon brushes on the CS16 C Disassembly Make sure that the machine is disconnected from the electricity supply. Move the machine to the tank draining area, and empty the solution tank and the collection tank.
- Page 17 PLDC04626 REVISION March 11, 2022 TECHNICAL DEPT. Stavale Arrange the motor cable (power E) so that they are not pulled when the motor is moved away from the solution tank. Tip the machine rearwards, until the handle rests on the floor.
- Page 18 PLDC04626 REVISION March 11, 2022 TECHNICAL DEPT. Stavale Use a suitable hook to pull away the spring clip M while lifting the carbon brush L out by its cable. PHOTO 23 Check that the dimensions of the carbon brush L lie within the tolerances given in the figure below. The brush must have a minimum length of 8.0 mm / 0,31 in.
- Page 19 PLDC04626 REVISION March 11, 2022 TECHNICAL DEPT. Stavale Blow the inside of the motor clean with a jet of compressed air, paying particular attention to the area around the carbon brushes and to the part of the rotor N with which the carbon brushes come into sliding contact. Check the rotor N for wear, paying particular attention to the area of contact with the carbon brushes.
- Page 20 Stavale A2 REMOVING THE BRUSH MOTOR AND BRUSH HEAD Removing the CS16 brush motor and brush head is a quick and easy operation. It is nevertheless important to take careful note of the polarity of the motor’s power cables, to avoid problems caused by the brush that could compromise the washing.
- Page 21 March 11, 2022 TECHNICAL DEPT. Stavale A2.1 Removing the brush motor from the CS16 Battery Disassembly Move the machine to the tank draining area, and empty the solution tank and the collection tank. Move the machine to a flat, dry floor. For convenience, use a fork lift if one is available.
- Page 22 PLDC04626 REVISION March 11, 2022 TECHNICAL DEPT. Stavale Lift from its seat the two fuse holders. Detach the cable from the squeegee mounting by unscrewing the screw E. Lift the solution tank up to the brush motor. PHOTO 31 Disconnect the thermal cutout’s two red bullet connectors F. Pull the protective boots G away from power terminals and disconnect the power cables from the motor.
- Page 23 PLDC04626 REVISION March 11, 2022 TECHNICAL DEPT. Stavale Remove the brush drive flange H. Remove the stainless steel M8 x 20 mm bolt H1 along with its lock washer and flat washer. Use a suitable puller to remove the brush drive flange H. PHOTO 33 Remove the key I from the groove in the motor shaft and keep it safe.
- Page 24 PLDC04626 REVISION March 11, 2022 TECHNICAL DEPT. Stavale Remove the motor and replace it with an identical new one. Before you fit the new motor, make sure that the key I engages properly with the groove in its shaft. It must be neither too tight nor (worse still) too loose.
- Page 25 March 11, 2022 TECHNICAL DEPT. Stavale A2.2 Removing the brush motor from the CS16 Cord Disassembly Move the machine to the tank draining area, and empty the solution tank and the collection tank. Move the machine to a flat, dry floor. For convenience, use a fork lift if one is available.
- Page 26 March 11, 2022 TECHNICAL DEPT. Stavale A2.3 Removing the brush head from the CS16 Battery and Cord Disassembly On “B” (battery powered) versions, follow the procedure given in section A2.1 “Removing the brush motor from the CS16 B”, as far as step 16.
- Page 27 PLDC04626 REVISION March 11, 2022 TECHNICAL DEPT. Stavale Lift the machine frame and pull out the brush head complete with brush cover and squeegee mounting. PHOTO 42 Reassembly To fit the brush head, repeat the steps for disassembly in reverse order. On completion of reassembly, make sure that the brush head pivots smoothly around the axes formed by bolts B1 and B2.
- Page 28 PLDC04626 REVISION March 11, 2022 TECHNICAL DEPT. Stavale A2.4 Replacing the brush motor’s thermal protector Though it is highly unlikely, the thermal protector in the brush motor may, in time, stop functioning properly and start cutting out at temperatures below that for which it was originally calibrated. It may even develop a fault causing its contacts to remain open, thus cutting off power to the motor.
- Page 29 PLDC04626 REVISION March 11, 2022 TECHNICAL DEPT. Stavale Remove the two bolts C1 from the top of the motor cover C. PHOTO 47 Rest the brush motor on its side, and pull off the cover C, applying the necessary force. Take care not to lose the shims C2 from the bearing housing in the cover.
- Page 30 PLDC04626 REVISION March 11, 2022 TECHNICAL DEPT. Stavale Reassembly Before fitting a new cover C, fit the shims C2 and the bearing D in the bearing housing. Check the rotor E for wear, paying particular attention to the area with which the carbon brushes come into sliding contact.
- Page 31 In this Service Manual, the machine version CS16 B = battery, CS16 C = corded may appear between brackets “( )”. This indicates that the instruction in question refers only to the version specified.
- Page 32 Stavale B1 SUCTION MOTOR On the scrubber CS16, the suction motors of “B” type battery versions and “C” type mains versions are very similar. Apart from the power source (24 V DC for battery versions and 240V AC / 50-60 Hz cord versions), the differences lie in the motors’...
- Page 33 March 11, 2022 TECHNICAL DEPT. Stavale B1.1 Measuring vacuum motor current draw on the CS16 Battery Disassembly Make sure the batteries on the machine are fully charged (24V ± 1V). Use a clamp-on ammeter with a full scale reading of at least 200 A (amperes) as shown below.
- Page 34 TECHNICAL DEPT. Stavale On the scrubber CS16 Battery, the suction motor is powered by the power control card. This imposes a current ramp, so you are unlikely to see in-rush current peaks. For this reason, always wait a few seconds for current draw to stabilise before taking the reading.
- Page 35 March 11, 2022 TECHNICAL DEPT. Stavale B1.2 Removing the vacuum motor from the CS16 Battery Disassembly Move the machine to the tank draining area, and completely empty the collection tank. Move the machine to a flat, dry floor. For convenience, use a fork lift if one is available.
- Page 36 PLDC04626 REVISION March 11, 2022 TECHNICAL DEPT. Stavale Lift the motor, complete with its bracket D. Disengage it from the anti-vibration mountings, and turn it through 180° (upside down). Identify the four self-tapping screws E securing the bracket D to the suction motor. PHOTO 58 Remove the four self-tapping screws E securing the bracket D to the suction motor.
- Page 37 March 11, 2022 TECHNICAL DEPT. Stavale B1.3 Replacing the vac. motor’s carbon brushes on the CS16 “B” Disassembly Follow the procedure for removing the suction motor, given in section B1.2, as far as step 10. With the suction motor turned upside down, remove the cover A from the cooling fan.
- Page 38 PLDC04626 REVISION March 11, 2022 TECHNICAL DEPT. Stavale Check the carbon brushes for wear and for signs of burning on the surface that comes into sliding contact with the rotor. Check also that the carbon brushes are free to slide in their seats and that the springs push with sufficient force for their entire stroke.
- Page 39 March 11, 2022 TECHNICAL DEPT. Stavale B1.4 Removing the suction motor from the CS16 “Cord” Disassembly Move the machine to the tank draining area, and completely empty the collection tank. Move the machine to a flat, dry floor. For convenience, use a fork lift if one is available.
- Page 40 March 11, 2022 TECHNICAL DEPT. Stavale B1.5 Replacing the vac. motor’s carbon brushes on the CS16 C Disassembly Follow the procedure for removing the suction motor, given in section B1.4, as far as step 7. With the suction motor turned upside down, remove the cover A from the cooling fan, following the instructions given in section B1.5 for battery powered machines.
- Page 41 PLDC04626 REVISION March 11, 2022 TECHNICAL DEPT. Stavale Replacement Always replace both carbon brushes together. Identify the cable F connecting the carbon brush to the motor’s electrical system. Use a screwdriver to disconnect the cable F from the carbon brush C. Gently lift the plastic part C2 of the carbon brush holder while gently pulling out the cable F and terminal G.
- Page 42 Stavale B2 SQUEEGEE UNIT Unlike those of other scrubber driers, the squeegee unit on the CS16 is mounted just behind the brush, and covers just over a third of its circumference. The squeegee mounting pivots directly under the brush motor so that the squeegee turns on the same axis as the brush, giving a better drying action around curves.
- Page 43 PLDC04626 REVISION March 11, 2022 TECHNICAL DEPT. Stavale B2.1 Adjusting the squeegee Prepare the machine for use and go to a flat, dry area of floor. Make sure that the squeegee flaps are in good condition and that the tops of the flaps are firmly seated in the squeegee body before beginning adjustment.
- Page 44 PLDC04626 REVISION March 11, 2022 TECHNICAL DEPT. Stavale B2.2 Replacing the squeegee flaps Disassembly Lower the squeegee unit to working position to facilitate its removal. Remove the suction hose A from the union on the squeegee unit. Unscrew the two plastic knobs B securing the squeegee unit to its mounting. Remove the squeegee unit from the machine and take it to the work bench.
- Page 45 PLDC04626 REVISION March 11, 2022 TECHNICAL DEPT. Stavale Clean the flap seats in the squeegee unit before fitting new flaps. PHOTO 78 Identify the front flap E and the rear flap D, and fit them to the squeegee, aligning them with the raised plastic references.
- Page 46 PLDC04626 REVISION March 11, 2022 TECHNICAL DEPT. Stavale PHOTO 80 Position the flap retainers G and F, and fit the bolts C. PHOTO 81 Fit the two short bolts C1 in the outside holes of the squeegee unit (where thickness is reduced). PHOTO 82 March 11, 2022 39/109...
- Page 47 PLDC04626 REVISION March 11, 2022 TECHNICAL DEPT. Stavale Position the flaps E and D and flap retainers G and F on the squeegee unit and fit the bolts C and C1 to hold them in place. Leave the butterfly nuts slack until the flaps are properly seated in the squeegee unit. Gradually tighten the butterfly nuts C, starting from the two nearest to the suction hose union.
- Page 48 PLDC04626 REVISION March 11, 2022 TECHNICAL DEPT. Stavale B3 CLEANING FILTERS AND HOSES, CHECKING THE SOLENOID VALVE, CHECKING THE FLOAT To ensure correct functioning, it is essential for all machine components to be fully efficient in addition to the brush. It is therefore important to verify the correct functioning of the solenoid valve and its cleanliness.
- Page 49 PLDC04626 REVISION March 11, 2022 TECHNICAL DEPT. Stavale B3.1 Testing the solenoid valve “B” type battery version Make sure the batteries on the machine are fully charged (24V ± 1V). Use a digital multi-meter able to measure DC voltages of at least 50 V. Make sure that the button on the control panel operates the solution dispensing solenoid valve (LED lit).
- Page 50 PLDC04626 REVISION March 11, 2022 TECHNICAL DEPT. Stavale Pull the lever C on the handle and measure the voltage (V) between the two fast-ons B. PHOTO 88 Provided measured voltage is between 25 and 21.4 V, the cabling and the electronic control system are functioning correctly.
- Page 51 PLDC04626 REVISION March 11, 2022 TECHNICAL DEPT. Stavale B3.2 Testing and replacing the solenoid valve on “B” type machines Make sure the batteries on the machine are fully charged (24V ± 1V). Use a digital multi-meter able to measure DC voltages of at least 50 V. Make sure that the button on the control panel operates the dispensing solenoid valve (LED lit PHOTO 89 Move the machine to the tank draining area, and empty the solution and collection tanks.
- Page 52 PLDC04626 REVISION March 11, 2022 TECHNICAL DEPT. Stavale Connect the probes of the digital multimeter to the two fast-ons B. Switch the machine back on and press the solution dispensing button. Pull the lever C on the handle and measure the voltage (V) between the two fast-ons B. PHOTO 92 Read the voltage off the digital multi-meter.
-
Page 53: Cleaning The Solenoid Valve
PLDC04626 REVISION March 11, 2022 TECHNICAL DEPT. Stavale CLOSED OPEN PHOTO 95 If, with fully charged batteries, voltage across the fast-ons is between 21 and 1 V, check the connections at the power control card and check the continuity of the wires to the solenoid valve. If the connections and the wiring are efficient, replace the power control card. -
Page 54: Replacing The Solenoid Valve
PLDC04626 REVISION March 11, 2022 TECHNICAL DEPT. Stavale Replacing the solenoid valve Disconnect the two fast-ons B (if still connected), and replace just the solenoid D. Alternatively, proceed as instructed below. Remove the two screws F securing the body of the solenoid valve to the machine frame. Remove the rubber hoses from the unions G and H. - Page 55 The CS16 uses a very simple float system, based on a rigid block of foam. When suction is switched on to dry the floor, the dirty water rising in the collection tank gradually lifts the float towards the suction holes.
-
Page 56: Disassembly And Inspection
Because its solution tank only contains a limited volume, and because the solution dispensing solenoid valve can be cleaned so easily, the CS16 is not fitted as standard with a solution filter. If required, an optional filter can be fitted, as shown below. - Page 57 PLDC04626 REVISION March 11, 2022 TECHNICAL DEPT. Stavale Optional solution filter Tip the machine up rearwards as instructed above, and identify the optional solution filter A. PHOTO 102 Unscrew the cap A1 from the body A2. Remove the filter A3 from the body A2. Make sure that there are no foreign bodies lodged inside the filter body A2.
- Page 58 PLDC04626 REVISION March 11, 2022 TECHNICAL DEPT. Stavale Clean the filter A3 by running water from the outside towards the inside. Use a small brush to remove any stubborn dirt. Fit the filter A3 in the body A2, then screw the cap A1 back on to the body A2. PHOTO 104 Replacing / fitting the solution filter If it ever proves necessary to replace the entire filter A, take care to fit the new filter the right way around.
- Page 59 PLDC04626 REVISION March 11, 2022 TECHNICAL DEPT. Stavale Cleaning and replacing the solution dispensing cock If little or no solution comes out even when the dispensing cock B is completely open, dirt may have built up at the inlet to the cock. The cock B can be cleaned either by blowing compressed air through it to free any obstruction, or by removing the cock and physically removing the dirt.
- Page 60 PLDC04626 REVISION March 11, 2022 TECHNICAL DEPT. Stavale If even this fails to dislodge the obstruction, gently push a small screwdriver through the cock B. PHOTO 108 After blowing air into the cock, empty the solution tank through its drain plug and rinse the tank to remove any dirt deposited inside it.
- Page 61 In this Service Manual, the machine version CS16 B = battery, CS16 C = corded may appear between brackets “( )”. This indicates that the instruction in question refers only to the version specified.
- Page 62 PLDC04626 REVISION March 11, 2022 TECHNICAL DEPT. Stavale D1 FUNCTION CONTROL CARD AND POWER CONTROL CARD On “B” type battery and “C” type cord machines, the function control card receives its power from the power control card via a flat cable. The function control card controls the machine’s functions (suction motor, brush motor, solenoid valve) via the same flat cable.
- Page 63 PLDC04626 REVISION March 11, 2022 TECHNICAL DEPT. Stavale D1.1 Replacing the function control card on “B” and “C” Machines Disassembly Move the machine to the tank draining area, and completely empty the collection tank. Take the machine to a flat, dry floor area. Lift up and remove the recovery tank to gain access to the fuse holder A.
- Page 64 PLDC04626 REVISION March 11, 2022 TECHNICAL DEPT. Stavale Rotate the handle 180°, unscrew the last screws and remove the front half-shell. PHOTO 114 Remove the operating levers to reach the plastic latch that locks the board in place. Unscrew the two screws that secure the retainer and the corrugated pipe clamp of the flat cable. PHOTO 115 Move the clip that locks the flat cable connector to one side to allow the plank board to be removed.
- Page 65 PLDC04626 REVISION March 11, 2022 TECHNICAL DEPT. Stavale Disassembly, “Cord” type machines Take the machine to a flat, dry floor area. Make sure that the power indicator D on the control panel shows that the machine is switched off. Make sure that the machine’s mains power cable is disconnected from the electricity supply. Remove the function control board by following the instructions previously described.
- Page 66 PLDC04626 REVISION March 11, 2022 TECHNICAL DEPT. Stavale D1.2 Testing the function control card on “B” and “C” machines The function control card is powered via the power control card, at 24 V on “B” type battery machines and at 12 V on “C” type mains machines. Via its flat cable, the function control card controls the machine’s actuators (brush motor, suction motor, solenoid valve).
- Page 67 PLDC04626 REVISION March 11, 2022 TECHNICAL DEPT. Stavale Replacing the flat cable Remove the 30 Amp power fuse in the case of “Battery” type battery machines, or unplug the power cable in the case of “Cord” type mains machines. The procedure for replacing the flat cable is similar for both “B” and “C” type machines. Disconnect and remove the function control card as instructed above.
- Page 68 PLDC04626 REVISION March 11, 2022 TECHNICAL DEPT. Stavale Attach the length of wire to the end of the new flat cable and pull it through the sheath to the power control card. Fit the new connector I to the flat cable, taking care to align the wires correctly. The flat cable must be perfectly perpendicular to the connector A, and the red stripe on the cable must align with pin 1 on the connector A, identified by the arrow.
- Page 69 D1.3 Replacing the power control card on “B” type machines Disassembly WARNING THE BOARDS ARE SET BY DEFAULT FOR THE CS16. FOLLOW THE INSTRUCTIONS TO CORRECTLY PROGRAM THE MODEL Move the machine to the tank draining area, and completely empty the collection tank.
- Page 70 PLDC04626 REVISION March 11, 2022 TECHNICAL DEPT. Stavale Disassemble the battery charger from the bracket by unscrewing the two bolts D to access the power board. Disconnect the power board from the machine wiring. Use a flat-blade screwdriver to remove the latch from the flat cable connector. PHOTO 127 Unscrew the four bolts and remove the power board from the bracket for replacement.
- Page 71 PLDC04626 REVISION March 11, 2022 TECHNICAL DEPT. Stavale Proceed with connecting the electrical wiring. Tighten screw E with a maximum torque of 3 Nm - 26.55 lbf-in. 3 N·m - 26,55 lbf·in PHOTO 129 Replace the battery charger on the bracket and tighten screws D to a maximum torque of 3 Nm -26.55 lbf-in. Reposition the bracket complete with battery charger in the dedicated compartment and fasten it to the tank.
-
Page 72: Eco Function
Consequently, if it is replaced, it must be programmed for the type of machine on which it is mounted. On the CS16 this operation does not need to be carried out as the default cards are programmed for the latter. - Page 73 PLDC04626 REVISION March 11, 2022 TECHNICAL DEPT. Stavale D1.4 Testing the power control card on “B” type machines The power control card supplies the function control card with power and signals for the current draw of the brush and suction motors. The function control card uses these signals to generate LED error code on the control panel and to disconnect power if current draw exceeds maximum limits.
- Page 74 PLDC04626 REVISION March 11, 2022 TECHNICAL DEPT. Stavale Use a digital multimeter able to read electrical resistance in Ohms. PHOTO 134 Use the digital multimeter to check the continuity of both power cables from the power control card to the suction motor. PHOTO 135 PHOTO 136 If the above tests find no faults, remove and replace the power card with a new one.
- Page 75 PLDC04626 REVISION March 11, 2022 TECHNICAL DEPT. Stavale Testing the brush motor If the brush motor fails to operate when switched on at the control panel, test the components in the circuit. Start by testing the motor’s thermal cutout, as instructed in section A2.4. Raise the brush off the floor and remove it.
- Page 76 PLDC04626 REVISION March 11, 2022 TECHNICAL DEPT. Stavale D1.5 Replacing the power control card on “Cord” type machines WARNING! RISK OF ELECTRIC SHOCK Disassembly Move the machine to the tank draining area, and completely empty the collection tank. Move the machine to a flat, dry floor. For convenience, use a fork lift if one is available.
- Page 77 PLDC04626 REVISION March 11, 2022 TECHNICAL DEPT. Stavale Identify the connectors you need to disconnect to remove the power control card from the waterproof box. Disconnect the black wire C1 and the brown wire C2 (common) for the suction motor, and the grey wire D1 and brown wire D2 (common) for the brush motor.
- Page 78 PLDC04626 REVISION March 11, 2022 TECHNICAL DEPT. Stavale PHOTO 145 Once all the connectors have been disconnected, remove the power control card from the box. Use a long nose pliers to release the four plastic clips E holding the power control card in place and lift the card out to remove it.
- Page 79 PLDC04626 REVISION March 11, 2022 TECHNICAL DEPT. Stavale PHOTO 147 Take care not to damage the connections to the fuses. The fuse F1 (8 A for 230 V machines, is the main fuse, and protects the motors and all main functions.
-
Page 80: Inspection And Testing
PLDC04626 REVISION March 11, 2022 TECHNICAL DEPT. Stavale D1.6 Testing the power control card on “C” type machines WARNING! RISK OF ELECTRIC SHOCK Make quite sure that the power cable is disconnected from the electricity supply before starting to test the power control card. Disconnect all connectors from the card and remove the card from the waterproof box before starting testing. - Page 81 PLDC04626 REVISION March 11, 2022 TECHNICAL DEPT. Stavale 230 V power control cards If there are no signs of any burned components and the capacitor is not swollen, measure the resistance of the transformer windings. The transformer is the most important component on the power control card as it generates the low voltage for the function control card and the three relays for the suction motor, brush motor and solenoid valve.
- Page 82 PLDC04626 REVISION March 11, 2022 TECHNICAL DEPT. Stavale Testing the 12 V secondary windings (on a 230 V machine) Use a digital multimeter able to measure resistance in Ohms. Measure the resistance of the transformer’s secondary winding. Connect the two probes B of the multimeter to the two ends D of the transformer’s secondary winding.
- Page 83 PLDC04626 REVISION March 11, 2022 TECHNICAL DEPT. Stavale Measuring the resistance of the relay coils The power control cards powers the brush and suction motors via relays, energised by the function control card. The relay coils are energised at 12 V DC. The relays are therefore theoretically interchangeable.
- Page 84 PLDC04626 REVISION March 11, 2022 TECHNICAL DEPT. Stavale Testing for continuity in cables If the measurements performed on the power control card have revealed no problems, test the continuity of the power cables to the motors and solenoid valve. In the following tests, there must be no breaks in continuity in any cable. Make sure that the machine’s mains power cable is disconnected from the electricity supply.
- Page 85 PLDC04626 REVISION March 11, 2022 TECHNICAL DEPT. Stavale Testing the brush motor cables for continuity First of all test the cable of the brush motor for continuity. This is easily identified as it is the only cable with a three way connector. Connect the red positive probe of the digital multimeter to the fast-on of the grey wire, and the black negative probe to black wire number 2, pin 3.
- Page 86 PLDC04626 REVISION March 11, 2022 TECHNICAL DEPT. Stavale Now test the third, ground wire. Though this does not influence the functioning of the brush motor, its continuity is important for safety purposes. Move the black negative probe to the connector’s central pin 2. Move the red positive probe to the common connector ground connector, recognisable for its yellow-green wires.
- Page 87 PLDC04626 REVISION March 11, 2022 TECHNICAL DEPT. Stavale Testing the suction motor cables for continuity Check the continuity of the suction motor cables. Move the black negative probe from the brush motor connector to pin 2 on the male two-pin suction motor connector. Move the red positive probe to the fast-on of the black wire to the suction motor relay.
- Page 88 PLDC04626 REVISION March 11, 2022 TECHNICAL DEPT. Stavale Testing the solenoid valve cables for continuity Check the continuity of the solenoid valve cables. Connect the red positive probe to the common connector of the blue and black wires. Connect the black negative connector to pin 2 of the solenoid valve’s black connector.
- Page 89 PLDC04626 REVISION March 11, 2022 TECHNICAL DEPT. Stavale D2 BATTERY CHARGER The battery charger is an advanced, high frequency electronic unit. It is designed to function at any supply voltage between 100 and 240 V AC. The charging process is entirely microprocessor controlled.
- Page 90 PLDC04626 REVISION March 11, 2022 TECHNICAL DEPT. Stavale D2.1 Replacing the battery charger If battery charging problems are encountered on a machine, before you replace the battery charger, test whether it is functioning correctly or not. The problem may well be that the batteries are no longer holding their charge.
- Page 91 PLDC04626 REVISION March 11, 2022 TECHNICAL DEPT. Stavale Test 2 Check that the battery charger is supplying current (in Amps) to recharge the batteries. The current supplied by the charger depends on the level of charge of the batteries. The lower the level of battery charge, the higher the charging current will be.
- Page 92 PLDC04626 REVISION March 11, 2022 TECHNICAL DEPT. Stavale If the battery charger passes both the above tests, replace the batteries with identical new ones. It is important to replace the batteries with identical ones, as the charging curve o the battery charger is designed for the specific type of battery fitted to the machine.
- Page 93 PLDC04626 REVISION March 11, 2022 TECHNICAL DEPT. Stavale Disconnect the two pin connector D to the batteries and the two bullet connectors E to the power control card. (This connection disables machine functioning while the batteries are under charge.) With the battery charger disconnected, identify the two nuts F1 and F2 securing the battery charger to the power unit’s mounting plate.
- Page 94 PLDC04626 REVISION March 11, 2022 TECHNICAL DEPT. Stavale Warnings & Suggestions A relay inside the battery charger disconnects power to the machine’s control system for the duration of the charge cycle, to prevent the machine being switched on or operated. This avoids loads being applied to the batteries, which the charger’s electronics could interpret as malfunctions, resulting in the recharge cycle being interrupted.
- Page 95 PLDC04626 REVISION March 11, 2022 TECHNICAL DEPT. Stavale D2.2 Configuring the battery charger The battery charger is configured in the factory to work with the specific type of batteries installed on the machine. If a new battery charger has to be fitted, configure it in the same way as the old one, as instructed below.
- Page 96 PLDC04626 REVISION March 11, 2022 TECHNICAL DEPT. Stavale Battery charger for EXIDE GEL battery The battery charger fitted to the machine can be recognised both by the batteries fitted as original equipment and by the label on the side of the battery charger cooling fan. The batteries are labelled with GEL technology and the charger is always labelled with the type of charge: IUIa –...
- Page 97 The figure below illustrates the settings of both DIP switches SW1 and SW2, with the cap removed. The figure shows the default setting for the CS16. Default DIP switch settings for the CS16 whit Exide battery CS 16 IUIa -GEL...
- Page 98 PLDC04626 REVISION March 11, 2022 TECHNICAL DEPT. Stavale Battery charger for DISCOVER AGM battery The battery charger mounted on the machine can be identified both by the batteries mounted as original equipment and by the label on the cable outlet side of the battery charger. The batteries are labelled with DRY CELL AGM technology and the charger is labelled with the type of charge: IUIa - AGM DISCO.
- Page 99 March 11, 2022 TECHNICAL DEPT. Stavale The figure below illustrates the settings of both DIP switches SW1 and SW2, with the cap removed. The figure shows the default setting for the CS16. DIP switch settings for the AGM Discover batteries CS16 IUIa...
- Page 100 PLDC04626 REVISION March 11, 2022 TECHNICAL DEPT. Stavale Battery charger for DISCOVER AGM battery with SBS mini The battery charger mounted on the machine is recognizable by the type of connector used for connection to the batteries. The connector used is an Anderson SBS mini with a metal cable clamp. In this case the batteries used are Discover DRY CELL AGM and the charging curve of the charger is IUIa - AGM DISCO, which is specific to the batteries fitted.
- Page 101 March 11, 2022 TECHNICAL DEPT. Stavale The figure below illustrates the settings of both DIP switches SW1 and SW2, with the cap removed. The figure shows the default setting for the CS16. DIP switch settings for the AGM Discover batteries CS16 IUIa...
- Page 102 TECHNICAL DEPT. Stavale The “Charge current” setting depends on the capacity of the batteries in Amperes. In the case of the CS16 it is recommended not to change the setting to 5A. A lower charging current (2.5A) would lengthen the charging time too much with the risk of not being able to charge them completely.
- Page 103 PLDC04626 REVISION March 11, 2022 TECHNICAL DEPT. Stavale D3 D4 ELECTRICAL WIRING DIAGRAMS D3.1 Electrical wiring diagram for the type battery version March 11, 2022 96/109...
- Page 104 PLDC04626 REVISION March 11, 2022 TECHNICAL DEPT. Stavale D3.2 Electrical wiring diagram for the type Cord version March 11, 2022 97/109...
-
Page 105: Error Codes - Troubleshooting
In this Service Manual, the machine version CS16 B = battery, CS16 C = corded may appear between brackets “( )”. This indicates that the instruction in question refers only to the version specified. - Page 106 PLDC04626 REVISION March 11, 2022 TECHNICAL DEPT. Stavale E1 DISPLAY OF ERROR CODES E1.1 Error codes for the function control card on “B” type machines In conjunction with the power control card, the function card controls the brush and suction motors and monitors the level of battery charge. Functioning status is shown by the LEDs on the control panel.
- Page 107 PLDC04626 REVISION March 11, 2022 TECHNICAL DEPT. Stavale Brush motor alarms Brush motor current limit (Amperes) exceeded. The power control card powers the brush motor via MOS-FETs to provide a soft-start ramp. The card also imposes a current draw limit and cuts out power to the motor if it draws too much current.
- Page 108 PLDC04626 REVISION March 11, 2022 TECHNICAL DEPT. Stavale Brush motor MOS-FET temperature limit exceeded. The power control card also monitors the operating temperature of the MOS-FETs to prevent them burning out. Maximum operating temperature is set at 150° C. If this temperature (150° C) is exceeded, the power control card disconnects power to the brush motor and warns of this by rapidly flashing the brush LED on the control panel.
- Page 109 PLDC04626 REVISION March 11, 2022 TECHNICAL DEPT. Stavale Brush motor thermal cutout tripped The power control card monitors the state of the brush motor’s thermal cutout. Important THE INTERVENTION OF THE THERMAL CUTOUT IS NOT SHOWN ON THE CONTROL PANEL. If the control panel shows no alarm condition, but the brush motor does not turn after the button has been pressed and the lever pulled in, the brush motor’s thermal cutout may have tripped as a result of the motor overheating, or fuse F3 is...
- Page 110 PLDC04626 REVISION March 11, 2022 TECHNICAL DEPT. Stavale Functioning of the thermal protector The thermal protector incorporated in the electric motor prevents it from reaching high temperatures and being irreversibly damaged. Thermal protectors are usually installed on the hottest parts of the motor, near the motor’s carbon brushes, or in the cover over the carbon brushes.
- Page 111 PLDC04626 REVISION March 11, 2022 TECHNICAL DEPT. Stavale Suction motor alarms Suction motor current limit (Amperes) exceeded. The power control card powers the suction motor via MOS-FETs to provide a soft- start ramp. The card also imposes a current draw limit and cuts out power to the motor if it draws too much current.
- Page 112 PLDC04626 REVISION March 11, 2022 TECHNICAL DEPT. Stavale E2 TROUBLESHOOTING E2.1 Troubleshooting E2.1.1 The control panel LEDs do not light Recharge or replace the batteries (B type). Plug the machine into the mains power supply (C type). Check battery voltage (B type) or the presence of mains power (C type).
- Page 113 PLDC04626 REVISION March 11, 2022 TECHNICAL DEPT. Stavale E2.1.3 The brush does not rotate on “C” type mains machines Plug the machine into the mains power supply. Check the LED on the control panel to see If the machine is already connected to the mains whether power is reaching it.
- Page 114 PLDC04626 REVISION March 11, 2022 TECHNICAL DEPT. Stavale E2.1.5 The suction motor is not working on “B” type battery powered machines If the batteries are discharged, recharge them or Check the voltage of the batteries as shown at replace them. the control panel LEDs or as measured at the battery terminals.
- Page 115 PLDC04626 REVISION March 11, 2022 TECHNICAL DEPT. Stavale E2.1.7 Solution is not being dispensed If the solution tank is empty, fill it. Check that there is solution in the solution tank. If the solution tank is full, go to step 2. If the dispensing cock is closed, open it fully.
- Page 116 PLDC04626 REVISION March 11, 2022 TECHNICAL DEPT. Stavale EDITIONS - UPDATES TECHNICAL SERVICE MANUAL EDITION No. DATE Edition 00. 11/03/2022 Approval and publication of manual in English. Edition 0X. 00/00/0000 ….. Edition 0X. 00/00/0000 ……. Edition 0X. 00/00/0000 March 11, 2022 109/109...
Need help?
Do you have a question about the CS16 and is the answer not in the manual?
Questions and answers