Table of Contents
Advertisement
Quick Links
Advertisement
Table of Contents

Related Manuals for Carestream DENTAL CS 9000C


Summary of Contents for Carestream DENTAL CS 9000C
- Page 1 CS 9000C AND CS 9000C 3D User Guide...
- Page 2 Notice Congratulations on your purchase of the CS 9000C and CS 9000C 3D. Thank you for your confidence in our products and we will do all in our power to ensure your complete satisfaction. The User Guide for the CS 9000C and CS 9000C 3D includes information on the cephalometric features. For the panoramic or the 3D features, see the CS 9000 and CS 9000 3D (SM764) User Guide.
-
Page 3: Table Of Contents
Preparing and Positioning Adult and Pediatric Patients ........5–11 CS 9000C and CS 9000C 3D User Guide (SM768)_Ed 02... - Page 4 Contents Launching the X-ray ..............5–12 Acquiring a Submento-Vertex Image for Adult and Pediatric Patients .
-
Page 5: 1-About This Guide
Alerts you to a condition that might cause serious damage. IMPORTANT Alerts you to a condition that might cause problems. NOTE Emphasizes important information. Provides extra information and hints. CS 9000C and CS 9000C 3D User Guide (SM768)_Ed 02 1–1... - Page 6 Conventions in this Guide 1–2 About This Guide...
-
Page 7: 2-Cs 9000C And Cs 9000C 3D Unit Overview
Chapter 2 CS 9000C AND CS 9000C 3D UNIT OVERVIEW The CS 9000C and CS 9000C 3D unit have been designed to carry out the following radiological examinations: • Lateral • Frontal (PA or AP) • Oblique • Submento-vertex •... -
Page 8: Mobile Components
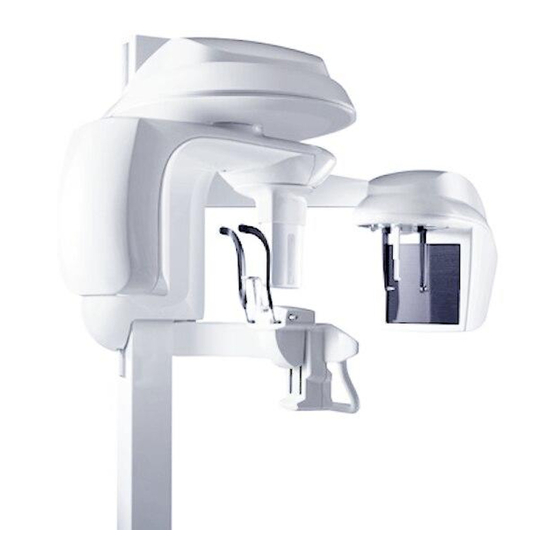
The following figures illustrate the general overview of the CS 9000C and CS 9000C 3D unit. Mobile Components Figure 2-1 illustrates the up and down movement of the CS 9000C and CS 9000C 3D mobile component and the 180° rotation of the rotative arm. Figure 2–1 CS 9000C and CS 9000C 3D Unit Mobile Components 2–2... -
Page 9: General Functional Components
General Overview General Functional Components Figure 2-2 illustrates the general functional components of the CS 9000C and CS 9000C 3D. Figure 2–2 CS 9000C and CS 9000C 3D Unit Functional Components ON/OFF button X-ray source assembly Unit fixed arm Unit rotative arm... -
Page 10: Digital Sensor Locations
* When the unit is ONLY panoramic, the 3D option is not available. Therefore, the location of the digital sensor indicates that it is ready for the 3D option. Figure 2–3 CS 9000C and CS 9000C 3D Unit Panoramic, 3D and Cephalometric Digital Sensor Locations Digi ta l 3 D 2–4... -
Page 11: Laser Locations
General Overview Laser Locations Figure 2-4 illustrates the location of the lasers of the CS 9000C and CS 9000C 3D. Figure 2–4 CS 9000C and CS 9000C 3D Unit Laser Positions 3D central positioning laser beam Mid-sagittal positioning laser beam... -
Page 12: Control Panel Overview
Display Screen: Displays the current acquisition parameters and the error messages. Ready Indicator LED: Green, indicates the unit is ready for acquisition. X-ray Emission LED: Yellow, indicates the X-rays are being emitted. System Status LED: Red, indicates the error alerts. 2–6 CS 9000C AND CS 9000C 3D UNIT OVERVIEW... -
Page 13: X-Ray Remote Control Overview
X-ray room. You must press and hold the exposure button until the end of acquisition. Premature release of the exposure button interrupts the acquisition. Figure 2–6 X-ray Remote Control Exposure button: launches image acquisition. CS 9000C and CS 9000C 3D User Guide (SM768)_Ed 02 2–7... -
Page 14: Positioning Accessories And Replacement Parts
Positioning Accessories and Replacement Parts Positioning Accessories and Replacement Parts The following accessories are used when positioning a patient. They are delivered with the CS 9000C and CS 9000C 3D digital imaging unit. Panoramic Positioning Accessories Table 2–1 Panoramic Positioning Accessories and Replacement Parts... -
Page 15: 3D Positioning Accessories
3D Positioning Accessories and Replacement Parts Accessory Description 3D bite block 3D bite block support 3D head rest and head strap Single use hygienic sheaths for 3D bite block (100 pcs box) CS 9000C and CS 9000C 3D User Guide (SM768)_Ed 02 2–9... -
Page 16: Patient Positioning Indicators
Patient Positioning Indicators represented on the chin rest base Positioning Indicators Description For sinus positioning • For TMJ x2 and TMJ x4 positioning • For panoramic positioning For 3D upper jaw positioning For 3D lower jaw positioning 2–10 CS 9000C AND CS 9000C 3D UNIT OVERVIEW... -
Page 17: 3-Imaging Software Overview
3D image management Cephalometric Acquisition Interface The cephalometric acquisition interface is a user-friendly working interface that was designed and developed specifically for the CS 9000C and CS 9000C 3D extraoral imaging system. 3–1 CS 9000C and CS 9000C 3D User Guide (SM768)_Ed 02... -
Page 18: Cephalometric Acquisition Interface
Cephalometric Acquisition Interface Cephalometric Acquisition Interface Cephalometric Acquisition Interface Overview The Cephalometric Acquisition interface is the main cephalometric interface with the CS 9000C and CS 9000C 3D extraoral imaging system that provides you with imaging acquisition functions. Figure 3–1 Cephalometric Acquisition Interface Information button: •... - Page 19 The Selector button enables you to access the following 3 panes: • Program pane: Examination type options • Patient pane: Patient type parameter options • Parameters pane: Exposure parameter options CS 9000C and CS 9000C 3D User Guide (SM768)_Ed 02 3–3...
-
Page 20: Cephalometric Program Pane
Cephalometric Acquisition Interface Cephalometric Program Pane The cephalometric Program pane enables you to choose different radiological exams as well as different acquisition formats. Figure 3–2 Cephalometric Program Pane Radiological exam options: Click for a submento-vertex exam. Click for a lateral exam. -
Page 21: Cephalometric Patient Pane
Cephalometric Patient Pane Patient type parameters: Click if the patient is a child. Click if the patient is small. Click if the patient is medium. Click if the patient is large. CS 9000C and CS 9000C 3D User Guide (SM768)_Ed 02 3–5... -
Page 22: Cephalometric Parameter Pane
Cephalometric Acquisition Interface Cephalometric Parameter Pane The cephalometric Parameter pane enables you to choose exposure parameters for the radiological image acquisition. If the default parameter setting is not adapted to your patient type, you can manually adapt the parameter settings to the patient type and save this setting as the default setting. -
Page 23: 4-Getting Started
3. Leave the X-ray room and close the door. For each parameter setting, from the X-ray remote control, press and hold the button to launch the X-ray The unit is now ready to be used for acquisition. 4–1 CS 9000C and CS 9000C 3D User Guide (SM768)_Ed 02... -
Page 24: Accessing The Cephalometric Acquisition Interface
Accessing the Cephalometric Acquisition Interface Accessing the Cephalometric Acquisition Interface To access the Acquisition windows, follow these steps: 1. In the Imaging window, from the toolbar, click to access the Cephalometric Acquisition window. Prepare the acquisition parameters and launch an acquisition. 4–2 GETTING STARTED... -
Page 25: 5-Acquiring Cephalometric Images
4. If the default parameter setting is not adapted to your patient type, click the Parameter button and select the appropriate parameters. To save the new parameter settings as the default settings, click and select Memorize settings. CS 9000C and CS 9000C 3D User Guide (SM768)_Ed 02 5–1... -
Page 26: Preparing And Positioning Adult And Pediatric Patients
Acquiring a Lateral Image for Adult and Pediatric Patients Preparing and Positioning Adult and Pediatric Patients To prepare and position the patient, follow these steps: 1. Ask the patient to remove all metal objects. 2. Ask the patient to wear a lead apron with a thyroid collar. Ensure that the apron lays flat across the patient’s shoulders. - Page 27 Acquiring a Lateral Image for Adult and Pediatric Patients 7. Lower the nasion support to a vertical position. CS 9000C and CS 9000C 3D User Guide (SM768)_Ed 02 5–3...
-
Page 28: Launching The X-Ray
Acquiring a Lateral Image for Adult and Pediatric Patients Launching the X-ray To launch the X-ray, follow these steps: 1. Leave the X-ray room and close the door. You must keep visual contact with the patient during acquisition. IMPORTANT To stop the acquisition, if there is any problem, release the exposure button of the remote control or press the red emergency stop button. -
Page 29: Acquiring A Frontal Ap Or Pa Image For Adult And Pediatric Patients
4. If the default parameter setting is not adapted to your patient type, click the Parameter button and select the appropriate parameters. To save the new parameter settings as the default settings, click and select Memorize settings. CS 9000C and CS 9000C 3D User Guide (SM768)_Ed 02 5–5... -
Page 30: Preparing And Positioning Adult And Pediatric Patients
Acquiring a Frontal AP or PA Image for Adult and Pediatric Patients Preparing and Positioning Adult and Pediatric Patients To prepare and position the patient, follow these steps: 1. Ask the patient to remove all metal objects. 2. Ask the patient to wear a lead apron with a thyroid collar. Ensure that the apron lays flat across the patient’s shoulders. - Page 31 Align the patient with the Frankfort laser beam for the frontal AP only. Figure 5–1 Frontal AP Figure 5–2 Frontal PA Figure 5–3 Frontal AP Figure 5–4 Frontal PA CS 9000C and CS 9000C 3D User Guide (SM768)_Ed 02 5–7...
-
Page 32: Launching The X-Ray
Acquiring a Frontal AP or PA Image for Adult and Pediatric Patients Launching the X-ray To launch the X-ray, follow these steps: 1. Leave the X-ray room and close the door. You must keep visual contact with the patient during acquisition. IMPORTANT To stop the acquisition, if there is any problem, release the exposure button of the remote control or press the red emergency stop button. - Page 33 Cephalometric Acquisition window disappears and the acquired image is automatically transferred to the Imaging window. 3. Check the image quality. If satisfactory, remove the ear cones and release the patient. CS 9000C and CS 9000C 3D User Guide (SM768)_Ed 02 5–9...
-
Page 34: Acquiring An Oblique Image For Adult And Pediatric Patients
Acquiring an Oblique Image for Adult and Pediatric Patients Acquiring an Oblique Image for Adult and Pediatric Patients Before acquiring an oblique image, check that you have: • Reset the unit rotative arm to the start position for patient to enter the unit. •... -
Page 35: Preparing And Positioning Adult And Pediatric Patients
5. Insert gently one cone in the auditory canal of the patient. Turn gently the button to close the arms. Insert gently the second cone in the auditory canal of the patient. 6. Lower the nasion support to a vertical position. CS 9000C and CS 9000C 3D User Guide (SM768)_Ed 02 5–11... -
Page 36: Launching The X-Ray
Acquiring an Oblique Image for Adult and Pediatric Patients Launching the X-ray To launch the X-ray, follow these steps: 1. Leave the X-ray room and close the door. You must keep visual contact with the patient during acquisition. IMPORTANT To stop the acquisition, if there is any problem, release the exposure button of the remote control or press the red emergency stop button. -
Page 37: Acquiring A Submento-Vertex Image For Adult And Pediatric Patients
3. If the default parameter setting is not adapted to your patient type, click the Parameter button and select the appropriate parameters. To save the new parameter settings as the default settings, click and select Memorize settings. CS 9000C and CS 9000C 3D User Guide (SM768)_Ed 02 5–13... -
Page 38: Preparing And Positioning Adult And Pediatric Patients
Acquiring a Submento-Vertex Image for Adult and Pediatric Patients Preparing and Positioning Adult and Pediatric Patients To prepare and position the patient, follow these steps: 1. Ask the patient to remove all metal objects. 2. Ask the patient to wear a lead apron with a thyroid collar. Ensure that the apron lays flat across the patient’s shoulders. -
Page 39: Launching The X-Ray
1. Leave the X-ray room and close the door. You must keep visual contact with the patient during acquisition. IMPORTANT To stop the acquisition, if there is any problem, release the exposure button of the remote control or press the red emergency stop button. CS 9000C and CS 9000C 3D User Guide (SM768)_Ed 02 5–15... - Page 40 Acquiring a Submento-Vertex Image for Adult and Pediatric Patients 2. Launch the X-ray with the remote control. Press and hold the exposure button until the end of acquisition. The turns yellow indicating X-ray emission. The image appears on the Preview Screen of the Cephalometric Acquisition window. When the acquisition ends, the Cephalometric Acquisition window disappears and the acquired image is automatically transferred to the Imaging window.
-
Page 41: Acquiring A Carpus Image For Pediatric Patients
4. If the default parameter setting is not adapted to your patient type, click the Parameter button and select the appropriate parameters. To save the new parameter settings as the default settings, click and select Memorize settings. CS 9000C and CS 9000C 3D User Guide (SM768)_Ed 02 5–17... -
Page 42: Preparing And Positioning Pediatric Patients
Acquiring a Carpus Image for Pediatric Patients Preparing and Positioning Pediatric Patients To prepare and position the patient, follow these steps: 1. Ask the patient to remove all metal objects. 2. Ask the pediatric patient to wear a lead apron with a thyroid collar. Ensure that the lead apron covers the patient’s thyroid area and lays flat across the patient’s shoulders. -
Page 43: Launching The X-Ray
Cephalometric Acquisition window disappears and the acquired image is automatically transferred to the Imaging window. 3. Check the image quality, if satisfactory, then release the patient. CS 9000C and CS 9000C 3D User Guide (SM768)_Ed 02 5–19... -
Page 44: X-Ray Dose Emission Information
X-ray Dose Emission Information X-ray Dose Emission Information EURATOM 97/43 Directive Compliance with You can right-click on each image to display the estimated emitted dose received by the patient. You can use this information to calculate the effective dose received by the patient for the image. -
Page 45: Monthly
Chapter 6 MAINTENANCE Perform the following maintenance activities on your CS 9000C and CS 9000C 3D unit. IMPORTANT For information on cleaning and disinfecting, see the CS 9000 Family Safety, Regulatory & Technical Specification User Guide. Monthly Wipe the outer covers of the unit with a soft and dry cloth. - Page 46 Controlling the Image Quality 3. In the Tools pane, double-click Quality Assurance Control. The Image Quality Control window is displayed. 4. In the Image Quality Control window, to perform the test, you can either: • Select the desired device in the List of detected acquisition devices field. •...
-
Page 47: Quick Troubleshooting
I 17 Sensor in movement The sensor is in the positioning Wait for the end of the positioning process. process for either panoramic, 3D or cephalometric mode. CS 9000C and CS 9000C 3D User Guide (SM768)_Ed 02 7–1... - Page 48 Quick Troubleshooting 7–2 TROUBLESHOOTING...
-
Page 49: 8-Contact Information
Representante no Brasil Carestream do Brasil Comércio e Serviços de Produtos Médicos Ltda. Rua Pequetita, 215 cjs. 31 E 32 Edifício Atrium VII - Vila Olímpia São Paulo - Brazil CEP (Zip code): 04552-060 CS 9000C and CS 9000C 3D User Guide (SM768)_Ed 02 8–1... - Page 50 Authorized Representatives 8–2 CONTACT INFORMATION...
Need help?
Do you have a question about the CS 9000C and is the answer not in the manual?
Questions and answers