Table of Contents
Advertisement
Quick Links
Advertisement
Table of Contents

Related Manuals for SPC STELLA 2


Summary of Contents for SPC STELLA 2
- Page 1 SPC STELLA 2...
-
Page 2: Table Of Contents
TABLE OF CONTENTS 1. Introduction ---------------------------------------------------------------------------------- 3 2. Position of the controls -------------------------------------------------------------------- 3 3. Useful tips ------------------------------------------------------------------------------------- 4 4. First steps before switching on ---------------------------------------------------------- 5 5. Switch on telephone ----------------------------------------------------------------------- 6 6. Unlock or turn on the phone screen --------------------------------------------------- 7 7. - Page 3 a. Bluetooth b. Calculator c. Calendar d. Alarm e. World clock 18. Flashlight ----------------------------------------------------------------------------- 22 19. Technical data ----------------------------------------------------------------------- 22 20. Frequently asked questions ----------------------------------------------------- 23...
-
Page 4: Introduction
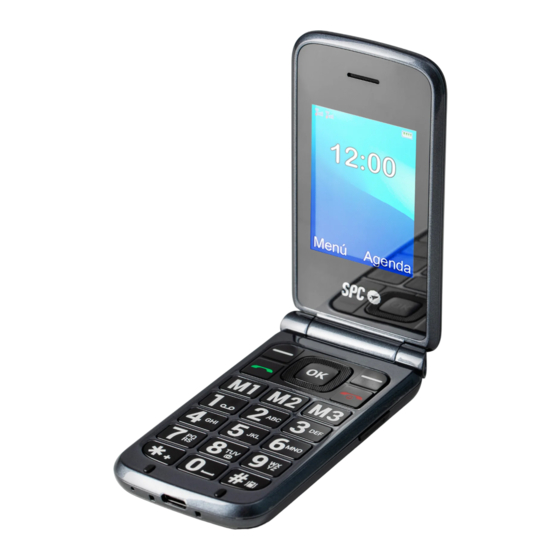
STELLA 2 1. INTRODUCTION This document is a user manual for the STELLA 2 push-button phone from SPC. Here you will find information about the first steps you need to take in order to use your cell phone and about its various functions. -
Page 5: Useful Tips
3. USEFUL TIPS To access the main menu, open the cover and press the upper left button while the phone is in standby mode. Press the structured corners of the middle OK button up or down to navigate through the main menu and the various submenus. The top left button performs the action shown at the bottom left of the screen. -
Page 6: First Steps Before Switching On
The top right button performs the action shown at the bottom right of the screen. To confirm a selection, press the middle OK button or the corresponding upper button. To return to the home screen, simply press the hang up button or by closing the cover and opening it again. -
Page 7: Switch On Telephone
Insert the battery by matching the gold contacts on the phone and the battery. Remember to remove the screen protector before using the device. 5. SWITCH ON PHONE Press and hold the power button for a few seconds to turn on the phone. Enter the PIN displayed on your SIM card. -
Page 8: Unlock Or Turn On The Phone Screen
NOTE: The personal identification number (PIN) protects the SIM card from unauthorized use. You can use the PIN unlock key (PUK number) to unlock a locked PIN. The PIN and PUK are supplied with the SIM card. For further details, please contact your operator 6. -
Page 9: Call A Contact From The Address Book
1. Dial the number you want to call. Press "Delete" to delete the incorrectly entered digits. 3. Press and select the SIM card you want to use to make the call. Press Enter the desired number using the keypad. If the number is stored in the address book, the name of the contact is displayed on the screen. -
Page 10: Accept / Reject Call
2. use the navigation keys to scroll through the list, select an entry and press to call. Accept / reject call When you receive a call, the number or name (if stored in the SPC STELLA 2 address book) is displayed on the screen. Press the key to accept the call or to reject it. -
Page 11: Speed Dial
8. SPEED DIAL Make a call by speed dial: The phone has three direct and eight indirect memory keys for speed dialing, so by simply pressing these keys the phone will directly call the number associated with each of these stored entries. -
Page 12: View Address Book
Select a profile and press Option to activate, adjust or reset it. You can customize a profile according to your taste and needs and set the following parameters: Notification type and choose between Ring only, Vibrate only, Vibrate and ring, or Vibrate and then ring. -
Page 13: Add A Contact
Add to blacklist, Mark several and Settings. Add a contact 1. When you enter the address book, select "Add contact" option at the top and press OK. Select the memory where you want to save the contact (on SIM1, SIM2 or in the phone). 3. -
Page 14: Write A Message
Write a message Go to Menu --> Messages --> Write message. Under Options>Input Method you can select the following EN (English, all in capital letters), En (English, first capital letter and the rest lower case), 123 (numbers), ABC (all caps), abc (all lower case), Abc (all upper and lower case letters), Other written languages... -
Page 15: What Is Smart Help
SMART HELP What is Smart Help? Smart Help is a set of intelligent assistance features that allow STELLA 2 users to use their device worry-free and help their family members and friends take care of them even when they are far away. - Page 16 These are the 3 STELLA 2 functions that can be configured from another phone via SMS. 1. ACTIVATE AND CONFIGURE SOS FUNCTION By sending an SMS to STELLA 2 from one of the allowed numbers with the following codes: - To activate/deactivate the SOS function:...
-
Page 17: Smart Ringtone
2. ADD CONTACTS TO ADDRESS BOOK OR QUICK MEMORY By sending an SMS to STELLA 2 from one of the allowed numbers with the following codes: - To add a contact to the quick memory M1, M2 or M3: ACTION... -
Page 18: Multimedia
There is 1 unanswered missed call. • STELLA 2 has been inactive for the last 24 hours, i.e. when it detects that you have not pressed any buttons, opened or closed the lid, or charged the device. You can enable or disable any of these warnings at Settings >... -
Page 19: Sound Recording
e. Sound recording It is located in the "Multimedia" menu. You can record calls by going to Options --> New recording. You can pause a recording in progress by pressing the upper left function key. You can then continue or pause the recording. You can cancel a recording in progress by pressing the upper right function key. -
Page 20: Battery And Charging Process
- The default security password is 0000. - If you access "Password for menus" and enable this option, you will block access by requesting a password to access the defined phone functions. c. SIM configuration For configuring the dual SIM operation mode. d. - Page 21 - Connect the adapter cable to the back of the charging station and place the phone on the station. - Plug the adapter in the box into any electrical outlet in your home. Connect the other end of the power adapter to the phone to charge the battery. During charging, the battery indicator on the front of the phone lights up red to indicate that charging is in progress.
-
Page 22: Other Functions / Tool Menu
When the battery is almost empty, the battery indicator is empty and the phone emits a warning tone and displays a message on the screen. You need to connect the AC adapter to charge the battery. When the phone battery is empty, the phone turns off and you cannot make or receive calls. - Page 23 e. World clock It is located in the "Tools" menu. Use the navigation keys to change the time zone. You can also enable/disable daylight saving time. FLASHLIGHT The phone has a flashlight that you can turn on and off using a special switch on the side. TECHNICAL DATA SCREEN.
- Page 24 The phone can be charged in the on or off state. During charging, the red charging lamp on the phone's display panel lights up. When it is on, the battery icon in the upper right corner moves its bars to indicate that it is in process. The problem could be in the power supply.
Need help?
Do you have a question about the STELLA 2 and is the answer not in the manual?
Questions and answers
How to I set capital letters in Address Book. The first word it automatic but thereafter, how is it done?