
Related Manuals for SMART Board GX V2 Series


Summary of Contents for SMART Board GX V2 Series
- Page 1 SMART Board ® GX (V2) series interactive displays User guide SBID-GX165-V2 SBID-GX175-V2 SBID-GX186-V2 IDGX65-2 IDGX75-2 IDGX86-2 Was this document helpful? smarttech.com/docfeedback/171862...
- Page 2 Trademark notice SMART Board, SMART Notebook, SMART TeamWorks, SMART Meeting Pro, Object Awareness, Silktouch, smarttech, the SMART logo and all SMART taglines are trademarks or registered trademarks of SMART Technologies ULC in the U.S. and/or other countries. The Bluetooth word mark is owned by the Bluetooth SIG, Inc. and any use of such marks by SMART Technologies ULC is under license.
-
Page 3: Important Information
Important information Note Refer to the SMART Board GX (V2) series interactive displays installation and maintenance guide (smarttech.com/kb/171861) for important information about installing and maintaining the display. Warning Do not open or disassemble the display. You risk electrical shock from the high voltage inside the casing. -
Page 4: Table Of Contents
Contents Important information Chapter 1 Welcome About this guide About the display Identifying your specific model Accessories More information Chapter 2 Using basic features Waking the display and putting it in standby Using the front control panel Using the remote control On-screen menus and controls Using touch Writing, drawing, and erasing... - Page 5 Contents Using the Record widget Using the Freeze widget Using the PIP widget Using the Split screen widget Using Screen lock Using the Calculator tool Using the Screen Capture widget Chapter 4 Connecting computers and other devices Installing and using SMART software Connecting room computers and guest laptops Connecting a SMART OPS PC module Connecting USB drives, peripherals, and other devices...
-
Page 6: Chapter 1 Welcome
This guide explains how to use SMART Board GX (V2) series interactive displays. This guide is for people who use SMART Board interactive displays. Documentation and resources for those who install and maintain displays is also available (see More information on page 12). -
Page 7: About The Display
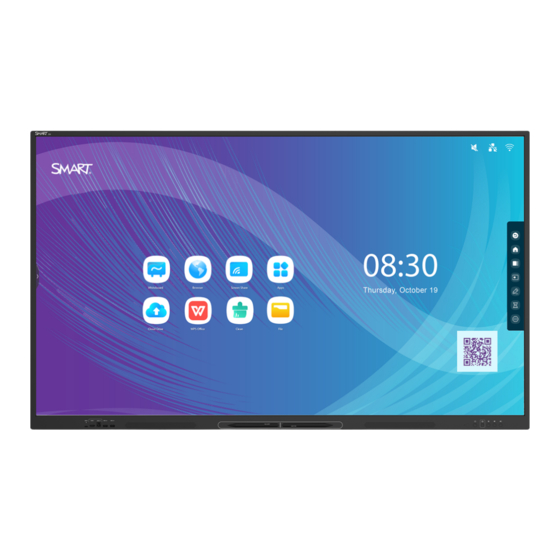
Chapter 1 Welcome About the display The SMART Board GX (V2) series gives you everything you need to get started with interactivity. The display includes a comprehensive set of features and components. Touch You can do everything on the display that you can do at your computer—open and close applications, meet with others, create new documents or edit existing ones, visit websites, play and manipulate videos, and so on—by touching the display’s surface. - Page 8 Chapter 1 Welcome Mounting hardware You can use VESA compliant wall mounts, such as SMART’s WM-SBID-200 wall mount (not included), to mount the display on a wall. You can also mount the display on a mobile stand (see Accessories on page 11). Front control panel The front control panel provides buttons for turning the display on and off, controlling the volume, freezing the screen, and displaying the Home screen.
- Page 9 Chapter 1 Welcome With Object Awareness , the display responds automatically to the tool or object you’re using, whether it’s a pen, finger, or palm. For more information, see Writing, drawing, and erasing on page 24. Audio The display includes two 20 W integrated speakers. Network connectivity The display requires a network and internet connection for downloading software and firmware updates.
-
Page 10: Identifying Your Specific Model
Identifying your specific model SMART offers several models of the SMART Board GX (V2) series interactive displays. For help identifying your model, see the labels on the back or left side of the display. The label features the display’s base model number (for example, SBID-GX075-V2). Please note this number is different from the actual model/SKU number (for example SBID-GX175-V2). -
Page 11: Accessories
Core processors and are designed specifically to work with a SMART Board interactive display. All OPS PC modules are fully licensed with Windows Pro. Install the OPS PC module in a display’s accessory slot to provide a complete 4K UHD Windows installation at your fingertips, without the need for an external PC or additional cables. -
Page 12: More Information
Chapter 1 Welcome If you want to use the 86" model (SBID-GX186-V2) with a variety of SMART’s electric height-adjustable stands, you must first attach a SMART wall mount (model WM-SBID-200, part #1031766, smarttech.com/kb/171405) to the display before mounting the display to the stand. (This applies to the FSE-400, FSE-410, and FSE-420 models of mobile stand and the WSE-400 and WSE-410 models of wall stand). -
Page 13: Chapter 2 Using Basic Features
Chapter 2 Using basic features Waking the display and putting it in standby Using the front control panel Using the remote control On-screen menus and controls Notification icons (network, audio, and so on) Side Toolbar buttons Toolbar Favorite widget shortcuts Shortcuts Adding shortcuts to the Home screen Managing shortcuts... -
Page 14: Using The Front Control Panel
Chapter 2 Using basic features Note When the display is connected to an external input that has had no active signal for 5 minutes, it begins a 10 second countdown before it enters Standby mode. For information about turning off the display, see the SMART Board GX (V2) series interactive displays installation and maintenance guide (smarttech.com/kb/171861). -
Page 15: Using The Remote Control
Chapter 2 Using basic features Name Procedure Power, and status Enter or exit Ready mode. light Press and hold for three seconds to begin a 10 second countdown before the display enters Standby mode. Home Return to the Home screen. Freeze Freeze and unfreeze the screen. - Page 16 Chapter 2 Using basic features This image and table list the remote control’s functions. Name Description Power Press to begin a 10-second countdown before the display enters Standby mode. Home Open the Home screen. Up and down Move selection up or down. buttons Select a menu option in the settings, or enable selected items in apps.
- Page 17 Chapter 2 Using basic features Name Description Settings Show or hide display settings menu while viewing the Home screen. Show or hide the Input settings dialog when viewing a connected input. Screen shade Hide screen contents behind a screen shade. Freeze and unfreeze the screen.
-
Page 18: On-Screen Menus And Controls
Chapter 2 Using basic features On-screen menus and controls The SMART Board GX (V2) series display features a number of on-screen menus and controls. Notification icons (network, audio, and so on) The notification icons provide information about the display’s network connection, speaker status, and connected USB ... -
Page 19: Side Toolbar Buttons
Chapter 2 Using basic features Icon Description Notes USB drive connected Indicates a USB drive is connected to the display. Tap the icon to open a connected USB drive in File Manager. Side Toolbar buttons See Toolbar below. Toolbar From the Toolbar, you can access a number of commonly used display controls and widgets, including the widgets menu. - Page 20 Chapter 2 Using basic features Command Description Notes See the SMART Board GX (V2) Task view Shows a preview tile of each series interactive displays running app. installation and maintenance Swipe up or down to view all guide running apps. (smarttech.com/kb/171861) To open a running app Tap the tile to open the...
-
Page 21: Favorite Widget Shortcuts
Chapter 2 Using basic features Favorite widget shortcuts You can pin up to four of your favorite widgets to the Toolbar to make them easier to find from the Home screen. To pin a widget to the Toolbar 1. Open the Toolbar (see Toolbar on page 19). 2. -
Page 22: Managing Shortcuts
Chapter 2 Using basic features To move a shortcut on the Home screen, press and hold the shortcut, then drag it to a new location. To add an application shortcut 1. From the Home screen, tap the Apps icon 2. Press and drag an app to add it as a shortcut to the Home screen. To add a web page shortcut 1. -
Page 23: Using Touch
Chapter 2 Using basic features To delete a shortcut 1. Press and hold an app icon until the Remove option appears. 2. Tap Remove. The app shortcut is removed from the Home screen. Apps Open a menu of additional Android apps installed on the display, such as Palette, Camera, Clean, Cloud Drive, WPS Office, File manager, Settings, and SMART Remote Management. -
Page 24: Writing, Drawing, And Erasing
Chapter 2 Using basic features Pinch to zoom in / scale (enlarge) Pinch to zoom out / scale (reduce) Rotate Flick Erase with palm Erase with fist Writing, drawing, and erasing The display comes with two pens, which you can use to write or draw in digital ink. Each pen has a thin nib and a thick one. -
Page 25: Writing And Drawing In Digital Ink
2. Write or draw in digital ink on the screen. Important Use only pens designed for SMART Board GX (V2) series interactive displays. Pens for other SMART products aren’t compatible with SMART Board GX (V2) series (see Comparing SMART product pens). -
Page 26: Freezing The Screen
Chapter 2 Using basic features Using the SMART Ink dynamic (floating) toolbar If you touch a pen to the display’s screen while viewing a connected ® computer’s input, the SMART Ink dynamic (floating) toolbar appears. You can use this toolbar to temporarily change the pen’s color, thickness, or other properties, and you can also access SMART Ink’s tools, such as screen capture, spotlight, screen shade, and so on. -
Page 27: Chapter 2 Using Apps On The Display
Chapter 2 Using basic features Chapter 2 Using apps on the display Using Whiteboard Whiteboard tools and controls Writing and erasing notes Starting a new whiteboard Changing the background Navigating in the whiteboard Opening an existing whiteboard Saving a whiteboard Importing or exporting a whiteboard Exporting a whiteboard file to cloud storage Email a whiteboard file... - Page 28 Chapter 2 Using basic features Verifying the network Connecting your device to the display Managing connected devices Minimizing and rearranging screens Stopping a session Using the Bytello Share app Device requirements for using Bytello Share Downloading and using the Bytello Share app Using the Bytello Share app to interact with the display Using Desktop Sync Using Remote...
-
Page 29: Using Whiteboard
Using SMART Remote Management Using Settings Unsupported apps This chapter introduces the apps on SMART Board GX (V2) series interactive displays. Using Whiteboard You can view and erase notes, open a saved note, and save your notes to the display, a USB ... - Page 30 Chapter 2 Using basic features Tool Icon Description Cloud Storage Save the whiteboard contents directly to a Google Drive or OneDrive account. When you are signed in, the files upload in .png format directly to a date- and time-stamped folder. Note To add a Google Drive or OneDrive account to the display, select the drive type when prompted and sign in.
-
Page 31: Writing And Erasing Notes
Chapter 2 Using basic features Writing and erasing notes The Whiteboard has several tools for drawing and erasing. Tool Icon Description Select Select objects and manipulate them by moving, rotating, resizing, copying, or deleting them. Options are also available for adding color to an object, converting objects to text, to text, changing an object’s orientation, arranging the order of objects, copying or deleting an object, and more. -
Page 32: Starting A New Whiteboard
Chapter 2 Using basic features Tool Icon Description Table Add tables to a whiteboard. Select the size and then insert the table. Draw within the table to change cell sizes. Pair mode Partition the screen into equal non-overlapping parts. Each participant has their own space for writing and drawing. -
Page 33: Navigating In The Whiteboard
Chapter 2 Using basic features To change the whiteboard’s background 1. Tap the Menu icon 2. Tap the Theme icon 3. Tap Template and select a background from the templates provided. Tap Background and change the whiteboard’s background color, or upload an image to the background. -
Page 34: Opening An Existing Whiteboard
Chapter 2 Using basic features Opening an existing whiteboard You can easily continue from where you left off in a saved whiteboard. 1. Tap the Whiteboard icon 2. Tap the Menu icon 3. Tap the Open icon The Storage dialog appears. 4. -
Page 35: Importing Or Exporting A Whiteboard
Chapter 2 Using basic features 3. Type a name for the file in the File name box. 4. Tap OK. To save an existing whiteboard Tap the Save icon To save an existing whiteboard with a new name or location 1. -
Page 36: Exporting A Whiteboard File To Cloud Storage
Chapter 2 Using basic features To export a whiteboard 1. Tap the Menu icon 2. Tap the Export icon 3. Select the file type for the export (supported formats are .img, .pdf, .svg, and .iwb). 4. Browse to where you want to save the file. You can save a file to the display, a USB ... -
Page 37: Using Browser
Chapter 2 Using basic features Email a whiteboard file Note To enable this feature, you must first add an email account to the display in Settings. For more information, see SMART Board GX (V2) series interactive displays installation and maintenance guide (smarttech.com/kb/171861). 1. -
Page 38: Using Screen Share
Chapter 2 Using basic features Using Screen Share You can wirelessly share images, videos, or your computer or mobile device’s desktop to the display. Notes Bytello Share is a third-party application. SMART’s support for this application may vary depending on the inquiry. For the best performance, use the Bytello Share app to connect. -
Page 39: Connection Code
Chapter 2 Using basic features Connection code Both the Bytello Share app and the Bytello Share website require a 6-digit connection code for connecting to the display. Depending on the Screen Share app’s settings, the code changes at a regular interval for security purposes. -
Page 40: Active Screen Share
SMART Board GX (V2) display’s screen to be mirrored on other SMART Board GX (V2) display screens. Access this feature from the Menu on the Screen Share app’s main interface (see Menu options on the previous page). -
Page 41: Settings
Chapter 2 Using basic features Tap Join now to mirror another display’s screen on your display. Settings Access Settings from the Menu on the Screen Share app’s main interface. Change the display name and set your permissions, mirroring, and general preferences. To customize settings to turn a setting on or off. -
Page 42: About
Chapter 2 Using basic features Setting Description Floating window You can change the size of the floating window at the top of the display. size Normal shows the connection code with icon Small shows only the icon of the floating window Minimize disables the floating window Product User Choose whether to send operational behavior data from the Screen Share app... -
Page 43: Airplay
Chapter 2 Using basic features Feature Windows MacOS Android Chrome Photo sharing Video/Audio sharing Remote control Pause screen sharing No app install required AirPlay Feature MacOS Screen sharing Touchback Audio sharing Desktop Sync Device Sync Annotation Camera sharing Document sharing Photo sharing Video/Audio sharing Remote control... -
Page 44: Chromecast
Chapter 2 Using basic features Feature Android Windows Desktop Sync Device Sync Annotation Camera sharing Document sharing Photo sharing Video/Audio sharing Remote control Pause screen sharing No app install required Chromecast Feature PC only (Win/Mac/Chrome) Screen sharing Touchback Audio sharing Desktop Sync Device Sync Annotation... -
Page 45: Webcast
Chapter 2 Using basic features Webcast Feature Windows MacOS Chrome OS Screen sharing Touchback Audio sharing Desktop Sync Device Sync Annotation Camera sharing Document sharing Photo sharing Video/Audio sharing Remote control Pause screen sharing No app install required Connecting a device to the display The Screen Share app on GX (V2) displays enables you to share a computer or mobile device’s screen to the display. -
Page 46: Verifying The Network
Chapter 2 Using basic features Expand the sections below to learn more about each step. Verifying the network Your device must be on the same network as the display to connect using the Bytello Share App or native streaming from devices (Airplay, Miracast, and Chromecast). Use the following procedure to verify that your device and the display are connected to the same network. -
Page 47: Managing Connected Devices
Chapter 2 Using basic features 3. Choose from one of these connection methods listed below. Bytello Share app (see Using the Bytello Share app on page 51). For the best performance, use the Bytello Share app to connect. Native streaming services Airplay (available on iOS and Mac devices). - Page 48 Chapter 2 Using basic features Tool Icon Description Computer Computer is connected via Bytello Share app. connection via Computer Computer is connected via Cast from the Chrome browser. connection via Cast Computer Device is connected via Bytello Share URL/website connection via Invite to share Invite connected devices to cast their desktop from the display.
-
Page 49: Minimizing And Rearranging Screens
Chapter 2 Using basic features Minimizing and rearranging screens It’s possible to share up to nine screens on the display depending on the method used to share devices. You can connect using a combination of methods as well. Mirroring method Maximum number of devices Bytello Share app AirPlay... -
Page 50: Stopping A Session
Chapter 2 Using basic features Tool Icon Description Volume Mute or unmute the shared audio. Some devices don’t support audio, so this button might not always appear. See Features. Screen view Switch between screen views. The blue icon in the corner shows how many screens are currently sharing their screen to the display. -
Page 51: Using The Bytello Share App
Chapter 2 Using basic features Using the Bytello Share app For the best performance, use the Bytello share app to connect your device to the display. Device requirements for using Bytello Share Device Requirement iOS devices (iPhone 6 or later) iOS 10.0 and later Android devices Android 5.0 and later (Android 10.0 recommended) - Page 52 Chapter 2 Using basic features 3. Enter the 6-digit connection code shown on the Screen Share app’s main interface or in the floating menu at the top of the display. Click or tap the ScreenShare name (see Screen Share name and Bytello share website address on page ...
-
Page 53: Using The Bytello Share App To Interact With The Display
Chapter 2 Using basic features 4. When you’re done sharing, click or tap Close in the Screen share menu on your device. 5. Tap to disconnect. Using the Bytello Share app to interact with the display You can interact with the display using the Bytello Share app on your device, including controlling whether Touchback permissions are enabled (see Managing connected devices on page ... - Page 54 Chapter 2 Using basic features To use Desktop Sync 1. Open the Bytello Share app on your device and connect to the display. 2. On your device, tap Desktop Sync. Note For security purposes, touchback is automatically disabled, but you can enable it from the Device management page of the display’s Screen Share app (see Managing connected devices on page ...
-
Page 55: Using Remote
Chapter 2 Using basic features Using Remote For mobile devices only. 1. Open the Bytello Share app on your device. 2. Connect to the display using the app. 3. On your device, tap Remote in the app. 4. Control the display using the touchscreen on your mobile device. Tap the More menu to switch between Motion mode and Touchpad mode . - Page 56 Chapter 2 Using basic features To use AirPlay 1. From the display’s Home screen, tap Screen Share The main Screen Share interface opens. Note Make a note of the ScreenShare name next to the icon. 2. Verify that your device and display are connected to the same Wi-Fi network (see Verifying the network on page ...
-
Page 57: Connect Using Webcast
Chapter 2 Using basic features To use Chromecast to connect from a Chrome browser or Chromebook 1. From the display’s Home screen, tap Screen Share The main Screen Share interface opens. Note Make a note of the ScreenShare name next to the icon. -
Page 58: Using Palette
Chapter 2 Using basic features Using Palette The Palette app lets you paint or draw on a digital canvas using a variety of tools from a toolbox, colors from a color box, and a color mixing palette. Palette tools and controls Tools and controls for creating and sharing your palettes The Palette app has several tools and controls for creating and sharing your palettes. - Page 59 Chapter 2 Using basic features Tool Purpose Description Toolbox The pencil can be used for most writing applications. Write or draw digital ink in the Pencil style of a pencil. The pen is useful for teaching students handwriting. Write or draw digital ink in the style of a pen.
-
Page 60: Starting A New Palette
Chapter 2 Using basic features Tool Purpose Description ColorBox Choose a range of colors to draw or paint with. You can ColorBox Select a color to also mix and customize colors in the Palette tool. use when you paint or draw on the digital canvas. -
Page 61: Using Camera
Chapter 2 Using basic features 2. Select a color from the ColorBox. If you want, use the Palette tool to customize the selected color. Start by choosing two colors to mix. 3. Use the display’s pens or your finger to paint or draw in digital ink. Exiting a palette When you’re done, tap the Menu icon , then tap the Exit icon... - Page 62 Chapter 2 Using basic features To take a screen capture and add annotations 1. Tap the Capture picture icon The camera’s video changes to Replay mode and the image is saved to the display. Note Images are saved on the display in Storage > VideoPresenter > Photograph > [Dated Folder]. 2.
- Page 63 Chapter 2 Using basic features 5. Tap any of the following options on the menu bar to write or draw in digital ink and save your annotated screen capture. You can also insert a screen capture into a whiteboard file or upload the a screen capture to Google Drive or OneDrive cloud storage.
-
Page 64: Using Clean
Chapter 2 Using basic features Exiting Camera When you’re done, tap the Exit icon in the bottom-left corner of the screen. Using Clean Use the Clean app to optimize the display’s system memory and delete files in the trash. Opening and closing the Clean app To open the Clean app 1. -
Page 65: Using Cloud Drive
Chapter 2 Using basic features 1. Tap the Clean Memory icon 2. Wait for the app to finish. You can Optimize Againor exit the app when finished Using the Clean Trash tool Use the Clean Trash tool to clear the display’s deleted files (trash). 1. -
Page 66: Using Wps Office
Chapter 2 Using basic features Using WPS Office You can use the Writer, Presentation, and Spreadsheet features of this office suite to create or view a variety of document types. WPS Office can also open and edit documents created with a variety of other software, including Microsoft Office, Google Docs, and Adobe Acrobat. -
Page 67: Viewing Files
Chapter 2 Using basic features Viewing files To view a whiteboard file saved from the Whiteboard app 1. In File manager, browse to the folder that contains the saved whiteboard file and double-tap it. Note The default folder location for saving Whiteboard files in File Manager is Whiteboard . See Using Whiteboard on page ... - Page 68 Chapter 2 Using basic features 4. Tap the name of the connected USB Drive. 5. Browse to the files you want to move or copy. 6. Tap a file to select it. Tap Select to select multiple files. A check box appears next to the selected files. 7.
-
Page 69: Using A Google Drive Or Onedrive Account
Chapter 2 Using basic features 10. Double-tap the folder to open it. 11. Tap Paste. The file is copied or moved to the USB drive. Using a Google Drive or OneDrive account The following procedures require that you first set up the display to save or retrieve items from a Google Drive or OneDrive account. -
Page 70: Installing Apps Using File Manager
Chapter 2 Using basic features 5. Tap the file to select it. Tap Select to select multiple files. A check box appears next to the selected files. 6. Tap Cut or Copy in the bottom menu. Note Cut will remove the file from the display, whereas Copy will leave the file on the display. 7. -
Page 71: Using Smart Remote Management
Chapter 2 Using basic features Supported file formats For more information regarding supported file formats, see Supported Media Formats. Using SMART Remote Management You can use SMART Remote Management on the display. For more information , see the SMART Board GX (V2) series interactive displays installation and maintenance guide (smarttech.com/kb/171861). - Page 72 Google’s policies do not permit Google Play Services to be used on Play Services interactive display products. Apps requiring Google Play Services will not run on SMART Board GX (V2) interactive displays with embedded Android, and attempts to run them could cause problems. Apps with GPS Hardware limitations prevent apps from working.
-
Page 73: Chapter 3 Using Widgets On The Display
Using the Calculator tool Using the Screen Capture widget This chapter introduces the widgets on the SMART Board GX (V2) series interactive displays. To open the widget menu, open the Toolbar menu (see On-screen menus and controls on page 18) and tap the More icon You can also pin the widgets you use regularly to the Toolbar (see Favorite widget shortcuts on page ... - Page 74 Chapter 3 Using widgets on the display Icon Widget Function For more information Using the Overlay widget on the Overlay Write on an overlay on top of any app, video, website, next page document, or image, including input from a connected computer.
-
Page 75: Input Settings Menu
Chapter 3 Using widgets on the display Icon Widget Function For more information Using the Screen Capture Screen Capture Capture screen captures of widget on page 88 anything on the screen, including content from apps, websites, and videos. Select Freedom, Full, and window mode. - Page 76 Chapter 3 Using widgets on the display To erase ink on an overlay Erase ink by moving your fist or palm over the digital ink. Tap the Clean icon and erase all the ink. Overlay tools and controls Tool Select tool. When the Select tool is active, your touch passes through the overlay and interacts with the screen contents behind it.
-
Page 77: Using The Timer Widget
Chapter 3 Using widgets on the display Using the Timer widget Use the Timer widget to display a countdown timer on the screen. To use the Timer widget 1. Tap the Timer icon The Timer widget opens: Tool Timer display (left to right): hours, minutes, seconds. Slide your finger up or down on the numbers to customize the countdown timer. - Page 78 Chapter 3 Using widgets on the display 2. Tap Start to start the countdown timer. This image and table describe the options available after the timer has started: Tool Pause the countdown timer. Reset the countdown timer. Make the countdown timer full screen. Tap again to return to normal size. Tap the screen anywhere other than the timer to make the timer a moveable floating window and move it around.
-
Page 79: Using Stopwatch
Chapter 3 Using widgets on the display Using Stopwatch Use the Stopwatch widget to count up from zero and measure elapsed time. To use the Stopwatch widget 1. Tap the Stopwatch icon The Stopwatch tool opens: smarttech.com/kb/171862... - Page 80 Chapter 3 Using widgets on the display 2. Tap Start to start the stopwatch. This image and table describe the options available after the stopwatch has started: Tool Pause the stopwatch. Record the current time and display it in a list of other times you’ve recorded. Resume the stopwatch after pausing.
-
Page 81: Using The Spotlight Widget
Chapter 3 Using widgets on the display Using the Spotlight widget You can use the Spotlight widget during a presentation to draw attention to a particular screen area. To use the Spotlight widget 1. Tap the Spotlight icon The Spotlight widget is activated: Tool Open Settings for controls that change the spotlight’s size and transparency. -
Page 82: Using The Record Widget
Chapter 3 Using widgets on the display Using the Record widget You can use the Record widget to record a video of the on-screen activity. To use the Record widget 1. Tap the Record icon The Record widget opens: Tool Begin recording. - Page 83 Chapter 3 Using widgets on the display 4. If you want to pause the recording, tap the Pause icon To resume recording, press the Resume icon 5. To stop the recording, tap the Stop icon The recording is saved to the display. To close the Record widget Tap the Exit icon smarttech.com/kb/171862...
-
Page 84: Using The Freeze Widget
Chapter 3 Using widgets on the display Using the Freeze widget You can use the Freeze widget to temporarily freeze the screen. Note Freezing the screen does not pause running applications on the connected computer. It simply freezes the display of those applications. To use the Freeze widget 1. -
Page 85: Using The Pip Widget
Chapter 3 Using widgets on the display Using the PIP widget The picture-in-picture (PIP) widget enables you to show a different input in a smaller floating window you can position anywhere on the screen. The floating window appears on top of open apps, allowing you to continue viewing the second input while interacting with other apps or websites. -
Page 86: Using The Split Screen Widget
Chapter 3 Using widgets on the display 2. Tap an input to appear in the second window. 3. Tap the Enter icon to view the selected input in full screen. Note If selected input also has a USB cable connected for touch, you can control this input via touch, directly within the PIP window. -
Page 87: Using Screen Lock
Chapter 3 Using widgets on the display Using Screen lock Use the Screen lock feature to secure the display’s screen. When the Screen lock is enabled, a four digit passcode must be entered to unlock the screen. Note Creation of a Screen lock passcode is part of the display’s initial set up. You can also configure the Screen lock feature in display settings. -
Page 88: Using The Screen Capture Widget
Chapter 3 Using widgets on the display Using the Screen Capture widget The Screen Capture toolbar enables you to take a screen capture of a rectangular area or the entire screen. To use the Screen Capture tool 1. Tap the Screen Capture icon The Screen Capture tool opens: Tool Capture window resize handles. - Page 89 Chapter 3 Using widgets on the display 3. Tap the Save icon to save the selected window or screen. The captured image is saved on the display to the default folder. 4. Tap Finish to continue working on the display, or Open to see the save image in the destination folder.
-
Page 90: Chapter 4 Connecting Computers And Other Devices
Notes SMART Notebook Free software designed for use with a See SMART Notebook. SMART Board interactive display. SMART Notebook software comes with many features that you can use to create, edit, and deliver engaging lessons for your students. SMART Product Drivers... -
Page 91: Connecting Room Computers And Guest Laptops
Chapter 4 Connecting computers and other devices The following software is also available but sold separately: Software Description Notes SMART Learning Suite A suite of desktop and online software that For more information, see combines lesson delivery, activities, SMART Learning Suite. assessments, and collaborative workspaces. - Page 92 Chapter 4 Connecting computers and other devices Your organization’s installers might have connected cables to the display and run the cables behind a wall or under the floor to a desk or table where you can place your computer. As shown below, HDMI 1, HDMI 2, VGA, and Display Port share the Touch USB Type-B receptacle on the side connector panel, and HDMI 3 uses the Touch USB Type-B receptacle on the front connector panel (see Sharing USB Type-B receptacles on page ...
- Page 93 Chapter 4 Connecting computers and other devices USB Type-C 2 Connector Standard Connection type Cable USB Type-C 2 USB-C Video/audio/touch SuperSpeed USB Type-C smarttech.com/kb/171862...
- Page 94 Chapter 4 Connecting computers and other devices HDMI 1 Connector Standard Connection type Cable HDMI 1 HDMI 2.0 Video/audio Premium High Speed HDMI (18 Gbps) Touch USB 2.0 Type-B Touch High Speed (480 Mbps) USB 2.0 smarttech.com/kb/171862...
- Page 95 Chapter 4 Connecting computers and other devices HDMI 2 Connector Standard Connection type Cable HDMI 2 HDMI 2.0 Video/audio Premium High Speed HDMI (18 Gbps) Touch USB 2.0 Type-B Touch High Speed (480 Mbps) USB 2.0 smarttech.com/kb/171862...
- Page 96 Chapter 4 Connecting computers and other devices HDMI 3 Connector Standard Connection type Cable HDMI 3 HDMI 2.0 Video/audio Premium High Speed HDMI (18 Gbps) Touch input USB 2.0 Type-B Touch High Speed (480 Mpbs) USB 2.0 smarttech.com/kb/171862...
- Page 97 Chapter 4 Connecting computers and other devices Display Port Connector Standard Connection type Cable Display Port Display Port 1.2 Video/audio Display Port Touch USB 2.0 Type-B Touch High Speed (480 Mbps) USB 2.0 smarttech.com/kb/171862...
- Page 98 Chapter 4 Connecting computers and other devices Connector Standard Connection type Cable Video Audio In Stereo 3.5 mm Audio Stereo 3.5 mm Touch USB 2.0 Type-B Touch High Speed (480 Mbps) USB 2.0 Viewing a connected computer or other device’s input 1.
- Page 99 Chapter 4 Connecting computers and other devices 2. Select the source using one of the following methods: Using the Input settings menu Using the remote control a. Open the Toolbar by tapping one of the Press the Input icon side Toolbar buttons (on either sides of the screen).
- Page 100 Chapter 4 Connecting computers and other devices Input Maximum resolution Refresh rate HDMI 1 3840 × 2160 60 Hz HDMI 2 3840 × 2160 60 Hz HDMI 3 3840 × 2160 60 Hz 1920 × 1080 60 Hz Display Port 3840 ...
- Page 101 Chapter 4 Connecting computers and other devices Cable type Maximum length Recommendation USB 3.0 9' (3 m) SMART supports only installations that use directly connected video and USB cables, AC-powered extenders, or USB extenders purchased from SMART. You might be able to use higher-grade cables that exceed the recommended length.
-
Page 102: Connecting A Smart Ops Pc Module
Chapter 4 Connecting computers and other devices Connecting a SMART OPS PC module If your organization has purchased a SMART OPS PC module, you or your organization’s installers can install the OPS PC module in the display’s accessory slot following the OPS PC module’s installation instructions (smarttech.com/kb/171775 or smarttech.com/kb/171544). -
Page 103: Connecting Usb Drives, Peripherals, And Other Devices
Chapter 4 Connecting computers and other devices Connecting USB drives, peripherals, and other devices The display includes two USB 3.2 Gen 1 Type-A receptacles on the front connector panel and two USB 3.2 Gen 1 Type-A receptacles on the side connector panel. You can connect USB drives, peripherals (such as keyboards), and other devices to the USB 3.2 Gen 1 Type-A receptacles and use these devices with the display’s embedded OS or OPS slot computer. -
Page 104: Chapter 5 Troubleshooting The Display
Contact your network administrator. Ensure both antennas are correctly installed on the display. Ensure Wi-Fi is enabled in the display’s settings. See SMART Board GX (V2) series interactive displays user’s guide (smarttech.com/kb/171862). Note The range of a 5 GHz wireless connection is more limited than that of a 2.4 GHz connection. -
Page 105: The Display Isn't Turning On
Symptom Troubleshooting steps An app is missing or not available. The app might not be included with the SMART Board GX (V2) series interactive display. See Chapter 2 Using apps on the display on page 27. Note Apps that require Google Play Services (such as the Google Play store) cannot be used on the display. -
Page 106: The Screen Is Blank Or There's A Problem With The Image On The Screen
Chapter 5 Troubleshooting the display The screen is blank or there’s a problem with the image on the screen Symptom Troubleshooting steps The screen is blank when the status Make sure the screen is working by pressing the Home button on the front light is blue. - Page 107 Chapter 5 Troubleshooting the display Symptom Troubleshooting steps There are bright spots on the screen. Press the Home button on the front control panel. If it appears correctly, the issue is with the video input. Take a photograph of the screen and send it to SMART support. If SMART support determines that the issue is with the screen and the display is under warranty, you may be eligible for a replacement.
-
Page 108: There's No Sound Or There's A Problem With The Sound
Chapter 5 Troubleshooting the display Symptom Troubleshooting steps This is normal behavior if the Pixel shift setting is enabled in the System section of The image suddenly moves up and down, and then is stable again. the display’s settings. This can help reduce the risk of screen burn-in when a static image is displayed for very long periods. -
Page 109: Touch Isn't Working As Expected
SMART Product Drivers 12.20 or later are installed. For Mac computers with macOS Mojave, ensure your MAC OS security settings allow the SMART Board to control applications. See How to resolve issues with installing and using SMART Learning Suite software on macOS Mojave. -
Page 110: The Pens Aren't Working As Expected
Make sure you are using a SMART Board GX series interactive display pen. computer. Make sure SMART Product Drivers 12.20 or later is installed on any connected computers. -
Page 111: Smart Software On Connected Computers Isn't Working As Expected
Chapter 5 Troubleshooting the display SMART software on connected computers isn’t working as expected Symptom Troubleshooting steps SMART Notebook software isn’t See Troubleshooting SMART Notebook. working as expected. Lumio by SMART isn’t working as See Troubleshooting common issues in Lumio by SMART. expected. - Page 112 Chapter 5 Troubleshooting the display Scan the QR code on the label to view the SMART Board GX (V2) series interactive display support pages on the SMART website. smarttech.com/kb/171862...
-
Page 113: Chapter 6 Troubleshooting Tools And Apps
Whiteboards are saved in .enb format. The file the display is trying to open might Whiteboard. not be saved in a SMART Board GX (V2) Whiteboard file format. The display can’t open a The Whiteboard app on SMART Board GX (V2) series interactive displays doesn’t SMART ... -
Page 114: Resolving Issues With Browser
Chapter 6 Troubleshooting tools and apps Resolving issues with Browser Issue Solutions Browser isn’t working correctly. Make sure the display is connected to a properly configured network and the network is connected to the internet. See SMART Board GX (V2) series interactive displays installation and maintenance guide (smarttech.com/kb/171861). - Page 115 Chapter 6 Troubleshooting tools and apps Issue Solutions YouTube doesn’t show the screen when Due to content protection, YouTube cannot display the screen. using AirPlay. For the best user experience, connect to the display with the Bytello Share app. YouTube video doesn’t play after an ad Live videos time out after 10 seconds and are not available for playback when screen when using AirPlay.
-
Page 116: Resolving Issues With File Manager
Chapter 6 Troubleshooting tools and apps Resolving issues with File Manager Issue Solutions You can’t open files using File Make sure an app is installed on the display that supports the file type you’re trying Manager. to open. You can’t read from or write to a Connect the drive to the USB port for the display. -
Page 117: Certification And Compliance
Operations in the 5.15-5.25 GHz band are restricted to indoor > Regulatory Information. usage only. For more information, see the SMART Board GX (V2) series IEEE 802.11b or 802.11g operation of this product in the USA is interactive displays user guide (smarttech.com/kb/171862 firmware limited to channels 1 through 11. - Page 118 Troubleshooting tools and apps Radiation exposure statement The full text of the EU declaration of conformity is available at the following Internet address: smarttech.com/compliance This equipment complies with ISED radiation exposure limits set forth for an uncontrolled environment. This equipment should be installed and operated with minimum distance of 20 Warning cm between the antenna of this device and all nearby persons.
- Page 119 Troubleshooting tools and apps Batteries The display contains a CR2032 coin cell battery. The remote contains two AAA batteries. Recycle or dispose of batteries properly. Perchlorate The coin cell battery contains perchlorate material material. Special handling may apply. See dtsc.ca.gov/hazardouswaste/perchlorate. More See smarttech.com/compliance for more information...
- Page 120 SMART Technologies smarttech.com/support smarttech.com/contactsupport smarttech.com/kb/171862...
Need help?
Do you have a question about the GX V2 Series and is the answer not in the manual?
Questions and answers