Table of Contents
Advertisement
Quick Links
S i e m e n s M e d i c a l S o l u t i o n s G r o s s
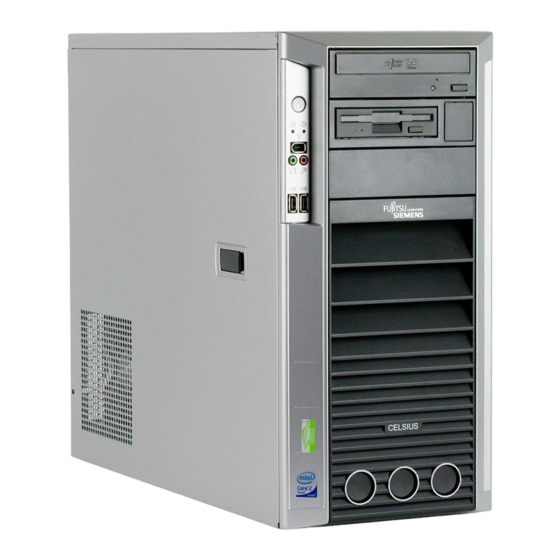
CELSIUS M450/440
Replacements of Parts
System
Replacement of Parts
Print No.:
TD00-400.841.40.02.02
Replaces:
TD00-400.841.40.01.02
10280914
TD
2007
© Siemens
The reproduction, transmission or use
of this document or its contents is not
permitted
without
express
authority. Offenders will be liable for
damages. All rights, including rights
created by patent grant or registration
of a utility model or design, are
reserved.
English
Doc. Gen. Date: 01.08
written
Advertisement
Table of Contents

Related Manuals for Siemens CELSIUS M450


Summary of Contents for Siemens CELSIUS M450
- Page 1 S i e m e n s M e d i c a l S o l u t i o n s G r o s s CELSIUS M450/440 Replacements of Parts System Replacement of Parts 10280914 2007 © Siemens...
- Page 2 Assemblers and other persons who are not employed by or otherwise directly affiliated with or authorized by Siemens or one of its affiliates are directed to contact one of the local offices of Siemens or one of its affiliates before attempting installation or service pro- cedures.
-
Page 3: Table Of Contents
Preparatory work steps ..........34 Page 3 of 52 Siemens TD00-400.841.40.02.02 CELSIUS M450/440 Medical Solutions 01.08 CS SD SP/CO... - Page 4 Final work steps ............50 8 _______ Changes to previous version _____________________________________ 51 Page 4 of 52 CELSIUS M450/440 TD00-400.841.40.02.02 Siemens 01.08...
-
Page 5: Notes
To completely disconnect the mains voltage, remove the power plug from the power socket. NOTE Components in the system can get very hot. • Wait a few minutes after switching OFF the system. Page 5 of 52 Siemens TD00-400.841.40.02.02 CELSIUS M450/440 Medical Solutions 01.08 CS SD SP/CO... -
Page 6: Replacement Or System Upgrades
General information Replacement or system upgrades NOTE Do use orginal Siemens spare parts only! It’s not permitted to use other parts! Because the device has to be shut down before system hardware components can be installed or uninstalled, it is a good idea to print out the relevant sections of this chapter. -
Page 7: Bios Installation
BIOS installation. If necessary, safe patient data before starting the BIOS installation. On some systems a BIOS installation requires a com- plete SW installation. Page 7 of 52 Siemens TD00-400.841.40.02.02 CELSIUS M450/440 Medical Solutions 01.08 CS SD SP/CO... -
Page 8: Opening The Housing
Fig. 2: Variant A (remove side cover) • Slide the side cover approximately 2 cm (a) in the direction of the arrow (1), until the stop. Page 8 of 52 CELSIUS M450/440 TD00-400.841.40.02.02 Siemens 01.08 CS SD SP/CO Medical Solutions... -
Page 9: Variant B (Version With A Locking Lever)
Variant B (version with a locking lever) Fig. 3: Variant B (version with a locking lever) • Pull the locking lever (1). The side panel is now free and can be detached. Page 9 of 52 Siemens TD00-400.841.40.02.02 CELSIUS M450/440 Medical Solutions 01.08 CS SD SP/CO... -
Page 10: Closing The Housing
(2) with the other hand. • Return the system unit to its original position. • Reconnect any disconnected cables (power cord, cables to external devices, etc.). Page 10 of 52 CELSIUS M450/440 TD00-400.841.40.02.02 Siemens 01.08 CS SD SP/CO Medical Solutions... -
Page 11: Variant B (Version With A Locking Lever)
Close the locking lever in the direction of the arrow (1). • Return the system unit to its original position. • Reconnect any disconnected cables (power cord, cables to external devices, etc.). Page 11 of 52 Siemens TD00-400.841.40.02.02 CELSIUS M450/440 Medical Solutions 01.08 CS SD SP/CO... -
Page 12: Opening The Front Panel
Fold open the front in the direction of the arrow (2). • If necessary, detach the hinge on the right-hand side of the front panel from the hous- ing and carefully remove the front panel. Page 12 of 52 CELSIUS M450/440 TD00-400.841.40.02.02 Siemens 01.08 CS SD SP/CO... -
Page 13: Closing The Front Panel
Close the front panel in the direction of the arrow (1) so that the three locking tabs on the left-hand side of the front panel engage (2). • Close the housing (Closing the housing / p. 10). Page 13 of 52 Siemens TD00-400.841.40.02.02 CELSIUS M450/440 Medical Solutions 01.08 CS SD SP/CO... -
Page 14: Front Fan
Open the housing (Opening the housing / p. • Open the front panel (Opening the front panel / p. 12). Fig. 9: Fan connectors on the mainboard Page 14 of 52 CELSIUS M450/440 TD00-400.841.40.02.02 Siemens 01.08 CS SD SP/CO Medical Solutions... -
Page 15: Removing The Front Fan
Remove the fan. Securing front fan on fan bracket Fig. 11: Fan bracket • Lay the fan on the fan bracket in the direction of the arrow (1). Page 15 of 52 Siemens TD00-400.841.40.02.02 CELSIUS M450/440 Medical Solutions 01.08 CS SD SP/CO... - Page 16 (Fig. 12 / p. 16). Fig. 12: Air flow of the front fan • Press the fan firmly into the fan bracket until it is felt to engage. Page 16 of 52 CELSIUS M450/440 TD00-400.841.40.02.02 Siemens 01.08 CS SD SP/CO Medical Solutions...
-
Page 17: Installing The Front Fan
• Close the front panel (Closing the front panel / p. 13). • Close the housing (Closing the housing / p. 10). Page 17 of 52 Siemens TD00-400.841.40.02.02 CELSIUS M450/440 Medical Solutions 01.08 CS SD SP/CO... -
Page 18: Side Fan
Disconnect the cable of the fan from the mainboard (refer to (Fig. 9 / p. 14), “Side fan”). • Remove the side fan from the housing. Page 18 of 52 CELSIUS M450/440 TD00-400.841.40.02.02 Siemens 01.08 CS SD SP/CO Medical Solutions... -
Page 19: Installing The Side Fan
(Fig. 16 / p. 19). • Push the side fan into the housing in the direction of the arrow (2). Fig. 16: Air flow of the side fan Page 19 of 52 Siemens TD00-400.841.40.02.02 CELSIUS M450/440 Medical Solutions 01.08 CS SD SP/CO... - Page 20 Fans, ventilation duct, crosspiece • Lock the side fan by pressing the locking hook (a) downward. • Close the housing (Closing the housing / p. 10). Page 20 of 52 CELSIUS M450/440 TD00-400.841.40.02.02 Siemens 01.08 CS SD SP/CO Medical Solutions...
-
Page 21: Ventilation Duct And Rear Fan
Press the lever (a) in the direction of the arrow until the lever unhooks. The hooks (1) on the back of the housing will release. • Carefully unhook the hooks (1). Fig. 18: Removing the ventilation duct (2) Page 21 of 52 Siemens TD00-400.841.40.02.02 CELSIUS M450/440 Medical Solutions 01.08 CS SD SP/CO... - Page 22 NOTE When removing the ventilation duct, be careful not to dam- age the processor cooler(s) on the mainboard. If necessary, disconnect the cable to the mainboard. Page 22 of 52 CELSIUS M450/440 TD00-400.841.40.02.02 Siemens 01.08 CS SD SP/CO Medical Solutions...
-
Page 23: Installing The Rear Fan And The Ventilation Duct
When routing the fan cable, make sure that it is not kinked or pinched. When fitting the ventilation duct, be careful not to damage the processor cooler(s) on the mainboard. Page 23 of 52 Siemens TD00-400.841.40.02.02 CELSIUS M450/440 Medical Solutions 01.08 CS SD SP/CO... - Page 24 Press the lever (a) of the ventilation duct in the direction of the arrow until the lever (a) hooks in. • Close the housing (Closing the housing / p. 10). Page 24 of 52 CELSIUS M450/440 TD00-400.841.40.02.02 Siemens 01.08 CS SD SP/CO Medical Solutions...
-
Page 25: Crosspiece
Detach the crosspiece from the brackets (b) on the back of the housing. • Remove the crosspiece from the housing in the direction of the arrow (2). Page 25 of 52 Siemens TD00-400.841.40.02.02 CELSIUS M450/440 Medical Solutions 01.08 CS SD SP/CO... -
Page 26: Installing The Crosspiece
• Install the ventilation duct (Installing the rear fan and the ventilation duct / p. 23). • Close the housing (Closing the housing / p. 10). Page 26 of 52 CELSIUS M450/440 TD00-400.841.40.02.02 Siemens 01.08 CS SD SP/CO Medical Solutions... -
Page 27: Preparatory Work Steps
• Remove the ventilation duct (Removing the ventilation duct and the rear fan / p. 21). • Remove the crosspiece (Removing the crosspiece / p. 25). Page 27 of 52 Siemens TD00-400.841.40.02.02 CELSIUS M450/440 Medical Solutions 01.08 CS SD SP/CO... -
Page 28: Changing The Power Supply
Move the new power supply into the housing and attach it with the 4 screws on the back. • Connect all power connectors and attach the cables as they were before. Page 28 of 52 CELSIUS M450/440 TD00-400.841.40.02.02 Siemens 01.08 CS SD SP/CO... -
Page 29: Final Work Steps
(Installing the crosspiece / p. 26). • Install the ventilation duct (Ventilation duct and rear fan / p. 21) • Close the housing (Closing the housing / p. 10). Page 29 of 52 Siemens TD00-400.841.40.02.02 CELSIUS M450/440 Medical Solutions 01.08 CS SD SP/CO... -
Page 30: Preparatory Work Steps
(Removing the side fan / p. 18). • Remove the crosspiece if it is in the way (Removing the crosspiece / p. 25). • Disconnect the cables connected to the board. Page 30 of 52 CELSIUS M450/440 TD00-400.841.40.02.02 Siemens 01.08 CS SD SP/CO Medical Solutions... -
Page 31: Removing A Board
Put the clip on. Make sure that the pin (a) is inserted into the screw hole. • Press the clip in the direction of the arrow (2). Make sure that the clip engages when released. Page 31 of 52 Siemens TD00-400.841.40.02.02 CELSIUS M450/440 Medical Solutions 01.08 CS SD SP/CO... -
Page 32: Installing A Board
Put the clip on. Make sure that the pin (a) is inserted into the screw hole. • Press the clip in the direction of the arrow (2). Make sure that the clip engages when released. • If necessary, connect the cables. Page 32 of 52 CELSIUS M450/440 TD00-400.841.40.02.02 Siemens 01.08 CS SD SP/CO Medical Solutions... -
Page 33: Final Work Steps
If you have installed or removed a PCI board, please check the relevant PCI slot settings in the BIOS Setup. If neces- sary, change the settings. Further information is provided in the PCI board documentation. Page 33 of 52 Siemens TD00-400.841.40.02.02 CELSIUS M450/440 Medical Solutions 01.08 CS SD SP/CO... -
Page 34: Preparatory Work Steps
Drives Preparatory work steps 5Drives • Open the housing (Opening the housing / p. • Remove the front panel (Opening the front panel / p. 12). Page 34 of 52 CELSIUS M450/440 TD00-400.841.40.02.02 Siemens 01.08 CS SD SP/CO Medical Solutions... -
Page 35: Cd/Dvd Drive
If necessary, make the required settings on the remaining hard disk drive. Fig. 32: Removing a CD/DVD drive (2) • Loosen the screws (1). • Remove the rails from the drive (2). Page 35 of 52 Siemens TD00-400.841.40.02.02 CELSIUS M450/440 Medical Solutions 01.08 CS SD SP/CO... - Page 36 (1). • Fasten the rails with the screws (2). Fig. 34: Removing a CD/DVD drive (4) • Slide the empty slide-in module into the housing. Page 36 of 52 CELSIUS M450/440 TD00-400.841.40.02.02 Siemens 01.08 CS SD SP/CO Medical Solutions...
-
Page 37: Installing A Cd/Dvd Drive
• Take the new drive out of its packaging. • Adjust the required settings on the drive (if necessary, on already-installed drives as well). Page 37 of 52 Siemens TD00-400.841.40.02.02 CELSIUS M450/440 Medical Solutions 01.08 CS SD SP/CO... - Page 38 • Use the Explorer to check, if CD-writer and DVD-drive still have the proper drive letters. These are: - DVD-drive -> R - CD-writer -> S Page 38 of 52 CELSIUS M450/440 TD00-400.841.40.02.02 Siemens 01.08 CS SD SP/CO Medical Solutions...
- Page 39 • Click ’Yes’ in the ’Confirm’ popup. (Repeat this sequence for every drive where the drive letter needs to be changed.) Page 39 of 52 Siemens TD00-400.841.40.02.02 CELSIUS M450/440 Medical Solutions 01.08 CS SD SP/CO...
-
Page 40: Hard Disk Drive
If necessary, make the required settings on the remaining hard disk drive. Installing a hard disk drive • Take the new hard disk drive out of its packaging. • Make the required settings on the drive. Page 40 of 52 CELSIUS M450/440 TD00-400.841.40.02.02 Siemens 01.08 CS SD SP/CO Medical Solutions... - Page 41 Push the hard disk drive into the housing (2) until the EasyChange rails engage. • Connect the data and power supply cables to the hard disk drive. Page 41 of 52 Siemens TD00-400.841.40.02.02 CELSIUS M450/440 Medical Solutions 01.08 CS SD SP/CO...
-
Page 42: Final Work Steps
Drives Final work steps • Close the front panel (Closing the front panel / p. 13). • Close the housing (Closing the housing / p. 10). Page 42 of 52 CELSIUS M450/440 TD00-400.841.40.02.02 Siemens 01.08 CS SD SP/CO Medical Solutions... -
Page 43: Preparatory Work Steps
• Remove the ventilation duct (Removing the ventilation duct and the rear fan / p. 21) • Remove the crosspiece (Removing the crosspiece / p. 25). Page 43 of 52 Siemens TD00-400.841.40.02.02 CELSIUS M450/440 Medical Solutions 01.08 CS SD SP/CO... -
Page 44: Removing A Memory Module
• Push the clips on the right and left of the memory slot outward (1). • Pull the memory module out of the memory slot (2). Page 44 of 52 CELSIUS M450/440 TD00-400.841.40.02.02 Siemens 01.08 CS SD SP/CO Medical Solutions... -
Page 45: Installing A Memory Module
Insert the memory module into the location (1). • At the same time flip the lateral holders upwards until the memory module snaps into place (2). Page 45 of 52 Siemens TD00-400.841.40.02.02 CELSIUS M450/440 Medical Solutions 01.08 CS SD SP/CO... -
Page 46: Final Work Steps
• Install the ventilation duct (Installing the rear fan and the ventilation duct / p. 23). • Close the housing (Closing the housing / p. 10). Page 46 of 52 CELSIUS M450/440 TD00-400.841.40.02.02 Siemens 01.08 CS SD SP/CO Medical Solutions... -
Page 47: Changing The Lithium Battery
Open the housing (Opening the housing / p. • If necessary, send any patient images in the system to the archive or burn them to a CD/DVD. Page 47 of 52 Siemens TD00-400.841.40.02.02 CELSIUS M450/440 Medical Solutions 01.08 CS SD SP/CO... - Page 48 Make sure that you observe the correct polarity when replacing the lithium battery. The plus pole must be on top! There are several different lithium battery holder designs; all of them function in the same way. Page 48 of 52 CELSIUS M450/440 TD00-400.841.40.02.02 Siemens 01.08 CS SD SP/CO...
- Page 49 2. Install the BIOS according to the specific system documentation. 3. At some systems the BIOS installation is only possible together with the complete SW installation procedure. Page 49 of 52 Siemens TD00-400.841.40.02.02 CELSIUS M450/440 Medical Solutions 01.08 CS SD SP/CO...
-
Page 50: Final Work Steps
Lithium battery Final work steps • Close the housing (Closing the housing / p. 10). Page 50 of 52 CELSIUS M450/440 TD00-400.841.40.02.02 Siemens 01.08 CS SD SP/CO Medical Solutions... - Page 51 Changes to previous version 8Changes to previous version All chapters completely revised. Page 51 of 52 Siemens TD00-400.841.40.02.02 CELSIUS M450/440 Medical Solutions 01.08 CS SD SP/CO...
- Page 52 Changes to previous version Page 52 of 52 CELSIUS M450/440 TD00-400.841.40.02.02 Siemens 01.08 CS SD SP/CO Medical Solutions...