Advertisement
Quick Links
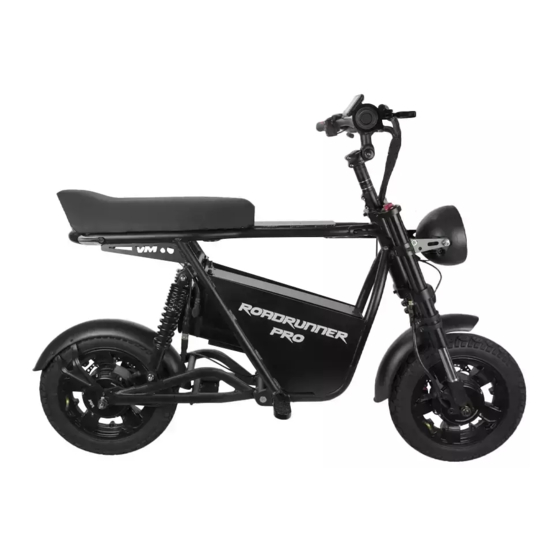
EMOVE RoadRunner Pro Seated
Electric Scooter User Manual
High Performance Vehicle Designed by VoroMotors
Product Contents
The package will include:
EMOVE RoadRunner Pro (1)
●
Foot pegs (2)
●
Stem adapter (1)
●
Product Dimensions and Details
Distributed by and property of VoroMotors
Charging adapter (1)
●
Toolkit (1)
●
1
Advertisement

Summary of Contents for VM EMOVE RoadRunner Pro
- Page 1 EMOVE RoadRunner Pro Seated Electric Scooter User Manual High Performance Vehicle Designed by VoroMotors Product Contents The package will include: EMOVE RoadRunner Pro (1) Charging adapter (1) ● ● Foot pegs (2) Toolkit (1) ● ● Stem adapter (1) ●...
- Page 2 Weight and Dimensions (Length x Width x Height) Scooter dimensions: 56.7" x 30.7" x 43.3" / 144 cm x 77.9 cm x 109.9 cm Scooter weight (with battery): 114.4 lbs / 51.9 kg Standalone battery weight: 21 lbs / 9.4 kg Seat dimensions: 20”...
- Page 3 Scooter Cockpit Introduction The VoroMotors TFT display is controlled by the rubber button console on top of the handlebars. There is an M (Mode) button, directional (+/-) buttons, and a power button. This is the main button console that powers on the scooter. The headlight, turn signals and horn are controlled by the rubber button console facing the seat.
-
Page 4: Product Use
Product Use How to Assemble the EMOVE RoadRunner Pro Tools: , scissors, stand (optional) Multitool Parts: Scooter, foot pegs, stem adapter, battery, multitool Unbox the Scooter Remove the foam inserts on top to make it easier to pull the scooter out of the box. - Page 5 11. Using the multitool, check the screws for the throttle, brake levers, and button consoles to make sure they are secure and the components are in the position that you like for riding. 12. Remove protective coverings from the display and seat. Install the Foot Pegs Locate the foot pegs (2).
-
Page 6: How To Charge
How to Charge Once your scooter is assembled, start charging. Plug the charging adapter into a power supply, preferably a grounded electrical socket. When powered, the indicator light on the adapter will glow green. 2. Locate the charging port on the right side of the battery (near the rear right spring suspension). - Page 7 How to Use the VoroMotors TFT Display The VoroMotors TFT display is controlled by the button console on the top of the left handlebar. This console has a mode (M) button, directional buttons (+/-) and a power button. Power on the display and the scooter by pressing the power button on the button console.
- Page 8 3. When you press the mode button, the readout will shift to the secondary display, which provides cumulative details, like trip mileage, total mileage, trip duration, average speed, and max speed. 4. To access the main menu settings, double-click the mode button. 5.
- Page 9 Password (setting password protection) Informations (displays information from trip) Average Speed ■ Max Speed ■ Trip (record) ■ Odometer ■ Hardware version ■ Software version ■ 6. Update settings using the button console. Use the directional buttons to toggle through features, and press mode to select the feature. You can tell which feature you are on because the icon will be green (otherwise blue).
- Page 10 VoroMotors Advance Settings The advance settings (also known as performance or p-settings) allow you to customize the display and configuration of the device. To access the P-settings, start with the display on. 2. Double-click the mode button to access the main menu. 3.
- Page 11 Assist Parameter/Speed Mode Settings In Advance setting, you can select from five profiles, which have default parameters for speed, braking, and power to the motors. Try the default settings first to see how they feel, then you can customize these Assist Parameters or Speed Modes to your preference. Speed Limit: 20% (very limited speed) / 100% (unlimited speed) EABS level: 1 (lowest response) / 5 (highest response) Start level: 2 (lowest start power) / 5 (highest start power)
-
Page 12: Error Codes
Error Codes The following are common error codes and solutions. Error Code Error Solution Error 1 Motor phase wire fault Check motor phase wires from the motor axle all the way to the controller. Check that there are no exposed, loose or damaged connections or cabling. - Page 13 Riding Safety Guidelines and Restrictions Comply with local laws. Research and follow the rules related to electric scooter use in your region. It is illegal to ride on the sidewalk in most areas, so it’s important to understand what’s allowable where you will be riding. 2.
- Page 14 Li-Ion Battery Care Unlike with other lithium ion batteries and charging adapters, you can safely leave your electric scooter charging overnight without worrying. However, you should still keep these tips in mind to maintain your battery health for as long as possible. Don’t rapidly charge or discharge the battery within 1 hour.
- Page 15 VI. WEIGHT ALLOWANCES. We warrant that the VORO products are to be used expressly as electric scooters supporting the following maximum weights: 330 lbs for EMOVE RoadRunner Pro electric scooter. VORO products cannot be used to support weight tolerances above those listed above. Our limited warranty will be void if the VORO product is subjected to conditions outside of the weight tolerance as a part of improper use.
- Page 16 You may only make a warranty claim for individual parts once during the coverage period. For example, VORO will replace the motor under warranty the first time failure occurs, but subsequent motor replacements within the warranty period are at the cost of the customer. Additionally, all electric scooters have recommended use and max load restrictions, with estimated performance using an average rider of 150 lbs.
- Page 17 XI. WHO MAY USE THIS WARRANTY?VORO is located at 14350 Arminta Street, Panorama City, CA 91402 and VORO ("we") extend this limited warranty only to the consumer who originally purchased the product ("you"). It does not extend to any subsequent owner or other transferee of the product. XII.
- Page 18 labor for repairs at no additional charge, but are responsible for any outbound and inbound shipping fees. Warranty claims made by international customers and customers in Alaska and Hawaii after 30 days of delivery are eligible for replacement parts at no additional charge, but are responsible for the cost of labor for repairs and any outbound and inbound shipping fees.
- Page 19 responsible for cost of labor, inbound/outbound shipping, any incurred cost due to taxes, unforeseen part replacements and/or other third party costs. XVII. PURCHASER’S RESPONSIBILITY.As the device’s owner, you are responsible for the performance and maintenance of your device. You may be denied a warranty claim if routine maintenance cannot be determined.
- Page 20 EMOVE RoadRunner Pro Specifications Feature Specification Notes Motor 2000W (2) BLDC 8000W Max power VM plug-and-play motor design Battery 60V 30Ah LG M50LT 1800 Wh battery capacity 21700 battery Standalone battery weight: 21 lbs / 9.4 kg Controller 45A sine wave (2) Product Weight 114.4 lbs / 51.9 kg...
Need help?
Do you have a question about the EMOVE RoadRunner Pro and is the answer not in the manual?
Questions and answers