Fujifilm INSTAX SQUARE SQ10 Instant Camera Manual
- User manual (76 pages) ,
- User manual (220 pages)
Advertisement
- 1 Before Use
- 2 Part Names
- 3 Display on the LCD Monitor
- 4 Attaching the Strap
- 5 Inserting/Charging the Battery
- 6 Turning the Camera on/off
- 7 Performing Initial Settings
- 8 Loading/Removing the Film Pack
- 9 Print Mode
- 10 Basic Photography and Playback
- 11 Printing
- 12 Image Effects
- 13 More on Photography
- 14 Changing the Shooting Mode
- 15 Printing from Print History (Reprint)
- 16 Using a Memory Card
- 17 Menus
- 18 Specifications
- 19 TROUBLE SHOOTING
- 20 IMPORTANT SAFETY NOTICE
- 21 Handling the Battery
- 22 Documents / Resources
Before Use
Before using the camera, check the following.
- Make sure supplied accessories are included in the package.
- Read "IMPORTANT SAFETY NOTICE" and "Handling the Battery" for safety use. !
- Read this User's Guide before using the camera.
Supplied Accessories
- NP-50 rechargeable battery (1)
![]()
- USB cable for charging (1)
![]()
- Hand strap (1)
![]()
- Strap rings (2)
![]()
- Clip attaching tool (1)
![]()
- User's Guide (1)


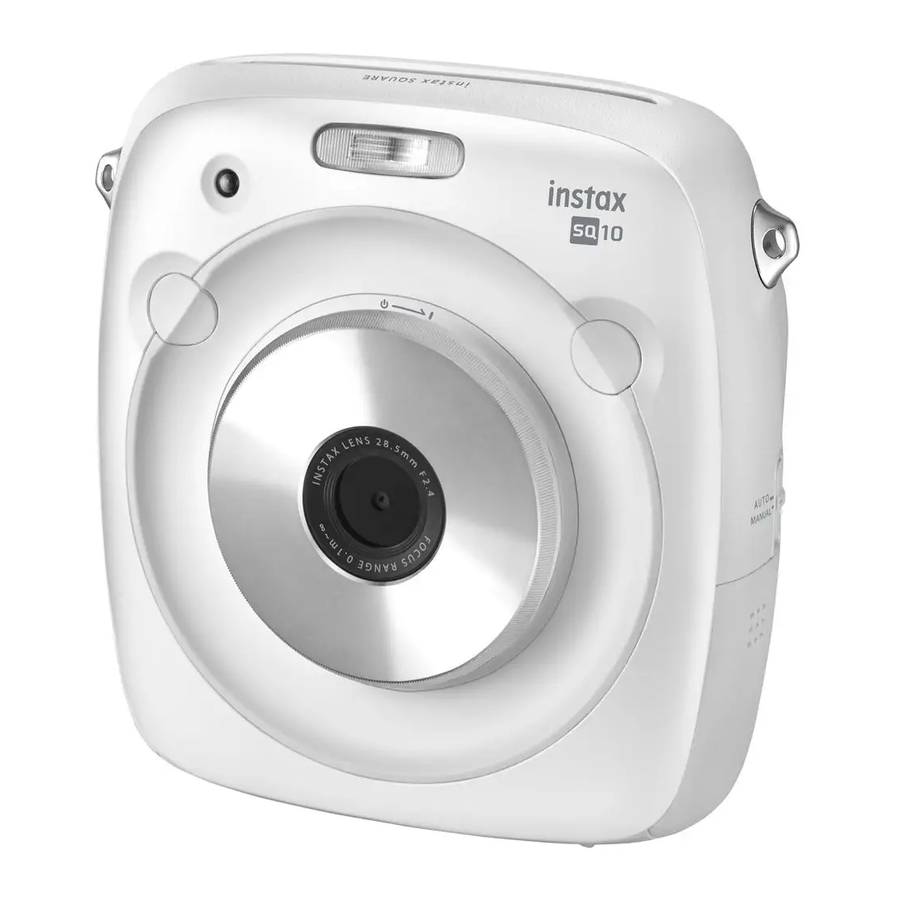
Part Names
Front

- Flash
- Film ejection slot
- AF-assist illuminator/Self timer lamp
- Strap eyelet (s)
- Shutter button (Right)
- Card slot cover
- USB port for charging
- Micro SD card slot
- Tripod socket (Tripod sold separately)
- Lens
- Lens ring (Power switch)
- Shutter button (Left)
Rear

- Film door lock
- Strap eyelet (s)
- Print mode selector
- Battery-chamber cover
- Battery latch
- Battery chamber
![]() (Filter) button
(Filter) button![]() (Vignette) button
(Vignette) button- Selector button/
Command dial ![]() (Playback) button
(Playback) button![]() (Back) button
(Back) button![]() (Print) button
(Print) button- MENU/OK button
![]() (Brightness) button
(Brightness) button- Film door
- LCD Monitor
 (Filter) button
 (Vignette) button
 (Playback) button
 (Brightness) button
Display on the LCD Monitor
Pressing the  (Back) button displays information below.

- Flash mode
- Brightness adjustment
- Filter
- Vignette
- Date/time print setting *1
- Shooting mode *2
- Print mode
- Current date/time
- Battery level
- Number of available frames *3
- Film remaining
*1 The icon is displayed in gray when the date/time print setting is disabled.
*2 Not displayed when STANDARD is selected.
*3 When a memory card is inserted, the  icon appears on the number. If the number of available frames is under 10, the icon on the number turns red.
Using the selector buttons

![]() Move cursor up
Move cursor up ![]() Move cursor left
Move cursor left ![]() Move cursor down
Move cursor down![]() Move cursor right
Move cursor right- Confirms selection
 Move cursor up
  Move cursor down
Using the command dial

Use the command dial on the following occasions.
- Selecting a menu or item
- Changing playback display
- Adjusting the value of image effect
Attaching the Strap
Attaching the Hand Strap
Attach the strap as illustrated below.
- When you carry or use the camera, put the strap around your wrist so that the camera does not drop.
![]()

Attaching the Shoulder Strap (Purchased Separately)
Attach the strap clips to the camera, then attach the shoulder strap.
- Open a strap clip.
Use the clip attaching tool to open a strap clip as shown.
![]()
Keep the tool in a safe place. You will need it to open the strap clips when removing the shoulder strap. - Place the shoulder strap clip on each strap eyelet.
Hook the strap eyelet in the clip opening. Remove the tool using the other hand to keep the clip in place.

- Pass the clip through each strap eyelet.
Rotate the clip fully through the eyelet until it clicks closed.
![]()
- Pass the shoulder strap through each clip.
![]()


- Use the strap only as a shoulder strap. Do not put the shoulder strap around your neck.
- Be careful so that the shoulder strap does not obstruct the film ejection slot.
- Strap eyelets may become worn or color may become faded as you are attaching the shoulder strap.
Inserting/Charging the Battery
Inserting the Battery
- Slide the battery cover to open.
![]()
- Insert the battery according to the arrow on it.
![]()
Make sure the yellow line on the battery aligns with the mark on the camera.


- To remove the battery, press the battery latch to the side, and slide the battery out of the camera.
- Close the battery cover.
![]()

Charging the Battery
 Be careful of the orientation.
Connect the camera and an AC power adapter supplied with your smartphone using the supplied USB cable, then connect the AC power adapter to an indoor power outlet.

- Use an AC adapter to meet the rated output below: DC 5.0 V/1000 mA
- You can take a picture or print an image while charging is in progress.
- Charging time is approximately three to four hours.
Charging status indication
| Status | While camera is on | While camera is off |
| While charging | The (  - > - >  - > - >  ) icon appears on the lower right of the LCD monitor ) icon appears on the lower right of the LCD monitor | AF illuminator/Self timer lamp lights up. |
| Charging finished | The ( ) icon appears on the lower right of the LCD monitor. (Goes off when disconnecting the USB cable.) | AF illuminator/Self timer lamp goes off. (The USB cable is connected.) |
| Charging error | An error message appears on the LCD monitor. | AF illuminator/Self timer lamp flashes. |
Charging from a PC:
- Connect the camera and PC directly. Do not connect them via a keyboard or USB hub.
- If the PC enters the sleep mode while charging is in progress, charging will stop. If you continue charging, resume the PC and reconnect the USB cable.
- You may not be able to charge the camera from a PC depending on your PC specifications, settings, or status.
- The battery is not charged fully at shipment. Be sure to charge it before using the camera.
- Read the cautions in "Handling the battery".
Turning the Camera on/off
To turn the camera on, turn the lens ring (power switch) clockwise. To turn it off, turn the switch counterclockwise.

The camera turns on and shooting screen appears.

The camera turns off.
Checking Remaining Battery Life
Pressing the (Back) button on the shooting/playback screen displays remaining battery life on the LCD monitor.
| Indication | Remaining battery life |
 | Battery is partially discharged. |
 | Battery is more than half discharged. Charging the battery is recommended. |
 | Battery level is low. Charge as soon as possible. |
When the battery level is low, the ( ) icon appears on the lower right of the LCD monitor.
When no battery capacity remains, the (  ) icon appears enlarged on the LCD monitor and the camera turns off.
- If no operation occurs for a certain period of time, the camera turns off automatically. You can specify the length of time before the camera turns off.
- Pressing the
![]() (Playback) button displays the playback screen and changes to the playback mode.
(Playback) button displays the playback screen and changes to the playback mode. - Pressing the shutter button fully during the playback mode displays the shooting screen and changes to the shooting mode.
- Fingerprints and other marks on the lens can affect pictures. Keep the lens clean.
Performing Initial Settings
The language, date, and time are not specified when the camera is turned on for the first time. Follow the procedure below to specify them.
You can specify these settings at any time.
- Turning the camera on displays the language selection screen.
- Select a language, then press the MENU/OK button or
![]() .
.
![]()
The language is specified and the DATE/TIME screen appears. - Specify the order, then press the MENU/OK button or
![]()
![]()
Select one of the orders below.


- year/month/day
- month/day/year
- day/month/year
The order is specified and the screen to specify the year, month, day, hour, and minute appears.
- Specify the year, month, day, hour, and minute, then press the MENU/OK button or
![]() .
.
![]()
Use![]()
![]() to select an item (year, month, day, hour, or minute) to specify, then use 67 to set the value.
to select an item (year, month, day, hour, or minute) to specify, then use 67 to set the value. - Specify the function of shutter buttons.
![]()
- Press the MENU/OK button.


Function Setting for the Shutter Button
Assign a function to each of the shutter buttons from the combinations on the table below.
| Shutter button (Right) | Shutter button (Left) | |
| Function | Shutter button | Shutter button |
| Shutter button | Shooting mode switching button | |
| Shutter button | OFF | |
| Shooting mode switching button | Shutter button | |
| OFF | Shutter button |
By default, shutter button function is assigned to the right shutter button, and shooting mode switching function to the left.
Use 
 to select the combination when the SHUTTER BUTTON SETTINGS screen is displayed, then press the MENU/ OK button.
- If you skip this procedure, press the
![]() (Back) button when each screen appears. The shooting screen appears.
(Back) button when each screen appears. The shooting screen appears. - If the battery is removed for an extended period of time, the setting values may be cleared. In this case, the language selection screen appears. Perform settings again.
Loading/Removing the Film Pack
Do not open the back cover until you have used up the film; otherwise, the rest of the film is exposed and turns white. The film can no longer be used.
- When you load the film pack, never press the two rectangular holes on the back of the film pack.
- Never use a film pack beyond its shelf life; otherwise, it may damage the camera.
Use FUJIFILM Instant Film "instax SQUARE" only.
The instax mini film or instax WIDE film cannot be used.
Notes on the film pack
- Each FUJIFILM Instant Film "instax SQUARE" pack contains 1 black film protective cover and 10 film sheets.
- Do not remove the film pack from its inner bag before loading it into the camera.
- The film cover is ejected automatically when the back cover is closed.
For details, refer to the instructions and warnings on FUJIFILM Instant Film "instax SQUARE".
Loading the Film Pack
- Press and hold the button of the film door lock (1), then slide the lever to the right (2) until the film door opens slightly

- Hold both sides of the film pack, align the bottom of the film pack on the groove of the film chamber (1), then insert it straight (2).
![]()
- Close the back cover. Make sure the back cover lock clicks into place.
![]()
- The film cover (black) is ejected automatically when the back cover is closed. Remove the film cover from the film ejection slot.
![]()


Unloading a Used Film Pack
When no film is left, all dots on the right of the shooting screen are displayed in gray.
Unload the film pack.
- Press and hold the button of the film door lock (1), then slide the lever to the right (2) until the film door opens slightly.

- Grasp the rectangular holes on the film pack, then pull it out straight.
![]()


Print Mode
Two print modes are available.
- Auto print mode
- Manual print mode (initial setting)
When the auto print mode is selected, printing starts immediately after the image is saved in the memory.
When the manual print mode is selected, the image is saved in the memory. You can select and print images later.
Auto Print Mode
Switch the print mode selector on the side to "AUTO".

The icon below appears on the shooting screen.

Printing starts immediately after the image is saved in the memory.

Manual Print Mode (initial setting)
Switch the print mode selector on the side to "MANUAL".

The icon below appears on the shooting screen.

The image is saved in the memory. You can select and print images later instead of printing them immediately.

Basic Photography and Playback
Taking a Picture
This section describes basic operation for photography.
- Turn the lens ring (power switch) clockwise to turn the camera on.
![]()
- Hold the camera and confirm the desired composition of the final image.
![]()
- Select the shooting mode or perform the steps to select your image effects.
- Press the shutter button halfway to focus.


- If the camera is able to focus: The camera beeps and the green focus frame appears on the monitor.
- If the camera is unable to focus: The red focus frame appears on the monitor. Change the composition or use focus lock.
- Lightly press the shutter button the rest of the way down to take the picture.
The picture is taken and it is saved in the camera's memory.
- If the print mode is set to auto print mode, the image will be printed.
- When you take a picture, hold the camera with both hands and brace your elbows against your sides.
- Be careful not to touch the lens surface when you press the shutter button.
- When you press the shutter button fully, press it lightly.
- Be careful that your fingers or the strap do not cover the flash, lens, or film ejection slot.
- If a subject is poorly lit, the flash may fire when the picture is taken. You can change the flash setting to disable flashing. (Page 56)
Cautions on the camera's memory
- When the memory becomes full, the shutter will not release and you cannot take a picture. Delete the images in the memory or use another memory card.
- You can save up to 50 images in the memory. 1000 images per 1 gygabyte can be saved if you use a memory card.
- Images in the memory may be damaged or lost if the camera has any trouble. We recommend you store important image files as backup using other media (e.g. Hard disk, CD-R, CD-RW, or DVD-R, etc.).
- If you ask for repair, we do not guarantee the safety of images in the memory.
- While the camera is being repaired, note that we may check the contents of images in the memory.
Viewing Images
Images can be viewed on the monitor. Take a test shot and check the results before printing a picture.
- Press the
![]() (Playback) button.
(Playback) button.
![]()
The most recent image will be displayed. - Press
![]() or
or ![]() to select an image to view.
to select an image to view.
![]()
Pressing![]() displays a previous image.
displays a previous image.
Pressing![]() displays a next image.
displays a next image.


- Pressing the shutter button fully returns to the shooting screen.
Changing the Playback Display
You can zoom in on the image on the monitor or change the number of images displayed at a time.
Zooming in on image
You can zoom in on an image on the monitor by turning the command dial clockwise.

- Use
![]()
![]()
![]()
![]() buttons to move the view area.
buttons to move the view area. - Pressing the MENU/OK button or
![]() (Back) button cancels zooming.
(Back) button cancels zooming. - You can print an image while it is zoomed in.
Changing the number of images on the monitor
You can change the number of images on the monitor displayed at a time. Turning the command dial counterclockwise changes the number of images (one, four, or nine).

- Turning the command dial clockwise changes the number of images (four or one).
- Pressing the MENU/OK button or
![]() (Back) button cancels the multiple image display.
(Back) button cancels the multiple image display. - You can print an image while four or nine images are displayed.
Printing
Print an image following the steps below.
- When the auto print mode is selected, the image will be printed immediately after it is taken.
- Press the
![]() (Playback) button.
(Playback) button.
![]()
The most recent image will be displayed. - Press
![]() or
or ![]() to select an image to view.
to select an image to view.
![]()
Pressing![]() displays a previous image.
displays a previous image.
Pressing![]() displays a next image.
displays a next image. - Adjust the image effect as necessary.
- Press the
![]() (Print) button
(Print) button
The screen below appears.
![]()
- Press the MENU/OK button.
Printing starts.


- To cancel printing press the
![]() (Back) button.
(Back) button.
- When the film has been ejected (the camera stops making a sound), grab the edges of the film, then take it out.
![]()

Film remaining indication
Dots on the right of the monitor indicates the number of remaining films.
One dot turns gray every time you print an image.

- When there are only two films left, dots turns red.
You can print an image that is zoomed in or print four or nine images on one film. Use the command dial to change to the multiple image display on step 2 when the image to print is displayed.
- For details on taking out the film, refer to the instructions and warnings on the FUJIFILM Instant Film "instax SQUARE" pack.
- The development time is approximately 90 seconds. (The time varies depending on the ambient temperature.)
Image Effects
You can select an effect menu directly by pressing a button on the rear to adjust the image effect while the shooting/ playback screen is displayed.
Filter
- Press the
![]() (Filter) button while shooting/playback screen is displayed.
(Filter) button while shooting/playback screen is displayed.
The screen below appears.
![]()
- Use the command dial to select a filter.
For details on each filter see the table on the right. - Press the
![]() (Filter) button again.
(Filter) button again.
The filter effect is applied to the image and returns to the previous screen.

- You can also return to the previous screen by pressing the MENU/OK button or
![]() (back) button.
(back) button.
- To cancel the filter effect, press and hold the button.
Filter effects you can use
| Type | Details |
| Cornelius | Intensifies shadows and brightens highlights to the image. |
| Monochrome | Turns your image into basic monochrome. |
| Luna | Brightens the image and intensifies all colors. |
| Immerse | Adds saturation and shadows |
| Amber | Adds saturation and shadows. |
| Marmalade | Adds a strong red tint and a burnt edge to the image. |
| Martini | Smooths skin tones with a slightvintage feel. |
| Sepia | Strong taste of old school |
| Roppongi | Adds brightness and warmth to the image. |
| Highline | Intensifies shadows with yellow tint. |
| PARTIAL COLOR (RED) | Areas of the image that are the selected color are recorded in that color. All other areas of the image are recorded in black-and-white. |
| PARTIAL COLOR (ORANGE) | |
| PARTIAL COLOR (YELLOW) | |
| PARTIAL COLOR (GREEN) | |
| PARTIAL COLOR (BLUE) | |
| PARTIAL COLOR (PURPLE) |
Adjusting the Brightness
Follow the steps below to adjust the brightness.
- Press the
![]() (Brightness) button while shooting/ playback screen is displayed.
(Brightness) button while shooting/ playback screen is displayed.
The screen below appears.
![]()
- Use the command dial to adjust the brightness.
Turn the command dial clockwise to brighten the image, and turn the dial counterclockwise to darken it. - Press the
![]() (Brightness) button again.
(Brightness) button again.
The adjusted brightness is applied to the image and returns to the previous screen.

- You can also return to the previous screen by pressing the MENU/OK button or
![]() (back) button.
(back) button.
- To cancel the adjusted brightness, press and hold the
![]() (Brightness) button.
(Brightness) button.
Vignette
Adjust the brightness of four corners on the image. Follow the steps below to adjust the brightness.
- Press the
![]() (Vignette) button while shooting/ playback screen is displayed.
(Vignette) button while shooting/ playback screen is displayed.
The screen below appears.
![]()
- Use the command dial to adjust the brightness of the four corners.
Turn the command dial clockwise to darken the corners, and turn the dial counterclockwise to brighten them. - Press the
![]() (Vignette) button again.
(Vignette) button again.
The adjusted brightness is applied to the image and returns to the previous screen.

- You can also return to the previous screen by pressing the MENU/OK button or
![]() (back) button.
(back) button.
- To cancel the adjusted brightness, press and hold the
![]() (Vignette) button.
(Vignette) button.
Notes on image effects:
- Each adjusted value or effect remains after you take a picture. However, it will be disabled when you view the image on a device (e.g. computer) other than this camera.
- You can apply multiple effects to one image.
- Press and hold the
![]() (Back) button to cancel all adjusted values or effects.
(Back) button to cancel all adjusted values or effects. - Depending on the subject or camera settings, images may (in some cases) be grainy or vary in brightness and hue.
More on Photography
Using AF/AE Lock
Use "AF/AE lock" to lock focus/exposure by pressing the shutter button halfway. AF/AE lock is useful when you take a picture with off-center subjects.
- Position the subject to focus on the center, then press the shutter button halfway.
- Decide the composition with the shutter button pressed halfway.
- Press the shutter button all of the way down to take the picture.
As the camera may be unable to focus on the subjects listed below, we recommend you use AF/ AE lock.
- Very shiny subjects such as mirrors or car bodies
- Fast moving subjects
- Subjects photographed through a window or other reflective object
- Dark subjects and subjects that absorb rather than reflect light, such as hair or fur
- Insubstantial subjects, such as smoke or flame
- Subjects that show little contrast with the background (e.g. subjects that are the same color as the background)
- Subjects positioned in front of or behind a highcontrast object that is also in the focus frame (e.g. a subject photographed against a backdrop of highly contrasting elements)
Using the SelfTimer
Use the self timer to include a photographer in a group photo or to reduce blur when the shutter button is pressed.
- Press the MENU/OK button on the shooting screen.
![]()
The shooting menu appears. - Select SELF-TIMER, then press the MENU/OK button.
- Select 10 SEC or 2 SEC, then press the MENU/OK button.
- Press the shutter button fully.

- When you select 10 SEC:
When you press the shutter button, the AF-assist illuminator/Self timer lamp lights up, and then it flashes 3 seconds before shooting. - When you select 2 SEC:
When you press the shutter button, the AF-assist illuminator/Self timer lamp flashes.
- To cancel the self timer, press the
![]() (Back) button.
(Back) button.
Using the Flash
Use the flash when shooting at night or indoors under low light.
- Press the MENU/OK button on the shooting screen.
![]()
The shooting menu appears. - Select FLASH, then press the MENU/OK button.
- Select the flash setting, then press the MENU/OK button.
See the right column for details on each flash setting. - Press the shutter button to shoot.

Flash settings
Select one of the settings below.
![]() AUTO FLASH
AUTO FLASH
The flash fires automatically when the camera recognizes it is dark. Recommended in most situations.![]() FORCED FLASH
FORCED FLASH
The flash always fires regardless of the brightness of the subject. Use this setting for backlit subjects.![]() SUPPRESSED FLASH
SUPPRESSED FLASH
The flash does not fire even when the subject is poorly lit. Recommended when using a flash is prohibited. We recommend you use a tripod when it is dark.![]() SLOW SYNCHRO
SLOW SYNCHRO
As the flash fires with slow shutter (slow synchro) in a dark place, the background and subject in front of it are photographed brightly. Note that the picture may be overexposed if you use this setting in a bright place.![]() RED EYE & SLOW
RED EYE & SLOW
This setting minimizes "red-eye", which is caused by the flash reflecting from the retinas of portrait subjects when you use flash in a dark place.
When you select this setting, the flash fires several times as a pre-flash to minimize red-eye.
 AUTO FLASH
 FORCED FLASH
 SUPPRESSED FLASH
 SLOW SYNCHRO
 RED EYE & SLOW
Changing the Shooting Mode
Select a shooting mode according to the subject or purpose.
Selecting a Shooting Mode
Follow the steps below to select a shooting mode.
- Press the MENU/OK button on the shooting screen.
![]()
The shooting menu screen appears. - Select SHOOTING MODE, then press the MENU/OK button or
![]() .
. - Select the shooting mode, then press the MENU/ OK button.
The changed setting is applied. - Press the
![]() (Back) button.
(Back) button.
The LCD monitor returns to the shooting screen.

When you use another shutter button to select a shooting mode, the mode switches every time you press the shutter button.

Shooting Mode
 STANDARD
Select for normal photography. The flash fires automatically when the camera recognizes it is dark.
You can select a setting so that the flash does not fire.
 BULB MODE
The shutter is kept open while the shutter button is pressed. Use when shooting a night view. Using a table or tripod is necessary.
- Adjust the time to press the shutter button according to the brightness.
 DOUBLE EXPOSURE
Press the shutter button twice to shoot two subjects in one picture. After you shoot the first subject, shoot the second.
Follow the instructions on the monitor.
Printing from Print History (Reprint)
Print an image with the same settings (e.g. image effect) as those specified when you printed the image in the past.
Follow the steps below for operation.
- Press the
![]() (Playback) button.
(Playback) button.
![]()
The most recent image will be displayed. - Press the MENU/OK button.
The playback menu appears. - Select PRINT HISTORY, then press the MENU/OK button.
The screen to select an image appears.

- The latest 50 print histories are stored in the memory.
- If the print histories exceed 50, new print history overwrites the oldest one.
- Press
![]() or
or ![]() to select an image to print.
to select an image to print.
![]()
Pressing![]() displays a previous image.
displays a previous image.
Pressing![]() displays a next image.
displays a next image.

- You can select a view with four or nine frames.
- Press the
![]() (Print) button.
(Print) button. - Press the MENU/OK button.
Printing starts.
- Press the
![]() (Back) button to cancel printing.
(Back) button to cancel printing.
- When the film has been ejected (the camera stops making a sound), grab the edges of the film, then take it out.
![]()

- You cannot save the print history on a memory card.
- All print histories are deleted if you initialize the memory.
- You cannot edit or apply effects on the images in the print history.
Using a Memory Card
This camera can save approximately 50 images in the memory. However, using a memory card enables you to save more images.
Caution on the memory card
- Micro SD/micro SDHC cards have been approved for use in this camera. Using cards other than those specified could damage the camera.
- Memory cards are small and can be swallowed; keep out of reach of children. If a child swallows a memory card, seek medical assistance immediately.
- Do not turn the camera off or remove the memory card while the memory card is being formatted or data are being recorded or deleted from the card. Failure to observe this precaution could damage the card.
- Avoid using or storing memory cards in an environment where strong static electricity or electric noise is generated.
- If you insert a memory card charged with static electricity into the camera, it may cause malfunction. In this case, turn the camera off and turn it on again.
- Do not put memory cards in a pocket; otherwise, strong force will be applied and can cause damage.
- When you remove the memory card after using the camera for a long time, the card may be warm. However, this is not malfunction.
- Do not affix labels to memory cards. Peeling labels can cause camera malfunction.
Caution when using the memory card on computer
- Format memory cards before first use, and be sure to reformat all memory cards after using them in a computer or other device.
- Folders are created automatically if you use a memory card formatted with the camera. Do not change the folder/file name or delete a folder using a computer; otherwise, you cannot use the memory card.
- Use the camera to delete image files.
- Edit an image file after copying or moving it to a hard disk. Avoid editing an original image file.
Inserting the Memory Card
- Slide the card slot cover to open.
![]()
- As shown below, slide in the memory card until it clicks into place at the back of the slot.
![]()
- Close the card slot.
![]()


To remove the memory card, press it in and release it slowly. The card can be removed by hand.
- When you remove the memory card, press it with your finger and release the card gently; otherwise the card could come out of the slot too quickly.
Printing Images Taken with another Camera
You can print images taken with another camera by inserting a memory card containing the images. However, they should meet the conditions below.
- Copy images to print to the root directory instead of copying them to a folder.
- The file name should consist of four capital letters (A to Z) followed by four numeric characters.
Menus
Shooting Menu
Follow the steps below to specify/change the shooting menu.
- Press the MENU/OK button on the shooting screen.
![]()
The menu screen appears. - Select the setting item to change and change the setting.
- Press the MENU/OK button.
The changed setting is applied. - Press the
![]() (Back) button.
(Back) button.
The LCD monitor returns to the shooting screen.

Items on the shooting menu
SHOOTING MODE
Select a shooting mode according to the purpose or situation.
- You can also use a shutter button to which you assign the shooting mode switch function on SHUTTER BUTTON SETTINGS. Press the button repeatedly to choose a shooting mode.
FLASH
Select a setting for flash photography.
SELF-TIMER
Select a setting when using the self timer.
AF ILLUMINATOR
If you select ON, the AF-assist illuminator lights up while focusing to assist auto focus when it is dark.
Option: ON/OFF
- The camera may be unable to focus using the AF- assist illuminator in some cases.
- When you are close to the subject, the AF-assist illuminator may not be as effective as you expect.
- Avoid shining the AF-assist illuminator directly into your subject's eyes.
Playback Menu
Follow the steps below to specify/change the playback menu.
- Press the MENU/OK button on the playback screen.
![]()
The menu screen appears. - Select the setting item to change and change the setting.
- Press the MENU/OK button.
The changed setting is applied. - Press the
![]() (Back) button.
(Back) button.
The LCD monitor returns to the playback screen.

Items on the playback menu
PRINT
Press the MENU/OK button to start printing.
PRINT HISTORY
Display up to 50 images you printed in the past.
Select an image, then press the  (Print) button to start printing.
Pressing the MENU/OK button allows you to delete an image in the print history one by one.
ERASE
Delete an image one by one or delete all at one time.
Option: FRAME ALL FRAMES
IMAGE ROTATE
Rotate an image by 90 degrees. Use the command dial for operation.
COPY
Copy images in the camera's memory to a memory card and vice versa.
Follow the procedure below.
- Press the MENU/OK button or
![]() .
. - Select the destination, then press the MENU/OK button or
![]()
- Select FRAME or ALL FRAMES, then press the MENU/OK button or
![]() .
.
Copying starts if you select ALL FRAMES.
Proceed to step 4 if you select FRAME. - Select an image to copy, then press the MENU/OK button or
![]() .
.
AUTOROTATE PB
If you select ON, an image rotates on the playback screen.
Option: ON OFF
Setup Menu
Follow the steps below to specify/change the setup menu.
- Press the MENU/OK button on the shooting/ playback screen.
![]()
The menu screen appears. - Select the setting item to change and change the setting.
- Press the MENU/OK button.
The changed setting is applied. - Press the
![]() (Back) button.
(Back) button.
The LCD monitor returns to the shooting screen.

Items on the setup menu
DATE/TIME
Specify date and time.
DATE STAMP
If you select ON, the date of recording is printed on the lower right of the picture. The settings on DATE/TIME affect the order of year/month/day.
LANG.
Specify the language displayed on the monitor.
OPERATION VOL.
Adjust the volume of the operation, shutter, or startup sound.
Option: OFF/1/2/3
Select OFF to disable sounds.
SHUTTER BUTTON SETTINGS
Assign the function for the left/right shutter button.
AUTO POWER OFF
Select the length of time before the camera turns off automatically if no operations are performed.
Option: 5 MIN 2 MIN OFF
RESET
Reset all settings to default values.
The date and time specified on DATE/TIME are not reset.
FORMAT
Initialize camera's memory or a memory card inserted in the card slot. All saved images will be deleted.
FIRMWARE UPGRADE
Update the firmware.
Save the firmware on a memory card in advance, insert it in the card slot, and then follow the instructions on the monitor.
Download the latest firmware from our website.
Specifications
Camera
| Image sensor | 1/4-in., CMOS with primary color filter |
| Effective pixels | 1920 x 1920 |
| Storage media | Built-in memory, microSD/microSDHC memory card |
| Recording capacity | Built-in memory: Approx. 50 files microSD/microSDHC memory card: Approx. 1000 files per 1 gigabyte |
| File system | Compliant with Design Rule for Camera File System (DCF), Exif Ver.2.3, Compliant with JPEG and PIM |
| Focal length | Fixed as 28.5 mm (35-mm format equivalent) |
| Aperture | F2.4 |
| Auto focus system | Single AF (Contrast-detect TTL, equipped with AF illuminator) |
| Focus range | 10cm to ∞ |
| Shutter speed | 1/29500 sec. to 1/2 sec. (Auto), maximum 10 sec. in Bulb mode |
| Sensitivity | ISO 100 to 1600 (Auto) |
| Exposure control | Programmed AE |
| Metering | 256-segment through the lens (TTL) metering, Multi metering |
| White balance | Auto |
| Flash | Auto/Compulsory fl ash/Suppressed fl ash/Slow synchro/Red-eye removal Eff ective range: Approx. 50 cm to 8 m |
| Shooting mode | Standard, Double exposure, Bulb mode |
| Self-timer | Approx. 10 sec./Approx. 2 sec. |
| Image eff ect | 16 Filters, Brightness adjustment, Vignette |
| Playback function | Trimming, Multi image playback |
Printer
| Film | FUJIFILM Instant Film "instax SQUARE" (Purchased separately) |
| Photo capacity | 10 prints/pack |
| Film size | 86 mm x 72 mm |
| Image size | 62 mm x 62 mm |
| Supported image size | 800 x 800 dots |
| Printing solution | 12.5 dots/mm (318 dpi, 80 μm dot pitch) |
| Printing levels | 256 levels per color (RGB) |
| Supported image format | JPEG (Some images saved with a photo editing/processing software may not be displayed or printed.) |
| Printing time | Approx. 12 seconds |
| Print timing | Printing shortly after shooting/Printing after selecting image |
| Printing function | Images on built-in memory/micro SD card |
| Reprint | Printable up to the past 50 prints (Up to 50 images stored in print history) |
| Digital zoom | Up to 2.4 X in printing (Output pixels: 800 x 800) |
| Film detection | Yes (Automatic ejection when inserted) |
Others
| LCD monitor | 3.0-in. (7.6 cm) TFT color LCD monitor Pixels: Approx. 460k-dots |
| Input/Output terminals | Micro USB (For charging only) |
| Battery | NP-50 |
| Charging function | Built-in |
| Printing capacity | Approx. 160 prints (From when the battery is charged fully) * Varies depending on the conditions of use. |
| Charging time | Approx. 3 to 4 hours (Using 0.5 A USB port) * Varies depending on air temperature. |
| Dimension | 119 mm x 47 mm x 127 mm (W x D x H) |
| Weight | 450 g (includes fi lm pack and battery) |
* Specifications above are subject to change for improvement.
TROUBLE SHOOTING
Review below if you think the camera has some trouble. If you cannot find the solution, contact a FUJIFILM authorized distributor.
Or visit our website below.
FUJIFILM website http://fujifilm.com/
During operation
| Problem | Possible Causes | Solution |
| The camera cannot be turned on. |
|
|
| The battery runs out too fast. |
|
|
| The camera turns off during operation. |
|
|
| The battery charge does not start. |
|
|
| It takes long to charge the battery. |
|
|
| During the battery charge, the AF-assist illuminator/Self timer lamp flashes, or an error message appears on the LCD monitor, indicating that the battery cannot be charged. |
|
|
| An unintended language appears on the monitor. |
|
|
| No picture is taken when the shutter button is pressed. |
|
|
| The monitor went dark after shooting. |
|
|
| The camera does not focus. |
|
|
| The flash does not fire. |
|
|
| The flash does not fully light the subject. |
|
|
| Images are blurred. |
|
|
| Images are blotchy. |
|
|
| The camera is unresponsive. |
|
|
| The film pack cannot be loaded, or cannot be loaded easily. |
|
|
| The film cover cannot be ejected. |
|
|
| The film cannot be ejected to the end. |
|
|
| The film pack cannot be ejected. |
|
|
Printed pictures
| Problem | Possible Causes | Solution |
| The correct date is not printed. |
|
|
| Part or whole finished print is white. |
|
|
| The picture is blurred. |
|
|
| A black line is printed on the bottom of the finished print. |
|
|
IMPORTANT SAFETY NOTICE
This product has been designed with safety in mind, and to provide safe service when handled correctly and in accordance with the User's Guide and instructions. It is important that both the product and the INSTAX fi lm are handled properly and used only to print pictures as instructed in this User's Guide and in the INSTAX mini fi lm instructions. For your ease and safety, please follow what is written in this User's Guide. It is also a good idea to keep this User's Guide in a safe, easy to fi nd place where you can refer to it if needed.

This symbol indicates danger, which could result in injury or death. Please follow these instructions.
 If the camera (or batteries) become hot, emit smoke or a burnt smell or otherwise seem abnormal, immediately remove the batteries. Faults of this nature could start a fire and cause burns. (Take particular care to avoid burns when removing the batteries or pull out the USB cable.)
If the camera is dropped into water or if water or metal or other foreign objects get inside the camera, immediately remove the batteries, disconnect the AC power adapter and unplug the AC power adapter from the power outlet. Faults of this nature could cause the camera to overheat or catch fire.

Do not use this camera in places where there is flammable gas or near open gasoline, benzine, paint thinner or other unstable substances which can give off dangerous vapors. Faults of this nature could cause the camera to explode or catch fire and cause burns.
Never take the batteries apart. Do not subject them to heat, throw them into an open fire, attempt to recharge them, short-circuit them, drop them, or apply impact to them. Doing so could cause the batteries to explode.
Use only the type of batteries specified in your camera's User's Guide. Faults of this nature could cause the camera to overheat or catch fire. Make sure batteries are stored in a safe, secure place and well out of the reach of any infants, young children or pets. The batteries could be accidentally swallowed by young children or pets. If this occurs, immediately seek medical treatment.
Only use the specified battery designated for use with the camera. In addition, do not use the camera with a power supply voltage other than that indicated. Using other batteries could cause the camera to overheat or catch fire.

 Never attempt to take this product apart. You may be injured.
If anything is wrong with the camera, never attempt to repair it by yourself. You may be injured.
 If this product is dropped or damaged so that the inside is showing, do not touch it. Contact your FUJIFILM dealer.
Do not touch any parts or projecting parts inside the back cover. You may be injured.
Never get this product wet or handle it with wet hands. Doing so may result in an electric shock.
Do not mix new and old batteries or batteries of different types. Also make sure that the battery C and D polarities are correct. A damaged battery or electrolyte leakage may cause a fire, injury, and contaminate the environment.
If the camera will be left unused for a long period (because you are traveling, etc), remove the batteries, disconnect the AC power adapter and unplug the USB cable. Failing to do so could cause a fire.
Do not move the camera while the USB cable is still connected to it. Doing so could damage the USB cable and cause a fi re or electric shock.
Keep out of the reach of small children. This product could cause injury in the hands of a child.
Do not cover or wrap the camera or the AC power adapter in a cloth or blanket. This can cause heat to build up and distort the casing or cause a fire.
When using the camera, make sure that the battery cover is attached; otherwise, you may be injured.

The "CE" mark certifi es that this product satisfi es the requirements of the EU (European Union) regarding safety, public health, environment and consumer protection.("CE" is the abbreviation of Conformité Européenne.)
For customers in the USA:
FCC Statement
This device complies with part 15 of the FCC Rules. Operation is subject to the following two conditions:
- This device may not cause harmful interference, and
- this device must accept any interference received, including interference that may cause undesired operation.
This equipment has been tested and found to comply with the limits for a Class B digital device, pursuant to Part 15 of the FCC Rules.
For customers in Canada:
This Class B digital apparatus complies with Canadian ICES-003.

COMMON SENSE CAMERA CARE
CAMERA CARE
- Your camera is a precision instrument. Do not get it wet or drop it. Also, do not expose it to sand.
- Do not use a strap made for cellular phones or other similar electronic products. These straps are usually too weak to hold your camera securely. For safety, use only straps designed for your camera, and use only as specifi cally intended and instructed.
- When using a tripod, check the strength of the tripod and then mount the camera by turning the tripod instead of the camera body. When mounting the camera to a tripod, be sure not to turn the tripod screw excessively, apply unreasonable force, etc. Also, do not carry the camera while it is mounted to the tripod. Personal injury or camera damage may result.
- If you are not using your camera for a long period, unload the battery and keep it where it will be safe from heat, dust, and moisture.
- Do not use solvent such as thinner and alcohol to remove dirt.
- Keep the fi lm chamber and camera interior clean to avoid damaging fi lms.
- In hot weather, do not leave your camera in hot places such as in a car or on the beach. Do not leave it in damp places for long periods.
- Moth repellent gas such as naphthalene may aff ect your camera and prints. Be careful to keep your camera or prints in a chest or bureau.
- Because your camera is software-controlled, there is the chance that on rare occasions it will malfunction. If you experience incorrect operation, reset by removing the batteries and then reloading them after a while.
- Note that the temperature range within which your camera can be used is +5°C to +40°C (+41°F to +104°F).
- Take great care to ensure that printed materials do not violate copyright, image rights, privacy or other personal rights and do not off end public decency. Actions that violate the rights of others, are contrary to public decency or constitute a nuisance may be punishable by law or otherwise legally actionable.
Cautions during printing

INSTAX SQUARE FILM AND PRINT CARE
See FUJIFILM Instant Film "instax SQUARE" for film use instructions. Follow all instructions for safe and proper use.
- Keep the film in a cool and dry place. Do not leave the film in a place where the temperature is extremely high (e.g., in a closed car) for many hours.
- When you load a film pack, use the film as soon as possible.
- If the film has been kept in a place where the temperature is extremely high or low, bring it to room temperature before starting to print pictures.
- Be sure to use the film before the expiration or "Use Before" date.
- Avoid airport checked luggage inspection and other strong X-ray illumination. The effect of fogging, etc. may appear on unused film. We recommend that you carry the camera and/or the film onto the aircraft as carry-on luggage. (Check with each airport for more information.)
- Avoid strong light, and keep the developed prints in a cool and dry place.
- Do not puncture, tear, or cut INSTAX SQUARE film. If film becomes damaged, do not use.
Cautions on handling the film and prints
For details, refer to the instructions and warnings on FUJIFILM Instant Film "instax SQUARE".

Handling the Battery
- Make sure that you use your camera correctly. Read these safety notes and your User's Guide carefully before use.
- After reading these safety notes, store them in a safe place.
This symbol indicates danger, which could result in injury or death. Please follow these instructions.
This symbol indicates possible damage, which could result in injury to other people or damage to an object. Please follow these instructions. Please handle the product properly.
 Do not use the battery except as specified. Load the battery as shown by the indicator.
Do not heat, change or take the battery apart. Do not drop or subject the battery to big impacts. Do not short-circuit the battery. Do not store the battery with metallic products. Do not charge the battery using a charger other than a specified one. Any of these actions can cause the battery to burst or leak and cause fi re or injury as a result.
Do not use voltages other than the power supply voltage shown. The use of other power sources can cause a fire.
If the battery leaks and fluid gets in contact with your eyes, skin or clothing, flush the affected area with clean water and seek medical attention or call an emergency number right away.
Risk of explosion if battery is replaced by an incorrect type. Dispose of used batteries according to the instructions.
Dispose of used batteries according to the instructions. When discarding, cover the battery terminals with insulation tape. Contact with other metallic objects or batteries could cause the battery to ignite or burst.

When you are cleaning the camera or you do not plan to use the camera for an extended period, remove the battery. Failure to do so can cause a fire or electric shock.
If a problem arises, turn the camera off and remove the battery. Continued use of the camera when it is emitting smoke, is emitting any unusual odor, or is in any other abnormal state can cause a fire or electric shock. Contact your FUJIFILM dealer.
The Battery
The following describes the proper use of batteries and how to prolong their life. Incorrect use can shorten battery life or cause leakage, overheating, fire, or explosion.
The battery is not charged at shipment. Charge the battery completely before use.
Notes on the Battery
The battery gradually loses its charge when not in use. Charge the battery one or two days before use.
Battery life can be extended by turning the camera off when not in use.
Battery capacity decreases at low temperatures; a depleted battery may not function when cold. Keep a fully charged spare battery in a warm place and exchange as necessary, or keep the battery in warm place and insert it in the camera only when shooting. Do not place the battery in direct contact with hand warmers or other heating devices.
Charging the Battery
Charge the battery using the supplied USB cable. Charging times will increase at ambient temperatures below +10°C (+50°F) or above +35°C (+95°F). Do not attempt to charge the battery at temperatures above 40°C (+104°F); at temperatures below +5°C (+41°F), the battery will not charge.
Do not attempt to recharge a fully charged battery. The battery does not however need to be fully discharged before charging.
The battery may be warm to the touch immediately after charging or use. This is normal.
Battery Life
At normal temperatures, the battery can be recharged about 300 times. A noticeable decrease in the length of time the battery will hold a charge indicates that it has reached the end of its service life and should be replaced.
Storage
Performance may be impaired if the battery is left unused for an extended period of time when fully charged. Deplete the battery fully before storing it.
If the camera will not be used for an extended period, remove the battery and store it in a dry place with an ambient temperature of from +15°C to +25°C (+59°F to +77°F). Do not store in locations exposed to high extremes of temperature.
Cautions
- Do not affix stickers or other objects to the battery.
- Do not tear or peel off the external label.
- Keep the terminals clean.
- The battery and camera body may become warm to the touch after extended use. This is normal.
Disposal
Dispose of used batteries according to local regulations.
Certification marks acqured by the camera located inside the film chamber

A lithium ion battery that is recyclable powers the product you have purchased. Please call 1-800-8-BATTERY for information on how to recycle this battery.
In Countries Outside the European Union, Norway, Iceland and Liechtenstein:
If you wish to discard this product including the batteries or accumulators, please contact your local authorities and ask for the correct way of disposal.
Information for traceability in Europe
Manufacturer: FUJIFILM Corporation
Address, City: 7-3, Akasaka 9-Chome, Minato-ku, Tokyo
Country: JAPAN
Authorized representative in Europe: FUJIFILM EUROPE GMBH
Address, City: Dusseldorf Heesenstrasse 31, 40549
Country: Germany
Information for FUJIFILM in the United States
FUJIFILM North America Corp.
200 Summit Lake Drive
Valhalla, New York 10595, USA
Information for FUJIFILM in Canada
FUJIFILM Canada Inc.
600 Suffolk Court, Mississauga, Ontario L5R
4G4
If you have any inquiries about this product, please contact a FUJIFILM authorized distributor, or access the website below.
http://www.fujifilm.com/

Documents / Resources
References
Download manual
Here you can download full pdf version of manual, it may contain additional safety instructions, warranty information, FCC rules, etc.
Advertisement


Need help?
Do you have a question about the instax SQUARE SQ10 and is the answer not in the manual?
Questions and answers