H3C MSR2600 Series Manual
Hide thumbs
Also See for MSR2600 Series:
- Configuration manual (288 pages) ,
- Installation manual (64 pages) ,
- Probe command reference (28 pages)
Table of Contents
Advertisement
Quick Links
Contents
1 Preparing for installation ·········································································· 1-1
Safety recommendations ································································································································ 1-1
Safety symbols ········································································································································ 1-1
General safety recommendations ··········································································································· 1-1
Electricity safety ······································································································································ 1-2
Examining the installation site ························································································································· 1-2
Temperature and humidity ······················································································································ 1-2
Cleanliness ·············································································································································· 1-2
Cooling system ········································································································································ 1-3
ESD prevention ······································································································································· 1-3
EMI prevention ········································································································································ 1-4
Lightning protection ································································································································· 1-4
Rack requirements ·································································································································· 1-5
Installation tools and accessories ··················································································································· 1-5
Pre-installation checklist·································································································································· 1-6
2 Installing the router ·················································································· 2-1
Installation prerequisites ································································································································· 2-1
Installation flowchart········································································································································ 2-1
Installing the router·········································································································································· 2-2
Mounting the router on a workbench ······································································································· 2-3
Mounting the router in a rack ·················································································································· 2-3
Mounting the router on a wall ·················································································································· 2-6
Grounding the router ······························································································································· 2-7
Installing interface modules ··················································································································· 2-11
Installing a 3G SIM card ································································································································ 2-13
Installing a 3G antenna ································································································································· 2-15
Connecting a 3G/4G antenna extension cable to a 3G router ······································································ 2-16
Installing a 4G SIM card ································································································································ 2-17
Installing a 4G antenna ································································································································· 2-19
Connecting a 3G/4G antenna extension cable to a 4G router ······································································ 2-20
Connecting interface cables ·················································································································· 2-21
Logging in from the console port and setting terminal parameters ······················································· 2-22
Connecting the AC power cord ············································································································· 2-25
Verifying the installation ························································································································ 2-27
Starting the router ········································································································································· 2-28
3 Replacement procedure··········································································· 3-1
Replacing an interface module ······················································································································· 3-1
Replacing a SIC ······································································································································ 3-1
Replacing a DSIC ···································································································································· 3-2
Replacing a transceiver module ······················································································································ 3-3
4 Troubleshooting ······················································································· 4-1
Power supply failure ········································································································································ 4-1
Symptom ················································································································································· 4-1
Solution ··················································································································································· 4-1
Fan tray failure ················································································································································ 4-1
Symptom ················································································································································· 4-1
Solution ··················································································································································· 4-1
No display on the configuration terminal ········································································································· 4-2
Symptom ················································································································································· 4-2
Solution ··················································································································································· 4-2
Garbled display on the configuration terminal ································································································· 4-2
Symptom ················································································································································· 4-2
Solution ··················································································································································· 4-2
No response from the serial console port ······································································································· 4-2
i
Advertisement
Table of Contents

Related Manuals for H3C MSR2600 Series


Summary of Contents for H3C MSR2600 Series
-
Page 1: Table Of Contents
Contents 1 Preparing for installation ·········································································· 1-1 Safety recommendations ································································································································ 1-1 Safety symbols ········································································································································ 1-1 General safety recommendations ··········································································································· 1-1 Electricity safety ······································································································································ 1-2 Examining the installation site ························································································································· 1-2 Temperature and humidity ······················································································································ 1-2 Cleanliness ·············································································································································· 1-2 Cooling system ········································································································································ 1-3 ESD prevention ·······································································································································... - Page 2 Symptom ················································································································································· 4-2 Solution ··················································································································································· 4-2 Interface module failure··································································································································· 4-3 Symptom ················································································································································· 4-3 Solution ··················································································································································· 4-3 3G/4G SIM card and 3G/4G antenna failures ································································································· 4-3 Symptom ················································································································································· 4-3 Solution ··················································································································································· 4-3 Restoring the factory settings ························································································································· 4-3 Scenario 1 ··············································································································································· 4-3 Scenario 2 ···············································································································································...
-
Page 3: Preparing For Installation
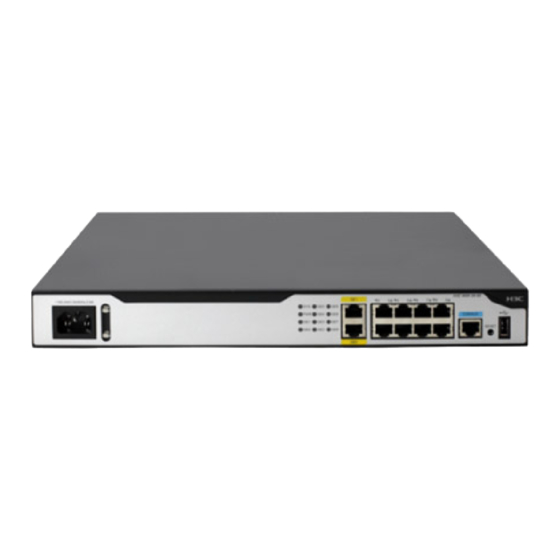
Preparing for installation This document is applicable to the router models in Table1-1. Table1-1 H3C MSR2600 router series models Model (marked on the front panel) Product code RT-MSR2600-5-GU-CNDE RT-MSR2600-5-GT-CNDE H3C MSR 26-00 RT-MSR2600-5-LM-CNDE RT-MSR2600-10 RT-MSR2600-17 H3C MSR 26-30 RT-MSR2630 RT-MSR2600-6-X1... -
Page 4: Electricity Safety
Electricity safety • Locate the power-off switch in the equipment room before installation. Shut off the power immediately if an accident occurs. Disconnect the power cord from the router if necessary. • Make sure the router is reliably grounded. • Connect the interface cables correctly. -
Page 5: Cooling System
Substance Concentration limit (particles/m NOTE: Dust diameter ≥ 5 µm The equipment room must also meet limits on salts, acids, and sulfides to eliminate corrosion and premature aging of components, as shown in Table1-4. Table1-4 Harmful gas limits in an equipment room Maximum concentration (mg/m 0.006 0.05... -
Page 6: Emi Prevention
• Take dust-proof measures for the equipment room. • Maintain the humidity and temperature levels in the acceptable range. • Always wear an ESD wrist strap and an ESD garment when touching a circuit board or transceiver module. • Place the removed interface module on an antistatic workbench with the circuit board upward, or put it in an antistatic bag. -
Page 7: Rack Requirements
Rack requirements To install the router in a rack, make sure the rack meets the following requirements: • The rack has a good ventilation system. • The rack is sturdy and can support the router and its accessories. • The rack has a size that can accommodate the router. •... -
Page 8: Pre-Installation Checklist
Figure1-3 Installation accessories M6 screw (user MSR2600-6-X1/MSR2600-10- MSR2660-XS M4 screw supplied for the X1/MSR2600-15-X1/MSR2600-15-X1- mounting MSR2630E- brackets T/MSR2630/MSR2630E-X1/MSR2630- X1/MSR2660-XS) XS/MSR2680-XS/MSR2600-10/MSR2600- 17 mounting brackets MSR2600-6-X1/MSR2600- 15-X1/MSR2600-15-X1- MSR2600- Cage nut T/MSR2630-XS/MSR2660- 10/MSR2600- Console cable Power cord (user 17/MSR2600-10-X1 XS/MSR2680- supplied) power cord retainer clip XS/MSR2630E-X1 releasable cable tie MSR2600-6-X1/MSR2600-10-... - Page 9 Item Requirements • Dust-proof measures are taken in the equipment room. • Humidity and temperature are maintained at acceptable levels. • An ESD wrist strap and ESD garment are available. • An anti-static workbench and anti-static bags are available. • A single-phase three-wire power receptacle with protection earth (PE) is available for filtering interference from the power grid.
-
Page 10: Installing The Router
• Keep the tamper-proof seal on a mounting screw on the chassis cover intact, and if you want to open the chassis, contact H3C for permission. Otherwise, H3C shall not be liable for any consequence. -
Page 11: Installing The Router
Figure2-1 Installation flowchart Start Rack-mounting Workbench-mounting Determine the installation position Wall-mounting Mount the router on a Mount the router on a Mount the router in a rack workbench wall Ground the router Install interface modules Install SIM cards Connect interface cables Connect the router to a configuration terminal Connect the power cord... -
Page 12: Mounting The Router On A Workbench
Router dimensions and rack requirements The MSR2660-XS router is small and does not have rack requirements. For information about the dimensions of the MSR2660-XS router, see H3C MSR 2600 Router Series Hardware Information and Specifications. Table2-1 Router dimensions and rack requirements... - Page 13 Router model Chassis dimensions Rack requirements 60 mm (2.36 in) for connecting the E1 cable at the rear • Height—44.2 mm (1.74 in)/1 RU • A minimum of 0.6 m (1.97 ft) in • Width—360 mm (14.17 in) depth (recommended) •...
- Page 14 Installing the router in a rack CAUTION: The mounting brackets can support only the weight of the router. Do not place objects on the router. To install the router in a rack: Use a mounting bracket to mark the cage nut installation holes in the front rack posts. Make sure the cage nut installation holes on the front rack posts are on a horizontal line.
-
Page 15: Mounting The Router On A Wall
Figure2-5 Attaching mounting brackets to the router Use M6 screws to attach the mounting brackets on the router to the front rack posts. Figure2-6 Securing the router to the rack Mounting the router on a wall Only the MSR2600-5-GU-CNDE, MSR2600-5-GT-CNDE, and MSR2600-5-LM-CNDE routers can be mounted on a wall. -
Page 16: Grounding The Router
Torque a screw into each anchor. Leave at least 1.5 mm (0.06 in) between the screw head and the wall. Hang the router on the screws. Make sure the network ports face downwards and the sides with air vents are perpendicular to the ground. - Page 17 Use the needle-nose pliers to secure the metal part of the cable to the ring terminal end. Cover the joint with the insulation covering. User the blower dryer to dry the insulation covering. Make sure the insulation covering fully covers the joint. Figure2-8 Attaching the ring terminal Grounding cable Ring terminal...
- Page 18 Figure2-9 Connecting the grounding cable to the router...
- Page 19 Figure2-10 Grounding the router through the grounding terminal on the rack Grounding the router with a grounding strip If a grounding strip is available at the installation site, connect the grounding cable to the grounding strip. To ground the router with a grounding strip: Remove the grounding screw from the grounding hole in the rear panel of the chassis.
-
Page 20: Installing Interface Modules
Figure2-11 Grounding the router with a grounding strip Grounding the router by burying a grounding conductor in the earth ground If the installation site does not have any grounding strips, but earth ground is available, hammer a 0.5 m (1.64 ft) or longer angle iron or steel tube into the earth ground to serve as a grounding conductor. - Page 21 Figure2-12 Removing the filler panel from a SIC slot Figure2-13 Installing a SIC Installing a DSIC CAUTION: Do not hot swap DSICs. Make sure the router is powered off before installing a DSIC. You can only install DSICs on an MSR2630 router. To install a DSIC: Remove the screws on the filler panels in slot 1 and slot 2 of the router to remove the filler panels.
-
Page 22: Installing A 3G Sim Card
Figure2-15 Removing the slot divider Insert the DSIC into the slot and push it along the slide rails until it makes close contact with the backplane of the router. Figure2-16 Installing a DSIC Fasten the captive screws to secure the DSIC. Installing a 3G SIM card CAUTION: •... - Page 23 Figure2-17 Removing the 3G SIM card socket cover Push the 3G SIM card holder in the direction marked "OPEN" so the holder projects upwards. Do not insert the 3G SIM card to the card holder before projecting the card holder up or lift the holder forcibly.
-
Page 24: Installing A 3G Antenna
Figure2-19 Installing the 3G SIM card Position the 3G SIM card socket cover and fasten the screws on the cover. Figure2-20 Installing the 3G SIM card socket cover Installing a 3G antenna One 3G antenna per 3G module is provided with the router. Purchase one if you need to install two antennas. -
Page 25: Connecting A 3G/4G Antenna Extension Cable To A 3G Router
To install a 3G antenna: Change the angle of the antenna orientation from vertical to horizontal. Attach the antenna to the router, as shown in Figure2-21. Avoid over-tightening. Change the antenna orientation to vertical to achieve better signal coverage. Figure2-21 Installing a 3G antenna MAIN Connecting a 3G/4G antenna extension cable to a 3G router... -
Page 26: Installing A 4G Sim Card
Figure2-22 Installing the 3G/4G antenna extension cable Male connector 3G/4G antenna extension cable M2.9 Antenna bracket Installing a 4G SIM card CAUTION: • To avoid damage to the 4G SIM card holder, do not use excessive force when installing the 4G SIM card. - Page 27 Figure2-23 Removing the 4G SIM card socket cover Push the 4G SIM card holder in the direction marked "OPEN" so the holder projects upwards. Do not insert the 4G SIM card to the card holder before projecting the card holder up or lift the holder forcibly.
-
Page 28: Installing A 4G Antenna
Figure2-25 Installing the 4G SIM card Position the 4G SIM card socket cover and fasten the screws on the cover. Figure2-26 Installing the 4G SIM card socket cover Installing a 4G antenna Only the MSR2600-5-LM-CNDE router supports 4G antenna installation. To install a 4G antenna: Change the angle of the antenna orientation from vertical to horizontal. -
Page 29: Connecting A 3G/4G Antenna Extension Cable To A 4G Router
Change the antenna orientation to vertical to achieve better signal coverage. Figure2-27 Installing a 4G antenna 4G antenna Connecting a 3G/4G antenna extension cable to a 4G router A 3G/4G antenna extension cable is not provided with the router. To use a 3G/4G antenna extension cable, purchase it separately. -
Page 30: Connecting Interface Cables
Examine the port LED on the router to verify the connectivity. For more information about the LEDs, see LED description in H3C MSR 2600 Router Series Hardware Information and Specifications. Figure2-29 Connecting a copper port to a computer... -
Page 31: Logging In From The Console Port And Setting Terminal Parameters
Holding both sides of the transceiver module, insert the transceiver module slowly into the port. Identify the Rx and Tx ports on the transceiver module. Use the optical fiber to connect the Rx port and Tx port on the transceiver module to the Tx port and Rx port on the peer end, respectively. - Page 32 Click the following link, or copy it to the address bar on the browser to log in to download page of the USB console driver, and download the driver. http://www.h3c.com/en/home/USB_Console/ Select a driver program according to the operating system you use: XR21V1410_XR21B1411_Windows_Ver1840_x86_Installer.EXE—Applicable to 32-bit...
- Page 33 Figure2-33 Device Driver Installation Wizard Click Continue Anyway if the following dialog box appears. Figure2-34 Software Installation Click Finish. 2-24...
-
Page 34: Connecting The Ac Power Cord
Figure2-35 Completing the device driver installation wizard Setting configuration terminal parameters To configure and manage the router through the console port, you must run a terminal emulator program, TeraTermPro or PuTTY, on your PC. You can use the emulator program to connect a network device, a Telnet site, or an SSH site. - Page 35 Figure2-36 Connecting the AC power cord for an MSR2600-5-GU-CNDE, MSR2600-5-GT- CNDE, or MSR2600-5-LM-CNDE router Figure2-37 Connecting the AC power cord for an MSR2630 router 2-26...
-
Page 36: Verifying The Installation
Figure2-38 Connecting the AC power cord for an MSR2600-6-X1, MSR2600-15-X1, MSR2600- 15-X1-T, MSR2630-XS, MSR2660-XS, MSR2680-XS, or MSR2630E-X1 router Figure2-39 Connecting the AC power cord for an MSR2600-10, MSR2600-17, or MSR2600-10- X1 router Verifying the installation Verify the following items before you power on the router: •... -
Page 37: Starting The Router
Press Ctrl+D to access BASIC-BOOTWARE MENU... Booting Normal Extended BootWare The Extended BootWare is self-decompressing..Done. **************************************************************************** H3C MSR2600-10-x1 BootWare, Version 1.07 **************************************************************************** Copyright (c) 2004-2017 New H3C Technologies Co., Ltd. Compiled Date : May 6 2015 CPU ID : 0x1... - Page 38 Loading file flash:/msr2600-10-X1-cmw710-security-e0006p05.bin...Done. Loading file flash:/msr2600-10-X1-cmw710-voice-e0006p05.bin..Done. Loading file flash:/msr2600-10-X1-cmw710-data-e0006p05.bin..Done. Loading file flash:/msr2600-10-X1-cmw710-boot-e0006p05.bin....Done. Image file flash:/msr2600-10-X1-cmw710-boot-e0006p05.bin is self-decompressing ..Done. System image is starting... Line aux0 is available. Press ENTER to get started. Press Enter. The router is ready to configure when you see the following prompt: <Sysname>...
-
Page 39: Replacement Procedure
Replacement procedure Replacing an interface module Replacing a SIC CAUTION: • Only the SIC-4G-CAT6 and SIC-5G interface modules are hot swappable. To replace an interface module other than a SIC-4G-CAT6 or SIC-5G, make sure the router is powered off. • To avoid unexpected system reboot caused by removal of a SIC-4G-CAT6 or SIC-5G interface module, use the following procedure to remove a SIC-4G-CAT6 or SIC-5G module: remove a. -
Page 40: Replacing A Dsic
Replacing a DSIC CAUTION: Do not hot swap DSICs. Make sure the router is powered off before installing a DSIC. To replace a DSIC: Completely loosen the captive screws on the DSIC. Gently pull the DSIC out along the slide rails. Figure3-3 Removing a DSIC Install a new DSIC. -
Page 41: Replacing A Transceiver Module
Figure3-5 Installing filler panels Replacing a transceiver module Only the MSR2600-6-X1, MSR2600-15-X1, MSR2600-15-X1-T, MSR2630-XS, MSR2630E-X1, MSR2660-XS, MSR2680-XS, and MSR2600-17 routers support transceiver modules. To replace a transceiver module: Remove the optical fibers from the transceiver module. Release and pull down the bail latch on the transceiver module. Hold the bail latch to pull the transceiver module straight out. -
Page 42: Troubleshooting
• Keep the tamper-proof seal on a mounting screw on the chassis cover intact, and if you want to open the chassis, contact H3C for permission. Otherwise, H3C shall not be liable for any consequence. -
Page 43: No Display On The Configuration Terminal
Flow control—None. Emulation—VT100. Verify that the console cable is in good condition. If the issue persists, contact H3C Support. Garbled display on the configuration terminal Symptom The configuration terminal has garbled display when the router is powered on. Solution To resolve the issue: Verify that the Data bits field is set to 8 for the terminal. - Page 44 Verify that the serial console cable is in good condition. Verify that the port settings are correct. If the issue persists, contact H3C Support. Interface module failure Symptom An interface module is installed in the router, but the LED for the interface module is not on after the router is powered on.
- Page 45 Solution If you are not to save the configuration, press the RESET button for over four seconds to restore the factory settings. Then you can use the initial username and password to access the router. If you are to save the configuration and a console cable is available, you can access the router from the BootWare menu.
Need help?
Do you have a question about the MSR2600 Series and is the answer not in the manual?
Questions and answers