HYPERVOLT Home 3.0 Operation And Installation Manual
Hide thumbs
Also See for Home 3.0:
- Quick start manual (8 pages) ,
- Quick start manual (7 pages) ,
- Operation & installation manual (31 pages)
Table of Contents
Advertisement
Quick Links
Advertisement
Table of Contents

Related Manuals for HYPERVOLT Home 3.0


Summary of Contents for HYPERVOLT Home 3.0
- Page 1 Home 3.0 Operation and Installation Manual...
-
Page 2: Table Of Contents
Contents Introduction Safety Notice Getting to Know Your Hypervolt Product Overview Technical Specification Installation Getting Started Enclosure Parts Mounting the Charger Accessing the Connections Wiring and Cabling Mains CT Connection Connecting the LED Plate Fitting the Front Enclosure Monitoring and Protection Devices... - Page 3 Introduction Thank you for choosing Hypervolt, our team know you will be pleased by the ease of install and amazing functionality of your new Home 3.0 Smart EV Charger. Hypervolt aims to provide customers with state-of-the-art equipment embracing industry leading smart features backed up by excellent customer service.
- Page 4 Legal Notice This document is intended to be used as a reference guide for the installation and operation of the Hypervolt Home 3.0 EV Charger. The product images shown are for illustration purposes only and may not be an exact representation of the product. Hypervolt Limited reserves the right to make changes to the specifications and processes of the product and documentation at any time and without prior notice.
-
Page 5: Product Overview
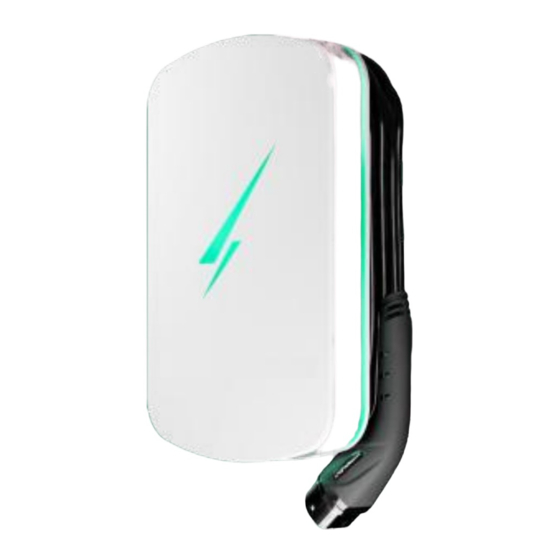
Getting to know your Hypervolt Product Overview 243mm Outer Ring LED Status Indicator LED Status 328mm Indicator Charging Cable Charging Plug 101mm What comes in the box TETHERED CHARGING CABLE CT CLAMP CONNECTOR BLOCK CHARGING CABLE HOLSTER ENCLOSURE SCREWS CHARGING UNIT... -
Page 6: Technical Specification
Getting to know your Hypervolt Technical Specification Product Information Connectivity Model: Home 3.0 WiFi: Wi-Fi 802.11b/g/n @2.4 GHz | Bluetooth:Bluetooth LE (Version 4.2) Connection Capacity: Single Phase, 7kW AC Safety Charging Connector: Tethered, IEC 62196/Type 2 OR SAE J1772/Type 1 Tethered Cable Length (m): 5 / 7.5 / 10 RCD Protection: Internal 6mA DC RCD (External AC Protection Required, “A”... -
Page 7: Getting Started
Vehicle Charging Equipment Installation” (as amended) by the IET must also be followed. ‣ If you are unsure about any part of the installation of a Hypervolt product you must obtain clarification from our technical department before proceeding. ‣ After installation and within 48hrs the unit must be registered as having been installed. -
Page 8: Enclosure Parts
Installation Enclosure Parts - Back Box - LED Plate - Front Cover... -
Page 9: Mounting The Charger
STEP 1 Remove the drill template and lift the Hypervolt out of the box. Separate the front cover putting it safely to one side. Leave the LED Plate attached. Find a clean flat surface protected from extremes of weather if possible (Discolouration of the enclosure may happen if exposed to strong UV light for extended periods). - Page 10 Installation Mounting the Charger STEP 2 Insert the bottom 2 screws (14) then tighten all 4 up pinching the unit up to the wall (do not over tighten or distort the back box). Make sure the unit is level and adjust if required.
-
Page 11: Accessing The Connections
STEP 3 The Hypervolt has an LED plate (B) which should be removed to access the connections and then replaced before the front cover (C) is fitted. To remove simply pull up on the top two tabs up and unhook the plate. -
Page 12: Wiring And Cabling
Wiring and Cabling Be sure the method you use to supply electricity to the Hypervolt is compliant with The BS7671 Wiring Regulations, particular attention should be given to section 722. Remember external RCD’s must be as a minimum Type “A”, individual and double pole (Including RCBO’s). SPD’s should be fitted with consideration given to wether a type 1 or type 2 device would be more suitable The Hypervolt requires two types of connections;... -
Page 13: Mains Ct Connection
A separate consumer unit spurred into the existing meter tails is installed just for the use of the Hypervolt unit. HyperConnect (1 Wire Method Orange cable only) is run from the Hypervolt unit and a joint made within the consumer unit to the CT Clamp. If you are not using HyperConnect then run a separate supply cable and separate Cat5 cable for the CT (2 wire method Orange &... -
Page 14: Connecting The Led Plate
STEP 7 Once you have finished wiring your Hypervolt charger, you will need to re-fit the LED plate (B). First click together the white square cable joint. Put the top two tabs of part (B) over their locators on the top side of the back box (A). Now pull down on the middle bottom edge of part (B) and click the bottom into place. Take... -
Page 15: Fitting The Front Enclosure
Installation Fitting the Front Enclosure STEP 8 Lastly slide the front cover (C) over parts A & B and secure using the four M4 screws supplied. A small amount of pressure will be required on the front to compress the seal and line the holes up. Please take care not to cross thread the screws which only need to be hand tight, never use powered screwdrivers. -
Page 16: Monitoring And Protection Devices
An RCD is a safety device used to ensure that the charger stops supplying electricity in the event that there is an electrical fault to earth. The Hypervolt has built-in 6mA DC protection but no built-in AC protection, it must therefore be connected to an individual “A” Type Double Pole RCD or RCBO not exceeding 30mA;... -
Page 17: Automated Load Management (Alm)
Automated Load Management ALM (Automatic Load Management) Hypervolt's Automatic Load Management control is used to safety adjust the maximum charging current an EV can take to prevent the charging device being responsible for overloading the electrical service to a property. -
Page 18: Maximum Operating Current
Maximum Operating Current It is possible to limit the maximum current the Hypervolt Home 3.0 will operate at by permanently derating the unit using the internal dip switches. This is called a “Hard Set” as opposed to a “Soft Set” which can be done from the App. -
Page 19: Led Statuses
Flashing LED: A Locked solar export (Super Eco The unit is no longer charger is trying to be Mode Only) charging your car. used. Pulsing LED: Charger Check status in the stopped from app. Hypervolt App and refer to troubleshooting on page 26. -
Page 20: Setting Up The App
Using your Charger Setting up the App We recommend installing the Hypervolt App, this enables you to control and monitor the charger. The If your Hypervolt has been installed by a “Hypervolt Trusted Installer” they will do this part for you. You app is free and can be downloaded from either the Google Play Store (Android) or App Store (Apple). - Page 21 LED ring around the any of the functions from anywhere in the Fi network you wish to connect your Hypervolt to, type in Hypervolt will change from pulsing white to world so long as your phone has an the password and hit “Connect.
-
Page 22: App Basics
Using your Charger App Basics The information below should help you get started with the basics of using your charger with the Hypervolt app. A more in depth guide is available on our website. Settings Adopted chargers (see page 20 for more details) See here for the charger you are controlling. -
Page 23: App Settings
If you need to adjust the Wi-fi connection your charger is linked to, Key information about your charger can do so here. Under ‘Your Hypervolt’ you can view unique information related to your charger, this is especially useful when you need help with support and being able to un-adopt the charger. -
Page 24: Charging Modes
(see page _). switch between plug and charge and scheduling modes. Scheduled Charging You can use Schedule charging mode to select when your Hypervolt charges your car maybe to match up with a cheap rate tariff. Plug and Charge Solar Charging... -
Page 25: Hypervolt Dashboard
Using your Charger Hypervolt Dashboard What is the Hypervolt Dashboard ? Using the Hypervolt Dashboard, you can access limited information and controls to your charger through your laptop/desktop web browser. Accessing the Hypervolt Dashboard Go to www.hypervolt.co.uk and in the top right corner click the ‘Sign... -
Page 26: Connecting Online Via Hotspot
Connecting to the hotspot Next open your browser i.e. Safari or Google Chrome and type in the address bar ‘hypervolt.energy’. It should display a list of available WiFi connections, select the one you need to connect to and enter your WiFi password. -
Page 27: Regulations And Security
Note to Installers: Any default settings changed to enable testing of the Hypervolt Unit must be set back to the default setting upon completion of the installation. Setting - Your Hypervolt - Default Schedule and Random Start - Both Set to On. -
Page 28: Troubleshooting Guide
1. The charger looks off and no lights are showing This could mean that there is no power reaching your Hypervolt device. Usually as simple as a circuit breaker that is off or has tripped. Please check the circuit breaker and make sure that it is ON. Press the test button on an RCD/RCBO style circuit breaker to test that it works. - Page 29 7. The charger is displaying a pulsing red colour The Hypervolt Home device has detected a problem during your charge session. Firstly try reseting the charger by turning it off then back on after 5 minutes. If the problem persists contact Hypervolt support.
-
Page 30: Contact Us
Diagram supplied are as examples and may differ or not be the full representation of the product that you have. This document can be subject to change at anytime without notice. You can find the latest version of the manual at support.hypervolt.co.uk.
Need help?
Do you have a question about the Home 3.0 and is the answer not in the manual?
Questions and answers