Advertisement
Available languages
Available languages
Quick Links
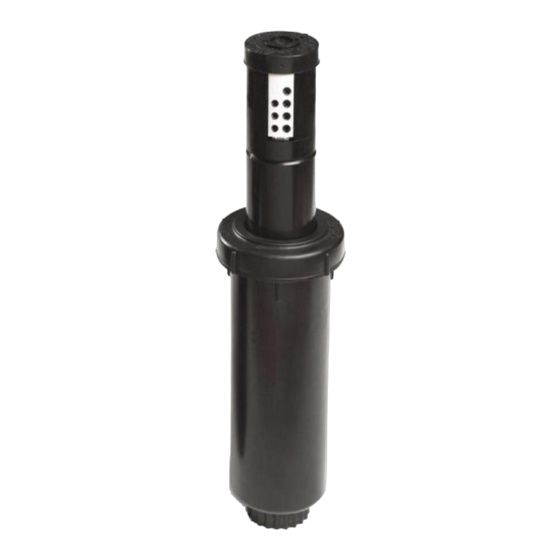
The V-1550 sprinkler is factory preset to 3 GPM (11 l/mn), 180° arc (part circle models) and 25° trajectory. To adjust these settings, use the following procedures.
Adjust Flow
1
Flow is adjustable from 1 to 9 GPM (4 to 34 l/mn)
• Factory preset to 3 GPM (11 l/mn)
Tip – Flow adjustment can be made
wet or dry.
1. Insert edge of Toro tool (provided)
into slot of flow adjust ring.
2. While holding top of nozzle with
thumb, turn flow adjust ring in
either direction to align arrow with
desired flow rate number.
3
Install Sprinkler and Check Arc Setting
1. Install and tighten sprinkler onto a
aligning arrow on cover with left watering border.
2. To check arc setting during operation, turn nozzle in
direction of rotation, releasing just before end of
arc – observe reversing point. To quickly
change direction of rotation, turn nozzle
slightly beyond the arc border to actuate
the reversing mechanism.
3. Fine tune arc setting by turning arc
adjustment slot right to increase or left
to decrease.
A
DJUSTMENT
2
+
–
1
3
⁄
" threaded fitting
4
3
11
I
NSTRUCTIONS
Adjust Arc (part circle models)
2
Arc is adjustable from 40° to 360°
• Factory preset to 180°
• Only right side of arc
is adjustable
Tip – Arc can be adjusted wet
or dry. Turn nozzle to left stop
before changing arc.
1. Insert Toro tool into small slot in nozzle top.
2. To increase arc: turn tool right (clockwise).
To decrease arc: turn tool left (counterclockwise).
(Full turn changes arc 180°; Half turn changes arc 90°)
4
Adjust Radius/Trajectory
Trajectory is adjustable from 7° to 25°
• Factory preset to 25°
1. Insert Toro tool through radius adjust-
ment hole in top of nozzle cover.
2. To decrease (–), turn tool right (7° min.).
To increase (+), turn tool left (25° max.).
Tip – 7° setting is not recommended for
newly seeded areas.
TM
2
1
–
+
Advertisement

Related Manuals for Toro MultiMatrix V-1550


Summary of Contents for Toro MultiMatrix V-1550
- Page 1 2. While holding top of nozzle with thumb, turn flow adjust ring in 1. Insert Toro tool into small slot in nozzle top. either direction to align arrow with 2. To increase arc: turn tool right (clockwise).
- Page 2 2. Insert sprinkler assembly into body. as shown. Remove Snap Ring Install Rubber Cover 1. Insert Toro tool into snap ring slot until Alignment gray interlocking ring beneath snap ring Keys V-1550-4 1. For part circle is pressed down.
- Page 3 Caudal. do antes de cambiar el arco. 2. Mientras sostiene la parte supe- 1. Introduzca la herramienta Toro en la pequeña rior de la boquilla con el pulgar, gire ranura situada en la parte superior de la boquilla. el anillo de Ajuste del Caudal en un 2.
- Page 4 3. Tuerza el anillo de retención el labio de retención y sáquelo. del cuerpo para asegurarla en 4. Retire el conjunto aspersor de posición. su cuerpo. © 2000 THE TORO COMPANY • IRRIGATION DIVISION FORMULARIO NO. IMPRESO EN LOS EE.UU. 368-0095 REV. E...
- Page 5 2. Tout en tenant l’extrémité de la 1. Insérez l'outil Toro dans la fente de réglage, dans la partie supérieure de la buse. buse avec le pouce, faites tourner l’anneau de réglage du débit dans la...
- Page 6 2. Insérez l’ensemble mécanisme/porte-buse dans le corps. du corps de l’arroseur comme indiqué ci-contre. Retirez le circlips Installez le couvercle de 1. Insérez l’outil Toro dans la fente du circlips jusqu’à l’enfoncement de protection en V-1550-4 l’anneau gris de verrouillage situé...
- Page 7 Wurfsektors nach links bis zum festhalten und den Durchflußeinstellring in Anschlag drehen. die gewünschte Richtung drehen, um 1. Das Toro-Werkzeug in den kleinen Schlitz oben auf den Pfeil auf die der Düse stecken. gewünschte Durchflußmengenzahl 2. Zur Vergrößerung des Wurfsektors das Werzeug nach rechts einzustellen.
- Page 8 3. Den Sprengring heraus- auf dem Regnerkörper drehen. ausrichten. 2. Die Abdeckung fest 4. Den Montagesatz vom auf den Rand des Regnerkörper entfernen. Regnerkörpers drücken. V-1550-12 © 2000 THE TORO COMPANY • BEWÄSSERUNGSABTEILUNG FORMULAR NR. PRINTED IN U.S.A. 368-0095 REV. E...
- Page 9 1. Inserire l'utensile Toro nella piccola fessura al centro della parte superi- 2. Con il pollice mantenere in posizione ore dell’ugello. l’ugello e ruotare, quindi, la ghiera di regolazione della portata, indifferente- 2.
-
Page 10: Istruzioni Per La Manutenzione
3. Torcere l’anello a scatto fino 2. Installare la protezione a staccarlo. sul corpo dell’irriga- 4. Rimuovere il gruppo motore dal tore premendo a fondo. corpo dell’irrigatore. © 2000 THE TORO COMPANY • DIVISIONE IRRIGAZIONE MODULO N. PRINTED IN U.S.A. 368-0095 REV. E...