Advertisement
Quick Links
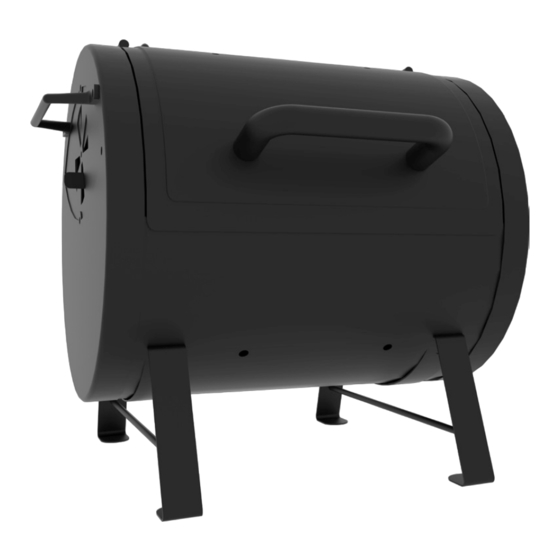
OWNER'S MANUAL
Portable Tabletop OR
Side Fire Box™
Model #72424
Keep your receipt with this manual for
Warranty.
CUSTOMER SERVICE
1-912-638-4724
Service@CharGriller.com
Contents of this manual are Trademarked and Copyrighted by Char-Griller | A&J Manufacturing.
Using the information contained in this manual without consent of Char-Griller and/or A&J
Manufacturing is strictly prohibited.
OM_72424_ED_ A.1
Advertisement

Related Manuals for Char-Griller Side Fire Box 72424


Summary of Contents for Char-Griller Side Fire Box 72424
- Page 1 Keep your receipt with this manual for Warranty. CUSTOMER SERVICE 1-912-638-4724 Service@CharGriller.com Contents of this manual are Trademarked and Copyrighted by Char-Griller | A&J Manufacturing. Using the information contained in this manual without consent of Char-Griller and/or A&J Manufacturing is strictly prohibited. OM_72424_ED_ A.1...
- Page 2 TABLE OF CONTENTS Safety Warnings & Warranty....... A-1 Assembly Instructions ........B-1 Table Top Grill ..........B-1 Side Fire Box ..........B-6 Product Usage ..........C-1 Recipes .............. D-1 Accessories ............E-1...
- Page 3 You have purchased a product that can be used as EITHER a Portable Table Top Charcoal Grill as a mounted side fire box on a Char-Griller barrel grill. Assembly instructions for use as a Portable Table Top Grill can be found on page B-1.
- Page 4 This Page Intentionally Left Blank...
-
Page 5: Important Safety Warnings
IMPORTANT SAFETY WARNINGS READ ALL SAFETY WARNINGS AND INSTRUCTIONS CAREFULLY BEFORE ASSEMBLING AND OPERATING YOUR GRILL Read the following instructions carefully and be sure your appliance is properly assembled, installed, and maintained. Failure to follow these instructions may result in serious bodily injury and/or property damage. -
Page 6: Register Your Grill
Customer Service at 1-912-638-4724. Registration provides important protections: 1. In the extremely unlikely event of a product recall Char-Griller can easily contact you and rectify the issue. 2. If a warrantied part is broken or missing we can send you the needed parts promptly. - Page 7 This grill has been made according to the highest of quality standards. If you have any questions that are not addressed in this manual or if you need parts please call our Customer Service Department at 1-912-638-4724 (USA) or email Char-Griller at: Service@CharGriller.com and have your serial number handy.
-
Page 8: Warranty Information
SURFACE RUST IS NOT CONSIDERED A MANUFACTURING OR MATERIALS DEFECT Char-Griller grills are made of steel and if exposed to the elements rust will occur naturally. Please refer to the section entitled, “Usage” to review how to care for your grill properly. - Page 9 ASSEMBLY INSTRUCTIONS PORTABLE TABLE TOP GRILL PARTS LIST AND TOOLS REQUIRED (Tools Not Included) Pliers 7/16" nut driver Phillips Head Screwdriver 10 pcs 20 pcs Bezel 2 pcs. Wing Nuts 2 pcs. Parts List: 1 Cooking Chamber 2 Damper Circle 2 Cast Iron Grates 2 Metal Rod Handle 1 Front Handle...
- Page 10 Step 1 Attach LEGS to GRILL BODY with four (4) 1/2” HEX BOLTS and four (4) HEX NUTS, see below. Grill Body Hex Nuts Hex Bolts Legs Step 2 Attach HANDLE and BEZELS to SFB HOOD with two (2) 1/4” WING NUTS and two (2) LOCK WASHERS.
- Page 11 Step 3 Attach WIRE HANDLE to GRILL BODY with four (4) HEX BOLTS and four (4) HEX NUTS, see below. Hex Bolts Wire Handle Wire Handle Hex Bolts Hex Nuts Step 4 Attach DAMPER CIRLCE to GRILL BODY with one (1) 3/4” HEX BOLTS, one (1) FLAT WASHER, one (1) LOCK WASHER, and one (1) HEX NUT.
- Page 12 Step 5 Attach DAMPER CIRCLE to the ASH DRAWER with 3/4” HEX BOLT, FLAT WASHER, LOCK WASHER, and HEX NUT, see below. Damper Circle Hex Nut Lock Nut Ash Drawer Flat Washer Hex Bolt Step 6 Attach U HANDLE to ASH DRAWER with two (2) LOCK WASHERS and two (2) HEX NUTS. Lock Washers Hex Nuts Ash Drawer...
- Page 13 Step 8 Place FIRE GRATE onto ASH DRAWER then slide it into GRILL BODY. Grill Body Fire Grate Ash Drawer Step 9 Place COOKING GRATES onto the GRILL BODY. Grill Body Cooking Grates...
- Page 14 ASSEMBLY INSTRUCTIONS SIDE FIRE BOX PARTS LIST AND TOOLS REQUIRED (Tools Not Included) Pliers 7/16" nut driver Phillips Head Screwdriver Hammer 10 pcs 20 pcs Bezel 2 pcs. Wing Nuts 2 pcs. Parts List: 1 Cooking Chamber 2 Damper Circle 2 Cast Iron Grates 2 Metal Rod Handle 1 Front Handle...
- Page 15 Step 1 Remove the FILLER PLATES from the SFB and main GRILL BODY that you plan to install the SFB onto. Grill Body Filler Plates Step 2 Attach SFB to main GRILL BODY. With a helper align the SFB in place over the opening on the grill body then attach with six (6) 1/2”...
- Page 16 Step 3 Attach SPACER TUBES in between SFB and SIDE BRACE and secure with two (2) 2” HEX BOLTS and HEX NUTS. The HEX BOLTS should go through from the SFB side, see below. Align the SPACER TUBES with the corresponding holes on the leg brace and SFB. Insert the 2” HEX BOLT through the SFB then through the SPACER TUBE , and finally through the LEG BRACE.
- Page 17 Step 5 Attach HANDLE and BEZELS to SFB HOOD with two (2) 1/4” WING NUTS and two (2) LOCK WASHERS. Handle Lock Washers Wing Nuts Step 6 Attach DAMPER CIRCLE to the ASH DRAWER with 3/4” HEX BOLT, FLAT WASHER, LOCK WASHER, and HEX NUT, see below.
- Page 18 Step 8 Tighten ALL BOLTS and NUTS. Insert a 1/2” BOLT and tighten with a NUT for any open holes in GRILL BODY after assembly. Step 9 Place FIRE GRATE onto ASH DRAWER then slide it into SFB. Fire Grate Ash Drawer Step 10 Place COOKING GRATES onto SFB.
- Page 19 OPERATING INSTRUCTIONS Setting Up Set grill up on solid, flat surface with adequate wind shelter. Do not move grill while hot, and do not leave unattended during operation. This appliance is designed for use outdoors, away from any flammable materials. It is important that there are no overhead obstructions and that there is a minimum distance of 3 feet (90cm) from the side or rear of the appliance.
-
Page 20: Lighting Instructions
Lighting Instructions 1. To start a charcoal fire, stack 15 or so briquettes in a pyramid and saturate with lighter fluid. NOTE: Do not use gasoline, kerosene or alcohol for lighting charcoal. Use of any of these or similar products could cause an explosion possibly leading to severe bodily injury. 2.
Need help?
Do you have a question about the Side Fire Box 72424 and is the answer not in the manual?
Questions and answers