Table of Contents
Advertisement
Quick Links
Advertisement
Table of Contents

Related Manuals for Leica M525 F20/CT20


Summary of Contents for Leica M525 F20/CT20
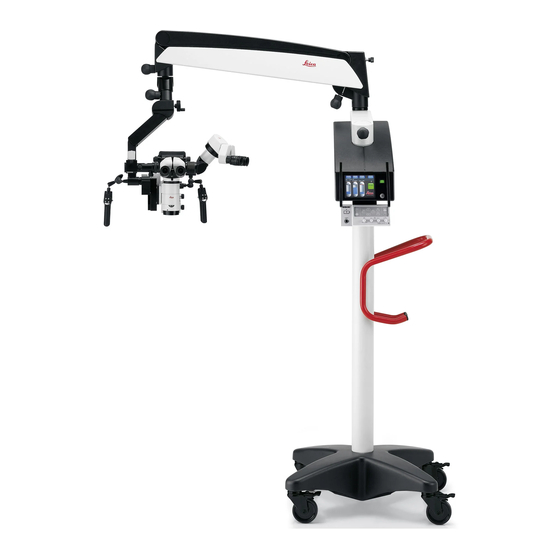
- Page 1 Leica M525 F20/CT20 User Manual 10 715 156 – Version 01...
- Page 2 In developing our systems, we have placed great emphasis on simple, self- explanatory operation. Nevertheless, we suggest studying this user manual in detail so that you know and are able to utilize all the benefits of your Leica surgical microscope in an optimum way.
-
Page 3: Table Of Contents
7.10 Adjusting the tilt of the microscope carrier Technical Data (45°/70°) 13.1 Electrical data 7.11 Balancing the Leica M525 F20/CT20 surgical 13.2 Auxiliary power socket microscope 13.3 Surgical microscope Leica M525 F20/CT20 / Ref. 10 715 156 / Version 01... - Page 4 13.13 Dimensional drawing of F20 floor stand 13.14 Dimensional drawing of CT20 ceiling mount Annex 14.1 Checklist before the operation This manual includes the following systems: • Leica M525 F20 • Leica M525 CT20 Leica M525 F20/CT20 / Ref. 10 715 156 / Version 01...
-
Page 5: Introduction
Action required; this symbol indicates that you need to perform a specific action or series of actions. Technical documentation and Assembly instruction The Technical documentation is part of the document “Assembly instruction”. Leica M525 F20/CT20 / Ref. 10 715 156 / Version 01... -
Page 6: Safety Notes
Follow the instructions in the user manuals for those accessories. • At the end of its expected service life, dispose of the Leica M525 Notes on use F20/CT20 according to the national guidelines for waste •... -
Page 7: Instructions For The User
“ME Systems” must be observed. Hazards due to movable parts • All parts of the Leica M525 F20/CT20 shall not be serviced or This section describes uses that, inadvertently, could lead to maintained while in use with a patient. -
Page 8: Dangers Of Use
Always close the footbrakes if the system is not in Fußbremsen immer schließen, wenn das System motion. nicht bewegt wird. Always open the footbrakes if the system is in Fußbremsen immer öffnen, wenn das System motion. bewegt wird. Leica M525 F20/CT20 / Ref. 10 715 156 / Version 01... - Page 9 The Leica M525 F20/CT20 surgical microscope may be the working distance! connected to a grounded safety socket only. Do not adjust the rotary knob for manual setting of the working distance while using the laser. Leica M525 F20/CT20 / Ref. 10 715 156 / Version 01...
- Page 10 WARNING Risk of injury from downward movement of surgical microscope! Do not exceed the max. load when equipping components and accessories. WARNING Not suitable for use in ophthalmology! Leica M525 F20/CT20 / Ref. 10 715 156 / Version 01...
- Page 11 Requirements of use, see chapter 14.5. CAUTION Connecting unauthorized secondary devices to the auxiliary power socket can lead to damage to the Leica M525 F20/CT20 surgical microscope and to the secondary device! Never connect secondary devices to the auxiliary power socket unless they conform to the specifications.
-
Page 12: Labels And Symbols
Max. 6.5 kg (14.33 lbs) carrier A/B balancing Danger sign for + – crushing hazard Scale balancing label Not suitable for use DO NOT USE IN in ophthalmology OPHTALMOLOGY Leica M525 F20/CT20 / Ref. 10 715 156 / Version 01... - Page 13 MM = month (2 digits) danger of tilting g TT = day (2 digits) h Production starting date Rotation range label MET label Caution, follow the User Manual Nameplate (F20) Max. power consumption Leica M525 F20/CT20 / Ref. 10 715 156 / Version 01...
- Page 14 Safety Notes Leica M525 CT20 ceiling mount Nameplate Leica M525 F20/CT20 / Ref. 10 715 156 / Version 01...
-
Page 15: Design
12 Fuse holder (2× 6.3 A, time-lag) and to the secondary device! Never connect secondary devices to the auxiliary power socket unless they conform to the specifications. Requirements of use, see chapter 14.5. Leica M525 F20/CT20 / Ref. 10 715 156 / Version 01... -
Page 16: Leica M525/Ct20 Ceiling Mount
Design Leica M525/CT20 ceiling mount 1 Swing arm 2 Binocular tube 3 Handle 4 Optics carrier 5 Microscope carrier 6 Control/illumination unit 7 Horizontal arm 8 CT20 ceiling mount Leica M525 F20/CT20 / Ref. 10 715 156 / Version 01... -
Page 17: Function
Balancing system brakes that stop the movements of the stand and surgical microscope: The balancing system is used to always balance the Leica M525 F20/ In the rotary joint (1) CT20 surgical microscope. All movements that must be carried out In the microscope carrier (2) during the operation require only minimal force. -
Page 18: Tilt Of The Microscope Carrier
If one of the xenon lamps fails, you can toggle to the other xenon done using screws below the cover (1) (see chapter 7.10). lamp using the toggle switch (2). 45ϒ 70ϒ Leica M525 F20/CT20 / Ref. 10 715 156 / Version 01... -
Page 19: Controls
11 Zoom 12 Focus 13 ALL FREE button (no braking function, but can be assigned other functions) 14 Selection button (no braking function, but can be assigned other functions) Leica M525 F20/CT20 / Ref. 10 715 156 / Version 01... -
Page 20: Control/Illumination Unit
For requirements of use, see technical data, chapter 13.2. CAUTION Connecting unauthorized secondary devices to the auxiliary power socket can lead to damage to the Leica M525 F20/CT20 surgical microscope and to the secondary device! Never connect secondary devices to the auxiliary power socket unless they conform to the specifications. -
Page 21: Swing Arm
3 Adjustable footrests 4 Automatic basic focus position 5 Focus (freely assignable, see page 35) 6 Zoom (freely assignable, see page 35) 1 Remote control 2 Ceiling mount down 3 Ceiling mount up Leica M525 F20/CT20 / Ref. 10 715 156 / Version 01... -
Page 22: Preparation Before Surgery
Engage all brakes. Bring swing arm into transport position. Step on the footbrake release levers (3) to release the footbrakes (2). Move the Leica M525 F20 using the handle. Leica M525 F20/CT20 / Ref. 10 715 156 / Version 01... -
Page 23: Cleaning The Optical Accessories
Set diopter values for users (see page 30). Configuring control unit See page 32. Check settings of the handles (see page 36). Check that all accessories are correctly connected and securely attached. Leica M525 F20/CT20 / Ref. 10 715 156 / Version 01... -
Page 24: Raising And Lowering The Ct20 Ceiling Mount
Position stand so that pivot point on swing arm carrier is period. located over the operation area. After 2 minutes of uninterrupted operation, the built-in temperature switch switches off the motor of the Leica Microsystems ceiling mount. Leica M525 F20/CT20 / Ref. 10 715 156 / Version 01... - Page 25 Leica M525 F20/CT20 / Ref. 10 715 156 / Version 01...
-
Page 26: Adjusting The Tilt Of The Microscope Carrier
Switch on the power switch (2, chapter 6.2) on the control unit. LED in power switch lights up. Reattach and tighten the 2 screws (2). Screw on the cover (1). Leica M525 F20/CT20 / Ref. 10 715 156 / Version 01... - Page 27 Balancing the Leica M525 F20/CT20 surgical microscope The Leica M525 F20/CT20 surgical microscope tilts forward: Push the push button in the "+" – direction (1) until the Leica Move the tubes (binocular tube, attachment for second M525 F20/CT20 surgical microscope no longer moves with the observer, videozoom tube) to the operating position.
-
Page 28: Balancing The Swing Arm
Make the joint more smoothly to move: Loosen the black brake knob (3). Make the joint more difficult to move: Leica M525 F20/CT20 / Ref. 10 715 156 / Version 01... -
Page 29: Operation
Explanation of luminous energy: otherwise luminosity will decrease rapidly. The optics of the Leica M525 F20/CT20 surgical microscope have a variable working distance of between 207 and 470 mm. The system is designed in such a way that it delivers sufficient light to produce a bright image even at a long working distance of 470 mm. -
Page 30: Toggling The Illumination
• Never begin an operation with only one functioning xenon lamp. Push the illumination toggle switch (1) from the defective xenon lamp to the intact xenon lamp. Leica M525 F20/CT20 / Ref. 10 715 156 / Version 01... -
Page 31: Setting The Illumination Field Diameter
The field diameter is automatically adapted to the size of the field distance! of view at the Leica M525 optics carrier. In addition, the field When using lasers, always set the working distance of diameter can be adjusted manually using the rotary knob (1). -
Page 32: Determining Diopter Settings For Users
Check image sharpness and adjust if necessary. Insert the protective glass upwards into the bayonet lock in direction (a). Turn the protective glass in direction (b) until it engages. Leica M525 F20/CT20 / Ref. 10 715 156 / Version 01... -
Page 33: Attaching Sterile Controls
Attaching sterile controls Sterile drape for stand General notes: Sterilizable covers can be fitted on the rotary knobs on the Leica • If the entire system is draped with a sterile wrap all the way to M525 F20/CT20 surgical microscope. -
Page 34: Control Unit With Touch Panel
Press the "User" button in the main menu. Select the desired doctor. The main menu appears again. The settings stored for the selected doctor are displayed in the status line. Leica M525 F20/CT20 / Ref. 10 715 156 / Version 01... - Page 35 From the selection list, click a place at which the doctor and his or her settings are to be stored. Confirm the following warning message with OK. The settings are of the selected operation type are stored under a name. Leica M525 F20/CT20 / Ref. 10 715 156 / Version 01...
- Page 36 A warning message appears. The following selection menu appears: Confirm the warning message with OK. Press the "Delete User" button. The name and settings stored for the selected doctor are deleted. Leica M525 F20/CT20 / Ref. 10 715 156 / Version 01...
- Page 37 In the selection list (3), use the arrow keys (2) to select the desired function for the active button and click it. The button on the footswitch/handswitch is assigned the selected function. Follow the same procedure to assign the other keys. Leica M525 F20/CT20 / Ref. 10 715 156 / Version 01...
- Page 38 30°–150° and eyepiece with 10x magnification. Select the tube you are using: Select "Tube Settings" with the arrow keys (1). All tubes that can be used on the Leica M525 F20/CT20 are displayed. Press the desired tube. The tube is selected.
-
Page 39: Controlling The Zoom And Focus
Press the "+" or "–" button briefly. The zoom/focus value is changed in increments of 1. Press and hold down the "+" or "–" button. The zoom/focus value is changed in increments of 5. Leica M525 F20/CT20 / Ref. 10 715 156 / Version 01... - Page 40 • Bottom button: Reduce working distance The assignment of the buttons can be selected individually (see page 35). Press the rotary knob (1). Set the desired zoom by turning the knob. Leica M525 F20/CT20 / Ref. 10 715 156 / Version 01...
-
Page 41: Taking The Surgical Microscope Out Of Operation
Switch off the surgical microscope at the power switch. If the focus motor fails, the focus can be set manually with the rotary knob (2). Set the required focus with the rotary knob (2). Leica M525 F20/CT20 / Ref. 10 715 156 / Version 01... -
Page 42: Accessories
• Fastened to beam splitter • With interpupillary distance adjustment for the eyebase • Focal distance f = 170 mm • Integrated eyepieces with dioptric adjustment and built-in eyecup adjustment Leica M525 F20/CT20 / Ref. 10 715 156 / Version 01... -
Page 43: Adapter Piece For Accessories Of
Loosen the clamping screw (1). • Light distribution: 50 % on each side or 70 % / 30 % Insert the accessories into the dovetail ring from above. Tighten the clamping screw. Leica M525 F20/CT20 / Ref. 10 715 156 / Version 01... -
Page 44: Accessories List For Advanced Configurations
• Leica Wireless Footswitch, 12 functions, type A • Leica Footswitch, 12 functions, type B • Leica Footswitch, 12 functions, type A • Leica Footswitch, 6 functions, type B • Leica Footswitch, 6 functions, type A Leica M525 F20/CT20 / Ref. 10 715 156 / Version 01... -
Page 45: Care And Maintenance
Please contact your Leica Microsystems service representative. CAUTION Burn hazard! The mount of the lighting gets very hot. Before replacing lamps, ensure that the mount has cooled down. Leica M525 F20/CT20 / Ref. 10 715 156 / Version 01... -
Page 46: Removing A Defective Lamp
Every xenon lamp has a predetermined service life. The risk of lamp defects increases during operation if this service life is exceeded. Replace the lamps after an operating duration of 500 hours. Leica M525 F20/CT20 / Ref. 10 715 156 / Version 01... -
Page 47: Replacing Fuses
Unscrew the fuse holder (3) on the bottom of the horizontal arm. Remove the fuse (4) from the holder and replace it. Use only a 1 A slow-blowing fuse. Leica M525 F20/CT20 / Ref. 10 715 156 / Version 01... -
Page 48: Reprocessing Of Re-Sterilizable Products
Dry off the product, except for optical components, with a consequences. disposable cloth/paper towel. Dry off optical surfaces with a microfiber cloth. Leica M525 F20/CT20 / Ref. 10 715 156 / Version 01... -
Page 49: Maintenance
Care and Maintenance 10.6.4 Sterilization This list provides an overview of the sterilizable components available at Leica Microsystems (Schweiz) AG, Medical Division, for the surgical microscope. Permissible sterilization methods Steam autoclave Ethylene oxide Art. No. Name 134 °C, t > 10 min. max. 60 °C... -
Page 50: Disposal
11 Disposal The respective applicable national laws must be observed for disposal of the products, with the involvement of corresponding disposal companies. The unit packaging is to be recycled. Leica M525 F20/CT20 / Ref. 10 715 156 / Version 01... -
Page 51: What To Do, If
Accessories not installed accurately. Correctly attach the accessories in the holders M525 F20/CT20 surgical microscope at the (see chapter 7.3). edges and the illumination field is outside the field of vision. Leica M525 F20/CT20 / Ref. 10 715 156 / Version 01... -
Page 52: Malfunctions On The Stand/Mount
The photographs have a blue tone. Incorrect film used. Use daylight film. If your instrument has a malfunction that is not described here, contact your Leica Microsystems representative. Leica M525 F20/CT20 / Ref. 10 715 156 / Version 01... -
Page 53: Technical Data
• Instrument does not conform to IEC/EN 60601-1 (EU) / UL 60601-1 (USA): Connection via isolating transformer. • Instrument conforms to IEC/EN 60601-1 (EU) / UL 60601-1 (USA): Establish connection via potential equalization or connection via isolating transformer. Leica M525 F20/CT20 / Ref. 10 715 156 / Version 01... -
Page 54: Optical Data
Load: Max. 6.5 kg from the interface of Leica M525 F20/CT20 surgical microscope dovetail ring Transport height: 1918 mm Weight: Approx. 229 kg with optics carrier and handles Leica M525 F20/CT20 / Ref. 10 715 156 / Version 01... -
Page 55: Limitations Of Use
13.10 Limitations of use 13.11 Electromagnetic compatibility (EMC) The Leica M525 F20 is only to be used on a strong, level floor in enclosed rooms. Negative effects from drift must be taken into Environment for which the instrument is suitable accounts on floors with an inclination exceeding 0.3°. -
Page 56: Configurations And Weights
Do not exceed the max. load when equipping components and accessories. The stands have the following maximum load from the interfaces of the microscope: Stand/Mount CT20 Max. load 6.5 kg 6.5 kg Leica M525 F20/CT20 / Ref. 10 715 156 / Version 01... -
Page 57: Dimensional Drawing Of F20 Floor Stand
Technical Data 13.13 Dimensional drawing of F20 floor stand (Dimensions in mm) Leica M525 F20/CT20 / Ref. 10 715 156 / Version 01... -
Page 58: Dimensional Drawing Of Ct20 Ceiling Mount
Technical Data 13.14 Dimensional drawing of CT20 ceiling mount 1692 (Dimensions in mm) Leica M525 F20/CT20 / Ref. 10 715 156 / Version 01... -
Page 59: Annex
(see chapter 7.9). Sterility Fit sterile components and sterile drape if used (see chapter 7.3). Final work Check that all equipment is in its proper position (all covers fitted, doors closed). Leica M525 F20/CT20 / Ref. 10 715 156 / Version 01... - Page 60 Leica M525 F20/CT20 / Ref. 10 715 156 / Version 01...
- Page 61 Leica M525 F20/CT20 / Ref. 10 715 156 / Version 01...
- Page 62 ISO 9001, ISO 13485, and ISO 14001 relating to quality management, quality assurance and environmental management. 10 715 156en/01 •Copyright © by Leica Microsystems (Schweiz) AG, Medical Division, CH-9435 Heerbrugg, 2018• Printed – 05.2018• Subject to modifications • LEICA and the Leica Logo are registered trademarks of Leica Microsystems...
Need help?
Do you have a question about the M525 F20/CT20 and is the answer not in the manual?
Questions and answers