
Related Manuals for Bambu Lab X1


Summary of Contents for Bambu Lab X1
- Page 1 3D Printer Quick Start Please review the entire guide before operating the printer. Safety Notice: Do not connect to power until assembly is complete.
-
Page 2: Component Introduction
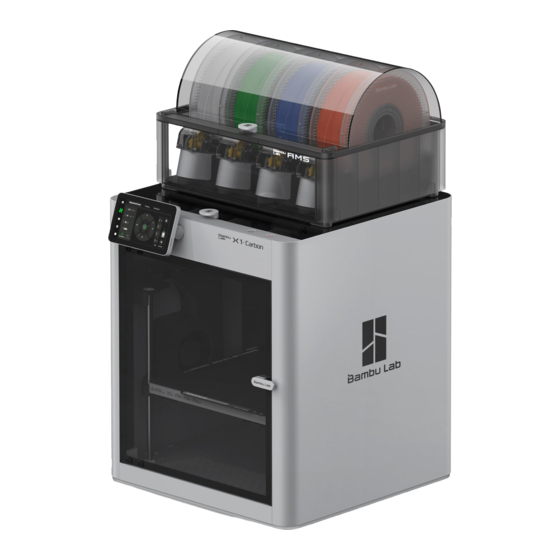
Component Introduction Air Filter Tool Head Bambu Micro Lidar Pause Touch Screen Screen Sleep/Wake Glass Cover Plate Chamber Camera (X1-Carbon Only) PTFE Tube Belt Tensioner Bambu Bus Cable 4-Pin Build Plate Auxiliary Part Excess Chute Cooling Fan (X1-Carbon Only) Power Socket... -
Page 3: Accessory Specification
Accessory Specification Touch Screen Spool Holder 250g Filament Spare Hot End Nozzle Wiping (x2) Power Cord Unclogging Pin Tool PTFE Tube Allen Key H1.5 Glue Stick for Allen Key H2 Build Plate Spare Sheet for Flexible Build Plate Bambu Scraper Bambu Cool Plate (x2) (Pre-installed on... - Page 4 Tool Head Unlock Remove the carboard from the tool head. Cut the zip tie securing the toolhead. Romove the foam from the excess chute.
- Page 5 Spool Holder Assembly (Allen Key H2) Remove the screw as pictured with an Secure the spool holder with two screws from the accessory box. Allen Key H2. *We recommend using the short end of the Allen Key to unlock the screws more easily.
-
Page 6: Screen Installation
Screen Installation Insert the FPC into the port by pressing the Pull the Flexible Printed Circuit(FPC) out terminal as pictured. about 50mm. Insert the screen back to the slot on the printer, then lock it by pushing it to the left. - Page 7 Hot Bed Unlock (Allen Key H2) Remove the three screws with an Allen Key H2 to unlock the hot bed. Connect the printer to power. Follow the instructions on the screen to complete the initial calibration. DO NOT remove the protective foam from beneath the hot bed until after the initial calibration is complete.
-
Page 8: First Print
First Print Insert the filament into the PTFE Tube. Keep Press " " - "Temperatre/Axis" - "Extruder" - " " pushing the filament until it can not move forward. about 5 times until the filament starts being pulled by the extruder and cannot be pulled out manually. *We recommend using the supplied Bambu PLA Basic for your first test print. -
Page 9: Specification
Specification Specification Item X1-Carbon Pringing Technology Fused Deposition Modeling Build Volume(W*D*H) 256*256*256 mm Chassis Steel Body Shell Aluminum & Glass Plastic & Glass Hot End All-Metal Extruder Gears Hardened Steel Steel Nozzle Hardened Steel Stainless Steel Max Hot End Temperature... - Page 10 Dimensions 389*389*457mm Physical Dimensions Net Weight 14.13kg 13.18kg Voltage 100-240 VAC, 50/60 Hz Electrical Requirements Max Power 1000W@220V, 350W@110V Display 5-inch 1280*720 Touch Screen Connectivity Wi-Fi,Bambu Bus Storage 4GB EMMC and Micro SD Card Reader Electronics Control Interface Touch Screen, APP, PC Application Motion Controller Dual-Core Cortex M4 Application Processor...
- Page 11 Please visit Bambu Lab Wiki to learn more setup and maintetance tutorials. https://wiki.bambulab.com/en/home If you need support, please try either of the two approaches: Approach 1: Creat a support ticket on Official Website Approach 2: Create a support ticket on Bambu Handy App...
- Page 12 Enjoy! www.bambulab.com...
Need help?
Do you have a question about the X1 and is the answer not in the manual?
Questions and answers