Table of Contents
Advertisement
Quick Links
Advertisement
Table of Contents

Related Manuals for Bosch WAU28PIHSN


Summary of Contents for Bosch WAU28PIHSN
- Page 1 Washing machine WAU28PIHSN [en] User manual and installation instructions...
-
Page 2: Table Of Contents
Table of contents 1 Safety .......... 4 10 Before using for the first time........ 36 1.1 General information.... 4 10.1 Starting an empty washing 1.2 Intended use....... 4 cycle ........ 36 1.3 Restriction on user group... 4 1.4 Safe installation ...... 5 11 Laundry........ 37 1.5 Safe use ........ 7 11.1 Preparing the laundry ..... 37 1.6 Safe cleaning and mainten-... - Page 3 16 Home Connect ...... 45 21 Customer Service..... 71 16.1 Home Connect settings.. 45 21.1 Product number (E-Nr.) and production number (FD).. 71 16.2 Connecting the appliance to a WLAN home network 22 Consumption values.... 72 (Wi-Fi) with WPS function .. 46 16.3 Connecting the appliance 23 Technical specifications..
-
Page 4: Safety
en Safety 1 Safety Observe the following safety instructions. 1.1 General information ¡ Read this instruction manual carefully. ¡ Keep the instruction manual and the product information safe for future reference or for the next owner. ¡ Do not connect the appliance if it has been damaged in transit. 1.2 Intended use Only use this appliance: ¡... -
Page 5: Safe Installation
Safety en 1.4 Safe installation Take note of the safety instructions when installing the appliance. WARNING ‒ Risk of electric shock! Improper installation is dangerous. ▶ Connect and operate the appliance only in accordance with the specifications on the rating plate. ▶ Connect the appliance to a power supply with alternating cur- rent only via a properly installed socket with earthing. - Page 6 en Safety WARNING ‒ Risk of injury! The high weight of the appliance may result in injury when lifted. ▶ Do not lift the appliance on your own. If this appliance is not correctly installed in a washer-dryer stack, the installed appliance may fall. ▶...
-
Page 7: Safe Use
Safety en ▶ Wear protective gloves when installing and transporting the ap- pliance. 1.5 Safe use WARNING ‒ Risk of electric shock! If the appliance or the power cord is damaged, this is dangerous. ▶ Never operate a damaged appliance. ▶ Never pull on the power cord to unplug the appliance. Always unplug the appliance at the mains. - Page 8 en Safety WARNING ‒ Risk of poisoning! Detergents and care products may result in poisoning if con- sumed. ▶ If accidentally swallowed, seek medical advice. ▶ Keep detergents and care products out of the reach of children. WARNING ‒ Risk of explosion! Laundry that has been pretreated with cleaning agents that con- tain solvents may cause an explosion in the appliance.
-
Page 9: Safe Cleaning And Maintenance
Safety en CAUTION ‒ Risk of chemical burns! If the detergent drawer is opened, detergent and care products may spray out from the appliance. Contact with eyes or skin may cause irritation. ▶ Rinse eyes and/or skin thoroughly with clean water if they come into contact with detergents or care products. -
Page 10: Preventing Material Damage
en Preventing material damage If the water pressure is too high or Preventing material damage 2 Preventing material too low, the appliance may not be able to operate properly. damage Make sure that the water pressure ▶ in the water supply system is min. Follow these instructions to avoid ma- Preventing material damage 100 kPa (1 bar) and max. -
Page 11: Environmental Protection And Saving Energy
Environmental protection and saving energy en Reduce the washing temperature for Environmental protection and saving energy 3 Environmental protec- lightly and normally soiled laundry. tion and saving energy a At low temperatures, the appliance consumes less energy. For light to Environmental protection and saving energy normal soiling, lower temperatures 3.1 Disposing of packaging than indicated on the care label... -
Page 12: Energy Saving Mode
en Installation and connection ATTENTION! 3.3 Energy saving mode Objects remaining in the drum that If you do not use the appliance for an are not designed for operation with extended period, it automatically the appliance may cause material switches to energy-saving mode. All damage and damage to the appli- displays go out and flashes. -
Page 13: Contents Of Package
Installation and connection en 4.2 Contents of package After unpacking all parts, check for any damage in transit and completeness of the delivery. Washing machine WARNING Risk of electric shock! Accompanying documents The appliance contains live parts. Touching live parts is dangerous. Water inlet hose Do not operate the appliance ▶... -
Page 14: Removing The Transit Bolts
en Installation and connection ATTENTION! Installation loca- Requirements If the appliance is installed in areas tion exposed to frost or outdoors, frozen On a wall Do not trap the residual water may damage the appli- hoses between ance and frozen hoses may crack or the wall and the split. -
Page 15: Connecting The Appliance
Installation and connection en Unscrew and remove all four Put on the four cover caps. screws for the transit bolts with a WAF 13 wrench. Press down on the four cover caps. Pull the power cord out of the holder. 4.5 Connecting the appliance Remove the four sleeves. - Page 16 en Installation and connection Connect the water inlet hose. Water outlet connection types This information is intended to help you to connect this appliance to the water outlet. Note: Please read the information in the Safety → Page 4 and Preventing material damage → Page 10 sections to ensure that you use the appliance safely.
-
Page 17: Aligning The Appliance
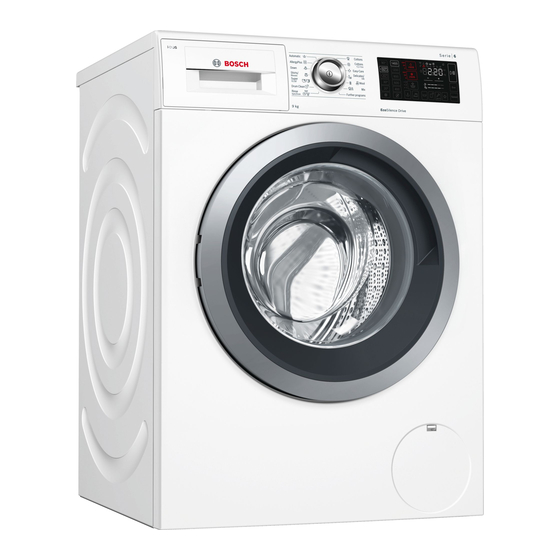
Installation and connection en Screw the lock nuts tightly against 4.6 Aligning the appliance the housing using a WAF 17 In order to reduce noise and vibra- wrench. tion and to prevent the appliance from moving, align the appliance cor- rectly. Note: Please read the information in the Safety → Page 4 and Preventing material damage → Page 10 sections to ensure that you use the appliance... - Page 18 en Familiarising yourself with your appliance Familiarising yourself with your appliance 5 Familiarising yourself with your appliance Familiarising yourself with your appliance 5.1 Appliance You can find an overview of the parts of your appliance here. On certain models, specific details such as the colour and shape may differ from those pictured.
-
Page 19: Familiarising Yourself With
Familiarising yourself with your appliance en 5.2 Detergent drawer Manual dosing compartment / : Dispenser for fabric softener or detergent : Dispenser for detergent 5.3 Controls You can use the control panel to configure all functions of your appliance and to obtain information about the operating status. 5.4 Operating logic Programmes → Page 27 Programme selector... - Page 20 en Familiarising yourself with your appliance...
-
Page 21: Display
Display en Display 6 Display The display shows the current settings, options or relevant information. Display Display Designation Description 0:40 Programme dura- Approximate expected programme dura- tion/programme tion or programme time remaining. time remaining 10 "Ready in" time The programme end has been set and the remaining number of hours is displayed. - Page 22 en Display Display Designation Description Water consump- Water consumption for the selected pro- tion gramme. : Low water consumption ¡ : High water consumption ¡ End signal Basic setting Button signal Basic setting Display brightness Basic setting Reminder to clean Flashes: Drum is dirty. Run the Drum the drum Clean programme for cleaning and caring for the drum and the outer tub.
- Page 23 Display en Display Designation Description Voltage control Flashes: The programme has been system paused because of impermissible voltage drops. The voltage is permissible again and the programme will continue. Note: The programme duration is exten- ded. Foam detection The appliance has detected too much system foam.
-
Page 24: Buttons
en Buttons Buttons 7 Buttons The selection of programme settings depends on the selected programme. You Buttons can see the selection options for each programme in the overview for → "Programmes", Page 27. Button Selection Description (Start/Pause) ¡ Start Start, cancel or pause the pro- gramme. - Page 25 Buttons en Button Selection Description - 1400 (Spin) – 1400 rpm Adjust the spin speed or deactivate the spin cycle. is selected, the water is drained and the spin cycle is deactivated at the end of the washing cycle. The laundry stays wet inside the drum.
- Page 26 en Buttons Button Selection Description (Prewash) ¡ Activate Activate or deactivate prewash, e.g. for washing heavily soiled laundry. ¡ Deactivate Note: If the intelligent dosing system is activated, the detergent will be dis- pensed automatically for the prewash and the main wash. If the intelligent dosing system is de- activated, place the detergent for the prewash directly in the drum.
- Page 27 Programmes en i-DOS i-DOS – Speed 1400 1400 Max. spin speed (rpm) Max. temperature (°C) Max. load (kg)
- Page 28 en Programmes i-DOS i-DOS – Speed 1400 Max. spin speed (rpm) – Max. temperature (°C) Max. load (kg)
- Page 29 Programmes en i-DOS i-DOS Speed 1200 1400 Max. spin speed (rpm) Max. temperature (°C) Max. load (kg)
- Page 30 en Programmes i-DOS – i-DOS – – – – – – Speed Max. spin speed (rpm) Max. temperature (°C) Max. load (kg)
- Page 31 Programmes en – – i-DOS – – – i-DOS – – – – – – – – – – – – – – Speed – 1400 1400 Max. spin speed (rpm) – – – Max. temperature (°C) Max.
- Page 32 en Programmes – i-DOS – i-DOS – – – – – – – – – – – Speed 1000 1200 Max. spin speed (rpm) – – Max. temperature (°C) Max. load (kg)
- Page 33 Programmes en i-DOS i-DOS Speed Max. spin speed (rpm) Max. temperature (°C) Max. load (kg)
- Page 34 en Programmes i-DOS i-DOS – Speed Max. spin speed (rpm) Max. temperature (°C) Max. load (kg)
- Page 35 Programmes en i-DOS i-DOS – – – Speed 1200 Max. spin speed (rpm) Max. temperature (°C) Max. load (kg)
-
Page 36: Accessories
en Accessories Accessories 9 Accessories Use original accessories. These have been made especially for your appliance. Accessories Order number Water inlet hose exten- Extend the water inlet WMZ2381 sion hose for cold water or AquaStop (approx. 2.50 Fixing brackets Improves the stability of WMZ2200 the appliance. -
Page 37: Laundry
Laundry en Pull out the detergent drawer. Push in the detergent drawer. Pour approx. 1 litre of water into Press (Start/Pause) to start the the manual dosing compartment. programme. a The display shows the remaining programme duration. Start the first wash cycle or press to switch off the appliance. -
Page 38: Sorting Laundry
en Laundry – Remove curtain hooks and lead 11.2 Sorting laundry strips or use a mesh laundry Note: Please read the information in the Safety → Page 4 and Preventing – Use a mesh laundry bag for material damage → Page 10 sections small items of laundry such as to ensure that you use the appliance children's socks safely. -
Page 39: Detergents And Care
Detergents and care products en Symbol Washing process Recommended pro- gramme Gentle Easy Care Particularly gentle Delicates/Silk for wash- ing by hand Hand wash Wool Not suitable for machine-wash- – Tip: You can find more information Notes about care symbols at www.gine- ¡... -
Page 40: Detergent Dosage
en Detergents and care products Tip: Visit www.cleanright.eu to find further information on detergents, care products and cleaning agents for domestic use. 12.2 Detergent dosage The detergent dosage depends on: You can find out how hard your ¡ The amount of laundry water is from your local water com- pany or measure it yourself using ¡... -
Page 41: Basic Operation
Basic operation en 13.3 Adjusting the pro- Basic operation 13 Basic operation gramme settings Basic operation Depending on the programme and 13.1 Switching on the appli- programme progress, you can adjust ance or activate/deactivate the settings. Note: Overview of all programme set- Press ▶ tings: Requirement: A programme has been set. -
Page 42: Adding Detergent And Care Product
en Basic operation Requirement: Prepare and sort the Pull out the detergent drawer. laundry. Pour in detergent. → "Laundry", Page 37 → "Detergent drawer", Page 19 If required, add the care product. Open the door. Push in the detergent drawer. 13.7 Starting the programme Note: If you want to change the time until the programme ends, set the "Ready in"... -
Page 43: Unloading The Laundry
Childproof lock en Press 13.11 Switching off the appli- Open the door. ance The appliance door remains Press locked for safety reasons if the temperature and water levels are high. – If the temperature is high, start the Rinse programme. – If the water level is high: Start the Spin or Drain programme. -
Page 44: Deactivating The Childproof Lock
en Intelligent dosing system a The childproof lock remains active Open the dispenser lid. even after the appliance has been switched off. 14.2 Deactivating the child- proof lock Requirement: To deactivate the childproof lock, the appliance must be switched on. Press and hold ... -
Page 45: Basic Dosage
Home Connect en Home Connect services in your coun- Adjusting the dispenser contents try. You can find information about Press and hold i-DOS for ap- this at: www.home-connect.com. prox. 3 seconds. ¡ → "Connecting the appliance to a To set , press ... -
Page 46: (Wi-Fi) With Wps Function
en Home Connect Reconnect the appliance to the 16.2 Connecting the appli- ‒ WLAN home network (Wi-Fi) ance to a WLAN home with WPS function. network (Wi-Fi) with Connect your appliance to the WPS function Home Connect app. → Page 47 Using your router's WPS function is 16.3 Connecting the appli- the simplest way to connect the ap- ance to a WLAN home... -
Page 47: Connecting Your Appliance
Home Connect en Call up the Wi-Fi settings on the 16.4 Connecting your appli- mobile device. ance to the Home Con- Connect the mobile device to the nect app Home Connect Wi-Fi network and enter the password (key) Home- Requirements Connect. ¡ The appliance is connected to the a Your mobile device now connects WLAN home network (Wi-Fi). -
Page 48: Deactivating Wi-Fi On The Appliance
en Home Connect a If End is shown on the display, the 16.6 Deactivating Wi-Fi on the network settings are reset. appliance Tip: If you wish to operate your appli- Press and hold for at least ance again via the Home Connect three seconds. app, you will need to reconnect it to Set the programme to position 4. -
Page 49: Basic Settings
Basic settings en Basic settings 17 Basic settings You can configure the appliance to meet your needs. Basic settings 17.1 Overview of the basic settings Below is an overview of the basic settings on your appliance. Basic setting Symbol Value Description End signal 0 (off) Set the volume of the signal at the 1 (quiet) -
Page 50: Cleaning And Servicing
en Cleaning and servicing To exit the basic settings, switch 18.2 Cleaning the drum off the appliance. If you often wash at a washing tem- perature of 40 °C and lower or the appliance has not been used for a Cleaning and servicing 18 Cleaning and servi- long period, clean the drum. - Page 51 Cleaning and servicing en Press down on the insert and re- Empty the detergent drawer. move the detergent drawer. ATTENTION! The pump unit con- Remove the pump unit. tains electrical components. Do not clean the pump unit in the ▶ dishwasher and do not immerse it in water.
-
Page 52: Descaling
en Cleaning and servicing Clean the detergent drawer and Clean the inside of the detergent the lid with a soft, damp cloth or drawer housing. hand shower. Push in the detergent drawer. Dry the detergent drawer, lid and pump unit and reinsert them. 18.4 Descaling If you add detergent correctly, you do not need to descale your appliance. - Page 53 Cleaning and servicing en Disconnect the appliance's mains Take the drain hose out of the plug from the power supply. holder. Open the maintenance flap. CAUTION - Risk of scalding! Remove the maintenance flap. When you wash at high temperat- ures, the detergent solution gets hot.
- Page 54 en Cleaning and servicing Insert the drain hose into the Clean the interior, the thread on holder. the pump cap and the pump hous- ing. Cleaning the drain pump Make sure that the impeller in the drain pump can be rotated. Note: Please read the information in the Safety → Page 4 and Preventing Insert the pump cap and screw it...
-
Page 55: Cleaning The Water Outlet Hose At The Siphon
Cleaning and servicing en Clean the water outlet hose and si- Before the next wash phon connecting piece. To prevent unused detergent from flowing straight into the outlet in the next wash, run the Drain programme after you have emptied the drain pump. - Page 56 en Cleaning and servicing Connect the water inlet hose and Cleaning the filter on the tap check for leaks. Note: Please read the information in the Safety → Page 4 and Preventing material damage → Page 10 sections to ensure that you use the appliance safely. Requirement: The water inlet hose is empty.
- Page 57 Cleaning and servicing en Use pliers to remove the filter. Clean the filter with a small brush. Reinsert the filter. Connect the hose and check for leaks.
-
Page 58: Troubleshooting
en Troubleshooting Troubleshooting 19 Troubleshooting You can rectify minor faults on your appliance yourself. Read the troubleshoot- Troubleshooting ing information before contacting after-sales service. This will avoid unneces- sary costs. WARNING Risk of electric shock! Incorrect repairs are dangerous. Repairs to the appliance should only be carried out by trained specialist ▶... - Page 59 Troubleshooting en Fault Cause and troubleshooting "E:36 / -10" Remove any unapproved extensions from the water ▶ hose. Connecting the appliance "E:36 / -25 / -26" Drain pump is blocked. → "Cleaning the drain pump", Page 52 ▶ "E:10 / -00 / -10 / The pump for the intelligent dosing system is blocked.
- Page 60 en Troubleshooting Fault Cause and troubleshooting Detergent dosage is too high. Immediate measure: Mix one tablespoon of fabric ▶ softener with 0.5 litres of water and pour the mix- ture into the compartment for manual dosing (not for outdoor clothing, sportswear or items stuffed with down).
- Page 61 Troubleshooting en Fault Cause and troubleshooting The programme does → "Deactivating the childproof lock", Page 44 ▶ not start. is activated. Check whether is activated. ▶ → "Buttons", Page 24 Laundry is caught in the door. Open the door again. Remove any trapped laundry. Close the door. Press to start the programme.
- Page 62 en Troubleshooting Fault Cause and troubleshooting The water is not drain- Drain pump is blocked. ing. → "Cleaning the drain pump", Page 52 ▶ is activated. Continue the programme by selecting Spin or ▶ Drain and pressing The water outlet hose is connected too high. Install the water outlet hose at a maximum height of ▶...
- Page 63 Troubleshooting en Fault Cause and troubleshooting The programme dura- The programme operation is optimised electronically. tion changes during This may change the programme duration. the wash cycle. Not a fault – no action required. ▶ The unbalanced load detection system eliminates an imbalance by repeatedly redistributing the laundry.
- Page 64 en Troubleshooting Fault Cause and troubleshooting i-DOS i-DOS Programme progress does not allow intelligent dos- cannot be actuated. ing. No remedial action possible. High spin speed not A low spin speed is selected. reached. The next time you run a wash cycle, set a higher ▶...
- Page 65 Troubleshooting en Fault Cause and troubleshooting Loud noises during Appliance is not correctly aligned. the spin cycle. Aligning the appliance ▶ The appliance feet are not fixed. Secure the appliance feet. Aligning the appliance ▶ Transit bolts have not been removed. Removing the transit bolts ▶...
- Page 66 en Troubleshooting Fault Cause and troubleshooting The spin result is not Note: Where possible, mix large and small items in satisfactory. The laun- the drum. Different sized items of laundry distribute dry is too wet/too themselves better during the spin cycle. damp. Start the Spin programme.
- Page 67 Troubleshooting en Fault Cause and troubleshooting Insufficient cleaning. Basic dosage is not correctly adjusted. If intelligent dosing is activated, adjust the basic ▶ dosage → Page 45 correctly. Detergent or care products have congealed in dis- pensers of the intelligent dosing system. Check whether the detergent used is suitable. → "Detergents and care products", Page 39 Drain the dispenser.
- Page 68 en Troubleshooting Fault Cause and troubleshooting Water is leaking out at Connect the water outlet hose correctly. Water out- ▶ the water outlet hose. let connection types Odours have formed Humidity and detergent residue may promote the in the appliance. formation of bacteria. → "Cleaning the drum", Page 50 ▶...
-
Page 69: Transportation, Storage And Disposal
Transportation, storage and disposal en Drain the remaining detergent 19.1 Emergency release solution. Releasing the door → "Cleaning the drain pump", Page 52 Requirement: The drain pump is Detach the hoses. empty. → Page 52 Empty the dispensers. ATTENTION! Escaping water may cause material damage. 20.2 Inserting the transit Do not open the door if you can ▶... -
Page 70: Using The Appliance Again
en Transportation, storage and disposal Insert all screws into the four Pour approx. 1 litre of water into transit bolts and tighten slightly. the manual dosing compartment in the detergent drawer. Start the Drain programme. a The unused detergent cannot flow straight into the outlet during the next wash. - Page 71 Customer Service en If you contact Customer Service, you tronic appliances (waste will require the product number (E- electrical and electronic Nr.) and the production number (FD) equipment - WEEE). of your appliance. The guideline determ- The contact details for Customer Ser- ines the framework for vice can be found in the enclosed the return and recycling...
- Page 72 en Consumption values Consumption values 22 Consumption values The following information is provided in accordance with the EU Ecodesign Consumption values Regulation. The values given for programs other than the Eco 40-60 are indicat- ive only and were determined in accordance with the applicable standard EN60456.
- Page 73 24 Declaration of Con- tion 0,10 W ¡ Left-on mode: formity 0,50 W ¡ Time until the Robert Bosch Hausgeräte GmbH Declaration of Conformity networked hereby declares that the appliance standby mode with Home Connect functionality is set (Wi-Fi): meets the essential requirements and 5 Min.
- Page 74 en Declaration of Conformity 5 GHz WLAN (Wi-Fi): For indoor use only.
- Page 76 Expert advice for your Bosch home appliances, help with problems or a repair from Bosch experts. Find out everything about the many ways Bosch can support you: www.bosch-home.com/service Contact data of all countries are listed in the attached service direct- ory.