Table of Contents
Advertisement
Quick Links
Advertisement
Table of Contents

Related Manuals for Classe Audio CDP-502


Summary of Contents for Classe Audio CDP-502
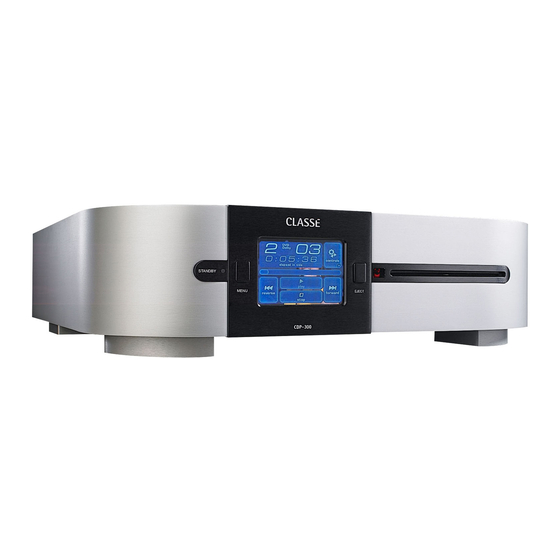
- Page 1 Owner’s Manual CDP-502 Reference Disc Player...
- Page 2 WARNING: TO REDUCE THE RISK OF FIRE OR ELECTRIC SHOCK, DO NOT EXPOSE THIS APPLIANCE TO RAIN OR MOISTURE. CAUTION: TO REDUCE THE RISK OF ELECTRICAL SHOCK, DO NOT REMOVE COVER. NO USER-SERVICEABLE PARTS INSIDE. REFER SERVICING TO QUALIFIED PERSONNEL. All of us at Classé...
-
Page 3: Important Safety Instructions
Important Safety Instructions Read these instructions. Keep these instructions. Heed all warnings. Follow all instructions. Do not use this apparatus near water. Clean only with dry cloth. Do not block any ventilation openings. Install in accordance with the manufacturer’s instructions. Do not install near any heat sources such as radiators, heat registers, stoves, or other apparatus (including amplifi... -
Page 4: Table Of Contents
... 16 AES/EBU digital output ... 16 optical digital output ... 16 The Remote Control ... 19 Using the CDP-502 ... 23 CD operational menu ... 23 playlist ... 23 controls menu ... 24 repeat mode ... 24 shuffle ... - Page 5 CAN-Bus shared features ... 32 configuration... 32 operate ... 32 AC status ... 32 status ... 32 name ... 32 global brightness ... 33 global standby ... 33 CAN-Bus model specific features ... 33 PlayLink ... 33 amp info ... 34 event log ...
-
Page 6: Welcome To The Classé Family
Every eff ort has been made to make the Classé CDP-502 simple and Welcome to the Classé family Congratulations on your purchase of a Classé product. It is the result of many years of continuous refi nement, and we are sure that you will enjoy it for many years to come. -
Page 7: Unpacking And Placement
Important! placement Th e CDP-502 has been designed to operate optimally on any stable and level surface. Incorporating vibration damping within the CDP-502’s feet and CD/DVD Drive Assembly, a high level of isolation from external disturbances is incorporated. -
Page 8: Register Your Purchase
Having found the serial number, now would be a good time to fi ll out the operating voltage Th e CDP-502 disc player is set at the factory (internally) for 100V, 120V, 220V, Warning: registration card. Please register your purchase so we can advise you of updates and other items of interest. -
Page 9: Warm Up/Break-In Period
warm up/break-in period Your new Classé disc player will deliver outstanding performance immediately. However, you should expect to hear it improve somewhat as it reaches its normal operating temperatures and its various components “break-in.” It has been our experience that the greatest changes occur within the fi rst 300 hours, as the player reaches thermal equilibrium and the capacitors fully form. -
Page 10: Special Design Features
GUI Th e LCD touchscreen on the front panel of your new component supports an extremely fl exible and versatile graphical user interface (GUI) while maintaining a clean, uncluttered appearance. Th e CDP-502 provides a range of controls that might otherwise require dozens of buttons and knobs on the front panel. -
Page 11: Front Panel
MENU MENU EJECT LOAD CDP-502 Front Panel Standby button & LED indicator Th e front panel Standby button will toggle the player between its fully operational status and a standby mode that leaves the player off , yet ready to respond to system commands via any of the supported control options (e.g. -
Page 12: Menu Button
Th e front panel Eject button operates the slot-loading mechanism of the CDP-502. It will eject a loaded disc. Th ere may be a short delay prior to ejection whilst a disc is playing, in order to give the disc time to come to a stop. -
Page 13: Rear Panel
Analog Outputs In most installations, you will want to use both the analog and the digital outputs of the CDP-502. Th e front left and right channels are supported with both balanced analog outputs on XLR connectors and single-ended analog outputs on RCA connectors. -
Page 14: Using The Single-Ended (Rca) Analog Outputs
Th ese pin assignments are consistent with the standards adopted by the Audio Engineering Society. Th e two output channels of the CDP-502 are provided in a high quality single-ended form on RCA plugs. Single-ended cables using RCA connectors are the most common form of analog connection used in consumer electronics. - Page 15 NOTE: due to Macrovision copy protection software, all HD resolutions may not be available depending on the disc. Th e Component video output of the CDP-502 can be set to 480i, 480p, 576i, 576p, 720p, or 1080i (based on the best match to your display).
-
Page 16: Coaxial Digital Output
AES/EBU digital output optical digital output Digital Outputs Th e CDP-502 has three digital outputs, all of which carry the same information. You may use whichever connection you prefer, consistent with the available connections on your A/V preamplifi er/processor. Only one of the three connections is needed. - Page 17 Th e Menu System. For example, your dealer can program Trigger Out to toggle your Classé power amplifi er between operate and standby with your CDP-502. Th e remote Trigger In will respond to the presence of 5–12VDC, with tip...
-
Page 18: Rs-232 Control Port
AC Mains Power Switch Th e main power switch for the CDP-502 is located at the right side of the rear panel. Th e player should be in standby mode before being switched off . Switching the unit on puts it in standby mode. -
Page 19: The Remote Control
The Remote Control Your new disc player comes with a versatile remote control which can control both the CDP-502 itself and several aspects of the rest of a Classé-based system. Th e keys are arranged in logical groups according to their functions. -
Page 20: Navigation Keys
• Home returns you to the normal display of chapter/track, time, and transport controls shown on the LCD screen on the front panel of the CDP-502. Th is provides a quick way to get back to normal operation, regardless of how deep you might be in the menu system. -
Page 21: Transport Controls
(if one has been created for the disc). • Repeat will cycle the CDP-502 through its repeat modes. • (scan reverse) provides a “rewind” function, the nature of which is dictated by your navigation preference selection in the menu system. - Page 22 Note: System Controls Th e CDP-502 remote control also can control user-defi ned functions as well as the volume and mute functions on a Classé system. • F1/F2/F3/F4 keys are available for controlling aspects of the CDP-502 not covered by the other buttons on the remote control.
-
Page 23: Using The Cdp-502
Your CDP-502 includes a versatile touchscreen LCD display which supports both an attractive information display and a fl exible menu system. Because of this fl exibility, the CDP-502 can present diff erent controls and capabilities when playing a CD, and when playing a DVD. We will present these separately. -
Page 24: Controls Menu
Th en highlight the tracks one at a time, in your desired order. Th e CDP-502 will build a new playlist based on your preferred sequence. To remove a playlist, simply deselect all tracks and press the save button. -
Page 25: Dvd Operational Menu
DVD operational menu When a DVD is inserted in the CDP-502, a different set of controls is displayed. the home screen Th e home screen for DVDs is presented at left in the graphic above, and contains basic information about where you are within the disc, as well as basic navigation buttons similar to those on your remote control. -
Page 26: The Menu System
The Menu System Th e CDP-502 uses its versatile touchscreen display to make a wide variety of setup choices and system defaults readily available. Using these menus, you can easily customize the behavior of your DVD player to suit your particular system’s confi... -
Page 27: Teach Ir
Th is button brings up the display setup menu, which itself has subordinate menus. For more detailed information, please see the display setup menu, found later in this manual. (It allows you to confi gure the CDP-502’s LCD screen brightness, the display timeout, the language used in the touchscreen and menu system, the temporary display, and how volume settings are displayed if you use the variable volume capability of the CDP-502.) -
Page 28: Remote Fkeys
F4, and are located near the bottom of the remote control. Th e “remote Fkeys” menu allows you to defi ne how your CDP-502 will respond to seeing one of these Fkey signals. You can use the Fkeys to give you instant access to specifi c system functions that might otherwise be buried in a menu somewhere. -
Page 29: Status
Th e status screen provides several items of information on the currently playing disc, as well as access to information on the software used in and the internal sensors of the CDP-502. While on this page, pressing the ‘more’ key will access the CAN-Bus features. -
Page 30: Hardware Setup 1
A single CAN-Bus Terminator may be required. It is inserted into the CAN-Bus OUT connector of the last component in the CAN-Bus daisy chain. One is included in the box with your CDP-502. They are also available free of charge from your nearest Classé Customer Support Centre http://www.Classeaudio.com/support/service.htm... -
Page 31: Using Can-Bus
Th e diagrams below illustrate how to connect the CAN-Bus hardware. Any combination of models in any order without SSP-300 or SSP-600. Any combination of models in any order with SSP-300 or SSP-600. NOTE: Daisy chain may need to be terminated with CAN-Bus Terminator. using CAN-Bus CAN-Bus is controlled via the touchscreen of any Delta series component. -
Page 32: Can-Bus Shared Features
CAN-Bus shared features Th e following CAN-Bus features are shared by all models. configuration Selecting confi guration will present the CAN-Bus confi guration screen operate Th e operate settings allow you to bring the target unit in and out of standby, or AC status Th e AC status screen displays information from the target unit’s electrical supply status Th e status screen is the simplest way to access essential information about name Allows you to set the name that this component will be listed under in the... -
Page 33: Global Brightness
global brightness By setting all your components to global brightness you can adjust the touchscreen and LED brightness for your entire system by changing the brightness of a single touchscreen. All CAN-Bus software updates automatically set the updated unit to Global Brightness. If you want a particular unit to be excluded from Global Brightness, deselect Global Brightness for that unit. -
Page 34: Amp Info
amp info Available for amplifi ers only, this screen displays the data provided by the event log Reserved for amplifi ers, this feature is a protection circuitry event log which can PlayLink is automatically active after a software update, and the PlayLink icon will only appear on the CAN-Bus confi... -
Page 35: Display Setup Menu
CDP-502’s LCD display: the brightness of the backlighting, the timeout of the backlighting, and the language used. brightness Th e brightness setting of the CDP-502 has three possible values: low, medium, and high. Select the appropriate setting based on the level of ambient light typically found in your listening room while using the system. -
Page 36: Language
Th e language menu off ers you any of fi ve diff erent languages supported by the colors Th e CDP-502 has the ability to change the color of the GUI menu system to temporary display When playing a DVD, the CDP-502 displays the picture information on... -
Page 37: System Setup
Pressing the menu button to the left of the LCD touchscreen, followed by pressing the on screen system setup button, will bring you to a menu system that gives you a wide range of control over how the CDP-502 works both on its own and as a part of your overall system. -
Page 38: Audio Delay
audio delay When a disc has been incorrectly authored, the audio can be out of sync from digital output Th e digital outputs can be confi gured in any of three ways, based on how you volume setup Th e volume setup menu allows you to set up several volume-related parameters the video. -
Page 39: Distance
CDP-502 to conform with a diff erent standard, your choices are: • NTSC/PAL/native — either choose the broadcast standard for your area, or set the CDP-502 to play the disc in its native format. Th is last option requires that you have a suitable multistandard display that can handle both NTSC and PAL. -
Page 40: Aspect Ratio
You have three choices for the way widescreen movies will be displayed on your resolution Th e CDP-502 has the ability to “upconvert” standard defi nition DVDs to higher television. Th e choice should be determined by the capabilities of your television as well as your personal preference. -
Page 41: Edge Enhancement
Th e DVD standard supports multiple soundtracks and languages, all on the same disc. Th is versatility can make playing a DVD more complicated than you might like. By establishing your preferences, the CDP-502 will be able to select the right soundtrack and language without you having to search through menus. -
Page 42: Navigation
Historically, navigating within a CD and a DVD has worked diff erently. parental control Th e CDP-502 includes a set of parental controls, similar to what you may have Specifi cally, the “fast forward” and “rewind” functions on a CD required you to press and hold the button during the scanning process. -
Page 43: Troubleshooting
A disc was inserted, but the machine rejected it and asked for another disc to be inserted. Check that the disc is compatible with your unit. Th e CDP-502 will play CD Audio, DVD-Video, DVD-Audio, MP3, WMA, Video-CD, and S-VCD discs. - Page 44 The screen shows an error message and the Eject button does not eject the disc (or the player shows some other anomalous behavior). Press the Standby button so the screen dims and the blue light goes on. Using the rear panel power switch, turn off the unit for at least thirty seconds.
-
Page 45: Care & Maintenance
Care & Maintenance To remove dust from the cabinet of your disc player, use a feather duster or a lint-free soft cloth. To remove dirt and fi ngerprints, we recommend isopropyl alcohol and a soft cloth. Dampen the cloth with alcohol fi rst and then lightly clean the surface of the player with the cloth. -
Page 46: Specifications
Specifications All specifi cations are accurate at the time of printing. Classé reserves the right to adjust specifi cations without notice. Frequency response (balanced and single-ended) Distortion (THD+noise) Output voltage (single-ended) Output voltage (balanced) Signal-to-noise ratio Channel separation D/A Converter Audio sample rate Formats supported CD, CD-R, CD-RW, DVD Audio, DVD Video,... -
Page 47: Dimensions
Dimensions... - Page 48 Classé Audio 5070 François Cusson Lachine, Quebec Canada H8T 1B3 +1 (514) 636-6384 +1 (514) 636-1428 (fax) http://www.classeaudio.com email: cservice@classeaudio.com North America: 1 800 370 3740 email: classe@bwgroupusa.com Europe: 44 (0) 1903 221 700 email: classe@bwgroup.com Asia: (852) 2790 8903 email: classe@bwgroup.hk All Others: +1 514 636 6394 email: cservice@classeaudio.com...
Need help?
Do you have a question about the CDP-502 and is the answer not in the manual?
Questions and answers