Table of Contents
Advertisement
Quick Links
Monster Tower
5714 U.S. Hwy 411 S.
Maryville, TN 37801
Installation Instructions and Owner's Manual
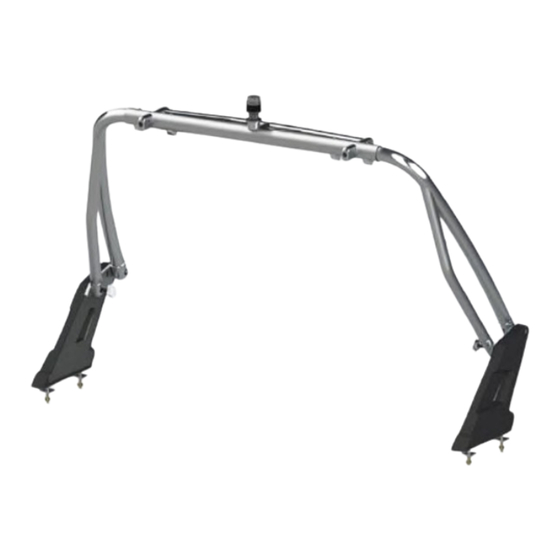
Your HS1 uses many common parts and design features that make
it affordable, adjustable, and easy to install. There are four main
components: Top section, right leg, left leg, and cast mounting
bases. The top section has a larger inside diameter to allow the
legs to slide inboard and outboard adjusting to different boat
widths. An important part of the installation is drilling holes in the
tower to lock the legs into a position custom fit to your boat.
Quick Release Knobs allow you to fold the tower for storage.
Following all the installation instructions will give you a
professional look.
Important notes for installation, maintenance, and use of your new HS1!
For a High Quality, Trouble Free Installation, read the entire Installation Manual before you begin.
Monster Tower has documented forces on arches exceeding of 300 ft./lbs. under normal wakeboarding
conditions. Dynamic forces can exceed 10 G on "double-ups". Towing forces are transferred into the deck of the
boat. Monster Tower REQUIRES reinforcement to be installed under the deck by a qualified installer who can
take your boat's individual mounting situation into account. Every boat, mounting location, and configuration is
unique and needs to be assessed by a fiberglass professional to ensure the forces generated from towing do not
cause damage to the deck and other areas of your boat.
Monster Tower is not responsible for damages due to improper installation or reinforcement.
Leave the protective plastic wrap around the legs to prevent damage during installation.
Do not use power nut drivers to run bolts. Always turn by hand to prevent the bolts from heating up.
After drilling the locking bolts in the top section the width is permanently set and cannot be moved to another
boat unless the mounting width is the same. Be sure to measure twice before drilling!
The tower is silent by design. If you hear any rattling or noise please check all hardware for tightness. Please
call us at 877-778-6937 if rattling or noise persists.
USE PROVIDED ANTI-SEIZE (IN FOIL PACKET) ON ALL BOLTS!
If you are unfamiliar with these instructions please contact one of our many dealers listed under our dealer
locator on our website.
Copyright 2017 Monster Tower, Inc.
HS1
CAUTION
Phone: 877-778-6937
www.monstertower.com
info@monstertower.com
Page 1
Advertisement
Table of Contents

Summary of Contents for monster tower HS1
- Page 1 Dynamic forces can exceed 10 G on “double-ups”. Towing forces are transferred into the deck of the boat. Monster Tower REQUIRES reinforcement to be installed under the deck by a qualified installer who can take your boat’s individual mounting situation into account. Every boat, mounting location, and configuration is unique and needs to be assessed by a fiberglass professional to ensure the forces generated from towing do not cause damage to the deck and other areas of your boat.
- Page 2 Step 1: To ensure you are not missing any hardware layout all pieces and verify you are not missing any hardware. Supplied pieces Tools Needed Page 2...
- Page 3 Step 2: Mounting Location Determine where the tower will mount on your boat. The tower requires a 16x3 inch flat mounting surface on top of the boat. Once you determine where you will mount the bases reinforce the back side of the boat with the 3/8”...
- Page 4 Step 4: Leg and Top Section Installation Start with the starboard side and install the ½” x 4” bolt The head of the bolt will face inside the boat. Before putting the bolt through the case base place the 1 ½” fender washer (pc.1) against the leg so that it is between the cast base and the leg section.
- Page 5 Step 6: Installing the LED Navigation Light Use a wire fish to pull the wire through the tower to the side of the boat you drilled for the navigation light. At the end of the leg, pull out the wire and run it into the wire slot of the leg mounting plate. In most cases, the LED anchor light can be wired into the existing navigation light system.
- Page 6 Apply enough pressure so that the peg fits fully into the insert. Using your new HS1 Wakeboard Tower – Operating Instructions The HS1 tower easily folds for storage. To fold the tower, remove the quick release knobs and slowly guide the tower to the folded position.

Need help?
Do you have a question about the HS1 and is the answer not in the manual?
Questions and answers