
Related Manuals for Toro Pro Force 44554


Summary of Contents for Toro Pro Force 44554
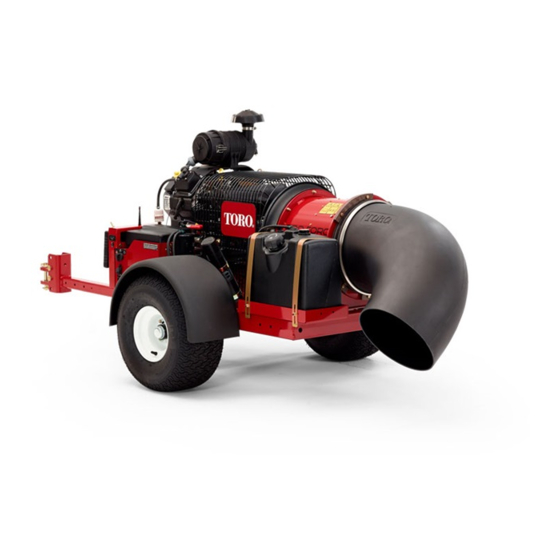
- Page 1 Form No. 3450-332 Rev A Pro Force ® Debris Blower Model No. 44554—Serial No. 408000000 and Up *3450-332* Register at www.Toro.com. Original Instructions (EN)
- Page 2 Operation is subject to the following two conditions: (1) this device may not cause interference, and (2) this device must accept any interference, including interference that may cause undesired operation of the device. © 2021—The Toro® Company Contact us at www.Toro.com. 8111 Lyndale Avenue South Printed in the USA...
- Page 3 Whenever you need service, genuine Toro parts, or additional information, contact an Authorized Service Dealer or Toro Customer Service and have the model and serial numbers of your product ready. Figure 1 identifies the location of the model and serial numbers on the product.
-
Page 4: Table Of Contents
Contents Belt Maintenance ..........28 Adjusting the Belt..........28 Miscellaneous Maintenance......... 29 Safety ............... 5 Checking the Nozzle......... 29 General Safety ........... 5 Cleaning .............. 30 Safety and Instructional Decals ......6 Washing the Machine ........30 Setup ................ 8 Disposing of Waste........... -
Page 5: Safety
Safety This machine has been designed in accordance with ANSI standard B71.4-2017. General Safety This product is capable of throwing objects. Always follow all safety instructions to avoid serious personal injury. • Read and understand the contents of both this Operator’s Manual and the operator’s manual of the traction unit before using this machine. -
Page 6: Safety And Instructional Decals
Safety and Instructional Decals Safety decals and instructions are easily visible to the operator and are located near any area of potential danger. Replace any decal that is damaged or missing. decal115-5105 115-5105 1. Warning—read the Operator's Manual. 2. Warning—all operators should read the Operator’s Manual and be trained before operating the machine. 3. - Page 7 decal131-6766 131-6766 1. 7.5 A 3. Electrical accessory (15 A) 2. 7.5 A 4. TEC-2403 (2 A) decal133-8062 133-8062...
-
Page 8: Setup
Setup Loose Parts Use the chart below to verify that all parts have been shipped. Procedure Description Qty. Grafo 112X grease (Toro Part No. — Connect the battery. 505-47) Debris blower assembly Hitch Bolt (3/8 x 3 inches) Flange nut (3/8 inch) Mount the hitch to the debris blower. -
Page 9: Connecting The Battery
(+) terminal. Attach the negative cable (black cable) to the negative (-) terminal of the battery. Coat the terminals and mounting fasteners with Grafo 112X (skin over) grease (Toro Part No. 505-47) to prevent corrosion. -
Page 10: Connecting The Debris Blower To The Tow Vehicle
Connecting the Debris Blower to the Tow Vehicle Parts needed for this procedure: Hitch pin Clevis g008175 Figure 5 Procedure 1. Hitch pin 3. Clevis Back the tow vehicle up to the blower. 2. Tow vehicle hitch Adjust the blower hitch clevis to the same level as the tow vehicle hitch as follows: •... -
Page 11: Product Overview
Choke Control Product Overview To start a cold engine, move the choke control lever (Figure 7) to the O position. Controls Nozzle-Direction Button Press the button to rotate the nozzle to the desired direction (Figure g030332 Figure 7 3. Ignition switch 1. -
Page 12: Before Operation
Operation containers on the ground, away from your vehicle before filling. • Remove the equipment from the truck or trailer Note: Determine the left and right sides of the and refuel it while it is on the ground. If this is not machine from the normal operating position. -
Page 13: Adding Fuel
Adding Fuel Filling the Fuel Tank Shut off the engine. • Fuel tank capacity: 18.9 L (5 US gallons) Clean the area around the fuel tank cap and • Recommended Fuel remove the cap (Figure – For best results, use only clean, fresh (less Note: The fuel tank cap contains a gauge which than 30 days old), unleaded fuel with an octane... -
Page 14: Checking The Tire Pressure
Checking the Tire Pressure During Operation Check the tire pressure (Figure During Operation Safety The correct tire pressure is 96.5 kPa (14 psi). General Safety • The owner/operator can prevent and is responsible for accidents that may cause personal injury or property damage. -
Page 15: Starting The Engine
Starting the Engine accessories that may be required by law, such as lights, turn signals, slow-moving vehicle (SMV) signs, and others as required. WARNING • If the machine ever vibrates abnormally, stop the machine immediately, shut off the engine, remove Rotating parts can cause serious personal the key, wait for all moving parts to stop, and injury. -
Page 16: Shutting Off The Engine
Adjusting the Nozzle Direction Press the nozzle direction button to rotate the nozzle to the desired direction (Figure 11). g018877 Figure 10 1. N button 3. Ignition switch OZZLE DIRECTION 2. Throttle/Engine speed After the engine starts, move the choke control g018877 to the O position. -
Page 17: The Nozzle-Position Gauge
The Nozzle-Position Gauge • When the pointer is in the same colored region on the decal, that indicates that the chute opening is positioned more parallel to the ground. The nozzle-position gauge (Figure 12) is located behind the turbine housing, above the fuel tank. •... -
Page 18: After Operation
Hauling After Operation • Use care when loading or unloading the machine into a trailer or truck. After Operation Safety • Use full-width ramps for loading machine into a trailer or truck. General Safety • Tie the machine down securely using straps, •... -
Page 19: Maintenance
Such • Do not charge the batteries while servicing the use could void the product warranty of The Toro machine. Company. Recommended Maintenance Schedule(s) Maintenance Service... -
Page 20: Daily Maintenance Checklist
Maintenance Service Maintenance Procedure Interval • Replace the paper air filter element (more frequently if conditions are dusty or sandy). • Change the engine oil. Every 100 hours • Check the condition of the tires. • Replace the carbon-canister air filter (Service more frequently if conditions are extremely dusty or sandy). -
Page 21: Pre-Maintenance Procedures
Pre-Maintenance Engine Maintenance Procedures Engine Safety CAUTION • Shut off the engine before checking the oil or adding oil to the crankcase. Failure to properly maintain the machine could result in premature failure of machine • Do not change the governor speed or overspeed systems causing possible harm to you or the engine. -
Page 22: Servicing The Carbon Canister
Servicing the Carbon Note: To reduce the amount of dust dislodged, avoid knocking the filter against the air-filter Canister housing. Inspect the air-filter element. Replacing the Carbon-Canister Air • If the air-filter element is clean, install the filter element, refer to Installing the Air Filter Filter (page... -
Page 23: Servicing The Engine Oil
Checking the Engine Oil Level Service Interval: Before each use or daily Note: The best time to check the engine oil is when the engine is cool before it has been started for the day. If it has already been run, allow the oil to drain back down to the sump for at least 10 minutes before checking. - Page 24 Changing the Oil Changing the Oil Filter Service Interval: Every 100 hours Service Interval: Every 200 hours Start the engine and let it run 5 minutes. This Note: Change the oil filter more frequently when the warms the oil so that it drains better. operating conditions are extremely dusty or sandy.
-
Page 25: Servicing The Spark Plugs
Servicing the Spark Plugs Ensure that the air gap between the center and side electrodes is correct before installing the spark plugs. Use a spark plug wrench for removing and installing the spark plugs and a gapping tool/feeler gauge to check and adjust the air gap. -
Page 26: Fuel System Maintenance
Servicing the Fuel Tank Fuel System Maintenance DANGER In certain conditions, fuel is extremely Replacing the Fuel Filter flammable and highly explosive. A fire or explosion from fuel can burn you and others Service Interval: Every 500 hours and can damage property. Never install a dirty filter if it is removed from the fuel •... -
Page 27: Electrical System Maintenance
Replacing the Fuses Electrical System Maintenance Engine A 15 A in-line fuse is incorporated into the engine wire Important: Before welding on the machine, harness (Figure 24). disconnect the controller and the negative cable from the battery to prevent damage to the electrical system. -
Page 28: Drive System Maintenance
Belt Maintenance Drive System Maintenance Adjusting the Belt Inspecting the Tires Service Interval: After the first 8 hours Every 50 hours Service Interval: Every 100 hours If the belt slips when changing the direction of the Check the tire pressure frequently to ensure proper nozzle, an adjustment to the belt is required. -
Page 29: Miscellaneous Maintenance
Miscellaneous Cleaning the Nozzle Guides Maintenance Check and remove any grass, dirt or debris buildup around and in between the nozzle guides (Figure 30). If the nozzle guides for the belts or rollers are not kept free of debris, the nozzle may not rotate freely which Checking the Nozzle could cause the motor to stall. -
Page 30: Cleaning
Cleaning Storage Storage Safety Washing the Machine Shut off the machine, remove the key (if equipped), Important: Do not use brackish or reclaimed and wait for all movement to stop before you leave the water to clean the machine. operator’s position. Allow the machine to cool before Important: Do not pressure wash the machine. - Page 31 Paint all scratched or bare metal surfaces. Paint is available from your authorized Toro distributor. Store the machine in a clean, dry garage or storage area. Remove the key from the ignition switch and keep it out of reach of children or other unauthorized users.
- Page 32 Notes:...
- Page 33 The Toro Company (“Toro”) respects your privacy. When you purchase our products, we may collect certain personal information about you, either directly from you or through your local Toro company or dealer. Toro uses this information to fulfil contractual obligations - such as to register your warranty, process your warranty claim or to contact you in the event of a product recall - and for legitimate business purposes - such as to gauge customer satisfaction, improve our products or provide you with product information which may be of interest.
- Page 34 While the exposure from Toro products may be negligible or well within the “no significant risk” range, out of an abundance of caution, Toro has elected to provide the Prop 65 warnings. Moreover, if Toro does not provide these warnings, it could be sued by the State of California or by private parties seeking to enforce Prop 65 and subject to substantial penalties.
- Page 35 Countries Other than the United States or Canada Customers who have purchased Toro products exported from the United States or Canada should contact their Toro Distributor (Dealer) to obtain guarantee policies for your country, province, or state. If for any reason you are dissatisfied with your Distributor's service or have difficulty obtaining guarantee information, contact your Authorized Toro Service Center.