Table of Contents
Advertisement
Advertisement
Table of Contents

Related Manuals for Ambiente LUNASTAT V2


Summary of Contents for Ambiente LUNASTAT V2
- Page 1 AMBIENTE LUNASTAT V2 | 43521...
-
Page 2: Table Of Contents
CONTENTS Setback temperature What is the LunaStat? Other features available Installation procedure Frost protection Setting program mode Programmable mode Keypad lock Floor limit protection LCD display Single channel timer Setting the clock LCD display Change/check temperature 14 Setting the clock Schedule and comfort settings Setting timer times... -
Page 3: What Is The Lunastat
WHAT IS THE LUNASTAT? The LunaStat is a multi-function thermostat/timer for any part of your heating or hot water system where thermostatic or programmable control is required The LunaStat consists of three main modes: 1. Standalone programmable/non-programmable thermostat 2. Setback thermostat with central programmer 3. - Page 4 1. PROGRAMMABLE/NON - PROGRAMMABLE THERMOSTAT The LunaStat operates by itself as independent control to the rest of the heating system as a thermostat in either programmable or non-programmable operation. A. Non-programmable – operates as a simple thermostat where the temperature is held at the set point continuously. B.
- Page 5 2. SETBACK THERMOSTAT WITH CENTRAL PROGRAMMER The LunaStat operates as temperature control on a room by room basis in conjunction with a single programmer (supplied separately) providing central timed control for larger areas or whole houses. The LunaStat is set to non-programmable and maintains the temperature at the set point whilst the programmer is on.
- Page 6 3. SINGLE CHANNEL TIMER The LunaStat operates by itself as 8am independent timer control for any part of your heating or hot water system. This enables you to have accurate timer control of your heating and hot water system, with the LunaStat ensuring the system operates at the time you require and set, available in 5 minute increments.
-
Page 7: Installation Procedure
INSTALLATION PROCEDURE Care should be taken on where the LunaStat is installed as being the ultimate control of your heating it is important that it is not installed near any secondary hot or cold sources. The LunaStat should be installed at chest/eye level and where it will receive an even reading of the temperature of the room. -
Page 8: Setting Program Mode
SETTING YOUR PROGRAM MODE SELECTION This LunaStat has been set by default to a programmable thermostat in 5+2 day programming (Weekdays + Weekend). To change between programmable, non-programmable, setback thermostat and single channel timer follow these steps. 1. Press and hold the button to turn the screen off 2. - Page 9 SETTING YOUR PROGRAM MODE SELECTION 7. Press OK 2 times, or until the small digit shows ’17’ 8. Press to change the large number for the following modes • 00 – Thermostat • 01 – Timer 9. Press button to return to the home screen.
-
Page 10: Programmable Mode
PROGRAMMABLE MODE ( 5+2 AND 7 DAY ) -
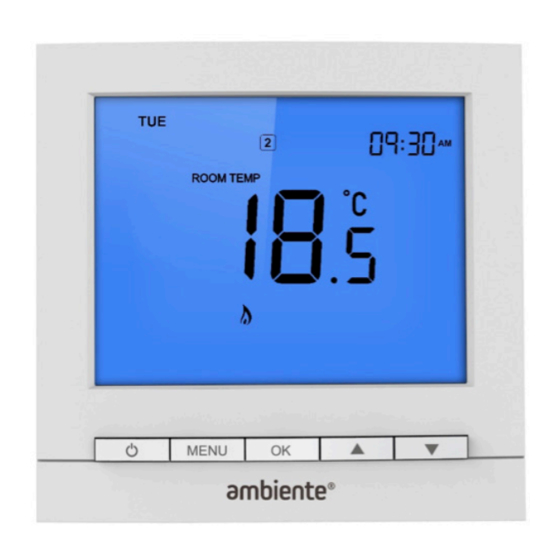
Page 11: Lcd Display
LCD DISPLAY... - Page 12 LCD DISPLAY 1. Day of the week – Displays the current day. 2. Temperature unit – Degrees Celsius ( C) or Fahrenheit ( 3. Hold left indicator – Displays when the HOLD FOR function is active along with the hours of hold remaining. 4.
-
Page 13: Setting The Clock
LCD DISPLAY 13. Frost shield – Displays when the thermostat is in frost protection mode. 14. Flame symbol – Displays when the thermostat is calling for heat. 15. Floor protection – Displays when the floor limit temperature is reached. 16. Main menu – Displays when setting schedule and feature parameters. -
Page 14: Change/Check Temperature
CHANGE/CHECK THE TEMPERATURE SETTINGS To set/change the temperature (temporary override) follow these steps. Note, this only changes the temperature until the next program time. 1. Press once to view the current temperature setting. 2. Press repeatedly to change the thermostat in increments of 0.5 3. -
Page 15: Schedule And Comfort
SCHEDULE AND COMFORT SETTINGS The LunaStat comes pre-programmed with comfort levels set. These factory default settings are: Weekday and weekend – 5/2 day programming Mon-Fri 5.30-20 8.00-16 16.00-20 C 22.00-16 Sat-Sun 6.30-20 9.00-16 16.00-20 C 23.00-16 Monday to Sunday – 7 day programming Mon-Sun 5.30-20 8.00-16... - Page 16 SCHEDULE AND COMFORT SETTINGS 5. Press to change the hour for ‘Period 1’. 6. Press OK to confirm and minute for ‘Period 1’ flashes. 7. Press to change the minute for ‘Period 1’. 8. Press OK to confirm and temperature for ‘Period 1’ flashes. 9.
-
Page 17: Setting The Holiday Mode
SETTING THE HOLIDAY MODE To set/change the holiday mode follow these steps (this is not applicable in non-programmable mode.) 1. Press MENU until the ‘SET HOLIDAY’ main menu item flashes. 2. Press OK to confirm. The ‘HOLIDAY LEFT’ symbol will show and the number of days will flash. -
Page 18: Setting The Hold Mode
SETTING THE HOLD MODE To set/change the hold mode follow these steps. Note: This function is also applicable in non-programmable mode. 1. Press MENU until the ‘SET HOLD’ main menu item flashes. 2. Press OK to confirm. The ‘HOLD LEFT’ symbol will show and the number of hours flash. -
Page 19: Optimum Start
OPTIMUM START The LunaStat will typically turn the heating on at the time set in the program. With the optimum start feature enabled the LunaStat will display a flashing symbol and turn the heating on beforehand in order to reach the required temperature for the time set. -
Page 20: Non-Programmable Mode
NON - PROGRAMMABLE MODE... -
Page 21: Lcd Display
LCD DISPLAY... - Page 22 LCD DISPLAY 1. Temperature unit – Degrees Celsius ( C) or Fahrenheit ( 2. Hold left indicator – Displays when the HOLD FOR function is active along with the hours of hold remaining. 3. Room/floor temperature – Indicates the current sensor set up and point of temperature measurement.
-
Page 23: Change/Check Temperature
CHANGE/CHECK THE TEMPERATURE SETTING To set/change the temperature follow these steps. 1. Press once to view the current temperature setting. 2. Press repeatedly to change the thermostat in increments of 0.5 3. Press OK to save the new temperature and return to the home screen. -
Page 24: Setting The Hold Mode
SETTING THE HOLD MODE To set/change the hold mode follow these steps. Note: This function is also applicable in non-programmable mode. 1. Press MENU until the ‘SET HOLD’ main menu item flashes. 2. Press OK to confirm. The ‘HOLD LEFT’ symbol will show and the number of hours flash. -
Page 25: Setback Thermostat Mode
NON - PROGRAMMABLE SETBACK MODE... -
Page 26: Lcd Display
LCD DISPLAY... - Page 27 LCD DISPLAY 1. Temperature unit – Degrees Celsius ( C) or Fahrenheit ( 2. Hold left indicator. – Displays when the HOLD FOR function is active along with the hours of hold remaining. 3. Room/floor temperature – Indicates the current sensor set up and point of temperature measurement.
- Page 28 CHANGE/CHECK THE TEMPERATURE SETTING To set/change the temperature follow these steps. 1. Press once to view the current temperature setting. 2. Press repeatedly to change the thermostat in increments of 3. Press OK to save the new temperature and return to the home screen.
-
Page 29: Setback Temperature
SETBACK TEMPERATURE The LunaStat operates a built in temperature setback when a timer/programmer is connected to the LunaStat. This setback is adjustable using the following steps. 1. Press and hold the button until the screen goes blank 2. Press and hold the menu button until the ‘SET SETUP main menu item flashes. -
Page 30: Other Features Available
FEATURES AVAILABLE ON ALL PROGRAM MODES FROST PROTECTION To set the thermostat in frost protection mode press the button. The symbol will display indicating that the thermostat is in frost mode and set to a lower temperature – factory default of 12 KEYPAD LOCK The LunaStat keypad can be locked to prevent any accidental... -
Page 31: Single Channel Timer
SINGLE CHANNEL TIMER MODE ( 5+2 AND 7 DAY ) -
Page 32: Lcd Display
LCD DISPLAY... - Page 33 LCD DISPLAY 1. Day of the week – Displays the current day. 2. Timer on/timer off status. 3. Hold left indicator – Displays when the HOLD FOR function is active along with the hours of hold remaining. 4. Holiday left indicator – Displays when the holiday function is active along with the number of days remaining.
-
Page 34: Setting The Clock
SETTING THE CLOCK To set/change the clock and day follow these steps. This is not applicable if the thermostat is in non-program mode. 1. Press MENU so the ‘SET CLOCK’ main menu item flashes. 2. Press OK to confirm. The current hour will flash 3. -
Page 35: Setting Timer Times
SETTING TIMER ON AND OFF TIMES The LunaStat comes pre-programmed with timer on and off times set. These factory default settings are. Daily programming Period 1 Period 2 Period 3 Period 4 On time 5:30 11:30 17:00 20:00 Off time 7:00 12:00 18:00... - Page 36 SETTING TIMER ON AND OFF TIMES To set/change the program comfort levels follow these steps. 1. Press MENU to display the main menu items. 2. Press MENU until the ‘SCHEDULE’ main menu item flashes. 3. Press OK to confirm. ‘MON ~ FRI’ will flash. 4.
- Page 37 SETTING TIMER ON AND OFF TIMES a. ‘Period 2’ is displayed and the On hour flashes 13. Repeat steps 5 to 12 for Periods 2, 3 & 4. 14. After pressing OK for ‘Period 4’, ‘COPY TO’ will flash. a. Press to cancel copy function and set other days manually b.
-
Page 38: Setting The Holiday Mode
SETTING THE HOLIDAY MODE To set/change the holiday mode follow these steps. 1. Press MENU to display the main menu items. 2. Press MENU until the ‘SET HOLIDAY’ main menu item flashes. 3. Press OK to confirm. The ‘HOLIDAY LEFT’ symbol will show and the number of days flash. -
Page 39: Setting The Hold Mode
SETTING THE HOLD MODE To set/change the hold mode follow these steps. Note: This function is also applicable in non-programmable mode. 1. Press MENU until the ‘SET HOLD’ main menu item flashes. 2. Press OK to confirm. The ‘HOLD LEFT’ symbol will show and the number of hours flash. -
Page 40: Factory Reset
FACTORY RESET Should the LunaStat need to be reset to factory default settings follow these steps. Press and hold the button to turn the LunaStat off. Press and hold and . The LunaStat will display all icons on the screen for 2 seconds. -
Page 41: Optional Features Explained
OPTIONAL FEATURES EXPLAINED The following settings are optional parameters to change how the thermostat works and what it displays. In many cases these need not be adjusted. Feature 01 – Sensor Selection: The LunaStat has the option of using its own built-in air sensor (default), a remote air sensor, floor sensor or a combination of these sensors for floor limit protection when both an air and floor sensor are used. - Page 42 OPTIONAL FEATURES EXPLAINED Feature 06 – On/off status: The LunaStat can be set to come on or stay off when power is turned on to the thermostat. Default is auto on/off from last power off. Feature 07 – Temperature calibration: The LunaStat has the option to adjust the sensor calibration by +/- 10 C in 0.5 increments.
- Page 43 OPTIONAL FEATURES EXPLAINED the switch output to prevent rapid switching on and off. This can be set from 00 – 15 minutes. Default is 00. Feature 12 – Optimum start: The LunaStat has the option to set an optimum start of up to 3 hours, see page 19 for more detail. Default is 0 hours.
-
Page 44: Changing Optional Features
CHANGING THE OPTIONAL FEATURES To change the optional features on the LunaStat follow these steps, selecting the required feature number and setting value. 1. Press and hold the button until the screen goes blank 2. Press and hold the menu button until the ‘SET SETUP’ main menu item flashes. -
Page 45: Optional Features Table
OPTIONAL FEATURE TABLE Feature Description Setting No. Sensor selection 00=Internal air sensor (Default) 01=Remote air sensor 02=Remote floor sensor 03=Internal air and remote floor sensor 04=Remote air and remote floor sensor Time format 12=12 hour, 24=24 hour (Default) Temperature format C (Default), 01= Frost protection when off 00=Enabled (Default) 01=Disabled... - Page 46 OPTIONAL FEATURE TABLE Optimum start 00 ~ 03 hours (Default = 00) Rate of change Information only, non-adjustable Floor temperature limit C ~ 60 C (68 F ~ 140 (Default =28 Setback enable 00=OFF (Default) 01=ON Setback temperature C ~ 5 C (5 F ~ 9 F) (Default =4...
-
Page 47: Error Codes
ERROR CODES Use the following table to determine and resolve error codes. Code Fault/Error Solution Internal sensor fault Replace thermostat Remote floor sensor fault Check programming for sensors – optional feature 01 Check floor sensor connections Check for damage on floor sensor or incorrect floor sensor resistance Remote air sensor fault Check programming for sensors –... -
Page 48: Wiring Diagrams
WIRING DIAGRAMS Wiring Diagrams LunaStat basic wiring diagram with switch live for heat item. Luna Stat basic wiring diagram with switch live for heat item. LunaStat This product must only be installed in accordance with local installation regulations and by a qualified electrician This product must only be installed in accordance with local installation regulations and by a qualified electrician. - Page 49 WIRING DIAGRAMS LunaStat wiring diagram with volt free switching for heat item. Wiring Diagrams Luna Stat wiring diagram with volt free switching for heat item. LunaStat This product must only be installed in accordance with local installation regulations and by a qualified electrician This product must only be installed in accordance with local installation regulations and by a qualified electrician.
- Page 50 WIRING DIAGRAMS LunaStat wiring diagram connecting to UH8 Wiring Centre. Wiring Diagrams Luna Stat wiring diagram connecting to UH8 Wiring Centre. LunaStat This product must only be installed in accordance with This product must only be installed in accordance with local installation regulations and by a qualified electrician local installation regulations and by a qualified electrician.
- Page 51 WIRING DIAGRAMS LunaStat basic wiring diagram in setback mode connecting to Wiring Diagrams UH8 Wiring Centre. Luna Stat basic wiring diagram in setback mode connecting to UH8 Wiring Centre. LunaStat This product must only be installed in accordance with local installation regulations and by a qualified electrician This product must only be installed in accordance with local installation regulations and by a qualified electrician.
- Page 52 Need more information or advice? Contact our team of highly trained experts today. 01707 649 118 info@ambienteufh.co.uk www.ambienteufh.co.uk LUNASTAT THERMOSTAT MANUAL...
Need help?
Do you have a question about the LUNASTAT V2 and is the answer not in the manual?
Questions and answers