Table of Contents
Advertisement
Advertisement
Table of Contents

Related Manuals for Comfee CDC17P0ABB


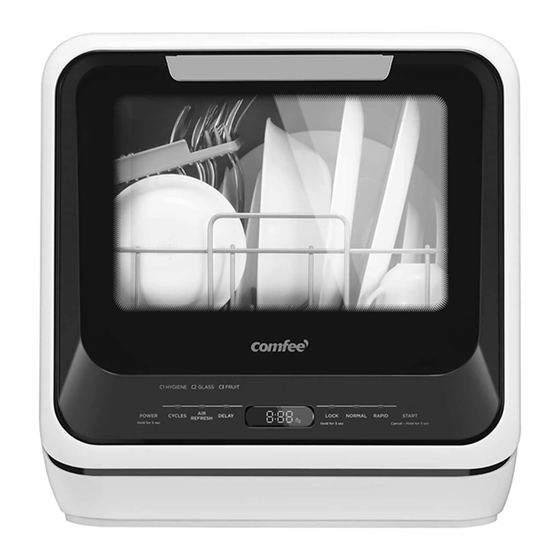
Summary of Contents for Comfee CDC17P0ABB
- Page 1 MODEL NUMBER CDC17P0ABB Please keep the manual for future reference.
- Page 2 QUICK START GUIDE Please read the entire manual for detailed operating instructions. Connecting to Power Supply The power required is 120VAC 60Hz, 10Amp circuit. Drain hose installation Place the end of the drain Hose into a sink or bucket. The clamp must be tightened by a screwdriver. ubber Fix the drain pipe with suction cups...
- Page 3 Prep the Dishware Remove the large residue on the dishware and glasses before placing into the dishwasher. Loading The Dishwasher Place dishes in the dishwasher in order by size and starting from the two ends, then load into the middle. All dishes are suggested to be tilted to improve cleaning performance.
-
Page 4: Table Of Contents
CONTENTS Please carefully read this manual before using the dishwasher, it will help you use and maintain the dishwasher properly . IMPORTANT SAFETY INSTRUCTIONS GETTING TO KNOW YOUR APPLIANCE Dishwasher Features Control Panel INSTALLATION INSTRUCTION Installation Preparation About Power Connection Water Connection Connection Of Drain Hoses USING YOUR DISHWASHER... -
Page 5: Important Safety Instructions
IMPORTANT SAFETY INSTRUCTIONS WARNING When using your dishwasher , follow the precautions listed below: Do not allow children to play with the appliance. Cleaning and user maintennace shall be made by children without supervision. This appliance is not intended for use by children or persons with reduced physical, sensory or mental capabilities, or lack of experience and knowledge, unless they have been given supervision or instruction concerning use of the appliance by a person responsible for their safety. - Page 6 General use Do not abuse, sit on, or stand on the door or dish rack of the dishwasher. Do not operate your dishwasher unless all enclosure panels are properly in place. Open the door very carefully if the dishwasher is operating, there is a risk of water squirting out.
- Page 7 Disposal For disposing of package and the appliance please go to a recycling centre. Therefore cut off the power supply cable and make the door closing device unusable. Cardboard packaging is manufactured from recycled paper and should be disposed in the waste paper collection for recycling. By ensuring this product is disposed of correctly, you will help prevent potential negative consequences for the environment and human health, which could otherwise be caused by inappropriate waste handling of this product.
-
Page 8: Getting To Know Your Appliance
GETTING TO KNOW YOUR APPLIANCE IMPORTANT: Before using this dishwasher for the first time and to get the best performance, read these instructions. Dishwasher features Handle Control panel Upper Spray Arm Water Tank Cap Lower Spray Arm Filter Detergent Dispenser Tableware Basket Basket Water Container... -
Page 9: Control Panel
Control panel C1 HYGIENE C2 GLASS C3 FRUIT LOCK To turn on and off. POWER Program Button: Press the button to select wash cycles HYGIENE ) -C2 (GLASS) -C3(FRUIT). HYGIENE: Use to remove bacteria from your dishes and CYCLES glassware. GLASS: Suitable for washing delicate ware with light soiled. -
Page 10: Installation Preparation
INSTALLATION WARNING Electrical Shock Hazard Disconnect electrical power before installing dishwasher. Failure to do so could result in death or electrical shock. Attention The installation of the pipes and electrical equipments should be done by professionals. Installation preparation The installation position of dishwasher should be near the existing water inlet tap and drain outlet and power socket. -
Page 11: About Power Connection
About Power Connection WARNING For personal safety: Do not use an extension cord or an adapter plug with this appliance. Do not, under any circumstances, cut or remove the ground connection from the power cord. Electrical Requirements Please look at the rating label to know the rating voltage and connect the dishwasher to the appropriate power supply. -
Page 12: Connection Of Drain Hoses
Connection of drain hoses The clamps must be tightened with a screwdriver. ubber stopper Fix the drain pipe with suction cups 1.Remove the rubber stopper. 2.Fix the drain pipe with the back pipe of the machine.The interface is fitted with clamps and tightened with a screwdriver. -
Page 13: Using Your Dishwasher
USING YOUR DISHWASHER Loading The Dishwasher Recommendation All items to be washed should be marked "dishwasher safe". Use only dish detergent designed for automatic dishwashers, hand dishwasher soap will create foam and require significant clean up and issues with the dishwahser. For delicate items, select a program with lower temperatures. - Page 14 All utensils are placed in the way that the spray arms can rotate freely during washing. NOTE Very small items should not be washed in the dishwasher as they could easily fall out of the basket. Place cups,deep bowls,and pans face down Load items in a way that the dirty surface faces the center of the dishwasher Position items such that they will not collect water of have puddles of water on top Load long and/or sharp cutlery horizontally on the cutlery tray...
- Page 15 Recommended loading layout with 1 serving bowl and 2 settings personal tableware. 2×Dinner plates(10in) 2×Bread and butter plates (6.7in) 2×Dessert bowls(5in) 2×Cups 2×Saucers(5.5in) 2×Glasses(12.5OZ) 2×Dinner forks 2×Salad forks 2×Knives 2×tea spoons × 1 Serving bowl(1L) 1×Oval platter(9.5in) 1×Serving forks 2×Serving spoons Folding Down The Rack Shelves The tines are used for holding plates and a platters.
-
Page 16: Loading The Detergent
Loading The Detergent This product not support rinse aid. Only add detergent. WARNING Only use detergent specifically for dishwashers. Never use any other rinse aid and detergents. This will damage the appliance. Dishwasher detergent is corrosive! Keep dishwasher detergent out of the reach of children. - Page 17 Adding detergent Detergent Cup -17-...
-
Page 18: Wash Cycle Selection
WASH CYCLE SELECTION Wash Cycle Programs The table below shows which programs are best for the levels of food residue on them and how much detergent is needed. It also show various information about the programs. Cycle Selection Description Program Detergent Time Information... -
Page 19: Turning On The Appliance
Turning On The Appliance Starting a wash cycle... Draw out the basket(see the section entitled "Loading the Dishwasher"). Pour in the detergent (see the section“Fill the detergent”). Insert the plug into the socket. The power supply is 120VAC 60HZ, Press the power button to turn on the appliance, Connect the inlet hose to the tap, make sure that the water supply is turned on to full pressure, or add water to the tank manually. -
Page 20: Forget To Add A Dish
NOTE If the door is opened during washing, the machine will pause. To resume press the Start Button, the machine will resume after 10 seconds. Forget to add a dish? A forgotten dish can be added within the first 10 minutes of the cycle.If this is the case, follow the instructions below: Open the door a little to stop the washing. -
Page 21: End Of The Wash Cycle
End Of Wash Cycle When the cycle has finished, the buzzer of dishwasher will sound 8 seconds,then stop.Turn off the appliance using the ON/OFF button, shut off the water supply and open the door of the dishwasher. Wait a few minutes before unloading the dishwasher to avoid scald. -
Page 22: Maintenance And Cleaning
MAINTENANCE AND CLEANING Filter System WARNING Never use the dishwasher without filters! Make sure the filter is properly assembled. The performance may be affected and dishes and utensils could become damaged. The filter efficiently removes food particles from the wash water, allowing it to be recycled during the cycle. -
Page 23: Dishwasher Care
NOTE To re-install the filter system, complete Step 2 to Step 1. The entire filter assembly should be cleaned once a week. Inspect the filters for blockages every time the dishwasher has been used. By unscrewing the coarse filter, you can remove the filter system. Remove any food remnants and clean the filters under running water. - Page 24 Protect against freezing Protect the dish washer from freezing temperatures.If the dishwasher will experience freezing temperature please flow the below procedure: 1. In standby mode,press and hold DELAY button + AUTO OPEN button for 3 seconds simultaneously to drain the water tank. Unplug electrical power to the dishwasher.
-
Page 25: Dishwasher Maintenance
Dishwasher Maintenance NOTE Before cleaning or performing maintenance, always unplug the dishwasher to remove power. After Every Wash After every wash, turn off the water supply to the appliance and leave the door slightly open so that moisture and odors are not trapped inside. Cleaning Best Practices To clean the exterior and rubber parts of the dishwasher, do not use solvents or abrasive cleaning products. -
Page 26: Troubleshooting Tips
TROUBLESHOOTING TIPS Before calling for service Reviewing the charts on the following pages may save you from calling for service. Problem Possible Causes What To Do Dishwasher doesn't Fuse blown, or the Replace fuse or reset circuit breaker. start circuit break tripped. Remove any other appliances sharing the same circuit with the dishwasher. - Page 27 Problem Possible Causes What To Do Remove all of the dishes from the Suds in the tub Incorrect Detergent/ dishwasher.Scoop out as much of the Soap suds as you can with a plastic container. Add a cup of either olive ail or white vineger,and run normal wash for a few minutes,and force a drain.Repeat as necessary until the foam is cleared, then...
- Page 28 Problem Possible Causes What To Do The dishes Detergent Use more detergent, or check the are not clean. data of the detergent,or try a different brand of detergent. Items are blocking Rearrange the items so that the spray the movement of can rotate freely.
-
Page 29: Error Codes
Error codes The dishwasher will display error codes when it detects a malfunction with in its systems. Codes Meanings Possible Causes Unit not receiving Check that the water supply is connected properly and the water is turned on.(Water enough water tank not full?) Not reaching required Contact Customer Service to have a qualified... -
Page 30: Technical Information
Technical Information 18 5/16" (465mm) 18 5/16" (465mm) Height Width 16 9/16" (420mm) Depth 17 1/8" (435mm) 0.04 - 1.0MPa Water pressure see rating label Power supply 2 place setting(AHAM) Capacity -30-... -
Page 31: Warranty
1 Year Limited Warranty This is the only express warranty for the product and in lieu of any other warranty or condition. This product is warranted to be free from defects in material and workmanship for a period of one year from the date of original purchase. During this period, your exclusive remedy is repair or replacement of this product or any component found to be defective, at our option;...
Need help?
Do you have a question about the CDC17P0ABB and is the answer not in the manual?
Questions and answers