
Related Manuals for Lamona LAM3410


Summary of Contents for Lamona LAM3410
- Page 1 Built-in Single Fan Oven LAM3410 LAM3411 Instructions and Installation www.howdens.com/appliance-registration ISSUE v3. 030522...
- Page 2 Built-in Single Fan Oven LAM3410 LAM3411 www.howdens.com...
- Page 3 Instructions and Installation Welcome Dear Customer, Congratulations on your choice of oven. The user manual will help you use your product quickly and safely. • Please read this user manual before installing and using the oven. • Always follow the safety instructions. •...
-
Page 4: Table Of Contents
Built-in Single Fan Oven LAM3410 LAM3411 Contents 1. Before using the oven 7. Clock Programmer General Safety Minute Minder Safety for children Timer Cooking Safety when working Delayed Start Cooking with electricity 8. Key Lock General warnings about cooking in the oven 9. -
Page 5: Before Using The Oven
Instructions and Installation 1. Before using the oven • Make sure that you have removed all packaging, wrappings, stickers and film from the oven’s surface and inside the oven cavity (see page 10). • It is recommended that you clean and wash the oven’s surface before using for the first time (page 14). - Page 6 Built-in Single Fan Oven LAM3410 LAM3411 • Repair procedures must always be performed by qualified service agents. The manufacturer shall not be held responsible for damages arising from procedures carried out by unauthorised persons, which may also void the guarantee.
-
Page 7: Safety For Children
Instructions and Installation • When hot and cold air meet, condensation can form. The outer door is air cooled and the inner glass will become hot during cooking, therefore some condensation might form. This is perfectly normal. All condensation will disappear as the oven reaches cooking temperature. •... -
Page 8: General Warnings About Cooking In The Oven
Built-in Single Fan Oven LAM3410 LAM3411 General warnings about cooking in the oven WARNING! Risk of fire! • Do not place aluminium foil • Do not line the grill tray or any or baking trays on the base of baking trays with aluminium foil. -
Page 9: Environmental Instructions
Instructions and Installation 2. Environmental Instructions Waste regulation Disposing of the old product. Compliance with the WEEE Directive and disposing of the waste product: This product complies with EU WEEE Directive (2012/19/EU). This product bears a classification symbol for waste electrical and electronic equipment (WEEE). This product has been manufactured with high quality parts and materials which can be reused and are suitable for recycling. -
Page 10: General Information
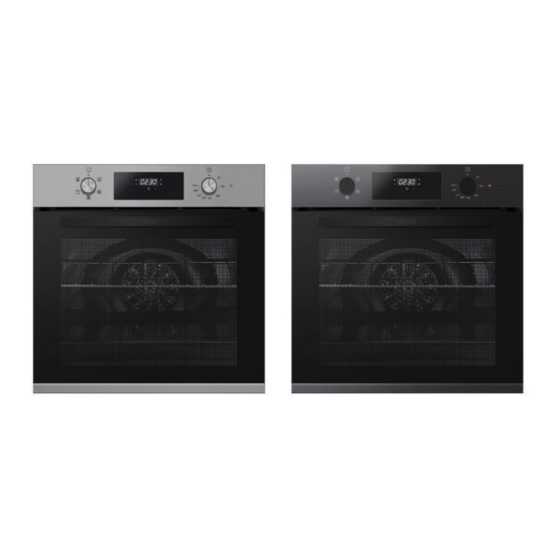
Built-in Single Fan Oven LAM3410 LAM3411 3. General information Oven layout Control panel Heating element Handle Light Oven door Oven shelf position Control panel layout Oven / grill function knob Main oven temperature control knob Oven /grill temperature indicator Accessories... -
Page 11: Operating Modes Oven Functions
Instructions and Installation 4. Operating modes Oven functions All functions or the ovens and grill are listed in this section. Please note* depending on the model of your oven, the number and order of operating modes available may deviate from the illustrations shown below. -
Page 12: Preparation
Built-in Single Fan Oven LAM3410 LAM3411 5. Preparation First cleaning of the appliance Tips for saving energy 1. Remove all packaging materials. The following information will help you to use your appliance in 2. Wipe the surfaces of the an ecological way, and to save... -
Page 13: How To Operate The Main Oven And Grill
Instructions and Installation 6. How to operate the main oven and grill Setting the correct time The operating modes of the electric oven are selected with the function knob. The temperature is adjusted with the thermostat knob. How to use the Oven & Grill 1. -
Page 14: Clock Programmer
Built-in Single Fan Oven LAM3410 LAM3411 Timer Cooking Warning - Do not place aluminium foil or baking trays on the bottom Timed Operation Period of oven cavity. This can lead to permanent damage to your Oven cooks for a selected time period then stops: (0.01min to 23.59hr) -
Page 15: Delayed Start Cooking
Instructions and Installation Delayed Start Cooking Time Stop Point Oven cooks until a designated time The two timed cooking modes then stops: (up to 23.59hr) can be combined to create a delayed start cooking period. Programme a Timed Operation Period (as described on p12). Then Programme a Time Stop Point Press mode button... -
Page 16: Key Lock
Built-in Single Fan Oven LAM3410 LAM3411 8. Key Lock How To Use Child Lock function is activated by touching Set + for a minimum of 5 seconds. From this moment on all other functions are locked and the display will flash STOP and preset time intermittently. -
Page 17: Cooking Table
Instructions and Installation 9. Cooking table The values indicated in the tables below are indicative. They may vary according to the type food, the quantity and your preferences of cooking. Baking and roasting Level 1 is the lowest shelf level. Oven cooking table Cooking Cooking... -
Page 18: Cooking And Baking Advice
Built-in Single Fan Oven LAM3410 LAM3411 Cooking Cooking Oven Rack Temperature Dish level Accessories time (min) Function position (ºC) number (approx.) Lasagna One level Oven Tray 30 - 40 Start 250, after 25 Beefsteak One level Oven Tray mins change to... - Page 19 Instructions and Installation Tips for grilling Tips for baking pastry • Grilling is ideal for cooking • If the pastry is too dry, increase meat, fish and poultry and will the temperature by 10 °C and achieve nice browning without decrease the cooking time.
-
Page 20: Care And Maintenance
Built-in Single Fan Oven LAM3410 LAM3411 11. Care and maintenance General information • Do not use cleaning agents that contain acid or chloride Service life of the product to clean the stainless steel will extend and the possibility surfaces and the handle. -
Page 21: Removal Of The Oven Door Glass
Instructions and Installation Removal of the oven Do not forget to lock the clips at the hinges when cleaning door glass is complete. 1. Open the door. Replacing the oven lamp 2. Unlock the door by moving the clips at the hinge: lift and move Hot surfaces may backwards as illustrated below: cause burns! -
Page 22: Removing And Cleaning Wire Racks
Built-in Single Fan Oven LAM3410 LAM3411 Removing and cleaning wire racks 1. Remove the wire racks by pulling them in the direction of the arrows (see below) 2. To clean the wire racks either put them in the dishwasher or use a wet sponge, ensuring that they are dried afterwards. -
Page 23: Installation
Instructions and Installation 12. Installation Before installation • The appliance is intended for installation in Howdens kitchen The product must only be installed cabinets. by suitably qualified persons. • Surfaces, synthetic laminates and adhesives used must be The product must be installed heat resistant. -
Page 24: Electrical Connections
Built-in Single Fan Oven LAM3410 LAM3411 Electrical connections • IMPORTANT: Ensure that the electricity supply is switched off before connecting. Your oven is intended for permanent installation. • Your appliance must be connected to fixed wiring via the use of a double pole switched fused spur outlet with at least 3mm contact separation. - Page 25 Instructions and Installation Installation The appliance may be connected to the mains Slide the oven into the cabinet supply only by a suitably aperture, align and secure. qualified person. The mains lead must not be clamped, bent, trapped, or come into contact with hot parts of the appliance.
-
Page 26: Cooling Fan
Built-in Single Fan Oven LAM3410 LAM3411 Cooling fan Control panel Door The Built-in cooling fan cools both the front of the appliance and cabinetry. Do not switch the oven off at the mains isolation switch immediately after cooking. Cooling fan continues to run for up to 20-30 minutes (approx.) even after the oven... -
Page 27: Technical Specifications
Instructions and Installation 13. Technical specifications Technical information General Voltage / frequency 220-240 V ~ 50 / 60 Hz Total power consumption 2.2 kW Fuse min. 13A Oven / grill External dimensions 595mm / 595mm / 545mm (height / width / depth) Installation dimensions 585-595mm / 560 mm / min. -
Page 28: Troubleshooting
Not a product fault. Test error code • Possible timer fault Call the Lamona Service line on 0344 460 0006 If you cannot eliminate the problem after following the instructions in this section, consult your depot or the Authorised Service Agent. -
Page 29: Your Guarantee
• Your full contact details. Call the Depot number on your Proof of Purchase Document supplied with the product/kitchen. Call the LAMONA Service Line on: Within the UK: 0344 460 0006 Within Republic of Ireland: 01525 5703 • Product installed within a domestic kitchen or a non-domestic kitchen where 8 or fewer people are using the appliance. - Page 30 Built-in Single Fan Oven LAM3410 LAM3411 Notes _____________________________________________________________________ _____________________________________________________________________ _____________________________________________________________________ _____________________________________________________________________ _____________________________________________________________________ _____________________________________________________________________ _____________________________________________________________________ _____________________________________________________________________ _____________________________________________________________________ _____________________________________________________________________ _____________________________________________________________________ _____________________________________________________________________ _____________________________________________________________________ _____________________________________________________________________ _____________________________________________________________________ _____________________________________________________________________ _____________________________________________________________________ _____________________________________________________________________ www.howdens.com...
- Page 31 Instructions and Installation Notes _____________________________________________________________________ _____________________________________________________________________ _____________________________________________________________________ _____________________________________________________________________ _____________________________________________________________________ _____________________________________________________________________ _____________________________________________________________________ _____________________________________________________________________ _____________________________________________________________________ _____________________________________________________________________ _____________________________________________________________________ _____________________________________________________________________ _____________________________________________________________________ _____________________________________________________________________ _____________________________________________________________________ _____________________________________________________________________ _____________________________________________________________________ _____________________________________________________________________...
- Page 32 Product serial number (Place sticker here) REPRISE À DÉPOSER À DÉPOSER À LA LIVRAISON EN MAGASIN EN DÉCHÈTERIE Cet appareil se recycle Howden Joinery Ltd, Thorpe Road, Howden, East Yorkshire, DN14 7PA Imported in EU by: Houdan Cuisines SAS, Z.A. du Bois Rigault Nord, 1Rue Calmette, 62880 Vendin-le-Vieil, Cedex, France.
Need help?
Do you have a question about the LAM3410 and is the answer not in the manual?
Questions and answers
how to turn off LOC