Table of Contents
Advertisement
Available languages
Available languages
Quick Links
Advertisement
Table of Contents

Related Manuals for Enel X JuiceBox


Summary of Contents for Enel X JuiceBox
- Page 1 JuiceBox ® / Manual / Manual / Manuel...
-
Page 3: Package Contents
2 wall bracket screws for installation into wood (#10 self-tapping Phillips head wood screws) 2 wall bracket anchors and screws for installation into brick or concrete 2 screws to hang JuiceBox onto wall bracket (#10-32 Phillips head machine screws) REQUIRED TOOLS Phillips Screwdriver (No. 2 drive size) -
Page 4: Installation Prerequisites
INSTALLATION PREREQUISITES JuiceBox requires a hardwired electrical connection that is rated to at least 125% of the device’s continuous load. JuiceBox must be be installed by a qualified electrician. An external enclosure rated at IP66 shall be used to house the connection between the JuiceBox input cable and the AC supply circuit. -
Page 5: Installation
INSTALLATION Fully read and understand the directions before installation. Refer to addi tional safety information at the end of this document. Isolate the electrical circuit. Use a 2-pole voltage detector to ensure that there is no power at the hardwire connection. WARNING: Do not continue with the installation or repair until the electrical circuit is proven electrically dead. - Page 6 Concrete or brick installation: a) Position the wall bracket as desired. While holding the wall frame in place, use the 2 mounting holes in the wall frame as a template to mark drill points on the wall b) Using a 10 mm bit, drill holes in the wall at the points marked in the previous step.
- Page 7 Insert the enclosure screws into the enclosure, as shown. Tighten the screws until approximately 2 mm of thread are visible. Hang the JuiceBox onto the wall bracket. NOTE: If the JuiceBox does not hang securely, adjust the screws that were installed in step 3.
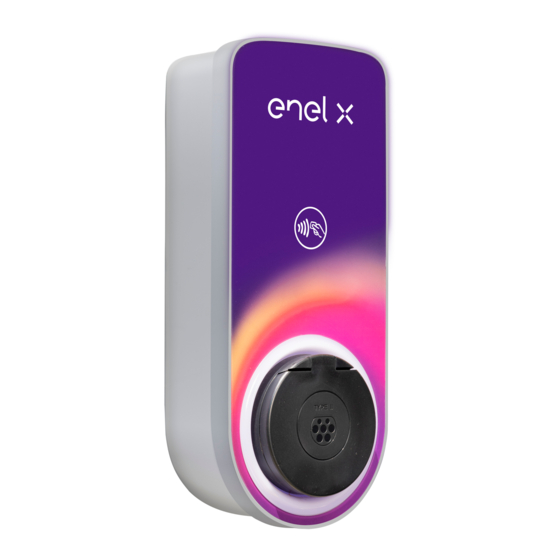
- Page 8 To connect JuiceBox to the internet, download the EV JuiceNet app and follow the onscreen instructions. For more information, refer to support-emobility.enelx.com LOCKING YOUR JUICEBOX After installing your JuiceBox, use the included keys to lock the JuiceBox to the wall frame.
-
Page 9: Important Safety Information
WARNING: Install and use the JuiceBox away from flammable, explosive, harsh or combustible vapors, materials or chemicals. WARNING: Do not operate the JuiceBox outside its temperature rating of -40°C to +60°C. WARNING: This device is intended only for electric vehicles not requiring ventilation during charging. -
Page 10: Benötigte Werkzeuge
JuiceBox Sicherungsschlüssel Wandhalterung 2x Wandhalterungsschrauben zur Montage in Holz (10 selbstschneidende Kreuzschlitz-Holzschrauben) 2x Dübel und Schrauben zur Montage in Ziegeln oder Beton 2x Schrauben zum Einhängen der JuiceBox in die Wandhalterung (10-32-Kreuzschlitz-Maschinenschrauben) BENÖTIGTE WERKZEUGE Kreuzschlitz-Schraubendreher (Größe Nr. 2) Hammer 10-mm-Mauerwerkbohrer... - Page 11 (Miniaturleistungsschalter) mit Kennlinie D als auch einen RCD (Fehlerstrom-Schutzschalter) des Typs A umfasst. Beachten Sie bei der Auswahl des Installationsortes für den fest verdrahteten Anschluss, dass die die JuiceBox wie folgt positioniert werden sollte: In Reichweite des Ladeanschlusses des Fahrzeugs 0,5m - 1,5m über dem Boden...
-
Page 12: Montage
MONTAGE Lesen und verstehen Sie die Anweisungen vor der Installation. Beachten Sie die zusätzlichen Sicherheitshinweise am Ende dieses Dokuments Schalten Sie Schutzschalter am fest verdrahteten elektrischen Anschluss aus. Überprüfen Sie mit einem Multimeter, dass am fest verdrahteten Anschluss keine Spannung anliegt. ACHTUNG: Fahren Sie erst mit der Installation fort, wenn das Multimeter anzeigt, dass am fest verdrahteten Anschluss keine Spannung anliegt. - Page 13 Montage in Beton oder Ziegeln: a) Platzieren Sie die Wandhalterung nach Wunsch. Während Sie die Wandhalterung in Position halten, verwenden Sie die 2 Montagebohrungen in der Wandhalterung als Schablone, um die Positionen der Bohrlöcher in der Wand zu markieren. b) Bohren Sie mit einem 10-mm-Bohrer Löcher an den Positionen, die Sie im vorherigen Schritt markiert haben.
- Page 14 Gehäuse ein. Ziehen Sie die Schrauben an, bis nur noch ca. 2 mm des Gewindes sichtbar sind. Hängen Sie die JuiceBox an die Wandhalterung. HINWEIS: Wenn die JuiceBox nicht sicher hängt, justieren Sie die Schrauben, die Sie in Schritt 4 angebracht haben. Schließen Sie die JuiceBox an:...
- Page 15 Erde Erde Schalten Sie Schutzschalter ein, der den fest verdrahteten elektrischen Anschluss mit Strom versorgt. Um JuiceBox mit WiFi zu verbinden, laden Sie die EV JuiceNet-App herunter und folgen Sie den Anweisungen auf dem Bildschirm. Weitere Informationen finden Sie auf support-emobility.enelx.com...
-
Page 16: Wichtige Sicherheitshinweise
Gehäuse zu öffnen. Es gibt keine vom Benutzer zu wartenden Teile im Inneren. Wenden Sie sich an qualifiziertes Servicepersonal. ACHTUNG: Installieren und verwenden Sie die JuiceBox nicht in der Nähe von brennbaren, explosiven, aggressiven oder brennbaren Dämpfen, Materialien oder Chemikalien. -
Page 17: Contenu De L'emballage
2 vis du support mural pour bois (vis à bois cruciformes autoperceuses n° 10) 2 chevilles et vis du support mural pour briques ou béton 2 vis pour accrocher la JuiceBox à un support mural (vis à métaux cruciformes n° 10-32) OUTILS REQUIS Tournevis cruciforme (n°... - Page 18 En choisissant l’emplacement d’installation du raccordement câblé ou de la prise, gardez à l’esprit que le JuiceBox doit être placé: À portée du port de recharge du véhicul 0,5m - 1,5m du sol Le cas échéant, à...
- Page 19 Rapportez-vous aux informations de sécurité supplémentaires disponibles à la fin du présent document. Mettez le circuit hors tension, mettez en position “off” les disjoncteurs du circuit dedié à la JuiceBox. Vérificateur d’absence de tension (VAT selon norme NFC18-510) AVERTISSEMENT: Ne poursuivez pas l’installation tant que le VAT n’indique pas l’absence de tension du raccordement câblé.
- Page 20 Installation en béton ou en briques: a) Placez le support mural à votre guise. Tout en maintenant le support mural en place, utilisez les 2 trous de fixation du support en tant que patron afin de marquer les points de perçage sur le mur.
- Page 21 Insérez les vis du boîtier dans le boîtier, comme illustré. Serrez les vis jusqu’à ce qu’environ 2 mm du pas de vis soient visibles. Accrochez la JuiceBox au support mural. REMARQUE: Si le JuiceBox s’accroche mal, ajustez les vis installées lors de l’étape 4.
- Page 22 Enclenchez le disjoncteur pour alimenter le circuit de la borne. Pour connecter JuiceBox à la WIFI, télécharger l’application JuiceNet et suivez les instructions affichées. Pour plus d’informations, consultez support-emobility.enelx.com VERROUILLER JUICEBOX Après avoir instalée votre JuiceBox, utilisez les clés incluses pour verrouiller la JuiceBox au cadre mural.
- Page 23 INFORMATIONS IMPORTANTES DE SÉCURITÉ Veuillez lire l’ensemble des informations de sécurité avant d’installer ce produit. AVERTISSEMENT: La JuiceBox doit être instalée par un électricien qualifié IRVE. AVERTISSEMENT: Cet appareil nécessite une supervision en présence d’enfants. AVERTISSEMENT: Ne placez pas vos doigts dans le connecteur du véhicule électrique...
- Page 24 http://support-emobility.enelx.com 755-000217.D...
Need help?
Do you have a question about the JuiceBox and is the answer not in the manual?
Questions and answers