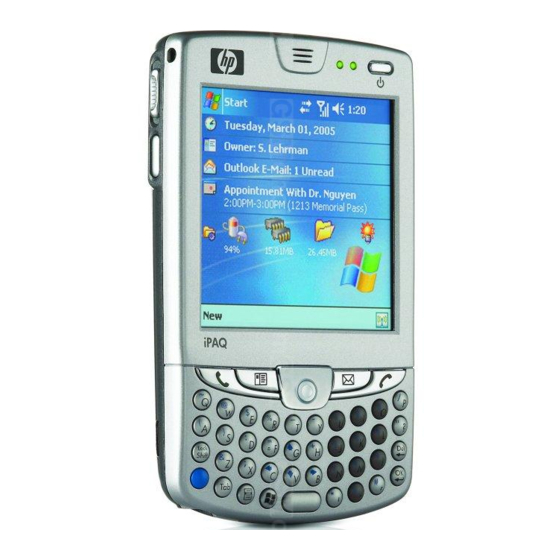
HP iPAQ hw6510 Manual
Mobile messenger series
Hide thumbs
Also See for iPAQ hw6510:
- User manual (192 pages) ,
- Manual (53 pages) ,
- Maintenance manual (24 pages)

Related Manuals for HP iPAQ hw6510


Summary of Contents for HP iPAQ hw6510
- Page 1 HP iPAQ hw6500 Mobile Messenger series How Do I...? Look inside to find answers to frequently asked questions about product setup, features, and more.
- Page 2 Microsoft, Windows, the Windows logo, Outlook, and ActiveSync are trademarks of Microsoft Corporation in the U.S. and other countries. HP iPAQ hw6500 Mobile Messenger series is Powered by Windows® Mobile™ 2003 Second Edition software for Pocket PC. All other product names mentioned herein may be trademarks of their respective companies.
-
Page 3: Table Of Contents
My HP iPAQ? ........14... - Page 4 My HP iPAQ? ........49...
-
Page 5: Find Out What's On My Cd
All of the software and documents are designed to be installed on your personal computer to enhance your ability to use your HP iPAQ to its fullest potential. The CD also contains software and drivers that can be installed directly onto your HP iPAQ for use on the go. - Page 6 Insert the Companion CD into the CD-ROM drive on your computer. The HP iPAQ Setup Wizard starts automatically. Select Start Here. Read the Welcome page, make sure your HP iPAQ is not yet connected to your computer, and select Next. Select Next again and the Setup Wizard starts scanning your system.
- Page 7 When the Set Up Microsoft ActiveSync window displays, click Next. When the Select Installation Folder for Microsoft ActiveSync window displays, accept the default location offered, or select Change... to specify a different location.
-
Page 8: Create An Activesync Partnership
A Microsoft ActiveSync partnership allows your HP iPAQ and your personal computer to communicate with each other. To synchronize your HP iPAQ and your personal computer, you must first create a partnership using ActiveSync. You only need to create a partnership once. - Page 9 USB port on your personal computer. Then connect one end of the AC adapter to the cradle and the other end to an electrical outlet. Turn on your HP iPAQ by pressing the Power button, and then insert it into the cradle.
- Page 10 When the New Partnership screen displays, select Synchronize with this desktop computer, and then click Next. When the Select Number of Partnerships screen displays, choose whether you want to synchronize with one computer or two (e.g., home and office).
-
Page 11: Synchronize My Hp Ipaq To A Personal Computer
(such as calendar, contacts, and e-mails) in both places, making it available when you work on your personal computer or when you take your HP iPAQ on the go. There are several ways to synchronize your HP iPAQ with your personal computer: •... - Page 12 Connect one end of the AC Adapter 2 to the cradle and connect the other end to an electrical outlet to charge the unit. Insert the HP iPAQ in the cradle 3 and push firmly to seat it. Synchronization begins automatically.
- Page 13 CAUTION: To avoid damaging your HP iPAQ or the autosync cable, be sure the HP iPAQ and cable connectors are properly aligned before pushing the cable into the universal sync connector. Connect the other end of the autosync cable to the USB port on your computer.
-
Page 14: Perform A Soft ("Normal") Reset
Locate the recessed Reset button on the bottom right side of your HP iPAQ. Use the stylus to lightly press and release the Reset button. The HP iPAQ restarts and displays the Today screen. NOTE: A soft reset does not change any Bluetooth or ActiveSync settings on your HP iPAQ. -
Page 15: Perform A Hard ("Full") Reset
Perform a hard reset (also known as a full reset) when you want to clear all settings, programs, and data from Random-Access Memory (RAM). CAUTION: If you perform a hard reset, your HP iPAQ returns to its default settings and loses all information (files, settings, etc.) that is not recorded in Read-Only Memory (ROM). -
Page 16: Use The Todaypanel To Monitor My System Resources
Resources? The TodayPanel displays halfway down the Today screen as icons or as text bars for quick and easy accessibility to the following: • today settings and options • battery power • storage and program memory • memory used in the iPAQ File Store folder •... -
Page 17: Migrate Data From Palm Desktop Software To Windows Mobile 2003
ActiveSync, you synchronize the Outlook data on your personal computer with your HP iPAQ. NOTE: Do not insert your HP iPAQ into the cradle until you have installed ActiveSync and are prompted to do so. To migrate data from Palm Desktop to Windows Mobile 2003:... -
Page 18: Keep Files Synchronized On My Personal Computer And My Hp Ipaq
If your HP iPAQ is in the cradle, synchronization begins automatically. A folder is created on your desktop that is named after the name you gave your HP iPAQ when you set up your partnership (for example, Pocket_PC My Documents). If your... -
Page 19: Insert The Subscriber Identity Module (Sim) Card Correctly
OK to save the changes. Copy any files you want to synchronize to your HP iPAQ to the Synchronized Files folder for transfer during synchronization. To verify that the files were synchronized successfully with your HP iPAQ, tap Start >... -
Page 20: Manage Available Storage
3. Do not touch metal contacts. How Do I Manage Available Storage? Your HP iPAQ normally manages storage for you by moving available space back and forth between storage memory (memory used to store data and document files) and program memory (memory used to run programs) as needed. -
Page 21: Program List
You can choose any or all of the options below. Option A: Changing Storage Settings Manually To temporarily change the storage settings manually: On your HP iPAQ, tap Start > Settings > System tab > Memory. Use the stylus to slide the Storage/Program bar as necessary. -
Page 22: Insert And Remove My Battery Correctly
Digital (SD) or Mini-SD memory card for your unit. The SD or Mini-SD card can be installed in the expansion slots located on the right side of the HP iPAQ. For a picture of the SD and Mini-SD slots, refer to the graphic under “How Do I Save Pictures to a Memory Card?”... -
Page 23: Maximize Battery Life And Check Battery Charge Levels
From the TodayPanel on the Today screen, tap the Battery icon > • Advanced tab to set the HP iPAQ to turn off after a short time if it is not being used. For information on the TodayPanel, refer to Do I Use the TodayPanel to Monitor My System Resources?”... - Page 24 HP iPAQ to AC power using the cradle or the AC adapter or insert a fully charged battery into the HP iPAQ. When the HP iPAQ turns off (due to low battery level) and does not turn on again, you have only up to 72 hours to recharge the battery before you lose data.
-
Page 25: Place And Receive Phone Calls
Placing a Call When you turn on the Phone, the Phone keypad displays on the HP iPAQ screen. To turn on the phone and place a call: From the Today screen, tap the iPAQ Wireless button in the Command bar. -
Page 26: Receiving A Call
Call History” in the User’s Guide located on the Companion CD). Receiving a Call When you receive a phone call, the HP iPAQ rings (or vibrates) and a message appears on the screen, giving you an option to either answer or ignore the incoming call. -
Page 27: Set Up And Access My Voicemail
The first speed dial location is set as a default for your voice mailbox number. When you insert your Subscriber Identity Module (SIM) card into your HP iPAQ, it sets (as default) the voice mailbox number of your mobile service provider. You might need to configure your phone to the Voicemail... -
Page 28: Make A Conference Call
To verify that your service plan supports international roaming, contact your mobile phone service provider. How Do I Change My Phone Services Settings? Your HP iPAQ phone has several phone services you can change, such as Call barring, Caller ID, Call Forwarding, Call Waiting, Voicemail, and Text messages. -
Page 29: Change The Call Forwarding Settings
You can configure the phone service settings you subscribe to through your mobile phone service provider. For example, you may want to block certain types of incoming and/or outgoing calls, forward incoming calls to a different phone number based on your situation, be notified of incoming calls when you’re already in a phone session, or let others know your identity when making calls. -
Page 30: Text Message
NOTE: You must have a Subscriber Identity Module (SIM) card installed in your HP iPAQ to send and receive text messages. A SIM card either came with your unit or must be purchased from a mobile phone service provider or electronics store. -
Page 31: Set Up And Manage An E-Mail Account On My Hp Ipaq
Messaging. NOTE: The network or ISP connection must use a POP3 or IMAP4 e-mail server and an SMTP gateway. To create an e-mail account on your HP iPAQ: From the Start menu, tap Messaging > Accounts > New Account... - Page 32 NOTE: Enter the e-mail address provided by your ISP or network administrator, such as username@servername.com or username@servername.net. Your HP iPAQ automatically attempts to configure your e-mail settings. Tap Next when the status says “completed,” or tap Skip to bypass this screen.
-
Page 33: E-Mail Using My Hp Ipaq
3 of the User’s Guide located on the Companion CD. How Do I E-mail Using My HP iPAQ? Once you have set up an e-mail account on your HP iPAQ, you can start using e-mail. To send an e-mail: From the Today screen, tap New in the Command bar, and then tap Message. -
Page 34: Use Gsm, Gprs, And Edge
Subscriber Identity Module (SIM) Text Messages GSM/GPRS/EDGE technology is integrated into your HP iPAQ. To send or receive data over a GSM/GPRS/EDGE network, you must have an account with a mobile phone service provider that supports GSM/GPRS/ EDGE data services and an activated Subscriber Identity Module (SIM) card. -
Page 35: Turn On Gsm
For more detailed information on GSM, GPRS, or EDGE, refer to “Using GSM/GPRS/EDGE Connections” in Chapter 7 of the User’s Guide located on the Companion CD or go to the HP Web site and chat with an online agent. For instructions on how to chat with an online agent, refer to the question “How Do I Find Information On Topics Not Covered in This... -
Page 36: Get Started Using Gps Navigation On The Hp Ipaq
However, before you can do this, you must set up your HP iPAQ and load a map onto your HP iPAQ or SD memory card. Use your HP iPAQ to download ONE free map from the Internet from a pre-selected list of cities in the United States, Canada, and Western Europe. -
Page 37: Setting Up Internet Access On Your Hp Ipaq
Setting Up Internet Access on Your HP iPAQ Now that you have completed the steps in the Getting started guide, verify you have Internet access on your HP iPAQ by visiting a web site such as www.google.com refer to the instructions under... -
Page 38: Verifying Date And Time On Your Hp Ipaq
Companion CD onto your personal computer. Verifying Date and Time on Your HP iPAQ Verify the correct date and time on your HP iPAQ. If the date and time are not correct, tap the Clock icon Downloading the Quick GPS Connection Data File Access your Quick GPS Connection status by tapping Start >... -
Page 39: Starting Gps Navigation
HP iPAQ can access the Internet. Downloading a Map Place the HP iPAQ in the cradle (if you have taken it out) and connect the HP iPAQ Cradle to your personal computer. At this point in the process you have not downloaded a map. Once you have completed selecting your preferences, your HP iPAQ notifies you “No maps found. - Page 40 Tap Yes to confirm the map will be downloaded to the /My Documents folder in main memory on your HP iPAQ. To change the folder or save to iPAQ File Store, tap Change. NOTE: Although it is possible to download your preferred map using a...
-
Page 41: Accessing The Internet On Your Hp Ipaq
Accessing the Internet on Your HP iPAQ Now that you have completed the steps in the Getting started guide, you must verify you have Internet access on your HP iPAQ to be able to download one free GPS city map (approximately 2 MB) and the Quick GPS Connection data file (approximately 40 KB). - Page 42 HP iPAQ. To set up proxy server settings on your HP iPAQ: From the Today screen on the HP iPAQ, tap Start > Settings > Connections tab > Connections icon > Tasks tab.
-
Page 43: Use The Built-In Digital Camera To Take And Send Pictures
Verify you have Internet access on your HP iPAQ by visiting a web site such as If you still cannot access the Internet, take your HP iPAQ out of the cradle and use a GPRS connection. For details, refer to “Creating a GPRS/EDGE Connection”... - Page 44 To take a picture: From the Start menu, tap Programs > HP Photosmart. Locate the camera lens in the middle on the back of the HP iPAQ and frame the subject to be photographed in the digital viewfinder on the HP iPAQ screen.
-
Page 45: View Pictures That I've Already Taken
When you snap a picture, your HP iPAQ makes an audible shutter sound (if you have not muted the sounds). The clock indicates a picture has been taken and the HP iPAQ processes the picture. It might take a few seconds to process and store the picture, depending on its size, quality, and complexity. -
Page 46: Save Pictures To A Memory Card
NOTE: Make sure to insert the expansion card into the SD or mini-SD expansion slot located on the right side of the HP iPAQ. If the memory card is not present in the expansion slot, the HP iPAQ does not list the storage card(s) as an option on the “Save to” screen. -
Page 47: Send Pictures Using Multimedia Messaging Service (Mms) Or E-Mail
How Do I Send Pictures Using Multimedia Messaging Service (MMS) or E-mail? NOTE: The built-in camera is available only on select HP iPAQ models. Multimedia Messaging Service allows you to exchange multimedia communications (such as audio and video clips, pictures and text) between your mobile phone and other devices. -
Page 48: Find Out More About Expansion Cards
Tap Send. How Do I Find Out More About Expansion Cards? You can expand the memory and connectivity of your HP iPAQ by using a Secure Digital (SD), Mini-SD, Secure Digital Input Output (SDIO), or Multimedia Memory (MMC) expansion cards. Use these optional expansion cards for: •... -
Page 49: Use Bluetooth
Using a Bluetooth Hands-Free Headset The Bluetooth Hands-Free headset allows you to use Bluetooth wireless technology to communicate with your HP iPAQ up to 10 meters (approximately 33 feet). NOTE: The 10 meter range is dependent upon environment, number of users, and other wireless devices within the immediate proximity. -
Page 50: Turn Bluetooth On And Off
For more information on Bluetooth, refer to “Using Bluetooth” in Chapter 9 of the User’s Guide located on the Companion CD or go to the HP Web site and chat with an online agent. For instructions on how to chat with an online agent, refer to the question Not Covered in This Booklet?”... -
Page 51: Use Bluetooth To Transfer Files To A Pocket Pc, Computer, Or Printer
(all devices or only paired devices), check the Allow other devices to connect checkbox. If you uncheck this option, no devices are able to discover or connect to your HP iPAQ. For more detailed information on Bluetooth, refer to “Using Bluetooth” in Chapter 9 of the User’s Guide located on the Companion CD. -
Page 52: Protect My Hp Ipaq From Screen Damage Or Cracking
For more detailed information on Bluetooth, refer to “Using Bluetooth” in Chapter 9 of the User’s Guide located on the Companion CD or go to the HP Web site and chat with an online agent. For instructions on how to chat with an online agent, refer to the question Topics Not Covered in This Booklet?”... -
Page 53: Find The Product Id, Serial Number, And Imei Number On My Hp Ipaq
• Clean your HP iPAQ by wiping the screen, the camera lens, and the exterior with a soft, damp cloth lightly moistened only with water. CAUTION: To reduce the risk of damage to the internal components, do not spray liquid directly on the screen or allow excess liquid to drip inside your HP iPAQ. - Page 54 Option B—To view the label: On the back of your HP iPAQ, press the battery release button down 1, and then remove the cover 2. Pull on the tab to lift the battery 3. Remove the battery 4 from the device.
-
Page 55: Find Information On Topics Not Covered In This Booklet
User’s Guide is in a printable format if you prefer a hardcopy document. If you have questions about using your HP iPAQ that have not been covered in this booklet or in the Getting started or User’s Guide, refer to the iPAQ Handheld Forum (a message board) at ipaqforums. - Page 56 © 2005 Hewlett-Packard Development Company, L.P. Microsoft, Windows, the Windows logo, Outlook and ActiveSync are trademarks of Microsoft Corporation in the U.S, and other countries. Windows Mobile™ 2003 software for Pocket PC First Edition, June 2005. Printed in Taiwan 378870-031...