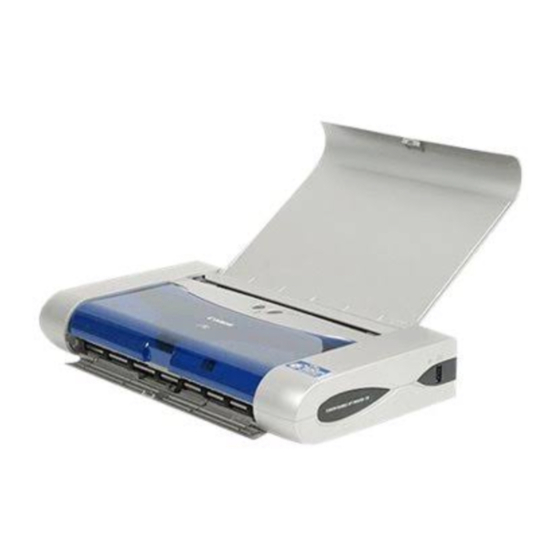
Canon i70 Quick Start Manual
Color bubble jet printer
Hide thumbs
Also See for i70:
- User manual (169 pages) ,
- Quick start manual (71 pages) ,
- Specifications (2 pages)

Related Manuals for Canon i70


Summary of Contents for Canon i70
-
Page 1: Table Of Contents
BUBBLE JET PRINTER Quick Start Guide Table of Contents Preface Shipping Materials Introduction Setting Up Preparing the Printer Connecting the Printer to the Computer Installing the Print Head Loading Paper Installing the Printer Driver Aligning the Print Head Basic Operations Printing with Windows Printing with Macintosh Print Head Maintenance... -
Page 2: Exif Print
® Program ® Partner, Canon Inc. has determined that this product meets the ENERGY The International ENERGY STAR that promotes energy saving through the use of computer and other office equipment. The program backs the development and dissemination of products with functions that effectively reduce energy consumption. -
Page 3: Preface
Preface Shipping Materials Thank you for purchasing a Canon Bubble Jet Printer. Check that all the following items are in the box. If anything is missing or is damaged, contact your Canon Authorized Dealer or Sales Representative. Printer Setup Software & User’s Guide CD-ROM... -
Page 4: Setting Up
1 Preparing the Printer 2 Connecting the Printer to the Computer USB cable Recommended: Canon or other computer manufacturer cable, up to 5 meters in length • Never attempt to plug the power cord into the power outlet or unplug the power cord when your hands are wet. -
Page 5: Installing The Print Head
If the Add New Hardware Wizard or Found New Hardware Wizard screen appears when carrying out the following operations, click Cancel and turn off the computer. For details, refer to page 7. 3 Installing the Print Head Installing the Print Head print head cover print head holder Follow the steps below to install the printer driver... -
Page 6: Print Head
lock button print head print head holder 4 4 4 4 Press the lock button, then raise the lock lever. Do not touch internal parts other than the lock lever. 5 5 5 5 Remove the protective cap from the print head. -
Page 7: Installing The Ink Tanks
Installing the Ink Tanks • For safety reasons, store ink tanks out of the reach of small children. • Do not drop or shake ink tanks as this may cause the ink to leak out and stain your clothes and hands. protective cap 7 7 7 7 Lock the print head into place by... -
Page 8: Loading Paper
4 Loading Paper Loading A4 (Letter) Size Plain Paper print side load limit mark 5 5 5 5 Use the same procedure to install the color ink tank in the front slot. 6 6 6 6 Close the print head cover. Wait until the preparatory operation is complete: it takes about 2 minutes. -
Page 9: Installing The Printer Driver
5 Installing the Printer Driver Installing the Printer Driver – Windows • When performing infrared transmission, requirements for using the computer must be satisfied. Refer to “Printing Data through Infrared Transmission” on page 20 before installing the printer driver. • Do not disconnect the cable or remove the CD-ROM during the installation. The driver cannot be correctly installed. - Page 10 3 3 3 3 Place the Setup Software & User’s Guide CD-ROM in the CD-ROM drive. • If the CD-ROM does not run automatically, click Start and select My Computer, then double-click the CD-ROM icon. For non-XP Windows, double- click My Computer in the Windows screen, then double-click the CD-ROM icon.
- Page 11 Installing the Printer Driver – Macintosh • Do not remove or insert the USB cable during installation, as this may result in the computer or printer not operating normally. • Before installing the driver, disable all virus detection programs and automatically loading programs or remove them from your system folder.
- Page 12 7 7 7 7 Click Install. Wait for the installation to finish. If the above message appears, check that there are no unsaved documents, then click Continue. If a document needs to be saved, click Cancel then save the document. After saving the document, begin again from step 4.
-
Page 13: Aligning The Print Head
6 Aligning the Print Head This operation must be carried out when using the printer for the first time. Aligning the print head positions allows you to print without shifts in the color registration. Aligning the Print Head – Windows 1 1 1 1 Click Start and select Control Panel, Printers and Other Hardware, and... - Page 14 6 6 6 6 Check that paper is loaded in the printer and click OK. If a message warning you not to perform other operations appears, click OK. It takes about 60 seconds to start printing. 7 7 7 7 After the pattern is printed, click Yes.
-
Page 15: Aligning The Print Head – Macintosh
Aligning the Print Head – Macintosh 1 1 1 1 Select Page Setup in the File menu. 2 2 2 2 Click Utilities. 3 3 3 3 Select Test Print from the menu and click Print Head Alignment. 4 4 4 4 Check that paper is loaded in the printer and click OK. - Page 16 6 6 6 6 In the same way, one by one, select the most even patterns printed with the least irregularities from each of Columns B to F, enter their numbers and click Send. If it is difficult to pick the best pattern on Column F, pick the setting that produces the least noticeable vertical white stripes.
-
Page 17: Basic Operations
• If you detect smoke, unusual smells or strange noises around the printer, immediately switch the printer off and always unplug the printer. Contact your local Canon service representative. • To avoid injury, never put your hand or fingers inside the printer while it is printing. -
Page 18: Basic Print Settings
(This may not appear when using Windows XP or Windows 2000. If this happens, click Start then select All Programs (or Programs) - Canon i70 - Guide). Click this to change the cursor shape to ?. By clicking on the item’s... -
Page 19: Printing With Macintosh
Printing with Macintosh Adjusting the print settings according to your needs allows you to produce better quality prints. Printing 1 1 1 1 Open the Page Setup dialog box in your application. On the File menu, click Page Setup. Check the application’s user’s manual for the actual procedures. -
Page 20: Page Setup
Page Setup Use the Page Setup dialog box to specify the paper size settings. Basic Print Settings For the best print quality, specify the minimum requirement settings in the Print dialog box. To get the best results, ensure you select the type of media loaded in the printer when printing on paper other than plain paper. -
Page 21: Print Head Maintenance
Print Head Maintenance If Blurring Occurs or If a Specific Color Does Not Print Perform print head cleaning to improve the print quality. Ensure that the printer is turned on and follow the instructions below. • Windows Open the printer properties dialog box and click the Maintenance tab. Click Cleaning. For details on how to open the printer properties dialog box, refer to “Aligning the Print Head –... -
Page 22: Appendix
Appendix Printing Data through Infrared Transmission If you have a computer or PDA with an infrared port for wireless data transmission, you can print data with a cordless connection with the printer. You can also print an address book, schedule, or memo received from a PDA (Personal Digital Assistants) in a fixed format through infrared transmission. - Page 23 Performing Infrared Transmission When performing infrared transmission, also refer to your computer or PDA manual. 1 1 1 1 Ensure that the universal AC adapter is connected securely. When using an optional battery, ensure that it has been charged. 2 2 2 2 Open the paper rest and turn on the printer.
-
Page 24: Printing Photos From The Digital Camera Directly
Printing Photographs Directly from a Digital Camera Connecting a Canon digital camera with the Bubble Jet Direct function to the printer allows you to print recorded images directly without using a computer. Connect the USB cable that came with your digital camera. -
Page 25: Notes On Handling The Usb Interface (For Windows Users)
• For the digital camera operation method and troubleshooting, refer to your digital camera manual. For print error messages, refer to the User’s Guide. • By operating the digital camera, you can make the following prints: • You can make a standard print from the image displayed in the single display mode or in the index display mode. -
Page 26: For Further Details
You can also use simple editing features such as trimming and image rotation. It is Exif Print (Exif 2.2) compatible. When starting Easy-PhotoPrint, click Start and select All Programs (or Programs) - Canon Utilities - Easy-PhotoPrint - Easy-PhotoPrint. ImageBrowser (Macintosh) You can import photographs taken with a digital camera into the computer, edit and caption them. - Page 27 When starting ImageBrowser, double-click the Canon ImageBrowser icon (alias) on the desktop. Easy-WebPrint (Windows) You can easily print homepages displayed on Internet Explorer or pages from User’s Guide (HTML manual of this printer) in full size. Easy-WebPrint automatically adjusts the layout when printing a screen.
- Page 29 QA7-2540-V02 ©CANON INC.2003 PRINTED IN VIETNAM...