Advertisement
Quick Links
Advertisement

Related Manuals for JVC KD-X355


Summary of Contents for JVC KD-X355
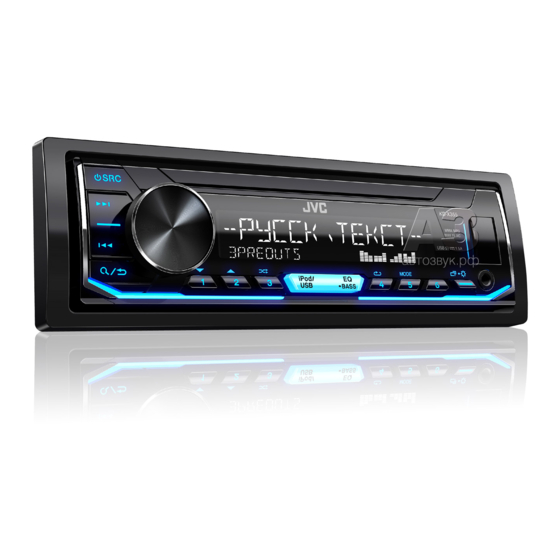
- Page 1 ENGLISH KD-X355 DIGITAL MEDIA RECEIVER INSTRUCTION MANUAL B5A-2136-10 [Q]...
- Page 2 3-12, Moriya-cho, Kanagawa-ku, Yokohama-shi, Kanagawa, 221-0022, JAPAN Par la présente, JVCKENWOOD déclare que Deste modo, a JVCKENWOOD declara que o EU Representative: l’équipement radio « KD-X355 » est conforme à la equipamento de rádio “KD-X355” está em JVCKENWOOD Deutschland GmbH directive 2014/53/UE.
- Page 3 Härmed försäkrar JVCKENWOOD att Herved erklærer JVCKENWOOD, at radioudstyret Šiuo JVCKENWOOD pažymi, kad radijo įranga С настоящото JVCKENWOOD декларира, radioutrustningen “KD-X355” är i enlighet med “KD-X355” er i overensstemmelse med Direktiv „KD-X355“ atitinka 2014/53/EB direktyvos че радиооборудването на “KD-X355” е в...
- Page 4 INSTALLATION/ CONNECTION How to read this manual • Operations are explained mainly using buttons on the faceplate of KD-X355. • English indications are used for the purpose of explanation. You can select the display language from the menu. ( 5) •...
- Page 5 BASICS Faceplate Attach Volume knob Display window Detach How to reset Detach button Reset the unit within 5 seconds after detaching the faceplate. On the faceplate Turn on the power Press • Press and hold to turn off the power. Adjust the volume Turn the volume knob.
- Page 6 Turn the volume knob to select [CLOCK FORMAT], then press the knob. For details on how to update the firmware, visit Turn the volume knob to select [12H] or [24H], then press the knob. <http://www.jvc.net/cs/car/>. To set the date FACTORY RESET YES: Resets the settings to default (except the stored station). ;...
- Page 7 RADIO GETTING STARTED CLOCK TIME SYNC ON: The clock time is automatically set using the Clock Time (CT) data in FM Radio Data System signal. ; OFF: Cancels. CLOCK ON: The clock time is shown on the display even DISPLAY when the unit is turned off. ; OFF: Cancels. “STEREO”...
- Page 8 RADIO Other settings IF BAND AUTO: Increases the tuner selectivity to reduce interference noises from adjacent FM/FM-LO stations. (Stereo effect may be lost.) ; WIDE: Subjects Press and hold to interference noises from adjacent FM/FM-LO stations, but sound quality Perform 'select an item ( 3 or 4)' operation to select an item will not be degraded and the stereo effect will remain.
- Page 9 When connecting an Android device, “Press [VIEW] to install JVC MUSIC PLAY APP” is shown. Follow the instructions USB cable * to install the application. You can also install the latest version of JVC MUSIC PLAY application on your Android device (commercially available) before connecting.
- Page 10 (via USB input terminal). Preparation: • To return to the previous setting item, press Install the latest version of JVC Remote application on your device before • To cancel, press and hold connecting. For more information, visit <http://www.jvc.net/cs/car/>.
- Page 11 Spotify Preparation: On the faceplate Install the latest version of the Spotify application on your device (iPhone/ Repeat play * Press repeatedly. iPod touch), then create an account and log in to Spotify. • Select [ON] for [SPOTIFY SRC] in [SOURCE SELECT]. ( 4) ALL REPEAT, ONE REPEAT * , REPEAT OFF Random play *...
- Page 12 AUDIO SETTINGS Use a portable audio player Connect a portable audio player (commercially available). 3.5 mm stereo mini plug with “L” shaped connector (commercially available) Portable audio player Select a preset equalizer directly Press repeatedly. Auxiliary input jack (or) Press , then turn the volume knob within 5 seconds. Select [ON] for [BUILT-IN AUX] in [SOURCE SELECT].
- Page 13 AUDIO SETTINGS PRO EQ Adjust your own sound settings. • The settings are stored to [USER]. • The settings made may affect the current settings of [EASY EQ]. 62.5HZ LEVEL –09 to LEVEL +09 (LEVEL 00): Adjusts the level to memorize for each source. (Before making an adjustment, select the source you want to adjust.) ON: Turns on the extended bass. ;...
- Page 14 AUDIO SETTINGS FADER (Not applicable when 3-way crossover is selected.) SOUND EFFECT POSITION R15 to POSITION F15 (POSITION 00): Adjusts the front and SPACE ENHANCE (Not applicable for TUNER source.) rear speaker output balance. SMALL/MEDIUM/LARGE: Virtually enhances the sound space. ; BALANCE * POSITION L15 to POSITION R15 (POSITION 00): Adjusts the left and OFF: Cancels.
- Page 15 AUDIO SETTINGS Speaker output settings Crossover settings [SPK/PRE OUT] (Applicable only if [X ' OVER TYPE ] is set to [2-WAY]) ( 12) Below are the available setting items for 2-way crossover and 3-way crossover. Select the output setting for the speakers [SPK/PRE OUT], based on the speaker connection method.
- Page 16 AUDIO SETTINGS 2-way crossover setting items 3-way crossover setting items SPEAKER SIZE SPEAKER SIZE FRONT SIZE 8CM/10CM/12CM/13CM/16CM/17CM/18CM/ TWEETER SMALL/MIDDLE/LARGE 4×6/5×7/6×8/6×9/7×10 MID RANGE 8CM/10CM/12CM/13CM/16CM/17CM/18CM/4×6/5×7/6×8/6×9 TWEETER SMALL/MIDDLE/LARGE/NONE (not connected) 16CM/20CM/25CM/30CM/38CM OVER/NONE (not connected) WOOFER * REAR * 8CM/10CM/12CM/13CM/16CM/17CM/18CM/4×6/5×7/6×8/ X ' OVER 6×9/7×10/NONE (not connected) TWEETER HPF FRQ 1KHZ/1.6KHZ/2.5KHZ/4KHZ/5KHZ/6.3KHZ/8KHZ/...
- Page 17 AUDIO SETTINGS Digital Time Alignment settings Determining the value for [DISTANCE] and [GAIN] of [DTA SETTINGS] If you specify the distance from the center of the Digital Time Alignment sets the delay time of the speaker output to currently set listening position to every speaker, create a more suitable environment for your vehicle.
- Page 18 DISPLAY SETTINGS Zone identification for brightness setting Default: XX DISPLAY DIMMER Dim the illumination. OFF: Dimmer is turned off. Brightness changes to [DAY] setting. ON: Dimmer is turned on. Brightness changes to [NIGHT] setting. ( [BRIGHTNESS]) DIMMER TIME: Set the dimmer on and off time. 1 Perform ‘select an item ( 3 or 4)’...
- Page 19 1 [RED]/[GREEN]/[BLUE]: Select a primary color. 2 [00] to [31]: Select the level. For: – Latest firmware updates and latest compatible item list – JVC original application Repeat steps 1 and 2 for all the primary colors. – Any other latest information •...
- Page 20 REFERENCES [HEAD MODE] • Просмотр видеофайлов в меню “Videos” в режиме невозможен. Change the display information • Порядок отображения песен в меню выбора данного устройства может отличаться от порядка песен в Each time you press , the display information changes. проигрывателе...
- Page 21 ( 18) formats. ( 17) • Reattach the device. Cannot playback at • Make sure JVC MUSIC PLAY APP is installed on the “UNRESPONSIVE DEVICE” Make sure the device is not malfunction and reattach [AUTO MODE].
- Page 22 INSTALLATION/CONNECTION TROUBLESHOOTING Warning Symptom Remedy • The unit can only be used with a 12 V DC power supply, negative ground. “NO DEVICE” or “READING” • Switch off the developer options on the Android device. • Disconnect the battery’s negative terminal before wiring and mounting. keeps flashing.
- Page 23 INSTALLATION/CONNECTION Part list for installation Installing the unit (in-dash mounting) (A) Faceplate (B) Trim plate Do the required wiring. ( 22) (C) Mounting sleeve (D) Wiring harness Hook on the top side Orientate the trim Dashboard of plate as illustrated your car before fitting.
- Page 24 INSTALLATION/CONNECTION Wiring connection Rear/Front/Subwoofer output For 3-way crossover: Tweeter/ Mid Range/Woofer output Antenna terminal When connecting to an external Fuse (10 A) amplifier, connect its ground wire to the car’s chassis to avoid damaging the unit. Microphone input jack ( 10) Connecting the ISO connectors on some VW/ Audi or Opel (Vauxhall) automobiles Yellow (Battery wire)
- Page 25 SPECIFICATIONS Frequency Range 87.5MHz — 108.0MHz (50kHz step) Frequency Response (±3 dB) 20 Hz — 20 kHz FM LO 65.0MHz — 74.0MHz (30kHz step) Input Maximum Voltage 1 000 mV Usable Sensitivity (S/N = 26 dB) 0.71 μV/75 Ω (8.2 dBf) Input Impedance 30 kΩ Quieting Sensitivity 2.0 μV/75 Ω Maximum Output Power 50 W × 4 or (DIN S/N = 46 dB) 50 W × 2 + 50 W × 1 (Subwoofer = 4 Ω) Frequency Response (±3 dB) 30 Hz —...
- Page 26 • IOS is a trademark or registered trademark of Cisco in the U.S. and other countries and is used under license. • SPOTIFY and the Spotify logo are among the registered trademarks of Spotify AB. • Android is trademark of Google Inc. © 2017 JVC KENWOOD Corporation 0817DTSMDTJEIN...