Table of Contents
Advertisement
Quick Links
Advertisement
Table of Contents

Related Manuals for JVC KD-X375BT


Summary of Contents for JVC KD-X375BT
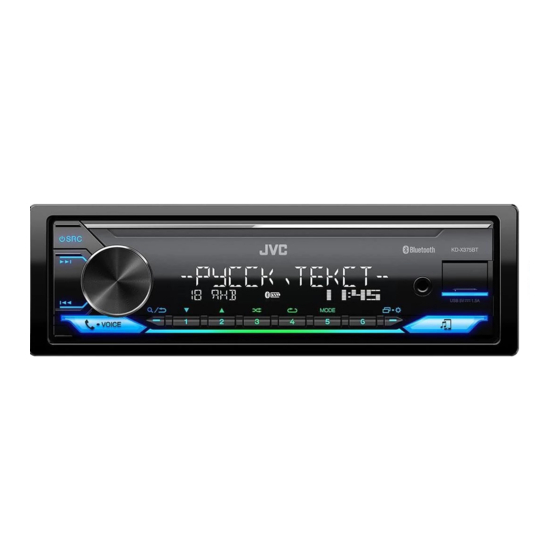
- Page 1 ENGLISH KD-X375BT DIGITAL MEDIA RECEIVER INSTRUCTION MANUAL B5A-3107-00b [E] JKBE...
- Page 2 Declaration of Conformity with regard to the RoHS Directive 2011/65/EU available at the following internet address: con la UE está disponible en la siguiente dirección de Manufacturer: http://www.jvc.net/cs/car/eudoc/ internet: JVC KENWOOD Corporation http://www.jvc.net/cs/car/eudoc/ Français 3-12, Moriya-cho, Kanagawa-ku, Yokohama-shi, Kanagawa, 221-0022, JAPAN Português Par la présente, JVCKENWOOD déclare que EU Representative: l’équipement radio «...
- Page 3 Visą EB direktyvos atitikties deklaracijos tekstą Пълният текст на ЕС декларацията за om överensstämmelse finns på följande er tilgængelig på følgende internetadresse: galite rasti šiuo internetiniu adresu: съответствие е достъпен на следния интернет Internetadress : http://www.jvc.net/cs/car/eudoc/ http://www.jvc.net/cs/car/eudoc/ адрес: http://www.jvc.net/cs/car/eudoc/ http://www.jvc.net/cs/car/eudoc/ Ελληνικά Malti...
- Page 4 SOFTWARE LICENSE AGREEMENT Article 4 Right pertaining to the Licensed Software Any and all copyrights and other rights pertaining to the Licensed Software and related documents The software embedded in the Product (hereinafter the "Licensed Software") provided by Licensor is shall belong to the Licensor or the original holder of the right who granted to the Licensor the license or copyrighted to or sublicensable by the Licensor, and this Agreement provides for the terms and conditions sublicense for the Licensed Software (hereinafter the "Original Rightholder"), and the User shall not be...
- Page 5 Important Notice concerning the Software Article 9 Destruction of the Licensed Software If this Agreement is terminated pursuant to the provision of Article 8, the User shall destroy the Licensed -jansson Software, any related documents and copies thereof within two (2) weeks from such date of termination. Copyright (c) 2009-2012 Petri Lehtinen <petri@digip.org>...
- Page 6 -CMP sha2 AUTHOR: Aaron D. Gifford - http://www.aarongifford.com/ The MIT License (MIT) Copyright (c) 2014 Charles Gunyon Copyright (c) 2000-2001, Aaron D. Gifford All rights reserved. Permission is hereby granted, free of charge, to any person obtaining a copy of this software and associated documentation files (the "Software"), to deal in the Software without restriction, including without You may obtain a copy of the license at limitation the rights to use, copy, modify, merge, publish, distribute, sublicense, and/or sell copies of the...
- Page 7 Copyright (c) 1995, 1996 Carnegie-Mellon University. All rights reserved. T-Kernel 2.0 Author: Chris G. Demetriou This product uses the source code of T-Kernel 2.0 under T-License 2.0 granted by T-Engine Forum (www.tron.org) Permission to use, copy, modify and distribute this software and its documentation is hereby granted, provided that both the copyright notice and this permission notice appear in all copies of the software, BSD-3-Clause derivative works or modified versions, and any portions thereof, and that both notices appear in supporting...
-
Page 8: Table Of Contents
CONTENTS BEFORE USE BEFORE USE IMPORTANT • To ensure proper use, please read through this manual before using this product. It is especially important BASICS that you read and observe Warning and Caution in this manual. • Please keep the manual in a safe and accessible place for future reference. GETTING STARTED 1 Cancel the demonstration Warning... -
Page 9: Before Use
Before Use IMPORTANT How to read this manual • To ensure proper use, please read through this manual before using this • The displays and faceplates shown in this manual are examples used to product. It is especially important that you read and observe Warnings and provide clear explanations of the operations. -
Page 10: Basics
BASICS Faceplate Attach Volume knob Display window* Auxiliary input jack Detach USB input terminal How to reset * For illustration purposes only. Detach button Reset the unit within 5 seconds after detaching the faceplate. On the faceplate Turn on the power Press •... -
Page 11: Getting Started
Getting Started Set the basic settings Press and hold Turn the volume knob to select an item (see the following table), then press the knob. Repeat step 2 until the desired item is selected or activated. Press to exit. Cancel the demonstration To return to the previous setting item, press When you turn on the power for the first time (or [FACTORY RESET] is set to [YES], see page 6), the display shows: “CANCEL DEMO” ... -
Page 12: Radio
[YES]: Starts upgrading the firmware. ; [NO]: Cancels (upgrading is not activated). For details on how to update the firmware, visit <http://www.jvc.net/cs/car/>. “STEREO” lights up when receiving an FM stereo broadcast with sufficient [FACTORY RESET] [YES]: Resets the settings to default (except the stored station). ;... - Page 13 Radio Select a stored station FM: SSM 01–06/SSM 07–12; FM-LO: SSM 01–06: Automatic programming of up to 12 FM radio stations and 6 FM-LO radio stations. Press one of the number buttons (1 to 6). The text “SSM” stops flashing after the first 6 stations have been stored. Select (or) SSM 07–12 to store the next 6 FM radio stations.
-
Page 14: Usb/Ipod Aux
USB/iPod Radio Connect a USB device PTY code NEWS, AFFAIRS, INFO, SPORT, EDUCATE, DRAMA, CULTURE, SCIENCE, VARIED, POP USB input terminal M (music), ROCK M (music), EASY M (music), LIGHT M (music), CLASSICS, OTHER USB 2.0 cable* M (music), WEATHER, FINANCE, CHILDREN, SOCIAL, RELIGION, PHONE IN, TRAVEL, (commercially available) LEISURE, JAZZ, COUNTRY, NATION M (music), OLDIES, FOLK M (music), DOCUMENT USB device... - Page 15 USB/iPod Basic operations Select music drive While in USB source, press 5 MODE repeatedly. Stored songs in the following drive will be played back. • Selected internal or external memory of a smartphone (Mass Storage Class). • Selected drive of a multiple drive device. Select control mode On the faceplate Press and hold S / T.
- Page 16 USB/iPod You can listen to music from a portable audio player via the auxiliary input Quick search (applicable only for USB source) jack. If you have many files, you can search through them quickly. Preparation: Press Select [ON] for [BUILT-IN AUX] in [SOURCE SELECT]. (Page 5) Turn the volume knob to select a folder/list, then press the knob.
-
Page 17: Spotify P
Spotify You can listen to Spotify on the following device. On the faceplate iPhone/iPod touch (via Bluetooth or via USB input terminal) or Android Press the volume knob. Play back/pause device (via Bluetooth) Press S*1 / T. Skip a track Preparation: Press 2 J / 1 K. Select thumbs up or •... -
Page 18: Using Other Applications
Using Other Applications Spotify JVC Remote application Search for a song or station You can control the JVC car receiver from the following device using Press JVC Remote application. Turn the volume knob to select a list type, then press the knob. -
Page 19: Bluetooth® Lu
Using Other Applications Bluetooth® • Depending on the Bluetooth version, operating system and the Repeat step 2 until the desired item is selected or activated. firmware version of your mobile phone, Bluetooth features may not Press to exit. work with this unit. •... - Page 20 Press B SRC to turn on the unit. • Once the pairing is completed, the Bluetooth device will remain registered Search and select the name of your receiver (“KD-X375BT” in the unit even if you reset the unit. To delete the paired device, see on the Bluetooth device.
- Page 21 Bluetooth® Bluetooth — Mobile phone On the faceplate While talking on the first incoming call... Answer another incoming Press or the volume knob. call and hold the current call Reject another incoming Press and hold or the volume knob. call While having two active calls...
- Page 22 Bluetooth® Default: [XX] Make a call [MIC GAIN] [LEVEL –10] to [LEVEL +10] ([LEVEL –04]): The sensitivity of the You can make a call from the call history, phonebook, or dialing the number. microphone increases as the number increases. Call by voice is also possible if your mobile phone has the feature. [NR LEVEL] [LEVEL –05] to [LEVEL +05] ([LEVEL 00]): Adjust the noise reduction level Press...
- Page 23 Bluetooth® Make a call to a registered number [DIAL NUMBER] 1 Turn the volume knob to select a number (0 to 9) or character ( , #, +). Press to enter Bluetooth mode. 2 Press S / T to move the entry position. Press one of the number buttons (1 to 6).
- Page 24 “CHECK MODE” appears. “SEARCH NOW USING PHONE” “PIN IS 0000” scrolls on the display. Search and select the name of your receiver (“KD-X375BT”) on the Bluetooth device within 3 minutes. Perform (A), (B) or (C) depending on what appears on the display.
- Page 25 Bluetooth® Bluetooth — Audio On the faceplate Select a file from a folder/ Refer to “Select a file to play” on page 9. list Switch between connected Press 5.*2 Bluetooth audio devices *1 Depending on the connected device, some devices may not support this feature. *2 Pressing the “Play”...
-
Page 26: Audio Settings
Audio Settings Adjusts your own sound settings. [EASY EQ] • The settings are stored to [USER] in [PRESET EQ]. • The settings made may affect the current settings of [PRO EQ]. [SUB.W SP]*1*2: [00] to [+06] (Default: [+03] [SUB.W]*1*3: [–50] to [+10] [00] [BASS]: [LVL–09] to [LVL+09]... - Page 27 Audio Settings [SUB.W LEVEL]*1 [SPK-OUT]*2 [DTA SETTINGS] (Not applicable when 3-way crossover is selected.) For settings, see “Digital Time Alignment settings” on page 26. [SUB.W 00] to [SUB.W +06] ([SUB.W +03]): [CAR SETTINGS] Adjusts the output level of the subwoofer connected [X ‘ OVER TYPE] Caution: Adjusts the volume before changing the [X ‘...
- Page 28 AUDIO SETTINGS Speaker output settings Crossover settings [SPK/PRE OUT] (Applicable only if [X ' OVER TYPE ] is set to [2-WAY]) ( 21) Below are the available setting items for 2-way crossover and 3-way crossover. Select the output setting for the speakers [SPK/PRE OUT], based on the speaker connection method.
- Page 29 Audio Settings 2-way crossover setting items [SUBWOOFER [SW LPF FRQ] [30HZ]/[40HZ]/[50HZ]/[60HZ]/[70HZ]/[80HZ]/ LPF]*2*3 [90HZ]/[100HZ]/[120HZ]/[150HZ]/[180HZ]/ [SPEAKER SIZE] [220HZ]/[250HZ]/[THROUGH] [FRONT] [SIZE] [8CM]/[10CM]/[12CM]/[13CM]/[16CM]/ [SW LPF SLOPE] [–06DB]/[–12DB]/[–18DB]/[–24DB] [17CM]/[18CM]/[4×6]/[5×7]/[6×8]/[6×9]/ [SW LPF PHASE] [REVERSE] (180°)/ [NORMAL] (0°) [7×10] [SW LPF GAIN] [–08DB] to [00DB] [TWEETER] [SMALL]/[MIDDLE]/[LARGE]/[NONE] (not connected) 3-way crossover setting items [REAR]*1...
- Page 30 Audio Settings Digital Time Alignment settings [MID RANGE] [HPF FRQ] [30HZ]/[40HZ]/[50HZ]/[60HZ]/[70HZ]/[80HZ]/[90HZ]/ [100HZ]/[120HZ]/[150HZ]/[180HZ]/[220HZ]/[250HZ]/ The digital signal delay function sets the speaker output delay time to [THROUGH] create a more suitable environment for your car. [HPF SLOPE] [–06DB]/[–12DB] • For more information, see “Determining the Time delays automatically” on page 25.
-
Page 31: Display Settings
Display Settings Audio Settings Zone identification for brightness settings Determining the delay time automatically If you specify the distance from the currently set listening position to every speaker, the delay time will be automatically calculated. 1 Set [POSITION] and determine the listening position as the reference point (the reference point for [FRONT ALL] will be the center between the right and left in the front seats). - Page 32 Display Settings Default: [XX] [COLOR] [DISPLAY] [PRESET] Select illumination colors separately for buttons in different zones. [DIMMER] Dims the illumination. 1. Zone selection ([ZONE 1], [ZONE 2], [ALL ZONE]). (See the illustration [OFF]: Dimmer is turned off. Brightness changes to [DAY] setting. on page 25.) [ON]: Dimmer is turned on.
-
Page 33: References
More information • You cannot operate iPod if “JVC” or “ ” is displayed on iPod. • Depending on the version of the operating system of the iPod/iPhone, some functions may not For: – Latest firmware updates and latest compatible item list operate on this unit. - Page 34 References Change the display information Source name Display information When [HEAD MODE]/[AUTO MODE] is selected ( 8): Each time you press , the display information changes. iPod USB/iPod BT Song title/Artist Album name/Artist Playing time • If the information is unavailable or not recorded, “NO TEXT”, “NO NAME”, or other information Clock Song title/Artist with music synchronisation* (eg.
-
Page 35: Troubleshooting Ro
Troubleshooting Symptom Remedy Symptom Remedy Sound cannot be heard. • Adjust the volume to the optimum level. “UNSUPPORTED DEVICE” • Check whether the connected USB device is compatible • Check the cords and connections. appears. with this unit and ensure the file systems are in supported formats. - Page 36 Troubleshooting Symptom Remedy Symptom Remedy “DISCONNECTED” USB is disconnected from the head unit. Please make sure Sound is being interrupted • Reduce the distance between the unit and the Bluetooth the device is connected properly through USB. or skipped during playback audio player.
-
Page 37: Specifications Pe
Installation/Connection Part list for installation This section is for the professional installer. For safety’s sake, leave wiring and mounting to professionals. Consult the car audio dealer. (A) Faceplate (×1) (B) Trim plate (×1) WARNING • The unit can only be used with a 12 V DC power supply, negative ground. •... - Page 38 Installation/Connection Installing the unit (in-dash mounting) When installing without the mounting sleeve 1 Remove the mounting sleeve and trim plate from the unit. 2 Align the holes in the unit (on both sides) with the vehicle mounting bracket and secure the unit with screws (commercially available). Use only the specified screws.
- Page 39 Installation/Connection Wiring connection Rear/3-way crossover output: Tweeter output Front/3-way crossover output jacks: Midrange speaker output Woofer/3-way crossover: Subwoofer output Antenna terminal When connecting to an external Fuse (10 A) amplifier, connect its ground wire to the car’s chassis to avoid damaging the unit. Microphone input jack ( 10) Connecting the ISO connectors on some VW/ Audi or Opel (Vauxhall) automobiles...
- Page 40 Specifications Frequency Range 87.5MHz — 108.0MHz (50kHz step) MP3 Decode Compliant with MPEG-1/2 Audio Layer-3 FM LO 65.0MHz — 74.0MHz (30kHz step) WMA Decode Compliant with Windows Media Audio Usable Sensitivity (S/N = 26 dB) 0.71 μV/75 Ω (8.2 dBf) AAC-LC “.aac,” “.m4a” AAC Decode Quieting Sensitivity 2.0 µV/75 Ω...
- Page 41 Specifications Maximum Output Power 50 W × 4 or 50 W × 2 + 50 W × 1 (Subwoofer = 4 Ω) Full Bandwidth Power 22 W × 4 (at less than 1 % THD) Speaker Impedance 4 Ω — 8 Ω Preout Level/Load (USB) 5000 mV/10 kΩ load Preout Impedance ≤ 600 Ω Operating Voltage 14.4 V (10.5 V — 16 V allowable)
- Page 42 • Microsoft and Windows Media are either registered trademarks or trademarks of Microsoft Corporation in the United States and/or other countries. • Use of the Made for Apple badge means that an accessory has been designed to connect specifically to the Apple product(s) identified in the badge and has been certified by the developer to meet Apple performance standards.