Table of Contents
Advertisement
Advertisement
Table of Contents

Related Manuals for ILVE 60 Series


Summary of Contents for ILVE 60 Series
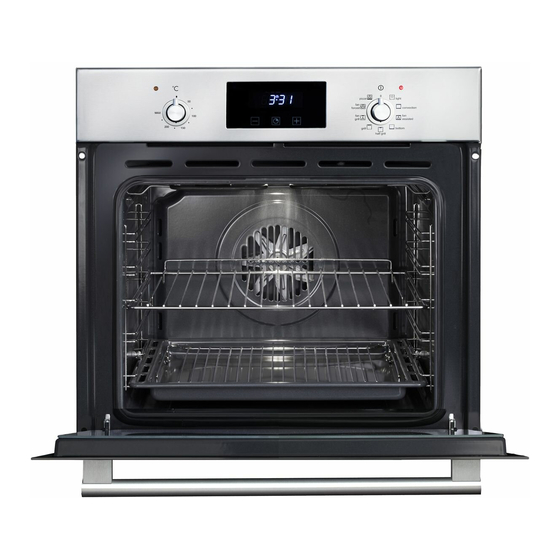
- Page 1 INSTRUCTION MANUAL FOR 60 SERIES BUILT-IN OVEN 600SKM & 600SKMP...
- Page 2 OPEN 24 ILVE ACCESSORIES ONLINE SHOP For a wide range of coffee machines, pods, and other ILVE accessories at the click of a button shop.ilve.com.au...
- Page 3 DEAR CUSTOMER, We thank you and congratulate you on your choice.This new carefully designed product, manufactured with the highest quality materials, has been carefully tested to satisfy all your cooking demands.We would therefore request you to read and follow these easy instructions which will allow you to obtain excellent results right from the start.
-
Page 4: Table Of Contents
CONTENTS First use page 5 Self-cleaning panel page 5 Control panel page 6 Instructions for use:- conventional cooking page 7 fan cooking page 7 grill cooking page 8 Thermostat page 8 Cooking timer page 9 Electronic timer page 9 Light replacement page 10 Removing the oven door page 11... -
Page 5: First Use
Never wash or clean self-cleaning panels with abrasive, acid, or alkaline products. CATALYTIC LINERS ARE AVAILABLE TO PURCHASE AS AN ACCESSORY FROM ILVE SPARE PARTS - P: 1300 694 853 SIDE LINERS - code 42105581 $40ea (2 REQUIRED) REAR LINER - code 42105083 $60... -
Page 6: Control Panel
CONTROL PANEL FUNCTIONS FUNCTION SYMBOLS ON THE SELECTOR Oven light (stays on while oven is in use). Bottom heating element. Thermostat setting from 50°C to MAX. Top and bottom heating elements. Thermostat setting from 50°C to MAX. Top and bottom heating elements with fan. Thermostat setting from 50°C to MAX. Circular heating element with fan. -
Page 7: Instructions For Use Conventional Cooking
ATTENTION: Accessible parts may become very hot during use. Children should be kept at a distance. Indicative table for positioning foods based on functions, temperatures and cooking times INSTRUCTIONS FOR USE CONVENTIONAL COOKING Conventional cooking uses top and bottom heat to cook a single dish. Place the food in the oven only once cooking temperature has been reached, i.e.when the heating indicator goes out. -
Page 8: Grill Cooking
GRILL COOKING Use the grill to grill or brown foods.Some ovens may be equipped with an electric motor, spit and skewers for turning on the spit.Place the shelf with the food to be cooked in the 1st or 2nd position from the top. Pre- heat the oven for 5 minutes. -
Page 9: Electronic Timer
PROGRAMMING END OF COOKING TIME WITH THE ANALOGUE TIMER Setting the clock Push the knob out and turn it anticlockwise to set the clock. First, turn the cooking se-lector to the required cook-ing function, and the thermostat to the desired cook-ing temperature. Then, to set end of cooking time, turn the cooking timer to the and to the desired time. -
Page 10: Light Replacement
FULLY AUTOMATIC OPERATION To set the end of cooking time, press the duration key and press the +/- keys to set the duration of cooking. Press the end of cooking key and press the +/- keys to set the time at which you want the oven to switch off.When you finish setting these times, the AUTO symbol flashes and the buzzer sounds. -
Page 11: Removing The Oven Door
REMOVING THE OVEN DOOR The oven door can be removed quickly and easily. To do so, proceed as follows: Open the door fully. Lift the two levers shown in fig. Close the door as far as the first stop (caused by the raised levers). Lift the door upwards and outwards to remove it from its mountings. -
Page 12: Electrical Connections
GAS OR ELECTRICAL CONNECTIONS Before connecting the oven to the mains power supply, make sure that: The supply voltage corresponds to the specifications on the data plate on the front of the oven. The mains supply has an efficient earth (ground)connection complying with all applicable laws and regulations. - Page 13 The contents of this manual are generic and not all the functions described may be available on your product. The manufacturer declines all responsibility for possible inaccuracies contained in this manual, due to printing or copying errors. We reserve the right to make on our own products those changes to be considered necessary or useful, without jeopardising the essential characteristics.
-
Page 14: Warranty
(including deterioration of parts and 48-50 Moore Street, Leichhardt N.S.W 2040 accessories and glass breakage); Post: (b) use for purpose for which the ILVE product Locked Bag 3000, Annandale, N.S.W 2038 was not sold or designed; P: 1300 856 411... - Page 15 Address: State: Postcode: Email: Home Phone: Mobile: Purchase Date: (Please attach proof of purchase to validate warranty) SERIAL NUMBER MODEL NUMBER (if you cannot locate the serial number please call ILVE on 1300 85 64 11) ILVE Operating Manual 01072016...
- Page 16 Australia National Telephone Number 1300 MYILVE (694 583) New Zealand Telephone Number 0508 458 369 ilve.com.au ILVE showrooms are open daily from 9am-5pm and Saturdays 10am-4pm NSW & ACT (Head Office) VIC & SA WA & NT TAS (Crisp Ikin)
Need help?
Do you have a question about the 60 Series and is the answer not in the manual?
Questions and answers