Table of Contents
Advertisement
Advertisement
Table of Contents

Related Manuals for ILVE ILO691X


Summary of Contents for ILVE ILO691X
- Page 1 INSTRUCTION MANUAL FOR BUILT-IN OVENS...
- Page 2 OPEN 24 ILVE ACCESSORIES ONLINE SHOP...
- Page 3 CARO CLIENTE, DEAR CHÈRE CLIENTE, CUSTOMER, CHER CLIENT, sentitamente La ringrazia- We thank you and con- Merci et sincères félici- mo e ci congratuliamo per gratulate your tations pour le choix que la scelta da Lei fatta. choice. vous avez fait. Questo nuovo prodotto ac- This new carefully designed Ce nouveau produit, conçu...
-
Page 4: Cottura Con La Funzione
INDICE CONTENTS INDEX Primo utilizzo pag. 6 First use pag. 6 Première utilisation pag. 6 Pannelli autopulenti Self-cleaning panel Panneaux autonettoyants Rispetto dell’ambiente 10 Respect for the Respect environment de l’environnement Frontale comandi 12-14 Control panel 12-14 Panneau de commande 12-14 Istruzioni di Instructions for use: Instructions pour le... -
Page 5: Panel De Control
INDEX INDICE INHOUD INDICE Erstmalige Benutzung S. 7 Primera utilización pag. 7 Eerste gebruik pag. 7 Primeira utilização pág. 7 Selbstreinigende Platten 9 Paneles autolimpiantes Zelfreinigende panelen Painéis autolimpantes Umweltverträglichkeit 11 Respeto por el medio Respect voor het milieu 11 Respeito do ambiente ambiente Bedienblende... - Page 6 PRIMO UTILIZZO PRIMO UTILIZZO THE FIRST TIME THE FIRST TIME PREMIERE PREMIERE YOU USE THE YOU USE THE UTILISATION UTILISATION PRIMO UTILIZZO THE FIRST TIME PREMIERE OVEN OVEN YOU USE THE UTILISATION Il forno va pulito a fondo Il forno va pulito a fondo Clean the oven thoroughly Clean the oven thoroughly Le four doit être nettoyé...
-
Page 7: Pannelli Autopulenti
PANNELLI SELF-CLEANING PANNEAUX AUTOPULENTI CATALYTIC AUTONETTOYANTS CATALICI PANELS CATALYTIQUES I nostri forni con pareti li- Our smooth walled ovens Nos fours à parois lisses sce hanno la possibilità di can be fitted with self- peuvent être munis, à l’inté- montare all’interno della cleaning panels to cover the rieur, de panneaux auto- muffola dei pannelli auto-... -
Page 8: Rispetto Dell'ambiente
RISPETTO RESPECT FOR THE RESPECT DE DELL’AMBIENTE ENVIRONMENT L’ENVIRONNEMENT La documentazione del pre- The documentation pro- La documentation de cet sente apparecchio utilizza vided with this oven has appareil est imprimée sur carta sbiancata, senza cloro, been printed on chlorine du papier blanchi, sans oppure carta riciclata allo free bleached paper or re-... -
Page 9: Ventilato
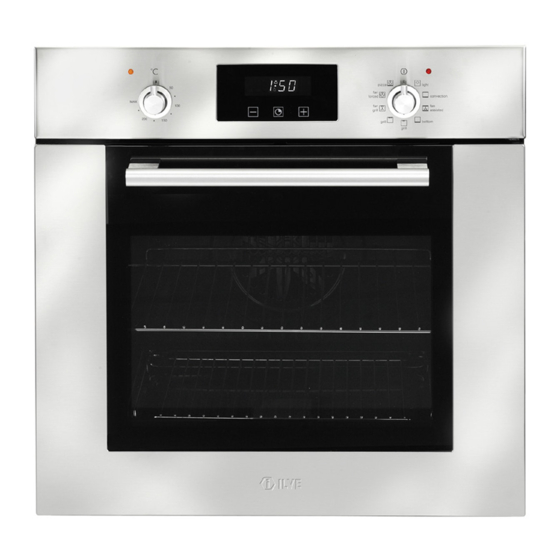
FUNZIONI CONTROL PANEL FONCTIONS DU PANNELLO FUNCTIONS PANNEAU DE COMANDI COMMANDE SIMBOLI FUNZIONI SUL FUNCTION SYMBOLS SYMBOLES DES COMMUTATORE ON THE SELECTOR FONCTIONS SUR LE COMMUTATEUR Lampada forno (rimane Oven light (stays on while Lampe du four (reste al- sempre accesa durante il oven is in use). -
Page 10: Termostato
Resistenza superiore (grill Resistenza superiore (grill Top heating element (small, Top heating element (small, Résistance supérieure (grill Résistance supérieure (grill superficie e potenza ridotta). superficie e potenza ridotta). low power grill). Thermo- low power grill). Thermo- à grande surface et puis- à... -
Page 11: Termostato
COTTURA CUISSON VENTILATO COOKING VENTILEE Con questo tipo di cottura, For this type of cooking a Avec ce type de cuisson, un un ventilatore posto nella fan positioned at the back ventilateur placé dans la parte posteriore fa circolare allows the circulation of hot partie postérieure fait... -
Page 12: Termostato
COTTURA AL GRILL GRILL COOKING CUISSON AU GRIL Tipo di cottura per la gri- Use the grill to grill or Type de cuisson pour griller gliatura o doratura dei cibi. brown foods. ou dorer les aliments. Alcuni forni possono essere Some ovens Certains fours peuvent être... -
Page 13: Termostato
TERMOSTATO THERMOSTAT THERMOSTAT Dispositivo che permette di Use the thermostat to set Dispositif permettant de ré- regolare la temperatura di cooking temperature gler la température de cuis- cottura più idonea ai cibi you need. The thermostat son la plus indiquée pour cuocere e può... - Page 14 Premere la manopolina e Push the knob out and turn it Appuyer le petit bouton et le ruotare in senso antiorario. anticlockwise to set the clock. tourner dans le sens inverse des aiguilles d’une montre. ture a tempo definito ruotare cuissons à...
-
Page 15: Termostato
TIMER 6 KEY TEMPORISATEUR ELETTRONICO 6 ELECTRONIC ELECTRONIQUE TASTI TIMER A 6 TOUCHES Regolazione dell’orologio Setting the clock Réglage de l’horloge Premere contemporanea- Appuyer en même temps Press the duration sur les touches de durée mente i tasti di durata and the end of cooking et de fin de cuisson e fine cottura... - Page 16 FUNZIONAMENTO FULLY AUTOMATIC FONCTIONNEMENT AUTOMATICO OPERATION AUTOMATIQUE Per cotture a tempo definito To set the end of cooking Pour les cuissons à temps premere il tasto di durata time, press the duration key défini, appuyer touche de durée cuisson cottura e impostare and press the +/- keys et, à...
-
Page 17: Oven Light
SOSTITUZIONE REPLACING THE REMPLACEMENT DELLA LAMPADA OVEN LIGHT DE LA LAMPE DU DEL FORNO FOUR IMPORTANTE: IMPORTANT: IMPORTANT: La lampada del forno de- The oven light must have La lampe du four doit ré- ve avere precise caratteri- these precise features: pondre à... -
Page 18: Demontage
SMONTAGGIO REMOVING THE DEMONTAGE DE DELLA PORTA OVEN DOOR LA PORTE DU FORNO FOUR Lo smontaggio della porta The oven door can be Le démontage de la porte forno può essere facilmente removed quickly and easily. du four peut être effectué effettuato operando come To do so, proceed as facilement de la manière... - Page 19 INSTALLATION INSTALLATION POUR POUR L’INSTALLATORE L’INSTALLATORE INSTRUCTIONS INSTRUCTIONS L’INSTALLATEUR L’INSTALLATEUR INSTALLATION POUR L’INSTALLATORE INSTRUCTIONS L’INSTALLATEUR Incasso del forno Incasso del forno Flush fitting Flush fitting Encastrement du four Encastrement du four Incasso del forno Flush fitting Encastrement du four Il forno può essere installa- Il forno può...
- Page 20 Backofens mit den Gas- horno con las placas de de oven met gas- of com os planos de cozedura oder Gas/Elektrokombi- cocción polivalentes gas o gemengde kookplaten, zie polivalentes gás kochfeldern siehe bei- combi eléctricos ver las de bijgaande instructies. combinados eléctricos ver liegende Anleitungen.
- Page 21 ALLACCIAMENTO ELECTRICAL BRANCHEMENT ELETTRICO CONNECTIONS ELECTRIQUE Prima di effettuare l’allac- Before connecting the oven Avant d’effectuer le bran- ciamento elettrico accertarsi to the mains power supply, chement électrique, s’assu- che: make sure that: rer que : - le caratteristiche dell’im- - The supply voltage corre- - les caractéristiques de l’in- pianto siano tali da soddi-...
- Page 22 completa nelle condizioni guarantee class permettant une déconnexion della categoria overvoltage protection, then complète dans les conditions sovratensione III, tali such a device must be fitted de la catégorie de surtension dispositivi di disconnessione to the power supply in III, ces dispositifs de devono essere previsti nella compliance with...
- Page 23 Il contenuto del presente manuale è generico e non tutte le funzionalità descritte potrebbero essere incluse nel vostro prodotto. La Casa costruttrice declina ogni responsabilità per le possibili inesattezze contenute nel presente opuscolo, imputabili ad errori di stampa o di trascrizione. Si riserva il diritto di apportare ai propri prodotti quelle modifiche che ritiene necessarie o utili, senza pregiudicare le caratteristiche essenziali.
- Page 24 Warranty Card Eurolinx Pty Limited A.B.N. 50 001 473 347 trading as ILVE (“ILVE”) WARRANTY REGISTRATION PRIVACY WARRANTY ILVE Operating Manual...
- Page 25 Warranty Card ALL SERVICE CALLS MUST BE BOOKED THROUGH THE ILVE SERVICE AND Warranty Card tear off ILVE Operating Manual...
-
Page 27: Control Panel
INSTRUCTION MANUAL FOR BUILT-IN OVEN TOUCH CONTROL PANEL... -
Page 29: Timer
TIMER TOUCH CONTROL Setting the clock Figure 1 “Auto” and “0:00” will start flashing when the unit is switched on for the first time. To set the clock, press the central button for about 3 seconds. When appears, press “+” or “-“ to set the correct time. - Page 30 End of cooking time Figure 4 The end of cooking time can also be set. Press the central button for 3 seconds. Press the central button twice consecutively and wait for “End” to appear (figure 4). Press “+” and “-” to set the required end of cooking time. The oven will work in the set mode and at the set temperature until the end of cooking time.
- Page 31 OPEN 24 ILVE ACCESSORIES ONLINE SHOP...
Need help?
Do you have a question about the ILO691X and is the answer not in the manual?
Questions and answers