
Related Manuals for Miele CombiSet CS 1411F


Summary of Contents for Miele CombiSet CS 1411F
- Page 1 Operating and Installation Instructions Electric Fryer CS 1411 en - US To prevent accidents and appliance damage, read these instructions before installation or use. M.-Nr. 07 346 970...
-
Page 2: Table Of Contents
Contents IMPORTANT SAFETY INSTRUCTIONS....... . . 3 Guide to the fryer ..........6 Before using for the first time. -
Page 3: Important Safety Instructions
IMPORTANT SAFETY INSTRUCTIONS Children WARNING- When using your Children should not be left appliance follow basic unattended in an area where the precautions, including the appliance is in use. Never allow following: children to sit or stand on any part of the appliance. - Page 4 Do not use an extension cord to connect this appliance to electricity. Installation, repair and maintenance Extension cords do not guarantee the work should be performed by a Miele required safety of the appliance. authorized service technician. Work by unqualified persons could be Be sure that the power cord does dangerous and may void the warranty.
- Page 5 IMPORTANT SAFETY INSTRUCTIONS Safety Make certain that the power cords of small appliances do not come in The appliance is hot during use and contact with the appliance. The remains so for some time after being insulation of the cable could become switched off.
-
Page 6: Guide To The Fryer
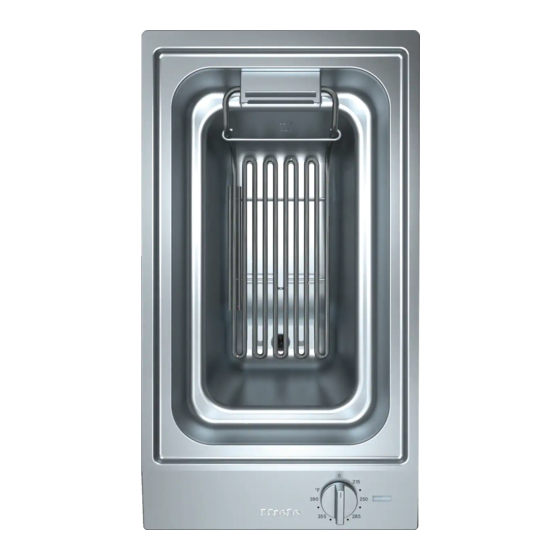
Guide to the fryer a Basket Indicators b Handle (fold-away, removable) c Basket clip d Basket support j On/Off indicator e Heating element (can be raised) k Temperature control light f Drain valve l Residual heat indicator g Display Lid (not shown) h Control knob Protects the reservoir before and after i Reservoir... -
Page 7: Before Using For The First Time
Before using for the first time Cleaning the appliance Heating the appliance ^ Remove any protective packaging or Metal components of the appliance labels. have a protective coating which may give off a slight odor the first time the ^ Make sure the drain valve is closed. appliance is heated. -
Page 8: Use
Fryer lid Turning On/Off ^ To remove the lid to the fryer, press Do not turn on the fryer when it is on the left or right side of the lid with empty or when the heating element your finger a. is raised. -
Page 9: Residual Heat Indicator
Residual heat indicator The indicator turns off once the appliance is cool enough to touch. Do not touch the fryer when the residual heat indicator is on. Danger of burns! -
Page 10: Using The Fryer
Using the fryer Before frying Using the fryer ^ Set the desired frying temperature Only operate the fryer with the lid (see table on next page). Once the removed. temperature control light goes out the oil has reached the set temperature. Only use oil/fat which is suitable for ^ Place the frying basket containing the frying. - Page 11 Using the fryer Fresh food Quantity Temperature Frying time in in °F (°C) minutes Steak fries 1 lb. (500 g) 355 (180) 4 - 6 French fries 1 lb. (500 g) 355 (180) 3 - 5 Chicken fingers 4 pieces 2 oz. 355 (180) 8-10 (60 g) each...
-
Page 12: Frying Tips
Using the fryer Frying tips – Heating the oil for too long will speed up its spoiling time. Do not add salt, powders or sauces – Food should be as dry as possible to food while the basket is over the since moisture can cause frothing. -
Page 13: After Using The Fryer
Using the fryer ^ Once all the oil has drained, close After using the fryer the drain valve by turning it Turn off the fryer and drain off the oil. clockwise b as far as it will go (do If you wish to store the oil, it should be not over tighten). -
Page 14: Safety Cut-Out Feature
Safety cut-out feature ^ Turn the control knob to "0" and wait This appliance is equipped with a safety cut-out feature that automatically until the heating element has cooled. shuts it off when: – the reservoir is not filled to at least the minimum level marker. -
Page 15: Cleaning And Care
Cleaning and care Under no circumstances use a steam cleaner to clean this appliance. Pressurized steam could cause permanent damage to the surface and to components. Do not use any sharp or pointed objects which could damage the seal between the frame and the countertop. - Page 16 (see "After using the fryer"). using a non-abrasive stainless steel cleaner (available from Miele). Apply sparingly with even pressure using a soft cloth. Fryer basket Clean the basket after each use using a mild solution of warm water and liquid dish soap.
-
Page 17: Frequently Asked Questions
See "Safety cut-out feature". activated. The circuit breaker has tripped. Check whether a fuse is blown. If the problem persists contact Miele. What if the oil/fat has an unpleasant odor or smokes when heated? Possible fault Solution The oil/fat needs to be changed. -
Page 18: Technical Service
Technical Service In the event of a fault which you cannot easily fix yourself, please contact the Miele Technical Service Department at the address on the back of this booklet. When contacting Technical Service please quote the serial number and model of the appliance. - Page 19 Miele Service department, Extended Service Contracts offered by other providers for Miele products will not be recognized by Miele. Our goal is to prevent unauthorized (and untrained) service personnel from working on your Miele products, possibly doing further damage to them, you and/or your home.
-
Page 20: Optional Accessories
Optional accessories Miele offers a variety of additional accessories for its appliances. All accessories can be ordered from Miele Pasta basket with lid For cooking pasta... - Page 21 Installation Instructions IMPORTANT: SAVE FOR THE LOCAL ELECTRICAL INSPECTOR'S USE To prevent accidents and machine damage read these instructions before installation or use.
-
Page 22: Important Installation Safety Instructions
Gas flames can certain conditions it may be possible for installation in these applications. Please ignite splattering oil. A distance of at contact the Miele Technical Service least 11 " (288 mm) should be Department with specific requirements. - Page 23 IMPORTANT INSTALLATION SAFETY INSTRUCTIONS Safety distances above the appliance The minimum safety distance given by the hood manufacturer must be maintained between the fryer and the hood above it. See the installation instructions of the hood for these safety measurements. If the hood manufacturers instructions are not available or if flammable objects are installed over the fryer (e.g.
- Page 24 IMPORTANT INSTALLATION SAFETY INSTRUCTIONS Safety distances to the sides of the appliance The fryer should only be installed as shown in the illustrations, while 2 " (50 mm) maintaining the required safety distances shown. Do not install the appliance between two tall cabinets, this is a fire hazard.
-
Page 25: Installation
Installation Safety distance when installing the appliance near a wall with trim or a back splash A minimum distance of 2" (50 mm) between the trim or back splash and the countertop cut-out if required. This distance is only necessary if these items are made of combustible materials e.g. -
Page 26: Installation Dimensions
Installation Installation dimensions a Spring clips b Front c Installation height d Power supply box with connection cable, L = 78 3/4" (2000 mm) e Drain valve f Rating label... - Page 27 Installation Cut-out If during installation the seal around ^ Make the countertop cut-out for the the frame does not sit flush with the desired number of appliances. countertop in the corners, the corner Remember to maintain a minimum radius, maximum "...
-
Page 28: Installation Of Multiple Appliances
Installation Installation of multiple appliances When installing more than one combiset appliance, a support bar b must be installed between the appliances. Countertop cut-out Countertop cut-out two appliances three appliances 6 " 6 " For the installation of two appliances For the installation of three appliances the width of the countertop cut-out D is the width of the countertop cut-out D is... - Page 29 Installation Sample calculations for a countertop cut-out for three appliances appliance width appliance width appliance width Countertop minus 5/16" minus 5/16" cut-out (8 mm) (8 mm) 11" (280 mm) 11 5/16" (288 mm) 11" (280 mm) 33 3/8" (848 mm) 11"...
- Page 30 Installation " 3 / 1 6 1 " - 1 0 m m ( 2 5 - 3 2 " 2 " ( 5 0 m ( 5 0 m 2 " 2 " " 3 / 1 6 ( 5 0 m ( 5 0 m 6 "...
-
Page 31: Attach The Spring Clips And Support Bars
Installation Attach the spring clips and support bars Wood or solid surface countertops Granite countertop " 3 / 1 6 " 3 / 1 6 1 " - 1 1 " - 1 0 m m ( 2 5 - 3 0 m m ( 2 5 - 3 ^ Position and attach the spring clips... - Page 32 Installation ^ Coat the edges of the spring clips, ^ and the space d between the strips and the countertop with silicone (supplied).
- Page 33 Installation Installing the appliance ^ Feed the power cord down through the cut-out. ^ Then place the front side of the appliance in the countertop cut-out. ^ Then with a hand on each side of the appliance press down evenly on the edges until it clicks into position.
-
Page 34: Sealing
Installation Sealing Tiled surfaces The grouting a and shaded area under the appliance frame must be flat and The appliance must not be permanently even so that the frame will lie evenly sealed into the countertop when and the sealing strip under the edge of installed. -
Page 35: Electrical Connection
Electrical connection Power supply CAUTION: Before installation or ^ Be sure your electrical supply servicing, disconnect the power matches the rating label. supply by either removing the fuse, shutting off the main power or The rating label is located on the manually "tripping"... - Page 36 Alteration rights reserved / 0609 M.-Nr. 07 346 970 / 01 M.-Nr. 07 346 970 / 01 For the most updated manual see the Miele web site.