Nortek 2GIG GC3e Series Installation And Programming Manual
Security & automation system
Hide thumbs
Also See for 2GIG GC3e Series:
- Installation and programming manual (92 pages) ,
- User manual (86 pages) ,
- User manual (86 pages)

Related Manuals for Nortek 2GIG GC3e Series


Summary of Contents for Nortek 2GIG GC3e Series
- Page 1 ® 2GIG GC3/GC3e Security & Automation System Installation and Programming Guide 10023748 B WARNING: OWNER’S INSTRUCTION NOTICE Not to be removed by anyone except occupant...
-
Page 2: Table Of Contents
Copyright © 2019 Nortek Security & Control LLC. All Rights Reserved. U.S. Patent D727,857. Australian Patent No. 357098. Additional Patents Pending. The 2GIG, GC3, GC3e, GoControl, and Linear logos are registered trademarks of Nortek Security & Control LLC in the United States and/or other countries. Other Nortek Security &... - Page 3 Q48: Programming mode entry reports to CS............62 Copyright © 2019 Nortek Security & Control LLC...
- Page 4 Risk of Noise Induced Hearing Loss ............. . . 91 Copyright © 2019 Nortek Security & Control LLC...
-
Page 5: Introduction
This added time, complexity and confusion for the user. The simplifi ed user interface will reduce confusion and frustration for those who may not interact with their security system every day. With the common tasks up front, it’s easy to select without having to memorize. Copyright © 2019 Nortek Security & Control LLC... -
Page 6: Document Conventions
Swipe down Swipe up Technical Support Should you require support services for this system, contact 2GIG Technical Support at Nortek Security & Control. For support in the USA and Canada, contact 2GIG Technical Support at Nortek Security & Control: »... -
Page 7: Planning The Installation
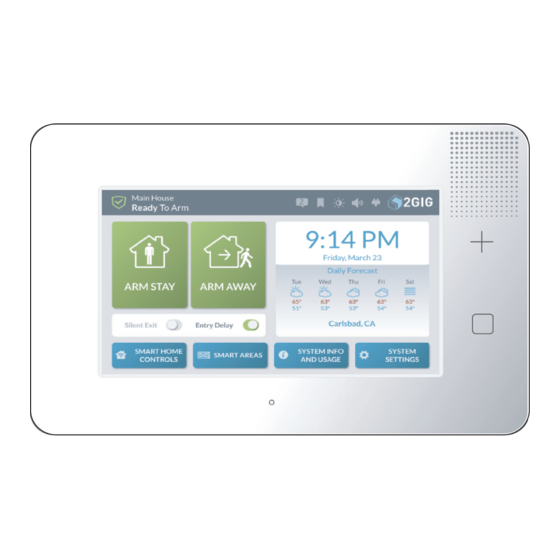
System Features and Capabilities If you’re familiar with other 2GIG Control Panels, you’ll notice the new GC3 Panel from Nortek Security & Control off ers the very best components of the GC2 Panel and has been transformed by a major visual upgrade— off ering a larger touchscreen and an intuitive user interface featuring convenient, gesture-based navigation. - Page 8 For example, when someone opens the front door, the system can be set up to announce “front door.” Date, Time and Weather Forecasts are supported by most Remote Service Providers in most regions. Consult your provider to determine if this feature is enabled. Copyright © 2019 Nortek Security & Control LLC...
-
Page 9: Internal Components
2-Way Voice communication. WLAN Card A Wireless LAN card to support the GC3 system’s self-contained Wi-Fi network. USB Port A built-in USB port for updating the panel’s fi rmware. Copyright © 2019 Nortek Security & Control LLC... -
Page 10: Additional Accessories
» 2GIG Carbon Monoxide Sensor » 2GIG Takeover Module » 2GIG Doorbell » Universal Garage Door Receiver » 2GIG Tilt Sensor » 2GIG Bypass Sensor » 2GIG Flood Sensor » 2GIG Repeater Copyright © 2019 Nortek Security & Control LLC... -
Page 11: Important Information
This is an accessory that lets one mount the GC3 Panel on a stand that can be placed on a fl at surface, such as desk or counter. Use of this option may aff ect compliance with state or regional codes. Copyright © 2019 Nortek Security & Control LLC... - Page 12 Lath and Plaster Location of Sensors SENSOR Less DOOR DOOR than 3 ft Large Wall above metal slab Minimum appliance Concrete Concrete 3 ft (refrig.) slab slab floor floor SENSOR SENSOR CORRECT CORRECT INCORRECT Copyright © 2019 Nortek Security & Control LLC...
- Page 13 DW - DOOR/WINDOW SENSOR PIR - MOTION DETECTOR GB - GLASS BREAK SENSOR PAD - WIRELESS KEYPAD ES - EXTERNAL SIREN GARAGE MAIN AND SIDE GARAGE DOOR SENSORS (WITH ENTRY/EXIT DELAY) diag-gc3-burglary-floor-plan-en Copyright © 2019 Nortek Security & Control LLC...
- Page 14 BEDROOM IMPORTANT: Regulations pertaining to smoke alarm installations vary. For more information, contact your local fire department or local authority having jurisdiction. Copyright © 2019 Nortek Security & Control LLC...
-
Page 15: Installation Steps
10. Program the Sensors & Peripherals: Program the system’s wireless and wired zones, as well as any keyfobs or keypads. See “Programming Sensors & Peripherals.” 11. Complete the Panel Programming Steps: Program settings for the GC3 Panel and the rest of the system. See “Panel Programming.” Copyright © 2019 Nortek Security & Control LLC... -
Page 16: Installing The System
7. After installing the Cellular Radio Module, go to the Installer Toolbox > System Confi guration > Radio Test. Then tap Start Radio Test. When the test reads “Success,” tap Done. Copyright © 2019 Nortek Security & Control LLC... - Page 17 7. Insert the GC3 Cellular Radio Module until it clicks into place. 8. (Optional) Install the lock on the Cellular Radio Module bay door. 9. Replace the hinged door. 10. Tap Done. Copyright © 2019 Nortek Security & Control LLC...
- Page 18 12. Route the antenna cable through the wiring cutout on the GC3 Control Panel’s backplate. 13. Connect the battery to the Control Panel. 14. Mount the Control Panel on the backplate. 15. Connect the AC power supply to the power source. Copyright © 2019 Nortek Security & Control LLC...
- Page 19 The Control Panel ships with the door-lock screw in the UNLOCK position. To limit the possibility of someone removing the door, installers have the option of moving the screw to the LOCK position. GC3 Cellular Radio Module Door Lock Copyright © 2019 Nortek Security & Control LLC...
- Page 20 3. Install the screw into the LOCK position on the left. This locks the hinged door on the GC3 Control Panel. GC3 Panel—LOCK position 4. Snap the faceplate back on the GC3 Control Panel. Mount the GC3 Panel’s Backplate Copyright © 2019 Nortek Security & Control LLC...
-
Page 21: Mount The Gc3 Panel's Backplate
9. Attach the backplate to the wall using the four (4) wall anchors and screws (supplied). The center top screw is the wall tamper and MUST have an anchor to work. Copyright © 2019 Nortek Security & Control LLC... - Page 22 GC3 Security & Automation System. This is an accessory that lets one mount the GC3 Panel on a stand that can be placed on a fl at surface, such as desk or counter. Use of this option may aff ect compliance with state or regional codes. Optional 2GIG Desktop Kit—Rear View Copyright © 2019 Nortek Security & Control LLC...
-
Page 23: Connect An External Alarm Sounder
This lets the system notify both the user and the Central Station if the wire between the external alarm sounder and GC3 Panel is cut. By default, this setting is turned OFF. See “Q28: Siren supervision time.” Copyright © 2019 Nortek Security & Control LLC... -
Page 24: Connect The Hardwire Loops
TIP: After the installation is complete, you must program the wired zone into the GC3 Panel. During programming, you must defi ne the normal state of the circuit for each wired zone. See “Program a Wired Zone.” Copyright © 2019 Nortek Security & Control LLC... -
Page 25: Connect The Power Wires
IMPORTANT: Do not over-tighten the terminal block’s contact screws. NOTE: Terminal 1 only provides power for the GC3 Panel when its power supply is connected to an AC power source. Copyright © 2019 Nortek Security & Control LLC... - Page 26 WARNING!! Do NOT plug the power supply into the outlet at this time. Always complete all system wiring and then secure the backplate to the GC3 Panel before connecting its power supply to the outlet. Copyright © 2019 Nortek Security & Control LLC...
-
Page 27: Control Panel Wiring Diagram
2 – 14VDC Power Input (–) 3 – COM 4 – Bell (+) 5 – Bell (–) 6 – ZONE 1 ALL output 7 – ZONE 2 CONTROL voltages are PANEL Class 2 Copyright © 2019 Nortek Security & Control LLC... -
Page 28: Terminal Blocks Wiring Diagram
Transmit (RS232 TX) (Image Sensor) CLASS 2 Receive (RS232 RX) (Image Sensor) CLASS 2 Open Collector Output 1 CLASS 2 Open Collector Output 2 CLASS 2 (+) Image Sensor CLASS 2 Not supported Copyright © 2019 Nortek Security & Control LLC... -
Page 29: Connect The Backup Battery
Note: Only a single broadband is available on the GC3 panel at any time. If a hardwired connection is active on the GC3 the WiFi connection will be disabled. Copyright © 2019 Nortek Security & Control LLC... -
Page 30: Install The Retaining Wall Bracket And Connect The Ac Power Supply
Wall Bracket Zip Tie—Standard-Style Duplex Receptacle Wall Bracket Zip Tie—Decora-Style Duplex Receptacle With the installation complete, you can begin programming sensors and peripherals for use with the GC3 Panel. See “Programming Sensors & Peripherals.” Copyright © 2019 Nortek Security & Control LLC... -
Page 31: Update The Gc3 Panel Firmware
The Firmware Update icon appears in the Status Icons Update message. area and the Firmware Update Available from USB 7. On the Messages screen, tap the GoControl Device message appears. Firmware Update message. Copyright © 2019 Nortek Security & Control LLC... -
Page 32: Navigate To The Installer Toolbox
WiFi as the main panel or to the systems internal Access Point. See the section “Access Point.” » At the Home screen, tap System Settings. Then, enter your code and tap Installer Toolbox. Copyright © 2019 Nortek Security & Control LLC... -
Page 33: Attaching To A Wireless Network
A list of available networks will be displayed. 3. Tap Network to connect to. Network Options Select Wireless Network Tapping Refresh will refresh the list of available networks. 4. Enter network password and tap Next. Copyright © 2019 Nortek Security & Control LLC... -
Page 34: Wired (Ethernet)
If the DHCP server is available on the network, the GC3 panel will automatically receive an IP address. 2. Enter network SSID. 3. Select authentication type used by the network. 4. Enter password. Copyright © 2019 Nortek Security & Control LLC... - Page 35 4. After any edits have been made, press Save Access Point Settings to save any confi guration settings. Note: Make a note of SSID and Password for use in WiFi setup of SP1 and SP2 keypads. 5. Tap ▼. Copyright © 2019 Nortek Security & Control LLC...
- Page 36 LAN – Connection to Local Network » Internet – Connection to Internet » Backend – Connection to Alarm.com NOTE: Correct any network issues to resolve broadband connectivity 4. Tap to return to Installer Toolbox Copyright © 2019 Nortek Security & Control LLC...
-
Page 37: Programming Sensors And Peripherals
Installer Toolbox.” 1. On the left side of the Wireless Zones screen, swipe up or down to move through the list of zones. 2. Tap one of the available zones to highlight it. Copyright © 2019 Nortek Security & Control LLC... - Page 38 » Learning Mode Entry: Place the GC3 Panel into 4. Tap ▼. Learning Mode and then trigger the sensor twice to transmit the TX ID from the sensor to the GC3 Panel. Copyright © 2019 Nortek Security & Control LLC...
- Page 39 5. Tap ▼. heat detection using Loop 2, and/or for freeze detection using Loop 3. Always check the Installation Instructions that came with the sensor or peripheral or consult with your dealer. Copyright © 2019 Nortek Security & Control LLC...
- Page 40 Central Station. Note: If this report feature is turned OFF< the sensor can still be used to trigger an alarm. 1. At the Wireless Zone <###> screen, highlight Sensor Reports. Copyright © 2019 Nortek Security & Control LLC...
-
Page 41: Next Steps
3. Tap ▼. » To permanently save the settings you just Wireless Zone <###>—Sensor Supervised programmed, tap Return to System Confi guration. Then tap . At the Confi rm Changes screen, tap Save. Copyright © 2019 Nortek Security & Control LLC... -
Page 42: Program A Wired Zone
Step 2: Select a Sensor Type Next, select the appropriate sensor type for the sensor or peripheral being programmed. 1. At the Wired Zone <###> screen, highlight Sensor Type. 2. Tap to expand the list. Copyright © 2019 Nortek Security & Control LLC... - Page 43 NO to NC would trigger an alarm. » End-of-Line Resistor (EOL): Choose this option when an end-of-line (EOL) resistor is present. Note: An EOL resistor must be installed at the sensor, not at the panel. Copyright © 2019 Nortek Security & Control LLC...
- Page 44 3. Tap ▼. Voice Descriptor—Touchscreen Keypad Entry Step 9: Choose a Chime Next, select the desired chime for the sensor or peripheral. 1. At the Wired Zone <##> screen, highlight Sensor Chime. Copyright © 2019 Nortek Security & Control LLC...
-
Page 45: Program A Keyfob
When disabled, the keyfob is OFF and cannot be Codes. used with the system (this is the default setting). eSeries sensors are only compatible with the GC3e 1. At the Keyfob <###> screen, highlight Fob Used. panel. Copyright © 2019 Nortek Security & Control LLC... - Page 46 fi ve (5) seconds. When the TX ID is received, the Sensor Received message appears. 4. Verify the serial number on the touchscreen matches the keyfob’s 7-digit TX ID. Then tap Accept. Copyright © 2019 Nortek Security & Control LLC...
- Page 47 Next, choose whether the keyfob can be used to disarm the system. When enabled, the keyfob has the ability to disarm the system. When disabled, the keyfob does not have the ability to disarm the system. Copyright © 2019 Nortek Security & Control LLC...
- Page 48 Delay timers when a keyfob is used to arm the system. of the desired vocabulary word. 1. At the Keyfob <###> screen, highlight Arm with No 4. Tap the matching vocabulary word above the Entry Delay. touchscreen keypad to select it. Copyright © 2019 Nortek Security & Control LLC...
-
Page 49: Program A Keypad
2. Tap one of the available keypads to select it. Note: A keypad is available for programming when it appears in gray text. A keypad that has already been programmed appears in black text. Copyright © 2019 Nortek Security & Control LLC... - Page 50 3. Tap to select the desired equipment code from the 2. Start pairing process on SP1 or SP2 (See SP1/2 list. installation manual for details). 3. System will show Device ID when paired. 4. Tap ▼. Copyright © 2019 Nortek Security & Control LLC...
- Page 51 TX ID, the Sensor Received status on the home screen and arming/disarming message appears. and status of all Smart Areas is available from the Smart Areas button on the home screen. Copyright © 2019 Nortek Security & Control LLC...
- Page 52 Touchscreen Keypad—Voice Descriptor Entry Done 3. Tap ▼. Step 8: Select a Voice Descriptor 1. At the Keypad <###> screen, highlight Voice Descriptor. 2. On the touchscreen, tap Edit Voice Descriptor to reveal the touchscreen keypad. Copyright © 2019 Nortek Security & Control LLC...
-
Page 53: Next Steps
To reset zone, keyfob, or keypad to its factory default setting: 1. At the Wireless Zones, Wired Zones, Keyfobs, or Keypads screen, tap the trash can icon next to the desired item. Copyright © 2019 Nortek Security & Control LLC... -
Page 54: Panel Programming
Q3: Lock default programming timer starts. Prevents system takeovers by limiting the user’s ability to The GC3 Panel beeps once every two (2) seconds during restore the GC3 Panel’s factory-default settings. There are the countdown. Copyright © 2019 Nortek Security & Control LLC... -
Page 55: Q6: Entry Delay 2, In Seconds (30-240)
See “Q40: Burglary bell cutoff time” and “Q41: Fire » Disabled: Turns the feature OFF. bell cutoff time.” » †Stay On Line: Turns the feature ON and automatically enables the 2-Way Voice feature after a burglary alarm. Copyright © 2019 Nortek Security & Control LLC... -
Page 56: Q10: Police Emergency Key
NOTE: When the Exit Delay Restart feature is arm the system. When OFF, only persons who know an enabled on the system and the user arms the active, four-digit user code can arm the system. Copyright © 2019 Nortek Security & Control LLC... -
Page 57: Q16: Allow Quick Exit
Confi gures the system to activate a unique sound when Home Controls menu (if enabled). See “Q21: Z-Wave the system is armed/disarmed with a keyfob. This feature feature “ above. can be assiged individually for each Smart Area. (Smart Copyright © 2019 Nortek Security & Control LLC... -
Page 58: Q24: Temperature Display Units
Wireless Zone 99 and Wireless Zone 100 must be violated. If only one of the two sensors in the cross sensor zone is violated, the system automatically transmits a trouble report Copyright © 2019 Nortek Security & Control LLC... -
Page 59: Q29: Cs Lack Of Usage Notifi Cation Time, In Days (0-255)
A record of the trouble alert condition is » Disabled: Turns the feature OFF. The GC3 Panel stored in the System History. will not display a visual indicator after a cellular radio Copyright © 2019 Nortek Security & Control LLC... -
Page 60: Q35: Broadband Network Failure Reports
For compliance with ANSI/SIA CP- 01-2010, the NOTE: This setting only aff ects the GC3 Panel default setting for this feature is enabled. alarm. It does not aff ect any auxiliary alarms that Copyright © 2019 Nortek Security & Control LLC... -
Page 61: Q42: Trouble Doesn't Sound At Night
OCL1 position of the GC3 Panel’s terminal block. See “Control Panel Wiring Diagram.” NOTE: For compliance with ANSI/SIA CP-01-2010, you must set Open Collector Output #1 to 11 - Follows Internal Sounder Alarm. Copyright © 2019 Nortek Security & Control LLC... -
Page 62: Q46: Time To Detect Ac Loss, In Minutes
Central Station when the system detects that any sensor encounters a trouble condition. NOTE: This setting does not aff ect trouble reports caused by Control Panel conditions. It only aff ects trouble reports caused by sensors. Copyright © 2019 Nortek Security & Control LLC... -
Page 63: Q54: Ac Restore Reports To Cs
Station after a low battery condition for a sensor is restored. Choose one of these options: » † Enabled: The system transmits a report to the Central Station. » Disabled: The system does not transmit a report to the Central Station. Copyright © 2019 Nortek Security & Control LLC... -
Page 64: Q62: Smart Test Reports
Confi gures the system to transmit a report to the Central displayed on the home screen of the GC3 and Station when a user force-bypasses a sensor while the SP1s. Smart Areas Settings will only display the system is armed. main system. Copyright © 2019 Nortek Security & Control LLC... -
Page 65: Q70: Main Panel Sounder Follows
4 digits. Installer pin code and To perform a soft reset: Master pin code will return to the 4-digit defaults. 1. Navigate to the Installer Toolbox screen. 2. Tap Restore Defaults. Copyright © 2019 Nortek Security & Control LLC... -
Page 66: System Confi Guration Reference
Stay continue until a user code is entered. or Away mode. Copyright © 2019 Nortek Security & Control LLC... - Page 67 An instant silent alarm will occur when this type of sensor is triggered with the system armed in either the Stay or Away mode. † Indicates sensor types that are not allowed for hardwired loops. Copyright © 2019 Nortek Security & Control LLC...
- Page 68 2869-eSeries PIR with Pet Immunity 0872-SMKE1-345 Smoke Detector (USA) 0871-SMKE1-345C Smoke/Heat Detector (Canada) 2864-eSeries Glass Break Detector 0868-2GIG Panic Button Remote 2058-eSeries Smoke Detector (USA) (Use for all loops (1 2 3).) Copyright © 2019 Nortek Security & Control LLC...
- Page 69 Refer to the device manual. Ice (115), Image (279), Image Sensor (280), Inside (116), Instant (117), Interior (118), Intrusion (119), Is (120) Refer to the device manual. Refer to the device manual. Copyright © 2019 Nortek Security & Control LLC...
- Page 70 Wall (248), Warehouse (264), Water (249), West (250), Window (251), Wing (285), Wireless (252) Ding-Dong #3 Ding-Dong #3 with Voice Yard (253) Chime #1 Zero (254), Zone (255) Chime #1 with Voice Chime #2 Chime #2 with Voice Copyright © 2019 Nortek Security & Control LLC...
-
Page 71: Panel Programming Reference
Audible Emergency key Disabled Audible Quick arming Enabled Enabled Disabled Enabled ‡Enabled Auto stay Disabled Exit delay restart Enabled ‡Enabled Disabled Allow quick exit Enabled Enabled Disabled Quick bypass Enabled Disabled Disabled Copyright © 2019 Nortek Security & Control LLC... - Page 72 Broadband network failure causes Enable Enabled trouble Disable Broadband network failure reports Enable Enabled Disable Periodic test, in days (0-255) 0-255 Days 30 Days Alarm cancel time, in minutes 5-255 Minutes 5 Minutes (5-255) Copyright © 2019 Nortek Security & Control LLC...
- Page 73 Random AC loss report time Enabled Enabled Disabled Programming mode entry reports Enabled Disabled to CS Disabled Trouble reports to CS Enabled Enabled Disabled Trouble restore reports to CS Enabled Enabled Disabled Copyright © 2019 Nortek Security & Control LLC...
- Page 74 All Events Except Open/Close All Events Allow backlight always on (demo Enabled Disabled mode) Disabled Smart Areas Enabled Disabled Disabled Main Panel Sounder Follows All Smart Areas All Smart Areas Main Panel Smart Area Only Copyright © 2019 Nortek Security & Control LLC...
-
Page 75: Features To Limit False Alarms
Swinger Shutdown Count (1-6) “Q61: Alarm restore reports to CS” 4.3.3 Fire Alarms Fire & Carbon Monoxide Protection Sensor Type — (24) Silent Burglary” Console Test 4.6.3 System Test “Testing the Installation” Sensors Test Copyright © 2019 Nortek Security & Control LLC... -
Page 76: Image Sensor
5. At the Installer Toolbox menu, tap Smart Home » Firmware Version Settings. This reveals the Smart Home Settings menu. » Battery level » Signal Strength Smart Home Settings Menu » Rules » Sensitivity Copyright © 2019 Nortek Security & Control LLC... -
Page 77: Add A New Device
Tip: Typically, you can trigger a device on the network by either powering the device OFF/ON, pressing a button once or twice, or fl ipping a switch on the device. Every device is diff erent. Copyright © 2019 Nortek Security & Control LLC... -
Page 78: Remove A Device
Tip: Typically, you can trigger a device on the network by either powering the device OFF/ON, pressing a button once or twice, or fl ipping a switch on the device. Every device is diff erent. Copyright © 2019 Nortek Security & Control LLC... -
Page 79: Check The Network
Z-Wave devices. To rediscover the network: 1. Navigate to the Smart Home Settings menu. See “Navigate to the Smart Home Settings Menu.” Copyright © 2019 Nortek Security & Control LLC... -
Page 80: View All Devices
Smart Home – View All Devices When the rediscovery is complete, the Rediscover Network screen with the Start button (shown above) appears again. 4. To view the options available for a device, tap the menu button ( Copyright © 2019 Nortek Security & Control LLC... - Page 81 To make a hidden device visible To make a hidden device visible on Smart Home Control screens: 1. Tap the menu button ( ) next to the device and tap Unhide. Smart Home Devices – Unhide Copyright © 2019 Nortek Security & Control LLC...
- Page 82 Smart Home Devices – Rename from the system. This option only appears for a device that is not communicating with the system. Note: Non-communicating devices are indicated by an alert icon ( Copyright © 2019 Nortek Security & Control LLC...
- Page 83 Note: Non-communicating devices are indicated by an alert icon ( 3. Walk to and trigger the replacement device on the network. For example, if you are replacing a Z-Wave light bulb, turn the light bulb ON. Copyright © 2019 Nortek Security & Control LLC...
-
Page 84: Associating Z-Wave Devices
5. At the Z-Wave Association screen, tap the Manage button next to the device that will act as the controller. Z-Wave Association—Manage 2. Enter the Master User Code to access the System Settings screen. Copyright © 2019 Nortek Security & Control LLC... -
Page 85: Reset The Controller
Note: Use this procedure only in the event that the network primary controller is missing or otherwise inoperable. Note: Resetting the controller will delete all node information from the GC3 Control Panel. Any Copyright © 2019 Nortek Security & Control LLC... -
Page 86: Learn Controller
1. At the existing controller, add the GC3 Panel to the Z-Wave network. (If the existing controller is a GC3 Panel, see “Add a New Device.” Otherwise, refer to the documentation that came with the Z-Wave controller.) Copyright © 2019 Nortek Security & Control LLC... -
Page 87: Testing The Installation
Sensors Test or Console Test, the system sends a Walk Test Started message to the Central Station. When you exit the test, the system sends a Walk Test Terminated message to the Central Station. Copyright © 2019 Nortek Security & Control LLC... -
Page 88: Verify The Radio Status
Recommended Resolution - 720p/30 frames per second, not to exceed 20Mbps 3. Insert the USB drive into the top of the panel. 4. Press the Replace Video button. Demo Mode - Replace Video Copyright © 2019 Nortek Security & Control LLC... - Page 89 Saver setting to “OFF” or “MY PHOTOS.” Settings. » See “User Guide” for additional screen settings. 10. Select the Screen tile. Screen - Screensaver Modes System Settings - Screen Tile * * * Copyright © 2019 Nortek Security & Control LLC...
- Page 90 [ THIS PAGE LEFT INTENTIONALLY BLANK ] Copyright © 2019 Nortek Security & Control LLC...
-
Page 91: Limited Warranty
There are no obligations or liabilities on the part of Nortek Security & Control LLC for consequential damages arising out of or in connection with use or performance of this product or other indirect damages with respect to loss of property, revenue, or profi... - Page 92 A L A R M D E A L E R I N F O R M A T I O N Company Name: Your Account Number: Installation Date: 10023748 B Copyright © 2019 Nortek Security & Control LLC...
Need help?
Do you have a question about the 2GIG GC3e Series and is the answer not in the manual?
Questions and answers