
Related Manuals for Miele H6660BPOB


Summary of Contents for Miele H6660BPOB
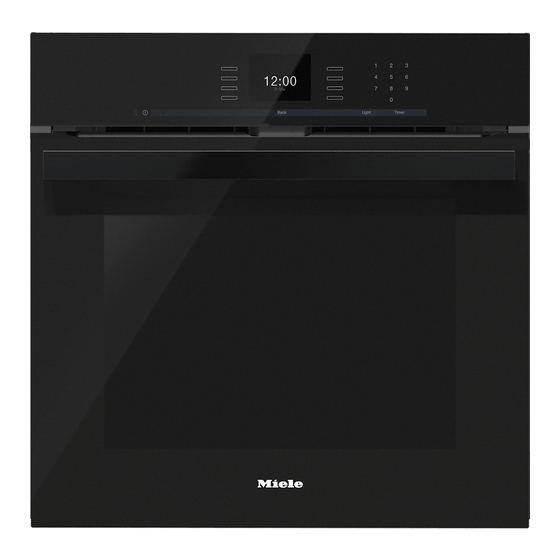
- Page 1 Operating and Installation Instructions Convection Oven To prevent accidents and machine damage, read these instructions before installation or use. en-US, CA M.-Nr. 09 786 801...
-
Page 2: Table Of Contents
Contents IMPORTANT SAFETY INSTRUCTIONS .............. 6 Guide to the oven .................... 15 Control panel ....................... 16 Sensor buttons ...................... 17 Display........................18 Symbols......................19 Features........................ 20 Model numbers ....................20 Data plate ......................20 Items included ....................... 20 Standard and optional accessories............... 20 Shelf runners .................... - Page 3 Contents Audible tone information ..................35 Melody...................... 35 Solo tone ...................... 35 Keypad tone ......................36 Units of measurement ................... 36 Weight ...................... 36 Temperature ..................... 36 Cooling fan ......................37 Self Clean ......................37 Recommended temperatures................37 Safety ........................38 System lock ...
- Page 4 Contents Using the MasterChef programs ................52 Notes on using these programs ............... 53 Favorites....................... 54 Creating a Favorite ....................54 Starting a Favorite ....................56 Changing Favorites....................57 Changing cooking stages................. 57 Changing the name .................. 57 Deleting a Favorite....................57 Bake........................
- Page 5 Contents Stubborn soiling (excluding the FlexiClip runners) ..........80 Cleaning the oven interior with Self Clean ............81 Preparing for the Self Clean program............... 81 Starting the Self Clean program ............... 82 Starting the Self Clean program ............... 82 Delaying the start of the Self Clean program ........... 82 At the end of the Self Clean program...............
-
Page 6: Important Safety Instructions
IMPORTANT SAFETY INSTRUCTIONS When using the appliance, follow basic safety precautions, including the following: Read all instructions before installation and use of the oven to prevent accidents and machine damage. This appliance complies with current safety requirements. Improper use of the appliance can lead to personal injury and material damage. - Page 7 Unauthorized installation, maintenance, and repairs can cause considerable danger for the user. Installation, maintenance, and repairs must only be carried out by a Miele authorized technician. Maintenance by the user: Never repair or replace any part of the appliance unless the instructions specifically recommend doing so.
- Page 8 IMPORTANT SAFETY INSTRUCTIONS Reliable and safe operation of the oven can only be guaranteed if it is connected to the power supply. To guarantee the electrical safety of this appliance, continuity must exist between the appliance and an effective grounding system.
- Page 9 All other servicing should be referred to a qualified technician. Defective components should be replaced by Miele original parts only. Only with these parts can safety of the appliance be assured as intended by the manufacturer.
- Page 10 IMPORTANT SAFETY INSTRUCTIONS It is important that the heat is evenly distributed throughout the food being cooked. This can be achieved by stirring and/or turning the food. Use only dry, heat-resistant potholders. Moist or damp potholders used on hot surfaces may result in steam burns. Do not let potholders come in contact with oil or grease.
- Page 11 IMPORTANT SAFETY INSTRUCTIONS Never store flammable liquids and materials in, above or under an oven, or near cooking surfaces. Do not use the oven to heat the room. The high temperatures radiated could cause objects near the oven to catch fire. ...
- Page 12 IMPORTANT SAFETY INSTRUCTIONS Plastic containers, which are not heat-resistant, melt and may ignite at high temperatures and can damage the oven. Use only plastic containers that are indicated by the manufacturer as being suitable for use in ovens. When residual heat is used to keep food warm, the high level of humidity and condensation can cause damage in the oven.
- Page 13 IMPORTANT SAFETY INSTRUCTIONS When baking frozen pizzas or pies, place them on the wire rack lined with parchment paper. Do not use the baking tray or the roasting pan for frozen foods with a large surface area. The tray or pan could become warped and difficult to remove from the oven when hot.
- Page 14 Do not place Miele Casserole Dishes on the top rail of shelf level 1, they will not be secure in this position by the anti-tip safety notches on the sides of the dish.
-
Page 15: Guide To The Oven
Guide to the oven a Oven controls b Safety Door Lock for Self Clean c Browning/Broiling element d Connection socket for the roast probe e Convection fan with heating element f Shelf runners with 5 levels g Oven floor with hidden Baking element h Front frame with data plate i CleanGlass Door... -
Page 16: Control Panel
Control panel a On / Off button Turns the oven On and Off b Sensor buttons To select operating modes, settings and menu items c Display Displays the time of day and information on the operation d Sensor buttons 0-9 Numeric keypad to enter values e “Timer”... -
Page 17: Sensor Buttons
Control panel Sensor buttons The sensors react to touch. Each touch is confirmed with an audible tone. This tone can be turned off (see “Settings – Keypad tone”). Sensor Function Notes button For selecting A menu option can be selected by touching the illuminated sensor ... -
Page 18: Display
Control panel A menu item can be selected by Display touching the illuminated sensor The display is used for showing the next to the menu item. time of day or information about Options can then be accessed by modes, temperatures, cooking touching the illuminated sensor ... -
Page 19: Symbols
Control panel Symbols The following symbols may appear in the display: Symbol Description Timer Allocates an illuminated Sensor button to an option and indicates that the option can be selected. If more than four options are available a bar will appear on the ... -
Page 20: Features
Printed on the data plate are the model products in these instructions are number, serial number and the designed to be used with Miele ovens. connection data (voltage/frequency/ These can be ordered from the Miele maximum rated load) of the oven. -
Page 21: Shelf Runners
Features Shelf runners Baking tray, Roasting pan and Wire oven rack Side runners are located on the right and left-hand sides of the oven with Baking tray HBB 71 levels for inserting accessories. The shelf level numbers are indicated on the front of the oven frame. Each side runner consists of two rails: Roasting pan HUBB 71 –... -
Page 22: Flexiclip Telescopic Runners Hfc 72
The FlexiClip telescopic runners can be make up a shelf level. attached to any shelf level. The telescopic runner with the Miele Push the FlexiClip telescopic runners logo must be inserted on the right. all the way into the oven before placing accessories on them. - Page 23 Features Perforated Gourmet baking tray HBBL 71 The perforated Gourmet baking tray has been specially developed for the Then secure the FlexiClip runner to preparation of baked goods made from the bottom of the two rails as fresh yeast and quark doughs. illustrated (3).
- Page 24 Features Round baking form HBF 27-1 Gourmet Casserole Dishes HUB and Lids HBD The Miele casserole dishes, unlike other oven dishes, slide into the oven on the side runners. They have non-tip safety This circular form is suitable for cooking notches to prevent them being pulled fresh or frozen pizzas, flat cakes, tarts out too far.
- Page 25 Features Roast Probe Miele Oven Cleaner Miele oven cleaner is suitable for removing stubborn soiling. It is not necessary to preheat the oven before use. The roast probe reliably monitors the roasting process. The tip of the probe continuously measure the core temperature of the meat or poultry.
-
Page 26: Oven Controls
Features Cooling fan Oven controls The cooling fan comes on automatically The oven controls allow you to use the when a cooking program is started. The various cooking modes to bake, roast cooling fan mixes hot air from the oven and broil. -
Page 27: Perfectclean Surfaces
Features The following have all been treated with PerfectClean surfaces PerfectClean: The revolutionary PerfectClean finish is – Universal tray a smooth, non-stick surface that is exceptionally easy to clean. – Baking tray Food and grime from baking or roasting – Grilling and roasting insert are easily removed. -
Page 28: Before First Use
Before first use Setting the voltage (electrical Standard settings version) The oven must not be operated The voltage set must match that until it has been properly installed of the house as to not damage the within cabinetry. oven. - Page 29 Before first use Time of day display You will then be asked when you want the time of day to show in the display when the oven is turned off (see “Settings - Time of day - Display”): – The time is always visible in the display.
-
Page 30: Heating The Oven
Before first use After heating up for the first time Heating the oven New ovens may have a slight odor Danger of burns! Allow the oven during their first use. Heating up the to cool before cleaning. oven for at least one hour with nothing in it will eliminate the odor. -
Page 31: Settings
Settings Changing and saving settings Accessing the “Settings” menu Select Settings Select Settings Scroll through the list until the desired A list of settings will appear in the setting appears. display. Touch the sensor button next to the They can be checked and changed, if setting. -
Page 32: Settings Overview
Settings Settings overview Option Available settings ... / / ... Language deutsch english Location Time Show Night Dimming Clock Format 24 h 12 h Date Lighting On for 15 Seconds Display Brightness Audible tone information Melody Solo Tone ... - Page 33 Settings Option Available settings Cooling Fan Temp. Controlled Time Controlled Self Clean With Reminder Without Reminder Default Temperature Safety System Lock Sensor Lock Calibrate Temperature Voltage 208V / 60Hz 220V / 60Hz 240V / 60Hz Showroom Program Demo Mode Factory Default Settings Favorites...
-
Page 34: Language
Settings Language Clock format You can select the clock format for the The desired location and language time of day: can be set. – 24 h After selecting and confirming your choice, the language selected will The time of day is shown in a 24 hour appear in the display. -
Page 35: Lighting
Settings Lighting Audible tone information – Melody The interior lighting is turned on At the end of a process, a melody will during the entire cooking period. sound several times in intervals. – On for 15 Seconds The volume of the melody is represented by a bar with seven The oven lighting turns off 15 segments. -
Page 36: Keypad Tone
Settings Keypad tone Units of measurement An audible tone is heard with each Weight touch of a sensor. – The volume of the keypad tone is The weight of food in MasterChef represented by a bar with seven programs is shown in grams. segments. -
Page 37: Cooling Fan
Settings Cooling fan Self Clean The cooling fan will continue to run for – With Reminder some time after the oven has been A reminder to run the self cleaning turned off to prevent humidity from program will appear in the display. building up in the oven, on the control –... -
Page 38: Safety
Settings Sensor lock Safety The sensor lock prevents a cooking System lock process from being switched off or The system lock prevents the oven changed while it is running. Once being turned on inadvertently. activated, the sensors are locked a few seconds after a program has started. -
Page 39: Calibrate Temperature
Settings Calibrate temperature Showroom program Using temperature calibration the This function enables the oven to be temperature can be modified, in all demonstrated in showrooms without modes and MasterChef programs, so heating up. It should not be set for that it is slightly higher or lower than domestic use. -
Page 40: Timer
Timer The timer can be used to time any Setting the timer activity in the kitchen, e.g. boiling eggs. When the setting Time Show The timer can also be used at the same set the oven must be turned on to set time as a cooking program if a start and the timer. -
Page 41: Resetting The Timer
Timer At the end of the timer Resetting the timer – flashes, Select “Timer” or the illuminated sensor next to the timer duration that – the time starts counting upwards, is counting down. – a buzzer will sound if turned on (see The time previously set appears “Settings - Acoustic information”). -
Page 42: Guide To The Modes
Guide to the modes The oven has a wide range of modes for preparing a variety of foods. Due to country-specific preferences for preparation of food, default temperatures and temperature ranges in °F and °C do not correspond. The temperature values have been defined as given in the chart. - Page 43 Guide to the modes Mode Default Temperature temperature range Bake 375 °F (190 °C) 200–525 °F (100–280 °C) This mode uses traditional baking techniques to perfect pies and biscuits. Browning 350 °F (190 °C) 200–475 °F (100–250 °C) For a perfectly browned topping, for example when making a gratin or browning the top of a casserole.
-
Page 44: Operating The Oven
Operating the oven Energy saving tips – Remove any accessories from the oven that you do not require for cooking. – Try not to open the door when cooking. – If a temperature range is given, it is best to select the lower temperature and check the food after the shortest cooking time given. -
Page 45: Quick Guide
Operating the oven Quick Guide Cooling fan Turn the oven on. After the cooking process the cooling fan will continue to run for a while after The main menu will appear. a program is complete to prevent Place the food in the oven. moisture from building up in the oven, on the control panel or surrounding ... -
Page 46: Additional Functions
Additional functions You have placed the food in the oven, Changing the oven mode selected an operating mode and set the You can change the oven mode during temperature. operation. Select Change Select Change Additional options will appear in the ... -
Page 47: Changing The Temperature
Additional functions Example: You have selected Convection Changing the temperature Bake and 350°F (170°C) and can As soon as a cooking mode is selected, see the temperature rising in the a default temperature will appear in the display. display together with its possible range You would like to reduce the target (see the “Guide to the modes”). -
Page 48: Rapid Preheat
Additional functions Preheating Rapid PreHeat – Rapid (Factory default) Rapid PreHeat can be used to speed up the preheating phase. The Browning / Broiling and ring heating elements turn on together The Rapid PreHeat function will turn on with the fan to enable the oven to automatically if a temperature of more reach the required temperature as than 212°F (100°C) is set for... -
Page 49: Setting Additional Durations
Additional functions Turning off automatically Setting additional durations It is now 11:45. The food takes 30 You have placed the food in the oven, minutes to cook and should be ready at selected a mode and set the 12:15. temperature. Select and set 0:30 h or select Duration... -
Page 50: Turning On And Off Automatically
Additional functions Turning on and off automatically Sequence of a cooking program that turns on and off automatically It It is recommended to use the Up until the start time the mode, the automatic On/Off feature when selected temperature, Start at and the roasting. -
Page 51: Changing The Set Time
Additional functions Changing the set time Select Change All options that can be changed will appear. Select the desired time. Change the set time Confirm with OK. These settings will be deleted in the event of a power failure. Canceling cooking ... -
Page 52: Masterchef
MasterChef Using the MasterChef Your oven has a wide range of programs MasterChef programs that enable you to achieve excellent cooking results Select MasterChef with ease. Simply select the appropriate program for the type of A list of food types will appear on the food you are cooking and follow the display. -
Page 53: Notes On Using These Programs
MasterChef Notes on using these programs – After cooking, allow the oven interior to cool down to room temperature again before starting a MasterChef program. – Some programs require a preheating phase before food can be placed in the oven. A prompt will appear indicating when to add the food. -
Page 54: Favorites
Favorites You can create and save up to 20 of Creating a Favorite your own programs. Select Favorites – Each one can have up to 10 cooking When first creating a program Create stages. This enables you to save your Program will appear in the display. - Page 55 Favorites Touch the sensors next to the More cooking stages can be added, for example, if you would like to add symbols to highlight the desired another cooking mode to follow the character. first. Select Select If additional cooking stages are The letter or number you have selected required, select Add Cooking Stage...
-
Page 56: Starting A Favorite
Favorites Select the desired menu item. Starting a Favorite Confirm the message regarding Place the food in the oven. which shelf level to use with OK. Select Favorites The selected program will begin The display shows the program names automatically right away or at the time Edit Program at the bottom. -
Page 57: Changing Favorites
Favorites Changing the name Changing Favorites Select Favorites Changing cooking stages The display shows the program names Cooking stages in a MasterChef at the bottom. Edit Program program that have been saved under a Select Edit Program different name cannot be changed. ... -
Page 58: Bake
Convection Bake , Intensive , or Surround Parchment paper / Greasing the pan . All Miele accessories (baking tray, universal tray, perforated baking tray Bakeware and round baking dish) are treated with The bakeware used depends on the PerfectClean finish. - Page 59 Bake Temperature Shelf level Select the suggested temperature if The shelf level that you place the food possible. on for baking depends on the oven mode and the number of trays being Choosing a baking temperature higher used. than those recommended may reduce the cooking time, but will lead to –...
-
Page 60: Roast
Roast Tips Always observe the USDA guidelines for food safety. – Resting time: At the end of the program, take the roast out of the Oven modes oven, cover with aluminum foil and let stand for about 10 minutes. This Depending on how you would like the helps retain the juices when the meat food cooked, you can use Convection... -
Page 61: Roast Probe
Roast When to use the roast probe Roast Probe Some MasterChef programs and Special modes will prompt you to use the roast probe. You can also use it with your own Favorite programs and with the following functions: The roast probe enables the roasting –... -
Page 62: Important Notes Regarding The Roast Probe
Roast Important notes regarding the roast Using the roast probe probe Insert the metal tip of the roast probe – The meat can be placed in a pot or fully into the centre of the food all the on the rack in the universal tray. way to the handle. -
Page 63: Time-Left Display
Roast You can also delay the start of the Time-left display cooking program to a later time. To do If the temperature set for a cooking this, select Start at process is above 285°F (140°C), the estimated duration remaining (time left) You can estimate approximately when will appear in the display. -
Page 64: Using Residual Heat
Roast Using residual heat Shortly before the end of the cooking program the oven heating will turn off. The residual heat in the oven is sufficient to complete the cooking process. Using the residual heat in the oven saves energy. will appear in the Energy Save Phase display to show that the oven is in... -
Page 65: Slow Roasting
Slow Roasting This cooking method is ideal for Cooking time / Core cooking beef, pork, veal or lamb when a temperatures tender result is desired. Always observe USDA food safety First, using a cooktop sear the meat on guidelines. all sides to seal in the juices. Meat ... -
Page 66: Using The Slow Roasting Function
Slow Roasting Using the Slow Roasting If the meat is not cooked to your function satisfaction, you can extend the cooking time. Select Special Modes Select Slow Roasting Set the required temperature. Set the core temperature. ... -
Page 67: Adjusting The Slow Roasting Temperature
Slow Roasting Adjusting the Slow Roasting temperature Use the wire oven rack on top of the universal tray. Do not use the Rapid PreHeat function to preheat the oven. Place the rack with the universal tray on shelf level 2. ... -
Page 68: Broil
Broil Cooking accessories Danger of burns! Broil with the oven door closed. If you broil with the door open the hot air will escape from the oven before it has been cooled by the cooling fan. The controls will get hot. Oven modes Maxi Broil ... - Page 69 Broil Temperature Preparing food for broiling As a general rule, select the default Rinse the meat under cold water and temperature. pat dry. Do not season the meat with If higher temperatures are used, the salt before broiling, this will draw out meat will brown on the outside, but will the juices.
-
Page 70: Special Modes
Special Modes In addition to the MasterChef programs This section also gives information on your oven has a variety of Special the following applications: Modes. – Gentle Bake – Defrost – Canning – Dehydrate – Frozen food – Reheat (to reheat plated meals) –... -
Page 71: Defrost
Special Modes Defrost Dehydrate Use the Defrost function to gently This program is designed for traditional defrost frozen food. drying of food to preserve it. The temperature can be set between The temperature can be set between 75-150°F (25-50°C). 175-250°F (80-100°C). ... -
Page 72: Reheat
Special Modes Select Special Modes Reheat Select Dehydrate This mode is designed to reheat cooked food. If necessary, adjust the default temperature and set the duration. Available options are: Follow the instructions on the display. – Pizza –... -
Page 73: Warm-Up Cookware
Special Modes Warm-up Cookware Proof This program is designed to warm your This mode is designed specifically for cookware. proofing dough. The temperature can be set between You can set a temperature between 75 75-175°F (50-80°C). and 125°F (30 and 50°C). ... -
Page 74: Pizza
Special Modes Pizza Sabbath Program This program is designed specifically This program is designed for religious for baking pizza. observance. The temperature can be set between Select the Sabbath Program and then 300-475°F (160-250°C). select the oven mode and temperature. ... -
Page 75: Gentle Bake
Special Modes Using the Sabbath Program Gentle Bake The program can only be canceled by The Gentle Bake mode is ideal for turnng the oven off. casseroles and gratins. Select Special Modes You can select a temperature setting from 200-475°F (100-250°C). ... -
Page 76: Canning
Special Modes Fruit / Cucumbers Canning As soon as bubbles begin to rise Always observe USDA food safety evenly in the jars, reduce the guidelines. temperature to the lowest setting. Then, leave the jars in the warm oven Canning containers for an additional 25-30 minutes. -
Page 77: Frozen Food
Special Modes Preparation Frozen food Handling food carefully will help Tips for pizza, French fries, protect your health. croquettes and other similar items Select the oven mode and Cakes, pies, pizza, baguettes temperatures recommended on the – Bake frozen pizza on parchment food's packaging. -
Page 78: Cleaning And Care
Cleaning and care Unsuitable cleaning agents Danger of burns! Make sure the heating elements are To avoid damaging surfaces when turned off and allowed to cool cleaning, do not use: completely. – Cleaners containing soda, ammonia, acids or chlorides ... -
Page 79: Tips
Cleaning and care Normal soiling The accessories are not dishwasher- safe. There is a seal around the oven interior which seals the inside of the Tips door. Take care not to rub, damage or – Soiling caused by spilled fruit juices move the gasket. -
Page 80: Stubborn Soiling (Excluding The Flexiclip Runners)
Cleaning and care Stubborn soiling (excluding the The cavity does not need to be treated FlexiClip runners) with oven cleaner as it is equipped with a Self Clean program. Do not use a protective coating (i.e. If necessary, the scouring pad on the tin foil) to line the oven and do not use commercial oven cleaner unless back of a non-scratching washing-up... -
Page 81: Cleaning The Oven Interior With Self Clean
Cleaning and care Preparing for the Self Clean program Cleaning the oven interior with The high temperatures used during Self Clean Self Clean will damage accessories that are not designed for cleaning in Instead of cleaning the oven by hand, you can use the Self Clean ... -
Page 82: Starting The Self Clean Program
Cleaning and care Starting the Self Clean program As soon as “Timer” is pressed, the buzzer and the flashing indicator will Risk of burns! turn off. When Self Cleaning the front of the Delaying the start of the Self Clean oven becomes hotter than with program normal oven use. -
Page 83: At The End Of The Self Clean Program
Cleaning and care Extend and retract the FlexiClip At the end of the Self Clean program telescopic runners several times after When the duration remaining reaches running the Self Clean program. 00:00 h, a message will appear in the display to tell you that the door is Please note: unlocking. -
Page 84: The Self Clean Program Is Canceled
Cleaning and care The Self Clean program is canceled Once the power returns after a power failure, Program Canceled will appear in If the Self Clean program is canceled the display. the oven door will remain locked until The door will unlock once the the temperature inside the oven drops temperature drops below 535°F (280°C) to below 535°F (280°C). -
Page 85: Door Removal
Cleaning and care Door removal Do not pull the door horizontally off its retainers, as they will spring back The door weighs approx. 24 lbs against the oven. (11 kg). Do not pull the door off the retainers by the handle, as the handle could break off. -
Page 86: Reinstalling The Door
Cleaning and care Open the door fully. Reinstalling the door If the locking clamps are not locked, the door can easily become detached from the brackets and be damaged. You must make sure that the locking clamps are locked again. ... -
Page 87: Removing The Shelf Runners With Flexiclip Telescopic Runners
Cleaning and care Removing the shelf runners Lowering the Browning/ with FlexiClip telescopic Broiling element runners Danger of burns! Make sure the heating elements are Danger of injury! turned off and allowed to cool Do not use the oven without the shelf completely. -
Page 88: Frequently Asked Questions
Time of day – Display”). There is no power to the appliance. Check if the breaker has tripped. If it has, contact a qualified electrician or Miele Technical Service. System Lock in the The system lock is On. - Page 89 Turn the oven off and then back on again. Then restart the Self Clean program. If the message appears again, contact Miele Technical Service. The door lock for the Self Clean program will not Door not released appears in the display.
- Page 90 Frequently Asked Questions Problem Possible cause and solution The browning is The wrong temperature or shelf level was selected. uneven. There will always be a slight unevenness. If the unevenness is great, check whether the correct temperature and shelf level were selected. The material or color of the bakeware is not suitable for the oven mode selected.
- Page 91 The oven door cannot be closed and the oven functions (oven modes, special modes and self clean) cannot be used. Contact the Miele Service Department. The rack and other The heat resistant surface of the shelf runners creates accessories make a...
-
Page 92: Technical Service
In the event of a fault which you cannot For further information, please refer to remedy yourself, please contact your your warranty booklet. Miele dealer or Miele Technical Service. Contact information for Miele Technical Service can be found at the end of this document. -
Page 93: Caring For The Environment
Consult with local authorities, dealers or Miele in order to dispose of and recycle electrical and electronic appliances. Miele assumes no responsibility for deleting any personal data left on the appliance being disposed. -
Page 94: Electrical Connection
– 120/208 V, 30 A, 60 Hz Installation, repair and maintenance – 120/240 V, 30 A, 60 Hz should be performed by a Miele authorized service technician. Work by unqualified persons could be The voltage can be adjusted (see dangerous and may void the “Settings - Electrical Version”). -
Page 95: Installation Diagrams
Installation diagrams Appliance and cut-out dimensions Miele ovens can be installed flush or proud. Discuss your installation requirements with your architect, designer and installer. Undercounter installation 21 5/8" 23 5/8" ( 550 mm) 21 15/16" (600 mm) (558 mm) 7/8"... -
Page 96: Installation Into A Tall Cabinet
Power cord with plug Oven with glass front Oven with metal front Depending on the model, the oven front may differ from the one shown the drawing. Current specifications can be found on the Miele website. -
Page 97: Front Dimensions
Installation diagrams Front dimensions 4 3/8" (111 mm) 23 7/16" (596 mm) 22 5/8" 23 5/16" (575 mm) (592 mm) 18 5/8" (473 mm) 3/16" (4 mm) - 1/16" (-2 mm) H65xx: 2 11/16" (69 mm) H66xx: 1 5/8" (42 mm) Oven with glass front: 1/16" (2.2 mm) Oven with metal front: 1/16"... -
Page 98: Installing The Oven
Installing the oven The oven must not be operated until it has been properly installed within cabinetry. The oven must have an adequate supply of cool air for proper operation. The required air must not be heated excessively by other heat ... - Page 99 Installing the oven Use the supplied screws to secure the oven to the side walls of the cabinetry through the holes in the trim. Reinstall the door, if necessary (see “Cleaning and care - Installing the door”).
- Page 103 Customer Service. U.S.A. Canada Miele, Inc. Importer Miele Limited National Headquarters 9 Independence Way Headquarters and Miele Centre Princeton, NJ 08540 161 Four Valley Drive Phone: 800-843-7231 Vaughan, ON L4K 4V8 609-419-4298 Fax: www.miele.ca www.mieleusa.com...
- Page 104 H6560BP; H6660BP en-US, CA M.-Nr. 09 786 801 / 01...