Table of Contents
Advertisement
Quick Links
Advertisement
Table of Contents

Related Manuals for Beko DIN59531


Summary of Contents for Beko DIN59531
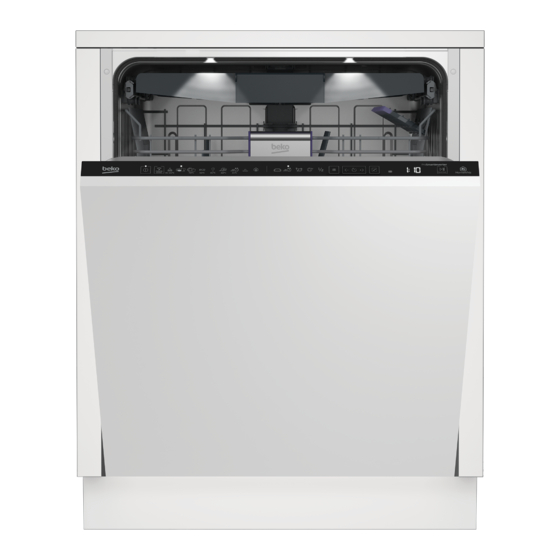
- Page 1 Dishwasher User’s Manual 18 7574 0100_AA_BEKO_E8P_EN/ 04-03-20.(11:56)
- Page 2 Please read this user manual first! Dear Customer, We hope that you get the best results from your product which has been manufactured with high quality and state-of-the-art technology. Therefore, please read this entire user manual and all other accompanying documents carefully before using the product and keep it as a reference for future use.
-
Page 3: Table Of Contents
CONTENTS 1 INSTRUCTIONS FOR SAFETY Lower basket bottle wire ....26 Upper basket height adjustable rack 26 AND ENVIRONMENT Upper basket multipurpose service General safety ........4 rack ............26 Intended use ..........4 Adjusting the height of the upper Children’s safety ........5 basket ...........27 Disposing of packaging material ..5 Collapsible upper basket wires .. -
Page 4: Instructions For Safety And Environment
instructions for safety and environment This section contains safety Never touch the plug with • instructions that will help to get wet hands! Never unplug by protected from risk of personal pulling on the cable, always injury or property damage. Failure pull out by grabbing the plug. -
Page 5: Children's Safety
instructions for safety and environment Children’s safety This appliance is intended • to be used in household and Electrical products are • similar applications such as: dangerous for the children. - Staff kitchen areas in shops, Keep children away from the offices and other working product when it is in use. -
Page 6: Compliance With Weee Directive And Disposing Of The Waste Product
instructions for safety and environment Package information 1. Unplug the product before transporting it. Packaging materials of the 2. Remove water drainage and product are manufactured water supply connections. from recyclable materials in accordance with our National 3. Drain the remaining water in Environment Regulations. -
Page 7: Dishwasher Overview
Dishwasher Overview Upper basket Cutlery basket Lower basket Automatic Liquid/Gel Detergent and Rinse Aid Dosing System Type Label Control panel Door Lower impeller Salt reservoir lid 10. Filters 11. Upper impeller 12. Upper basket rail 13. Upper cutlery basket ( depends on model ) 14. -
Page 8: Fan Drying System
Dishwasher Technical specifications Compliance to standards and test data / EC declaration of conformity This product complies with the following EU directives; Development, production and sales stages of this product comply with the safety rules included in all pertaining European Community regulations. 2014/35/EU, 2014/30/EU, 93/68/EC, IEC 60436/DIN 44990, EN 50242 Power input 220-240 V, 50 Hz (see rating label) -
Page 9: Installation
Installation Appropriate installation Refer to the nearest Authorised Service Agent for installation of your product. To location make the product ready for use, make sure Place the product on a solid and flat • that the electricity, tap water supply and floor that has sufficient load carrying water drainage systems are appropriate capacity! The product must be... -
Page 10: Connection To The Drain
Installation Permitted water temperature: connected to the drain hole or sink’s up to 25°C ( 60°C for products drainage. The length of this connection equipped with Aquasafe+; please must be min. 50 cm and max. 100 cm from refer toAquasafe+ section ) the floor. -
Page 11: Aquasafe
Installation Aquasafe+ The voltage and allowed fuse or breaker • protection are specified in the “Technical (depends on model) specifications” section. If the current The Aquasafe+ system protects against value of the fuse or breaker in the house water leaks that may occur at the hose is less than 16 Amps, have a qualified inlet.Water contact with the valve box of electrician install a 16 Amp fuse. -
Page 12: Preparation Tips For Energy Saving
PreparatIon Tips for energy saving Adjusting the water softening system Following information will help you use the product in an ecological and energy- Washing, rinsing and drying performance efficient manner. of your dishwasher will improve when Wipe away any coarse food remnants on the water softening system is adjusted the dishes before putting them in the correctly. - Page 13 PreparatIon Make the necessary Unpack the test Dip in the test strip Take out the strip Wait for 1 minute. Open the tap and adjustment strip. into the water for 1 from the water and let the water flow for according to the test second.
-
Page 14: Adding Salt
PreparatIon You can put about 2 kg of Even though your machine is softening salt into the salt equipped with Automatic Water reservoir. Hardness Detection System, water hardness setting is done 5. Replace the lid and tighten it when the by the authorised service agent/ reservoir is full. -
Page 15: Detergent
PreparatIon Thanks to this system, the amount of rinse Please follow the instructions aid and liquid/gel detergent required for the given in section “Operating the selected washing programme is adjusted Product” to change the settings automatically. of the Automatic Liquid/Gel Detergent Dosing System and Please read the information Rinse Aid. -
Page 16: Adding Liquid/Gel Detergent And Rinse Aid
PreparatIon The rinse aid used in dishwashers is a special product that is recommended to increase drying efficiency and prevent water or lime stains on the washed items. For this reason, care must be paid to have rinse aid in the After fully opening the door of the rinse aid reservoir and to use dishwasher, open the decorative cover as... - Page 17 PreparatIon Do not fill the liquid/gel If a different brand or type detergent box with liquids or of liquid/gel detergent will chemical cleaners (vinegar, be used, make sure previous bleacher etc.) other than liquid/ detergent is depleted gel detergent. completely and then remove and clean the liquid/gel Liquid/gel detergents that lost detergent tank under tap water.
-
Page 18: Powder Detergents
PreparatIon complete, follow the above steps in reverse Using a short or low temperature wash order to re-install the detergent and rinse cycle aid boxes. Stale or damp detergent Powder Detergents Poor quality detergent Hard water area without the use of You can find the correct amount Rinse Aid of powder detergent for the... - Page 19 PreparatIon Tablet detergents give Contact the detergent satisfying results only under manufacturer if your dishes certain usage conditions. The are wet and/or if you notice best washing performance in limescale spots particularly on dishwashers is obtained by your glasses after the washing using detergent, rinse aid and programme is over when using water softening salt individually.
- Page 20 PreparatIon Placing the dishes into the dishwasher You can use your dishwasher in the optimum way with respect to energy consumption and washing and drying performance only if you place the dishes in an orderly way. Wipe away any coarse food remnants •...
- Page 21 PreparatIon Suggestions for loading the dishwasher Improper Loading Of Dishware Lower basket Upper basket Improper Loading Of Dishware Dishwasher / User’s Manual 21 / 50 EN...
-
Page 22: Cutlery Basket
PreparatIon Cutlery basket Cutlery basket (depends on model) (depends on model) Cutlery basket is designed to wash your Cutlery basket is designed to wash your dishes such as knife, fork, spoon, etc. in an dishes such as knife, fork, spoon, etc. in an efficient manner. -
Page 23: Collapsible Lower Basket Tines
PreparatIon Collapsible lower basket Bringing the tines to the tines horizontal position by holding them from the tips may cause (depends on model) them to bend. Therefore, it There are foldable tines (A) located at the will be appropriate to bring the tines in the middle to horizontal lower basket of the machine are designed or vertical position by holding... -
Page 24: Tray Wash Supports
PreparatIon SoftTouch Accessory (depends on model) The SoftTouch Accessory found in the lower basket of your machine enables a safe washing for your fragile glasses. Bringing the tines to the horizontal position by holding them from the tips may cause them to bend. -
Page 25: Lower Basket Multipurpose / Height Adjustable Service Rack
PreparatIon Lower basket multipurpose Make sure that the impeller / height adjustable service does not touch the dishes you rack placed on the racks. (depends on model) To close the racks: This accessory located at the lower basket Fold the rack (A). of your machine allows you to easily wash 2. -
Page 26: Lower Basket Bottle Wire
PreparatIon Lower basket bottle wire Upper basket multipurpose service rack (depends on model) The bottle wire is designed for easier (depends on model) washing of long pieces with wide mouths. This accessory located at the upper basket You may take out the bottle wire from the of your machine allows you to easily wash basket when not in use by pulling it out pieces such as extra long ladles and bread... -
Page 27: Adjusting The Height Of The Upper Basket
PreparatIon Adjusting the height of the To lower the basket, while it is in the uppermost position; upper basket Hold the upper basket wires with both (depends on model) hands, slightly lift up the basket and The upper basket height adjustment simultaneously push and release the mechanism has been designed for you to latches shown in the figure (B). -
Page 28: Collapsible Upper Basket Wires
PreparatIon Collapsible upper basket Height setting with empty wires basket (depends on model) (depends on model) You can use collapsible wires when you In this model, the height setting of the need a larger space for your dishes in the upper basket may be changed using the upper basket of your machine. -
Page 29: Ceiling Cutlery Basket
PreparatIon Ceiling cutlery basket (depends on model) Ceiling cutlery basket is designed to wash your cutlery items such as forks, spoons and etc. by placing them between the bars on the basket. When the central tray is in the lower position, you can load long/high items such as coffee cups, ladles, etc. -
Page 30: Operating The Product
Operating the product On / Off Key 8. Function Selection Keys RemoteStart Key TrayWash Function 3. Menu Key Fast+ Function 4. Time Delay Selection / Menu Direction Selection Keys SteamGloss Function 5. Selection / Confirmation Key Super Rinse Function 6. Display Half Load function 7. -
Page 31: Programme Selection / Programme Cancel Key
Operating the product Programme selection On/Off Key When you press the On/Off key, the Press the On/Off button to turn on indicator lights illuminate on the display your machine. for ON position. The lights turn off in OFF 2. Check the Salt and Rinse Aid indicators position. - Page 32 Operating the product /50 EN Dishwasher / User’s Manual...
-
Page 33: Auxiliary Functions
Operating the product Auxiliary functions TrayWash Function Select Intensive 70°C programme and press Washing programmes of your dishwasher function key to run this function. are designed to obtain the best cleaning SteamGloss Function effect, considering the type of the soiling, It provides superior drying performance. - Page 34 Operating the product Submenu Functions: Automatic Liquid/Gel Detergent Function Off/On (depends on the model) SelfDry Function Off/On Detergent use setting: Tablet Detergent Function Off/On Level 1: 10 ml lower than the default value Level 2: 5 ml lower than the default value Level 3: Use the default liquid detergent amount determined by the program.
- Page 35 Operating the product Automatic Detergent Dosing position and on in “L:1” position. Function 3. Switch off the machine with the On/ The Automatic Detergent Dosing function Off key to save the changes. automatically adjusts the liquid/gel Tablet detergent function detergent use according to the selected (depends on model) washing programme and your settings.
-
Page 36: Scheduling The Washing Time
Operating the product Scheduling the washing the door of the product and wait for the draining process complete. Draining is time completed in 2 minutes and the machine Time Delay gives an audible warning when it is If an economical electricity tariff is applied completed. -
Page 37: Cancelling The Programme
Operating the product Cancelling the programme Adjusting the amount of rinse aid Open the door of the product Press and hold the Programme Selection / Programme After switching on your machine, press Cancel keys for 3 seconds. After the 3 - the Menu key for 3 second. -
Page 38: Water Cut-Off Warning
Operating the product For energy saving, the machine is automatically turned off following the completion of the programme or if the programme is not started. Leave your dishes in the machine for about 15 minutes to allow them cool down after they are washed. -
Page 39: Homewhiz Function
HomeWhiz Function You can check your dishwasher and learn use the WLAN function of your machine. about its status via your smart device with Make sure that your smart device is the HomeWhiz function. connected to the internet to use the application. - Page 40 HomeWhiz Function 7. While the dishwasher is connecting to If the account you have logged the selected network, you will see the on is the one to which you have Wireless icon ( ) flashing. Once the added appliance(s) before, you connection has been established, the can start using your dishwasher said icon will become on permanently.
- Page 41 HomeWhiz Function HomeWhiz on/off it on. In the wireless connection on/off settings menu, if the wireless connection Press the remotestart key to enable the function. is on, the Wireless connection indicator will light permanently; if it is off, the Wireless connection indicator will flash at short intervals.
-
Page 42: Product
HomeWhiz Function Changing the Downloaded If you download another Program program on the product, your You can use the HomeWhiz application to previous selection will be change the Downloaded Programme, which cancelled. is the last program on the product. You can download as many You can check the Table of Program Data programs as you wish on and Average Consumption Values... -
Page 43: Cleaning The Interior Of The Machine
Maintenance and cleaning Cleaning the filters Service life of the product extends and frequently faced problems decrease if it is Clean the filters at least once a week in cleaned at regular intervals. order for the machine operates efficiently. Unplug the product and turn off Check if food residues are left on the filters. -
Page 44: Cleaning The Hose Filter
Maintenance and cleaning Cleaning the hose filter Damages on the machine that may be caused by impurities coming from the urban supply water or your own water installation (such as sand, dirt, rust, etc.) can be prevented by means of the filter attached to the water inlet hose. -
Page 45: Cleaning The Impellers
Maintenance and cleaning Cleaning the impellers Upper impeller Clean the impellers for the machine to work Check if the holes on the upper impeller (1) efficiently. are clogged. If they are clogged, remove and clean the impeller. Turn its nut to left to remove the upper impeller. -
Page 46: Troubleshooting
Troubleshooting Machine does not start. • Power cable is unplugged. >>> Check if the power cable is plugged in. • Fuse is blown. >>> Check the fuses in your house. • Water is cut. >>> Make sure that the water inlet tap is open. •... - Page 47 Troubleshooting • Rinse aid is not sufficient. >>> Check the rinse aid indicator and add rinse aid if necessary. Increase the rinse aid setting if there is enough amount of rinse aid in the machine. • Machine is unloaded right after the programme is over. >>> Do not unload your machine right after washing process is completed.
- Page 48 Troubleshooting the filling process. Run the prewash programme to remove the salt that spilled inside the machine. Since the salt granules that will remain under the lid will dissolve during prewash, causing the lid loosen, check the lid once again at the end of the programme. There is a different odour in the machine A new machine has a peculiar odour.
- Page 49 Troubleshooting Detergent remains in detergent dispenser. • Detergent dispenser was damp when adding detergent. >>> Make sure that the detergent dispenser is dried well prior to filling it with detergent. • Detergent is added long before the washing process. >>> Pay attention to add detergent shortly before start-up of the washing.
- Page 50 Troubleshooting A smear remains on glasses that resembles milk stain which can not be removed when wiped by hand. A bluish / rainbow appearance occurs when the glass is pointed to light. • Excessive rinse aid is used. >>>Lower rinse aid setting. Clean the spilled rinse aid when adding rinse aid.