
Related Manuals for Beko DDS25840X


Summary of Contents for Beko DDS25840X
- Page 1 Dishwasher User manual DDS25840X DIS25840 Document Number : 15 0606 01 00_AA_BEKO_E5_45_USA/ 01-03-16.(8:10)
-
Page 2: Table Of Contents
10. CARE AND MAINTENANCE 10.1 CARING FOR YOUR DISHWASHER EXTERIOR 10.2 CARING FOR YOUR DISHWASHER INTERIOR 10.3 CLEANING THE FILTERS 10.4 CLEANING THE HOSE FILTER 10.5 CLEANING THE IMPELLERS 11. TROUBLESHOOTING 12. TECHNICAL FEATURES 13. WARRANTY STATEMENT FOR THE BEKO DISHWASHERS... -
Page 3: Important Safety Instructions
1. IMPORTANT SAFETY INTRODUCTION Please read this user manual and INSTRUCTIONS particularly the safety instructions WARNING:When using completely and carefully. They will save the dishwasher, follow basic you time and effort and help to ensure precautions, including the optimum dishwasher performance. following: Read all instructions before Be sure to observe all listed warnings... - Page 4 Check that the detergent dispenser more people are needed to move a is empty after the completion of each dishwasher. wash program. Before cleaning or carrying out • Dishwasher detergents are alkaline. maintenance, switch off the • They can be dangerous if inhaled or appliance, disconnect the power plug swallowed.
- Page 5 the infirmed, elderly and children. WARNING:Improper It is the legal responsibility of parents/ • connection of the equipment- legal guardians to supervise or instruct grounding conductor can result concerning use of the machine when in a risk of electric shock. Check the children become old enough to with a qualified electrician operate.
-
Page 6: Installation
2. INSTALLATION amperes. Electrical supply conductors shall be a minimum of # 16 AWG WARNING:When installing copper wire rated at 75 °C (167 °F) or the dishwasher, follow basic higher. These requirements must be precautions, including the met to prevent injury and machine following: damage. -
Page 7: Getting To Know Your Dishwasher
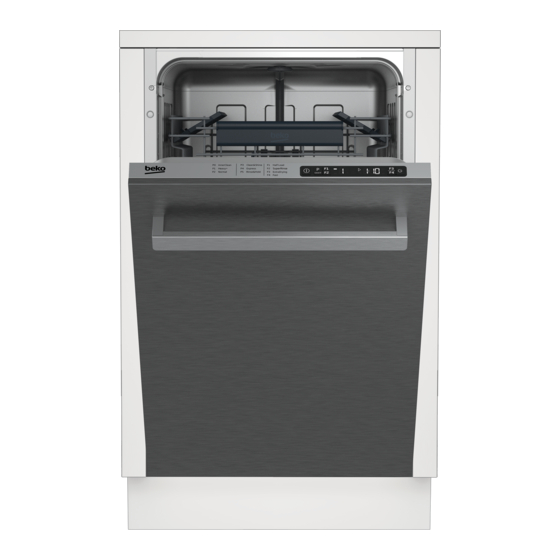
3. GETTING TO KNOW YOUR DISHWASHER 1. Upper rack 2. Upper spray arm 3. Cutlery basket 4. Detergent dispenser 5. Door 6. Control panel 7. Guiding track for the upper rack 8. Lower spray arm 9. Filters 10. Lower rack 11. -
Page 8: Loading The Dishwasher
4. LOADING THE Lower rack ( MODEL DEPENDING) DISHWASHER Pull the handle to open the door. If the door is opened during operation, the dishwasher will stop running. Once the door is closed the program will continue. Upper rack ( MODEL DEPENDING) Bottom rack load pattern for 8 place settings... -
Page 9: Upper Rack
4.1 UPPER RACK CAUTION:The cup racks are designed to support cups, Load the upper rack with dessert plates, glasses and kitchen utensils. cups, glasses etc. When the cup racks are in the dishwasher do not lean on or use the cup racks to support your body weight. - Page 10 FOLDING TINES (MODEL DEPENDING) There are “folding tines” in the upper rack to allow you more space to accommodate glasses or cups. Simply pull in the first front folding tine, move it to left A and right B to place in another positon.
-
Page 11: Lower Rack
HEIGHT SETTING (MODEL DEPENDING) In certain models, the height setting of the upper rack may be changed using the wheels which are present at two height levels. CAUTION:Make sure that the rack is empty. Changing the height setting while the rack contains tableware could Push the latches back into the correct cause the contents to dislodge,... - Page 12 COLLAPSABLE LOWER BASKET WIRES (2 & 4 PIECES) (MODEL DEPENDING) The foldable wires (A) located at the lower basket of the machine are designed for an easier placement of large pieces such as pans, bowls, etc. You can create larger spaces by folding each wire individually or all them at once.
- Page 13 COLLAPSABLE LOWER BASKET CUTLERY BASKET WIRES (2 PIECES) (MODEL DEPENDING) (MODEL DEPENDING) The two piece foldable wires located at the lower basket of the machine are designed for an easier placement of large pieces such as pans, bowls, etc. (1, 2). You can create larger spaces by folding each wire individually or all of them at once.
- Page 14 UPPER RACK CUP HOLDER (MODEL DEPENDING) You can use the upper rack cup holder for your small cups and similar small glasses. When you don’t use the upper rack cup holder you can remove it to create a bigger space. To attach the upper rack cup holder, place it in the way shown in (A).
-
Page 15: Proper And Improper Loading Of Dishware
4.3 PROPER AND IMPROPER LOADING OF DISHWARE Sliding Cutlery Basket load pattern for 8 1: Salad Fork place settings 2: Teaspoon 3: Dinner fork 4: Knife-solid handle 5: Serving spoon 6: Serving fork Place all large and very dirty items in the lower rack. •... -
Page 16: What Should Not Be Washed In Your Dishwasher
5. WHAT SHOULD NOT Do not wash sponges or dish cloths in • dishwasher. BE WASHED IN YOUR Do not wash art and craft articles in • DISHWASHER dishwasher. Rust-sensitive steel parts like iron Disposable plastics and disposable • • and cast iron that can rust and stain aluminum cannot withstand high other utensils and damage the interior... -
Page 17: Operating The Product
6. OPERATING THE PRODUCT NOTICE: If you do not perform any operation after switching on the machine, it will be automatically switched off within 5 seconds. Cancel 3” On/Off key Not in use 2. Programme Selection / Programme 7. Start / Cancel indicator Cancel (3 seconds) key 8. -
Page 18: Preparing The Machine
process complete. Draining is completed in 2 minutes and the machine gives an audible warning when it is completed. Function keys If you press any of the Function keys during programme selection or time delay selection, an affirmative key signal will be heard provided that the relevant function is supported by the selected programme. -
Page 20: Auxiliary Functions
6.4 AUXILIARY FUNCTIONS Sanitize Function Sanitize function raises the water Washing programmes of your dishwasher temperature in the final rinse to meet the are designed to obtain the best cleaning requirements of NSF/ANSI STANDARD effect, considering the type of the soiling, 184 for Residential Dishwashers. -
Page 21: Scheduling The Washing Time
3. Turn off the machine with On/Off key Floor illumination cannot be to save the changes. cancelled by the user. Automatic Detergent Detection Changing Warning Sound Volume Feature After turning on the machine, The product has a feature to automatically press Time Delay and P / P+ keys detect the type of the detergent and simultaneously. -
Page 22: Starting The Programme
increments up to 24 hours every time MODEL DEPENDING: you press the key. Your machine performs water 4. Close the door of your machine after softening depending on the setting the Delayed Start. Once hardness level of the supply the delay time is over, the selected water. -
Page 23: Cancelling The Programme
6.7 CANCELLING THE 6.10 END OF PROGRAMME PROGRAMME When the programme you have Open the door of the product Press selected comes to an end, an and hold the Programme Selection / audible warning signal will warn Programme Cancel keys for 3 seconds. you to turn off your machine. -
Page 24: Water Cut-Off Warning
6.11 WATER CUT-OFF InnerClean This programme is recommended to be WARNING operated on each 1-2 months for machine If mains water is cut or water inlet tap cleaning and necessary hygiene. The is turned off the machine cannot take programme should be operated while the water in and E:02 icon will flash on the machine is empty. -
Page 25: Detergent & Rinse Aid Dispenser
7. DETERGENT & RINSE AID DISPENSER 7.1 FILLING THE DETERGENT DISPENSER WARNING:Always store your detergent in locations which are cool, dry and out of the reach of children. • Check that the detergent If you do not know the hardness of your dispenser is empty after the water supply, use 15 ml / 3 tsp detergent. -
Page 26: Filling Rinse Aid Dispenser
7.2 FILLING RINSE AID dishes are less dirty, it is generally sufficient to fill the detergent up to DISPENSER the 15 ml / 3 tsp mark. WARNING:Keep your rinse aids out of the reach of children. Ingestion or inhalation of rinse aid may cause serious injury. -
Page 27: Set The Dose Of Rinse Aid
Close the lid until it clicks in 3. Carefully wipe off spilled rinse aid. Excessive rinse aid causes excessive foam formation, which may hinder cleaning. 7.3 SET THE DOSE OF RINSE AID The dose of rinse aid to be used can be set by means of the dispenser regulator 4 between levels 1 and 6. -
Page 28: Setting The Water Softener
8. SETTING THE WATER SOFTENER (MODEL DEPENDING) WATER HARDNESS & REGENERATION SETTINGS The dishwasher requires lime free water. Hard water leaves watermarks on your dishes. Your dishwasher has a special water softening system to remove the hardness of the tap water. -
Page 29: Filling The Dishwasher Salt Dispenser
9. FILLING THE If the hardness level of the water that you use is above 90°dF (French standard for DISHWASHER SALT water hardness) or if you are using well DISPENSER water, than it is recommended to use filter and water purification devices. (MODEL DEPENDING) If the hardness level of the water CAUTION :Never use culinary... -
Page 30: Care And Maintenance
10. CARE AND Open the screw-in cap of the salt container by turning it counter MAINTENANCE clockwise (Fig. A, B). WARNING:Before cleaning or carrying out maintenance, switch off the appliance, disconnect the mains plug and turn off the water tap. WARNING:Do not repair or replace any part of the dishwasher or attempt any... -
Page 31: Caring For Your Dishwasher Exterior
Cleaning the colored doors: Use only CAUTION :To avoid the soft cloth that is lightly dampened with possibility of slipping, keep the mild detergent. floor around the dishwasher clean and dry. Cleaning the stainless steel doors: Keep your appliance free Use a soft cloth with a cleaner made for from the accumulation of cleaning stainless steel. -
Page 32: Cleaning The Filters
10.3 CLEANING THE FILTERS 4. Clean all three filters under tap water by means of a brush. Clean the filters at least once a week in 5. Replace the metal/plastic filter. order for the machine operates efficiently. Check if food residues are left on the filters. 6. -
Page 33: Cleaning The Hose Filter
10.4 CLEANING THE HOSE 10.5 CLEANING THE FILTER IMPELLERS Damages on the machine that may be Clean the impellers at least once a week in caused by impurities coming from the order for the machine operates efficiently. urban supply water or your own water LOWER IMPELLER installation (such as sand, dirt, rust, etc.) Check if the holes on the lower impeller (1) - Page 34 UPPER IMPELLER Check if the holes on the upper impeller (1) are clogged. If they are clogged, remove and clean the impeller. Turn its nut to left to remove the upper impeller (A, B). Make sure that the nut is tightened well when installing the upper impeller.
-
Page 35: Troubleshooting
11. TROUBLESHOOTING Machine does not start. Power cable is unplugged. >>> Check if the power cable is plugged in. • Fuse is blown. >>> Check the fuses in your house. • Water is cut. >>> Make sure that the water inlet tap is open. •... - Page 36 machine right after washing process is completed. Slightly open the door and wait for evacuation of the steam inside for a while. Unload the dishes after the pieces cool down to a touchable level. Start unloading process from the lower basket. Thus, dropping of water remained on a piece at upper basket onto the pieces at lower basket is prevented.
- Page 37 There is a different odour in the machine A new machine has a peculiar odour. It will fade out after a couple of washing. Filters are clogged. >>> Check if the filter system is clean. Clean the filter system • regularly as illustrated in section “Cleaning and Care”.
- Page 38 Detergent remains in detergent dispenser. Detergent dispenser was damp when adding detergent. >>> Make sure that the • detergent dispenser is dried well prior to filling it with detergent. Detergent is added long before the washing process. >>> Pay attention to add •...
- Page 39 A smear remains on glasses that resembles milk stain which can not be removed when wiped by hand. A bluish / rainbow appearance occurs when the glass is pointed to light. Excessive rinse aid is used. >>>Lower rinse aid setting. Clean the spilled rinse aid •...
-
Page 40: Technical Features
If you cannot eliminate the problem although you follow the instructions in this section, consult your dealer or the Authorised Service Agent. Never try to repair a nonfunctional product yourself. 12. TECHNICAL FEATURES 8 place settings Load capacity Permissible water 4.35 - 145 psi (0.3 - 10 bars) pressure 120 V (volts), 12 A (amps), 60Hz (hertz) -
Page 41: Warranty Statement For The Beko Dishwashers
1 year (*) full warranty from date of first installation Disclaimers of warranties and exclusions: Beko will repair or replace at no cost to the consumer any defective parts of the Warranty does not cover service dishwasher if used under normal household... - Page 42 Statement is the complete and exclusive OF ALL OTHER EXPRESSED AND warranty from the manufacturer. No IMPLIED WARRANTIES, INCLUDING employee of Beko or any other party THE IMPLIED WARRANTIES is authorized to make any warranty OF MERCHANTABILITY AND statements in addition to those made in FITNESS FOR A PARTICULAR this Warranty Statement.