Yamaha MX400 User Manual
Yamaha mixing console user's guide
Hide thumbs
Also See for MX400:
- User manual (22 pages) ,
- Supplementary service manual (18 pages) ,
- Owner's manual (66 pages)
Table of Contents
Advertisement
Available languages
Available languages
MIXING CONSOLE
CONSOLES DE MIXAGE
MISCHPULTE
CONSOLA DE MEZCLA
User's Guide
Manuel d'utilisation
Bedienungsanleitung
Manual de uso
1
2
3
4
A
A
A
A
B
B
B
B
20dB
20dB
20dB
20dB
–16
–60
–16
–60
–16
–60
–16
–60
GAIN
GAIN
GAIN
GAIN
PEAK
PEAK
PEAK
PEAK
SIGNAL
SIGNAL
SIGNAL
SIGNAL
80
80
80
80
–15
+15
–15
+15
–15
+15
–15
+15
HIGH
HIGH
HIGH
HIGH
250
5K
250
5K
250
5K
250
5K
MID FREQ
MID FREQ
MID FREQ
MID FREQ
–15
+15
–15
+15
–15
+15
–15
+15
MID
MID
MID
MID
–15
+15
–15
+15
–15
+15
–15
+15
LOW
LOW
LOW
LOW
EQ
EQ
EQ
EQ
0
10
0
10
0
10
0
10
P
P
P
P
AUX 1
AUX 1
AUX 1
AUX 1
R
R
R
R
E
E
E
E
0
10
0
10
0
10
0
10
AUX 2
AUX 2
AUX 2
AUX 2
0
10
0
10
0
10
0
10
AUX 3
AUX 3
AUX 3
AUX 3
0
10
0
10
0
10
0
10
AUX 4
AUX 4
AUX 4
AUX 4
PRE
PRE
PRE
PRE
P
P
P
P
O
O
O
O
S
S
S
S
T
T
T
T
0
10
0
10
0
10
0
10
AUX 5
AUX 5
AUX 5
AUX 5
1–2
1–2
1–2
1–2
3–4
3–4
3–4
3–4
ST
ST
ST
ST
L
R
L
R
L
R
L
R
ODD
EVEN
ODD
EVEN
ODD
EVEN
ODD
EVEN
PAN
PAN
PAN
PAN
ON
ON
ON
ON
PFL
PFL
PFL
PFL
10
10
10
10
5
5
5
5
0
0
0
0
5
5
5
5
10
10
10
10
15
15
15
15
20
20
20
20
25
25
25
25
30
30
30
30
40
40
40
40
1
2
3
4
5
6
7
8
9
10
11
12
13
A
A
A
A
A
A
A
A
A
B
B
B
B
B
B
B
B
B
20dB
20dB
20dB
20dB
20dB
20dB
20dB
20dB
20dB
–16
–60
–16
–60
–16
–60
–16
–60
–16
–60
–16
–60
–16
–60
–16
–60
–16
–60
GAIN
GAIN
GAIN
GAIN
GAIN
GAIN
GAIN
GAIN
GAIN
PEAK
PEAK
PEAK
PEAK
PEAK
PEAK
PEAK
PEAK
PEAK
SIGNAL
SIGNAL
SIGNAL
SIGNAL
SIGNAL
SIGNAL
SIGNAL
SIGNAL
SIGNAL
80
80
80
80
80
80
80
80
80
–15
+15
–15
+15
–15
+15
–15
+15
–15
+15
–15
+15
–15
+15
–15
+15
–15
+15
HIGH
HIGH
HIGH
HIGH
HIGH
HIGH
HIGH
HIGH
HIGH
250
5K
250
5K
250
5K
250
5K
250
5K
250
5K
250
5K
250
5K
250
5K
MID FREQ
MID FREQ
MID FREQ
MID FREQ
MID FREQ
MID FREQ
MID FREQ
MID FREQ
MID FREQ
–15
+15
–15
+15
–15
+15
–15
+15
–15
+15
–15
+15
–15
+15
–15
+15
–15
+15
MID
MID
MID
MID
MID
MID
MID
MID
MID
–15
+15
–15
+15
–15
+15
–15
+15
–15
+15
–15
+15
–15
+15
–15
+15
–15
+15
LOW
LOW
LOW
LOW
LOW
LOW
LOW
LOW
LOW
EQ
EQ
EQ
EQ
EQ
EQ
EQ
EQ
EQ
0
10
0
10
0
10
0
10
0
10
0
10
0
10
0
10
0
10
P
P
P
P
P
P
P
P
AUX 1
AUX 1
AUX 1
AUX 1
AUX 1
AUX 1
AUX 1
AUX 1
AUX 1
R
R
R
R
R
R
R
R
E
E
E
E
E
E
E
E
0
10
0
10
0
10
0
10
0
10
0
10
0
10
0
10
0
10
AUX 2
AUX 2
AUX 2
AUX 2
AUX 2
AUX 2
AUX 2
AUX 2
AUX 2
0
10
0
10
0
10
0
10
0
10
0
10
0
10
0
10
0
10
AUX 3
AUX 3
AUX 3
AUX 3
AUX 3
AUX 3
AUX 3
AUX 3
AUX 3
0
10
0
10
0
10
0
10
0
10
0
10
0
10
0
10
0
10
AUX 4
AUX 4
AUX 4
AUX 4
AUX 4
AUX 4
AUX 4
AUX 4
AUX 4
PRE
PRE
PRE
PRE
PRE
PRE
PRE
PRE
PRE
P
P
P
P
P
P
P
P
O
O
O
O
O
O
O
O
S
S
S
S
S
S
S
S
T
T
T
T
T
T
T
T
0
10
0
10
0
10
0
10
0
10
0
10
0
10
0
10
0
10
AUX 5
AUX 5
AUX 5
AUX 5
AUX 5
AUX 5
AUX 5
AUX 5
AUX 5
1–2
1–2
1–2
1–2
1–2
1–2
1–2
1–2
1–2
3–4
3–4
3–4
3–4
3–4
3–4
3–4
3–4
3–4
ST
ST
ST
ST
ST
ST
ST
ST
ST
L
R
L
R
L
R
L
R
L
R
L
R
L
R
L
R
L
ODD
EVEN
ODD
EVEN
ODD
EVEN
ODD
EVEN
ODD
EVEN
ODD
EVEN
ODD
EVEN
ODD
EVEN
ODD
EVEN
PAN
PAN
PAN
PAN
PAN
PAN
PAN
PAN
PAN
ON
ON
ON
ON
ON
ON
ON
ON
ON
PFL
PFL
PFL
PFL
PFL
PFL
PFL
PFL
PFL
10
10
10
10
10
10
10
10
5
5
5
5
5
5
5
5
0
0
0
0
0
0
0
0
5
5
5
5
5
5
5
5
10
10
10
10
10
10
10
10
15
15
15
15
15
15
15
15
20
20
20
20
20
20
20
20
25
25
25
25
25
25
25
25
30
30
30
30
30
30
30
30
40
40
40
40
40
40
40
40
5
6
7
8
9
10
11
12
13
14
15
16
17
18
19
20
21
A
A
A
A
A
A
A
A
B
B
B
B
B
B
B
B
20dB
20dB
20dB
20dB
20dB
20dB
20dB
20dB
20dB
–16
–60
–16
–60
–16
–60
–16
–60
–16
–60
–16
–60
–16
–60
–16
–60
–16
GAIN
GAIN
GAIN
GAIN
GAIN
GAIN
GAIN
GAIN
PEAK
PEAK
PEAK
PEAK
PEAK
PEAK
PEAK
PEAK
SIGNAL
SIGNAL
SIGNAL
SIGNAL
SIGNAL
SIGNAL
SIGNAL
SIGNAL
SIGNAL
80
80
80
80
80
80
80
80
–15
+15
–15
+15
–15
+15
–15
+15
–15
+15
–15
+15
–15
+15
–15
+15
–15
HIGH
HIGH
HIGH
HIGH
HIGH
HIGH
HIGH
HIGH
250
5K
250
5K
250
5K
250
5K
250
5K
250
5K
250
5K
250
5K
250
MID FREQ
MID FREQ
MID FREQ
MID FREQ
MID FREQ
MID FREQ
MID FREQ
MID FREQ
MID FREQ
–15
+15
–15
+15
–15
+15
–15
+15
–15
+15
–15
+15
–15
+15
–15
+15
–15
MID
MID
MID
MID
MID
MID
MID
MID
–15
+15
–15
+15
–15
+15
–15
+15
–15
+15
–15
+15
–15
+15
–15
+15
–15
LOW
LOW
LOW
LOW
LOW
LOW
LOW
LOW
EQ
EQ
EQ
EQ
EQ
EQ
EQ
EQ
EQ
0
10
0
10
0
10
0
10
0
10
0
10
0
10
0
10
0
P
P
P
P
P
P
P
P
P
AUX 1
AUX 1
AUX 1
AUX 1
AUX 1
AUX 1
AUX 1
AUX 1
R
R
R
R
R
R
R
R
R
E
E
E
E
E
E
E
E
E
0
10
0
10
0
10
0
10
0
10
0
10
0
10
0
10
0
AUX 2
AUX 2
AUX 2
AUX 2
AUX 2
AUX 2
AUX 2
AUX 2
0
10
0
10
0
10
0
10
0
10
0
10
0
10
0
10
0
AUX 3
AUX 3
AUX 3
AUX 3
AUX 3
AUX 3
AUX 3
AUX 3
0
10
0
10
0
10
0
10
0
10
0
10
0
10
0
10
0
AUX 4
AUX 4
AUX 4
AUX 4
AUX 4
AUX 4
AUX 4
AUX 4
PRE
PRE
PRE
PRE
PRE
PRE
PRE
PRE
PRE
P
P
P
P
P
P
P
P
P
O
O
O
O
O
O
O
O
O
S
S
S
S
S
S
S
S
S
T
T
T
T
T
T
T
T
T
0
10
0
10
0
10
0
10
0
10
0
10
0
10
0
10
0
AUX 5
AUX 5
AUX 5
AUX 5
AUX 5
AUX 5
AUX 5
AUX 5
1–2
1–2
1–2
1–2
1–2
1–2
1–2
1–2
1–2
3–4
3–4
3–4
3–4
3–4
3–4
3–4
3–4
3–4
ST
ST
ST
ST
ST
ST
ST
ST
R
L
R
L
R
L
R
L
R
L
R
L
R
L
R
L
R
L
ODD
EVEN
ODD
EVEN
ODD
EVEN
ODD
EVEN
ODD
EVEN
ODD
EVEN
ODD
EVEN
ODD
EVEN
ODD
PAN
PAN
PAN
PAN
PAN
PAN
PAN
PAN
ON
ON
ON
ON
ON
ON
ON
ON
ON
PFL
PFL
PFL
PFL
PFL
PFL
PFL
PFL
PFL
10
10
10
10
10
10
10
10
10
5
5
5
5
5
5
5
5
5
0
0
0
0
0
0
0
0
0
5
5
5
5
5
5
5
5
5
10
10
10
10
10
10
10
10
10
15
15
15
15
15
15
15
15
15
20
20
20
20
20
20
20
20
20
25
25
25
25
25
25
25
25
25
30
30
30
30
30
30
30
30
30
40
40
40
40
40
40
40
40
40
14
15
16
17
18
19
20
21
22
23
24
ST IN 1/3
ST IN 2/4
A
A
A
S
A
S
A
MIXING CONSOLE
B
B
B
T
B
T
B
1
2
+4
+4
20dB
20dB
-10
-10
PEAK
PEAK
SIGNAL
SIGNAL
PEAK
PEAK
–60
–16
–60
–16
–60
GAIN
GAIN
GAIN
+6
+6
PEAK
PEAK
PEAK
+4
+4
–15
+15
–15
+15
HIGH
HIGH
SIGNAL
SIGNAL
+2
+2
0
0
80
80
80
–2
–2
–15
+15
–15
+15
–4
–4
LOW
LOW
–7
–7
AUX 1
AUX 1
–10
–10
+15
–15
+15
–15
+15
HIGH
HIGH
HIGH
–15
–15
AUX 2
AUX 2
–20
–20
1–2
1–2
GROUP 1
GROUP 2
GROUP 3
GROUP 4
5K
250
5K
250
5K
L
ST2/MONITOR
R
MID FREQ
MID FREQ
3–4
3–4
METER SELECT
ST
ST
+15
–15
+15
–15
+15
MID
MID
MID
L
R
L
R
ODD
EVEN
ODD
EVEN
BAL/PAN
BAL/PAN
+15
–15
+15
–15
+15
LOW
LOW
LOW
EQ
EQ
0
10
0
10
LEVEL
LEVEL
10
10
10
10
ON
ON
5
5
5
5
10
0
10
0
10
P
P
P
PFL
PFL
AUX 1
AUX 1
AUX 1
0
0
0
0
R
R
R
E
E
E
S
+4
S
+4
5
5
5
5
T
-10
T
-10
3
PEAK
4
PEAK
10
0
10
0
10
10
10
10
10
AUX 2
AUX 2
AUX 2
SIGNAL
SIGNAL
15
15
15
15
20
20
20
20
30
30
30
30
40
40
40
40
10
0
10
0
10
–15
+15
–15
+15
AUX 3
AUX 3
AUX 3
HIGH
HIGH
10
0
10
0
10
–15
+15
–15
+15
AUX 4
AUX 4
AUX 4
LOW
LOW
PEAK
PEAK
PEAK
PEAK
PRE
PRE
AUX 3
AUX 3
0
0
0
0
–20
–20
–20
–20
AUX 4
AUX 4
P
P
P
O
O
O
ON
ON
ON
ON
S
S
S
1–2
1–2
T
T
T
10
0
10
0
10
AUX 5
AUX 5
AUX 5
AFL
AFL
AFL
AFL
3–4
3–4
AUX SEND 1
AUX SEND 2
AUX SEND 3
AUX SEND 4
1–2
1–2
ST
ST
3–4
3–4
ST
ST
ST
L
R
L
R
TO ST
TO ST
TO ST
TO ST
ODD
EVEN
ODD
EVEN
BAL/PAN
BAL/PAN
R
L
R
L
R
0
10
0
10
EVEN
ODD
EVEN
ODD
EVEN
L
R
L
R
L
R
L
R
PAN
PAN
PAN
LEVEL
LEVEL
PAN
PAN
PAN
PAN
ON
ON
ON
ON
ON
ON
ON
ON
PFL
PFL
PFL
PFL
AFL
AFL
AFL
AFL
10
10
10
10
10
10
10
5
5
5
5
5
5
5
0
0
0
0
0
0
0
5
5
5
5
5
5
5
10
10
10
10
10
10
10
15
15
15
15
15
15
15
20
20
20
20
20
20
20
25
25
25
25
25
25
25
30
30
30
30
30
30
30
40
40
40
40
40
40
40
22
23
24
ST IN 1/3
ST IN 2/4
GROUP 1
GROUP 2
GROUP 3
GROUP 4
PEAK
+6
+4
+2
0
–2
–4
–7
–10
–15
–20
L
STEREO 1
R
POWER
PHANTOM
10
5
0
5
TALKBACK IN
10
15
20
GRP 1–4
30
40
AUX 1–4
ST
PEAK
0
10
0
LEVEL
–20
TB
ON
AFL
AUX SEND 5
0
10
REC OUT
PFL
2TR IN
0
10
0
10
TAPE IN
PHONES
MONI
ST2
ON
ON
L+R
10
10
10
5
5
5
0
0
0
5
5
5
10
10
10
15
15
15
20
20
20
25
25
25
30
30
30
40
40
40
ST2/MONITOR
L — ST 1 — R
Advertisement
Chapters
Table of Contents

Related Manuals for Yamaha MX400


Summary of Contents for Yamaha MX400
- Page 1 MIXING CONSOLE CONSOLES DE MIXAGE MISCHPULTE CONSOLA DE MEZCLA User’s Guide Manuel d’utilisation Bedienungsanleitung Manual de uso 20dB 20dB 20dB 20dB 20dB 20dB 20dB 20dB –16 –60 –16 –60 –16 –60 –16 –60 –16 –60 –16 –60 –16 –60 –16 GAIN GAIN GAIN...
- Page 2 L or coloured RED. Making sure that neither core is connected to the earth terminal of the three pin plug. * This applies only to products distributed by YAMAHA - KEMBLE MUSIC (U.K.) LTD. 5-2 BS2 01 2/5...
-
Page 3: Table Of Contents
1 Introduction ....1 Features of the MX400 ......1 2 Front and rear panels . - Page 4 4. Do Not Open the Case or Attempt Repairs or Modifications Yourself This product contains no user-serviceable parts. Refer all maintenance to qual- ified Yamaha service personnel. Opening the case and/or tampering with the internal circuitry voids the warranty. 5. Always power off before making connections Always turn the power OFF before connecting or disconnecting cables.
-
Page 5: Introduction
PA and installed systems. The MX400 series includes three models; 8 channel, 12 channel, 16 channel, and 24 channel mixers. In order to take full advantage of the MX400’s functionality, please read this manual carefully. Features of the MX400 Each of the mono input channels provides the following functions. -
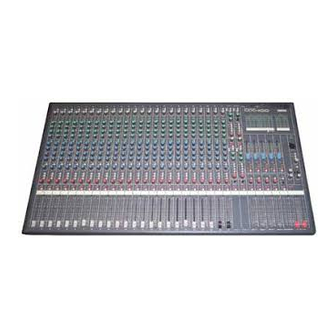
Page 6: Front And Rear Panels
AUX 1 AUX 2 AUX 3 AUX 4 AUX 5 MX400 User’s Guide A/B switch This switch selects the signal source of the input module. Select INPUT A (XLR type) or INPUT B (1/4” phone type). 20dB pad switch This is a 20dB input pad (attenuator) that affects INPUT A and INPUT B. - Page 7 They control the post-fader signal. • When the PRE switch is pressed They control the pre-fader signal. AUX 5 controls the post-fader signal. Nominal level is at 3 o’clock position. Input modules +/–15dB shelving type +/–15dB peaking type +/–15dB shelving type MX400 User’s Guide...
-
Page 8: Pan Control
Front and rear panels 1–2 3–4 EVEN MX400 User’s Guide Assign switches (1-2, 3-4, ST) These switches assign the signal of the input module to the group outputs and the ST output. The PAN control located below adjusts the stereo posi- tion of the signal between the odd (ODD) group and left (L) outputs and the even (EVEN) group and right (R) outputs. -
Page 9: Stereo Module
L and R, and the odd/even groups. LEVEL control This adjusts the output level of the stereo module. 12 kHz +/–15dB shelving type 80 Hz +/–15dB shelving type Stereo module MX400 User’s Guide... - Page 10 Front and rear panels MX400 User’s Guide ON switch This switch turns the stereo module on/off. When the switch is pressed the stereo module is on. Be sure to turn off input modules that are not in use. Even when a module is off, the SIGNAL and PEAK indicators will light if a signal is being input.
-
Page 11: Aux Send Module
GROUP OUT jack. AFL (After Fader Listen) switch This monitors the GROUP signal. This is on when the switch is pressed in. Group fader This fader adjusts the signal level of the GROUP output. AUX SEND module MX400 User’s Guide... -
Page 12: St2/Monitor Module
Front and rear panels ST2/MONITOR module 2TR IN MONI MX400 User’s Guide PFL indicator This indicator (yellow) will light when the PFL switch of one or more mod- ules is turned on. 2TR IN switch This switch selects the 2TR IN input signal. This signal will be sent to the headphone jack and to the ST2/MONI OUT jack. -
Page 13: Master Module (L-St1-R)
This switch turns the ST1 OUT output on/off. When it is pressed in, the sig- nal from the ST1 OUT jack will be output. L-ST1-R faders These faders control the level of the ST OUT output. A position at the zero (0) marking is the nominal output level. Master module (L-ST1-R) MX400 User’s Guide... -
Page 14: Meters
Front and rear panels Meters The MX400 provides six LED meters, and three types of output level can be viewed on the meters. 1) GROUP 1/2, 2) GROUP 3/4 or ST2/MONITOR L/R, 3) STEREO L/R. The “0” position indicates the nominal output level. -
Page 15: Rear Panel
• Nominal input level: 0dB • Nominal output level: 0dB DIRECT OUT jacks (0dB) These are unbalanced 1/4” phone jacks which output the post-fader signal independently from each input module. • Nominal output level: 0dB Rear panel INSERT OUT IN MX400 User’s Guide... - Page 16 Phantom Power Warning To prevent hazard or damage, connect only microphones and cables that conform to the IEC268-15A standard. 9-E FNTM 01 3/5 MX400 User’s Guide AUX SEND +4dB GROUP INSERT I/O 0dB ST INSERT GROUP OUT +4dB ST1 OUT +4dB...
-
Page 17: Phantom Power Switch
“ON” position, the PHANTOM indicator will light, and 48 DC power will be provided between pin 2 and pin 3 of the INPUT A jacks. If you do not need phantom power, be sure to turn this to the “OFF” posi- tion. Rear panel MX400 User’s Guide... -
Page 18: Appendix
Meters (0 LED = +4dB* output level) Input module, stereo input module indicators AUX SEND indicators MX400 User’s Guide 20 Hz~20 kHz +1, –2dB (ST L/R, GROUP @ 600 Less than 0.1% (20 Hz~20 kHz @ 14dB*) (ST L/R, GROUP @ 600 @ 600 –70dB (between adjacent channels) -
Page 19: Input Specifications
2TR IN TALKBACK *1. Sensitivity is the lowest input level that will produce an output of +4dB (1.23V) or the nominal output level when MX400 is set to maximum gain (i.e. all level controls and faders set to maximum). *2. XLR-type connectors and phone jacks (TRS) are balanced (Tip=HOT, Ring=COLD, Sleeve=shield). -
Page 20: Output Specifications
*4. In these specifications, when dB represents a specific voltage, 0dB is referenced to 775mV RMS, for TAPE SEND dBV represents a specific voltage, 0dBV is referenced to 1V RMS. • All specifications subject to change without notice. Dimensions MX400 User’s Guide Output Level For Use with Nominal Nominal Max. - Page 21 CONSOLES DE MIXAGE MANUEL D’UTILISATION...
- Page 22 1 Introduction ....1 Caractéristiques du MX400 ....1 2 Panneaux avant et arrière ..2 Modules d’entrée .
-
Page 23: Introduction
Introduction Nous vous remercions d’avoir porté votre choix sur le MX400 de Yamaha. Le MX400 est conçu pour vous faciliter la vie et surtout pour pouvoir s’insérer dans une vaste gamme de systèmes, y compris des systèmes d’amplification de salle mobiles et fixes. -
Page 24: Panneaux Avant Et Arrière
AUX 1 AUX 2 AUX 3 AUX 4 AUX 5 MX400 Manuel d’utilisation Commutateur A/B Ce commutateur sélectionne la source de signal du module d’entrée. Sélectionne INPUT A (type XLR) ou INPUT B (type jack 1/4). Commutateur d’atténuation 20dB Il s’agit d’un atténuateur d’entrée de 20dB qui affecte INPUT A et INPUT B. - Page 25 • Lorsque le commutateur PRE est enfoncé Elles contrôlent le signal avant (pre) curseur AUX 5contrôle le signal après-curseur. Le niveau nominal est obtenu avec une position “3 heures” Modules d’entrée +/–15dB plateau +/–15dB cloche +/–15dB plateau MX400 Manuel d’utilisation...
- Page 26 Panneaux avant et arrière 1–2 3–4 EVEN MX400 Manuel d’utilisation Commutateurs d’assignation (1-2, 3-4, ST) Ces commutateurs assignent le signal du module d’entrée aux sorties GROUP et à la sortie ST. La commande PAN, située juste en-dessous, permet de régler la position stéréo (voire le volume) entre le groupe impair (ODD) ou le canal gauche (L) et le groupe pair (EVEN) ou le canal droit (R).
-
Page 27: Module Stéréo
(EVEN) de l a paire choisie. Si cette commande se trouve au milieu, le niveau du signal du canal gauche et droit voire du groupe pair et impair est identique. 12 kHz +/–15dB plateau 80 Hz +/–15dB plateau Module stéréo MX400 Manuel d’utilisation... - Page 28 Panneaux avant et arrière MX400 Manuel d’utilisation Commande LEVEL Cette commande règle le niveau de sortie d’un module stéréo. Interrupteur ON Cet interrupteur active et désactive un module d’entrée. Lorsque l'interrup- teur est enfoncé, le module est activé (On). Veillez à couper les modules dont vous n’avez pas besoin.
-
Page 29: Module Aux Send
Commutateur AFL (After Fader Listen) Ce commutateur active la fonction solo de ce signal GROUP. Elle est activée lorsque le commutateur est enfoncé. Curseur Group Ce curseur règle le niveau du signal de la sortie GROUP. Module AUX SEND MX400 Manuel d’utilisation... -
Page 30: Module St2/Monitor
Panneaux avant et arrière Module ST2/MONITOR 2TR IN MONI MX400 Manuel d’utilisation Témoin PFL Ce témoin (jaune)s’allumera lorsque le commutateur PFL d'un ou de plu- sieurs modules est allumé. Commutateur 2TR IN Avec ce commutateur vous pouvez choisir le signal de l’entrée 2TR IN. Ce signal sera envoyé... -
Page 31: Module Master (L-St1-R)
Cet interrupteur active et désactive la sortie ST1 OUT. Lorsqu’il est enfoncé, le signal de la borne ST1 OUT sera envoyé. Curseurs L-ST1-R Ces curseurs contrôlent le niveau de la sortie ST OUT. Une position “0” cor- respond au niveau de sortie nominal. Module Master (L-ST1-R) MX400 Manuel d’utilisation... -
Page 32: Indicateurs
Panneaux avant et arrière Indicateurs Le MX400 vous offre six indicateurs à diodes et trois types de niveaux de sortie peuvent y être visualisés: 1) GROUP 1/2, 2) GROUP 3/4 ou ST2/MONITOR L/R, 3) STEREO L/R. La position “0” indique le niveau de sortie nominal. -
Page 33: Panneau Arrière
• Niveau de sortie nominal: 0dB Bornes DIRECT OUT (0dB) Il s’agit de bornes jacks 1/4” asymétriques qui émettent le signal après cur- seur de chaque module d’entrée indépendamment. • Niveau de sortie nominal: 0dB Panneau arrière INSERT OUT IN MX400 Manuel d’utilisation... - Page 34 Pour prevénir tout danger ou dommage, ne branchez que des microphones et des câbles répondant à la norme IEC268-15A. 9-F FNTM 01 4/5 MX400 Manuel d’utilisation AUX SEND +4dB GROUP INSERT I/O 0dB ST INSERT GROUP OUT +4dB ST2/MONI OUT +4dB...
- Page 35 ON, le témoin PHANTOM s’allume et une alimentation fan- tôme de 48V sera fournie aux broches 2 et 3 des bornes INPUT A. Si vous n’avez pas besoin d’alimentation fantôme, n’oubliez surtout pas de mettre ce commutateur sur OFF. Panneau arrière MX400 Manuel d’utilisation...
-
Page 36: Appendice
Témoins des modules d’entrée et stéréo Témoins AUX SEND MX400 Manuel d’utilisation 20 Hz~20 kHz +1, –2dB (ST L/R, GROUP @ 600 Moins de 0,1% (20 Hz~20 kHz @ 14dB*) (ST L/R, GROUP @ 600 –70dB (entre de s canaux adjacents) –70dB (entre sorties) -
Page 37: Spécifications D'entrée
*6. Dans ces spécifications lorsque dB représente une tension précise, 0dB correspond à 775 mV RMS et lorsque dBV représente une ten- sion précise, 0dBV correspond à 1 V RMS. 120V AC, 60Hz 230 AC, 50Hz MX400-8 17kg, MX400-12 19kg, MX400-16 22kg, MX400-24 28kg MX400-8 562 180,2 596 mm MX400-12 682 180,2 596 mm MX400-16 802 180,2 596 mm... -
Page 38: Spécifications De Sortie
*4. Dans ces spécifications lorsque dB représente une tension précise, 0dB correspond à 775 volts RMS et lorsque TAPE SEND dBV représente une tension précise, 0dBV correspond à 1 volt RMS. • Toutes ces caractéristiques peuvent être modifiées sans préavis. Dimensions MX400 Manuel d’utilisation Niveau de sortie Pour un niveau nominal... - Page 39 MISCHPULTE BEDIENUNGSANLEITUNG...
- Page 40 1 Vorweg ....1 Das Besondere am MX400 ....1 2 Front- und Rückseite .
-
Page 41: Vorweg
Vorweg Vielen Dank, daß Sie sich für ein MX400 von Yamaha entschieden haben. Die MX400 Serie wurde im Hinblick auf eine schnelle und problemlose Bedienung in einer Vielzahl von Einsatzbereichen konzipiert, darunter Beschallungs- und fest eingebaute Anlagen. Die MX400 Serie besteht aus drei Modellen: einer 8-, einer 12-, einer 16- und einer 24-Kanalversion. -
Page 42: Front- Und Rückseite
AUX 1 AUX 2 AUX 3 AUX 4 AUX 5 MX400 Bedienungsanleitung A/B Taster Mit diesem Taster wählen Sie die Signalquelle des Eingangsmoduls an. Wählen Sie INPUT A (XLR Buchse) oder INPUT B (1/4” Klinkenbuchse). 20dB Abschwächungstaster Dieser 20dB Abschwächungstaster ist sowohl INPUT A als auch INPUT B zugeordnet. - Page 43 Das Signal wird hinter dem Fader abgegriffen. • PRE Taster ist gedrückt Der Signalpegel wird vor dem Fader abgegriffen. Das AUX 5 Signal wird immer hinter dem Fader abgegriffen. Die 3-Uhr Einstellung vertritt den Nennwert. Eingangsmodule +/–15dB Kuhschwanz +/–15dB Kuhschwanz MX400 Bedienungsanleitung...
- Page 44 Front- und Rückseite 1–2 3–4 EVEN MX400 Bedienungsanleitung Zuordnungstaster (1-2, 3-4, ST) Mit diesen Tastern ordnen Sie das an das Eingangsmodul angelegte Signal den GROUP- sowie dem ST-Ausgang zu. Mit dem darunter befindlichen PAN-Regler können Sie die Stereoposition bzw. die Balance zwischen der ungeradzahligen (ODD) Gruppe oder dem linken Kanal (L) sowie der geradzahligen (EVEN) Gruppe oder dem rechten Kanal (R) einstellen.
-
Page 45: Stereo-Modul
Signal dem rechten Kanal oder der geradzahligen Gruppe des angewählten Paares zugeordnet. Befindet sich der Regler in der Mitte, so ist der Signalpegel des linken und rechten bzw. der geradzahligen und ungeradzahligen Gruppe derselbe. 12 kHz +/–15dB Kuhschwanz 80 Hz +/–15dB Kuhschwanz Stereo-Modul MX400 Bedienungsanleitung... - Page 46 Front- und Rückseite MX400 Bedienungsanleitung LEVEL Regler Hiermit stellen Sie den Pegel eines Stereo-Moduls ein. ON Taster Mit diesem Taster können Sie das Modul zu- und abschalten. Wenn der Taster gedrückt ist, ist das betreffende Modul eingeschaltet. Module, die Sie in einer bestimmten Situation nicht brauchen, sollten Sie auf jeden Fall aus- schalten.
-
Page 47: Aux Send Modul
Dient zum Aktivieren der Solofunktion dieses GROUP Signals. Die Solo- funktion ist aktiv, wenn dieser Taster gedrückt ist. Gruppen-Fader Mit diesem Fader stellen Sie den Pegel des an den betreffenden Gruppen- ausgang angelegten Signals ein. AUX SEND Modul MX400 Bedienungsanleitung... -
Page 48: St2/Monitor Modul
Front- und Rückseite ST2/MONITOR Modul 2TR IN MONI MX400 Bedienungsanleitung PFL Diode Diese (gelbe) Diode leuchtet, wenn der PFL Taster eines oder mehrerer Module gedrückt ist. 2TR IN Taster Mit diesem Taster wählen Sie die Signalquelle des 2TR IN Eingangs an. Die- ses Signal wird an die Kopfhörer- und ST2/MONI OUT Buchse angelegt. -
Page 49: Master Modul (L-St1-R)
TAPE IN PHONES L — ST 1 — R POWER Diode Diese Diode leuchtet, wenn Sie das MX400 einschalten. PHANTOM Diode Diese Diode leuchtet, wenn die Phantomspeisung aktiviert ist. Das erledigen Sie mit dem PHANTOM Schalter auf der Geräterückseite. TALKBACK IN Buchse An diese asymmetrisch XLR Buchse können Sie das Kommandomikrofon... -
Page 50: Meter
Front- und Rückseite Meter Das MX400 bietet sechs Meter. Drei Ausgangssignaltypen können mit den 1) GROUP 1/2, 2) GROUP 3/4 oder ST2/MONITOR L/R, 3) STEREO L/R Metern optisch überwacht werden. “0” bezieht sich auf den Nennausgangspegel. Die “PEAK” Position besagt, daß sich das Signal 3dB unter der Verzerrungs- grenze befindet. - Page 51 Belegung: Spitze= heiß, Ring= kalt, Mantel= Masse. • Nenneingangspegel: 0dB • Nennausgangspegel: 0dB DIRECT OUT Buchsen (0dB) Hierbei handelt es sich um asymmetrische 1/4” Klinkenbuchsen, an denen nur jeweils das Post-Fader Signal des betreffenden Eingangsmoduls anliegt. • Nennausgangspegel: 0dB Rückseite INSERT OUT IN MX400 Bedienungsanleitung...
- Page 52 Rückseite MX400 Bedienungsanleitung AUX SEND +4dB GROUP INSERT I/O 0dB ST INSERT GROUP OUT +4dB ST2/MONI OUT +4dB ST1 OUT +4dB POWER PHANTOM+48V ON OFF GROUP SUB IN Buchsen (+4dB) Hierbei handelt es sich um asymmetrische 1/4” Klinkenbuchsen, an die Sie das Signal eines anderen Mischpults oder einer anderen Signalquelle anle- gen können.
-
Page 53: Phantom Schalter
Signal der Stereo L, R Summe anliegt. • Nennausgangspegel: +4dB POWER Taster Mit diesem Taster schalten Sie das MX400 ein und aus. Wenn es eingeschal- tet ist, leuchtet die POWER Diode. PHANTOM Schalter Mit diesem Schalter können Sie die Phantomspeisung ein- und ausschalten. -
Page 54: Anhang
Meter (0 LED = +4dB* Ausgangspegel) Dioden der Eingangs- und Stereo-Eingangs- module AUX SEND Dioden MX400 Bedienungsanleitung 20 Hz~20 kHz +1, –2dB (ST L/R, GROUP @ 600 Weniger als 0,1% (20 Hz~20 kHz @ 14dB*) (ST L/R, GROUP @ 600 –70dB (zwischen nebeneinander liegenden Kanälen) –70dB (zwischen den Ausgängen) -
Page 55: Eingangsspezifikationen
*1. Empfindlichkeit vertritt den kleinsten Eingangspegel, mit dem ein +4dB (1.23V) erzielt werden kann oder den Nennausgangspegel, wenn das MX400 auf maximale Anhebung eingestellt ist (d.h. alle Pegelregler und Fader auf Höchstwert). *2. Buchsen und Klinken (TRS) sind symmetriert (Spitze=HEISS, Ring=KALT, Mantel=Abschirmung). -
Page 56: Ausgangsspezifikationen
*4. In diesen Spezifikationen, und sofern dB einen Spannungswert vertritt, entspricht 0dB 775 mV RMS, für TAPE SEND vertritt dBV einen spezifischen Spannungswert, wobei 0dBV 1 V RMS entspricht. • Änderungen der Spezifikationen ohne Vorankündigung vorbehalten. Abmessungen MX400 Bedienungsanleitung Ausgangspegel Bei Nennwert Nennwert... - Page 57 CONSOLA DE MEZCLA MANUAL DE USO...
- Page 58 1 Introducción ....1 Características del MX400 ....1 2 Paneles frontal y posterior ..2 Módulos de entrada .
-
Page 59: Introducción
Introducción Muchas gracias por la adquisición del MX400 Yamaha. La serie MX400 ha sido diseña para facilitar la operación y para ofrecer versatilidad en una amplia gama de aplicaciones, incluyendo audiodifusión (PA) y sistemas instalados. La serie MX400 incluye tres mode- los;... -
Page 60: Paneles Frontal Y Posterior
AUX 2 AUX 3 AUX 4 AUX 5 MX400 Manual de uso Interruptor A/B Este interruptor selecciona la fuente de señal del módulo de entrada. Seleccione INPUT A (tipo XLR) o INPUT B (tipo telefónico de 1/4”). Interruptor de atenuador de 20dB Éste es un atenuador de entrada de 20dB que afecta a INPUT A e INPUT B. - Page 61 Controlan la señal de post-regulación de nivel. • Cuando el interruptor PRE esté enganchado Controlan la señal de pre-regulación de nivel AUX 5 controla la señal de post-regulación. El nivel nominal es la posición de las 3 en punto. Módulos de entrada MX400 Manual de uso...
- Page 62 1–2 3–4 EVEN MX400 Manual de uso Interruptores de asignación (1-2, 3-4, ST) Estos interruptores asignan la señal del módulo de entrada a las salidas de grupo y la salida ST. El control PAN situado debajo ajusta la posición estéreo de la señal entre las salidas del grupo impar (ODD) e izquierdo (L) y las sal-...
-
Page 63: Módulo Estéreo
(R) y par (EVEN). Si el mando se coloca en la posición central, la 12 kHz tipo aplanamiento de +/–15dB 80 Hz tipo aplanamiento de +/–15dB Módulo estéreo MX400 Manual de uso... - Page 64 Paneles frontal y posterior MX400 Manual de uso misma cantidad de señal se enviará a los canales izquierdo (L) y derecho (R) estéreo y a los grupos impar/par. Control de nivel (LEVEL) Este control ajusta el nivel de salida del módulo estéreo.
-
Page 65: Módulo Aux Send
Interruptor de escucha post-regulador de nivel (AFL) Monitoriza la señal de GROUP. Estará activado (ON) cuando se encuentre enganchado. Regulador de nivel de grupo Este regulador ajusta el nivel de la señal de salida de GROUP. Módulo AUX SEND MX400 Manual de uso... -
Page 66: Módulo St2/Monitor
Paneles frontal y posterior Módulo ST2/MONITOR 2TR IN MONI MX400 Manual de uso Indicador de escucha pre-regulador de nivel (PFL) Este indicador (amarillo) se encenderá cuando enganche (ON) el interrup- tor de uno o más módulos. Interruptor de transmisión 2/monitorización (2TR/MONI- TOR) Este interruptor selecciona la señal de entrada de 2TR IN. -
Page 67: Módulo Principal (L-St1-R)
(ON), saldrá la señal de la toma ST1 OUT. Reguladores de nivel L-ST1-R Estos reguladores controlan el nivel de la salida ST OUT. La posición mar- cada con cero (0) es el nivel nominal de salida. Módulo principal (L-ST1-R) MX400 Manual de uso... -
Page 68: Medidores
Paneles frontal y posterior Medidores El MX400 dispone de seis medidores de LED, y en ellos podrán verse tres tipos de niveles de salida: 1) GROUP 1/2, 2) GROUP 3/4 o ST2/MONITOR L/R, y 3) STEREO L/R. La posición “0” indica el nivel nominal de salida. -
Page 69: Panel Posterior
Tomas de salida directa (DIRECT OUT 0dB) Éstas son tomas telefónicas de 1/4” desequilibradas que dan salida a la señal de post-regulador de nivel independientemente desde cada módulo de entrada. • Nivel nominal de salida: 0dB Panel posterior INSERT OUT IN MX400 Manual de uso... - Page 70 Panel posterior MX400 Manual de uso AUX SEND +4dB GROUP INSERT I/O 0dB ST INSERT GROUP OUT +4dB ST2/MONI OUT +4dB ST1 OUT +4dB POWER PHANTOM+48V ON OFF Tomas de entrada secundarias de grupo (GROUP SUB IN +4dB) Éstas son tomas telefónicas de 1/4” que dan entrada a señales de los mez- cladores secundarios u otros dispositivos.
- Page 71 “ON”, el indicador PHANTOM estará encendido, y la aliment- ación de 48 V CC se suministrará entre las patillas 2 y 3 de las tomas INPUT Si no necesita alimentación fantasma, cerciórese de poner este interruptor este interruptor en la posición “OFF”. Panel posterior MX400 Manual de uso...
-
Page 72: Apéndice
Indicadores del módulo de entrada, mó- dulo de entrada estéreo MX400 Manual de uso 20 Hz - 20 kHz +1, –2dB (ST L/R, GROUP a 600 Menos del 0,1% (20 Hz - 20 kHz a 14dB*) (ST L/R, GROUP a 600 –70dB (entre canales adyacentes) -
Page 73: Especificaciones De Entrada
TALKBACK *1. La sensibilidad es el nivel de entrada más bajo que producirá una salida de +4dB (1,23 V) o el nivel de salida nominal cuando el MX400 se ajusta a la ganancia máxima (es decir, todos los controles de nivel y los reguladores de nivel ajustados al máximo) *2. -
Page 74: Especificaciones De Salida
*4: En estas especificaciones, cuando dB representa una tensión específica, 0dB hace referencia a 775 mV de valor eficaz, para TAPE SEND, dBV representa una tensión específica, 0dBV hace referencia a 1 V de valor eficaz. • Todas las especificaciones están sujetas a cambios sin previo aviso. Dimensiones MX400 Manual de uso Nivel de salida Para utilizar con el valor nominal Nominal Líneas de 600... - Page 75 Block/Level diagram Block- und Pegelschaltbild CTRL CTRL STEREO GROUP HIGH FREQ Schéma de connexions/de niveau Diagrama en bloques/de nivel HIGH HIGH STEREO STEREO ST2/MONITOR GROUP ST2/MONITOR GROUP GROUP GROUP...
- Page 76 YAMAHA CORPORATION P.O.Box 1, Hamamatsu, Japan R0 1 IP Printed in Korea...